How to manage your music library with TidyTic ?
In this tutorial I will explain how TidyTic can help you manage all the music you have on your PC.
TidyTic provides you with additional tools to efficiently manage your music.
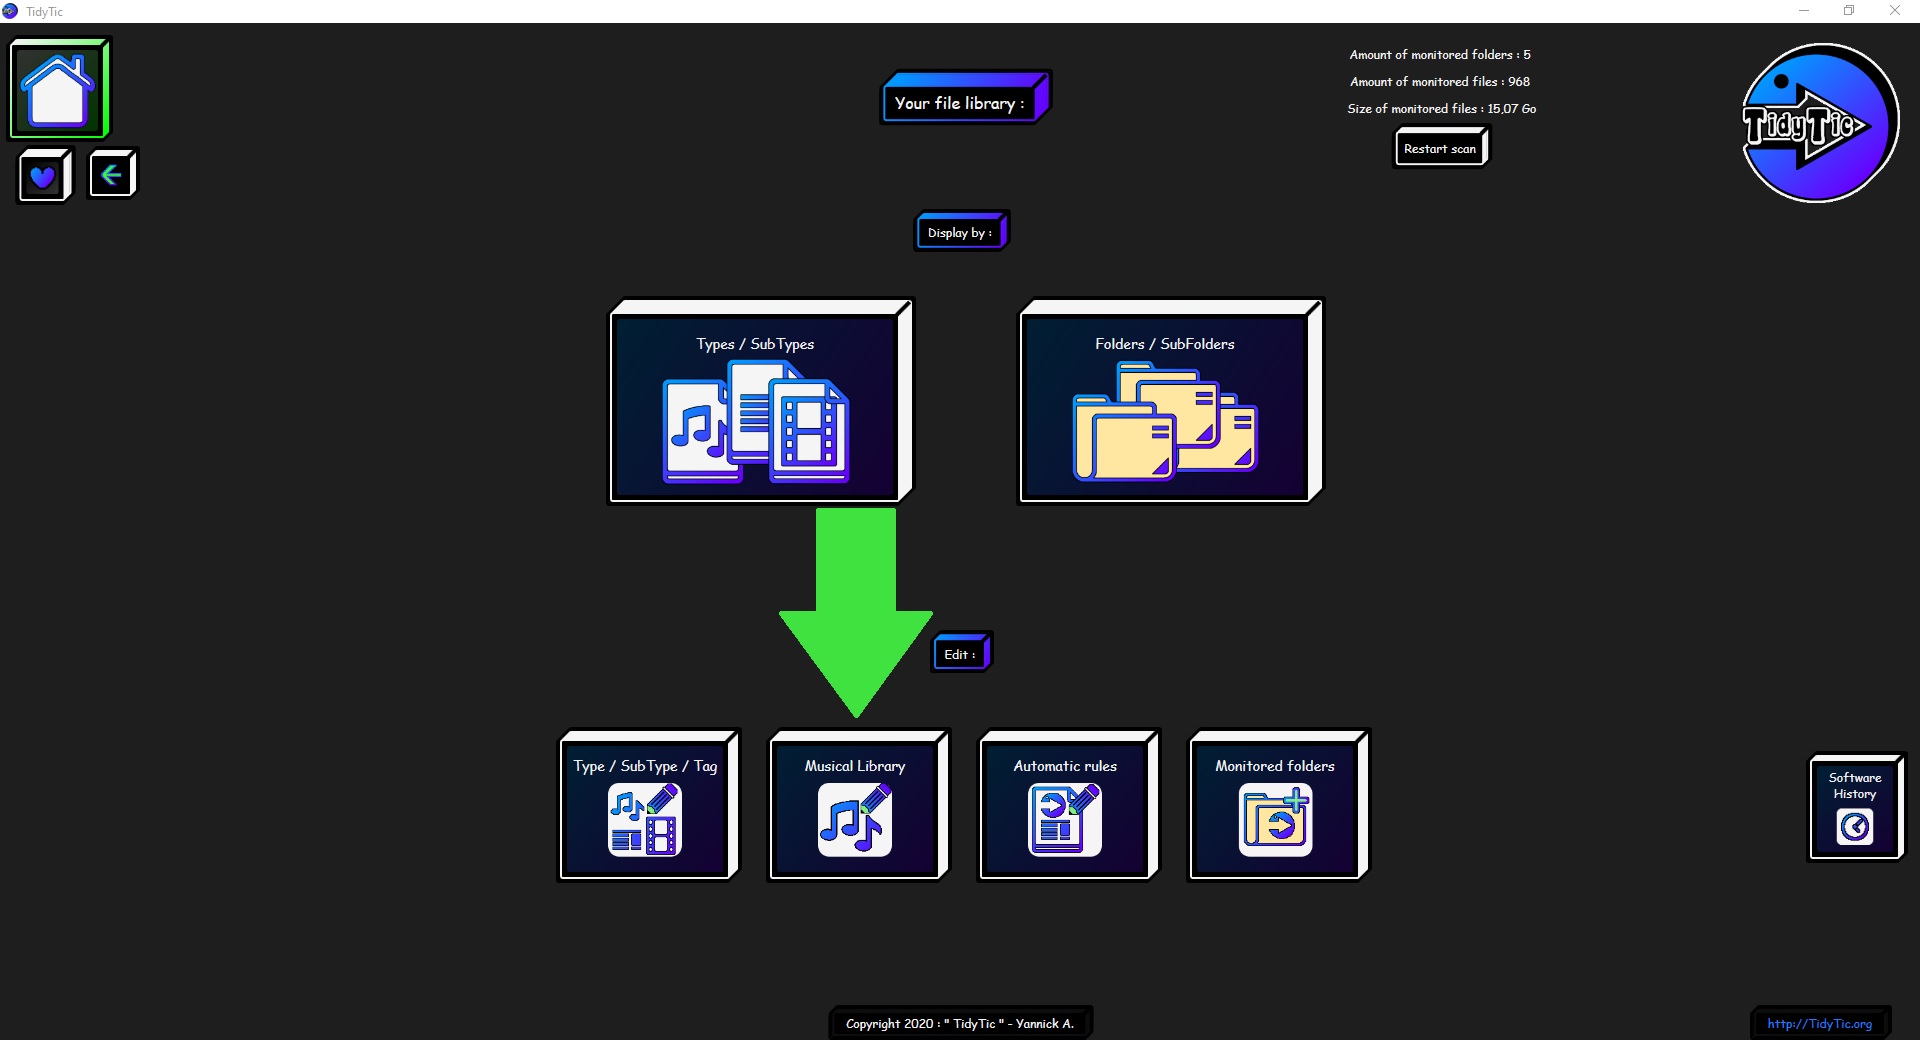
You will find these functions on the “Musical Library” page of the software.
The shortcut for this page is available on the TidyTic home page.
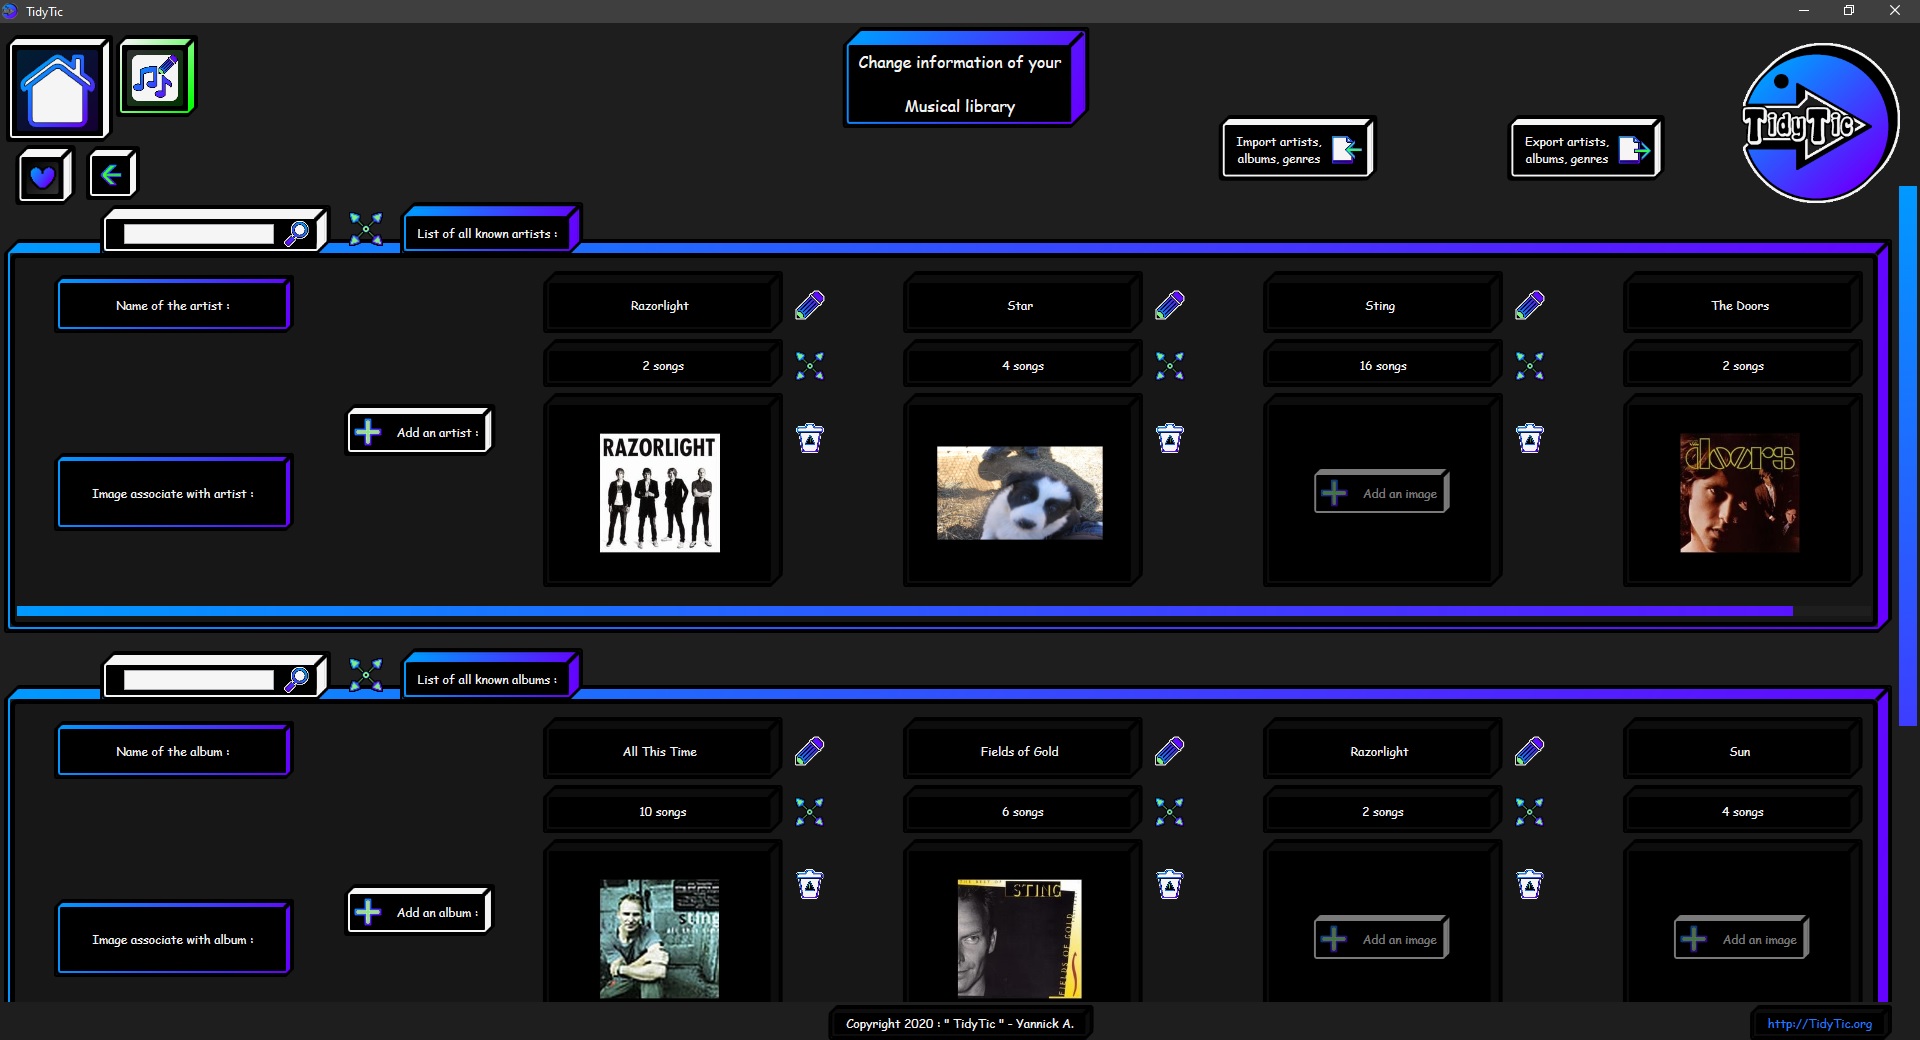
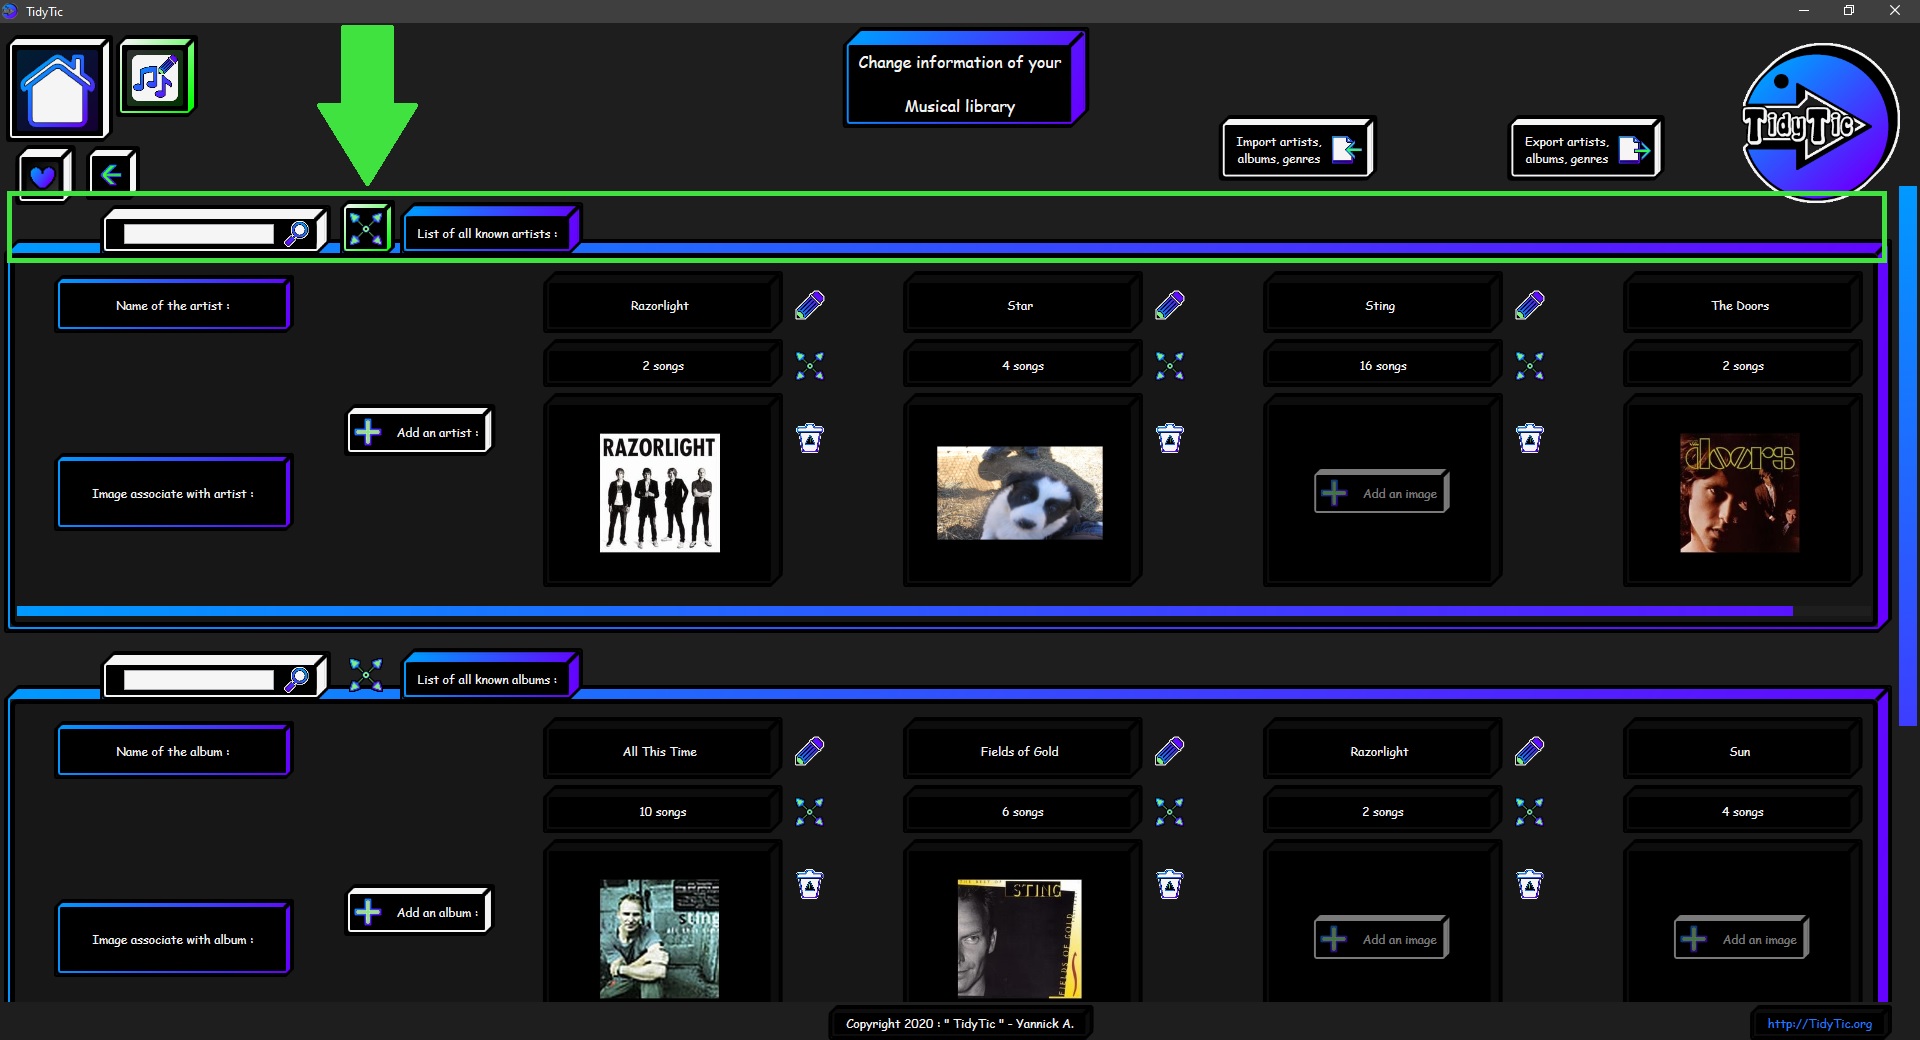
On this page you will find the list of all artists, albums and genres that the software have find in the musics of your monitored folders.
 ____
____ 
You can also for example rename an artist, this modification will be automatically applied to all music associated with this artist.
These changes will be visible even outside of TidyTic, when you play the music on your phone for example. And even on your car radio.
I will detail each of the possibilities that the software makes available to you to help you organize your music as you wish.
I will then give you some examples on cases that you will surely meet : Duplicate artist in your musics because his name is spelled in different ways etc.
Manage the artists of your musics with TidyTic :
Browse your known artists or search for a particular artist :
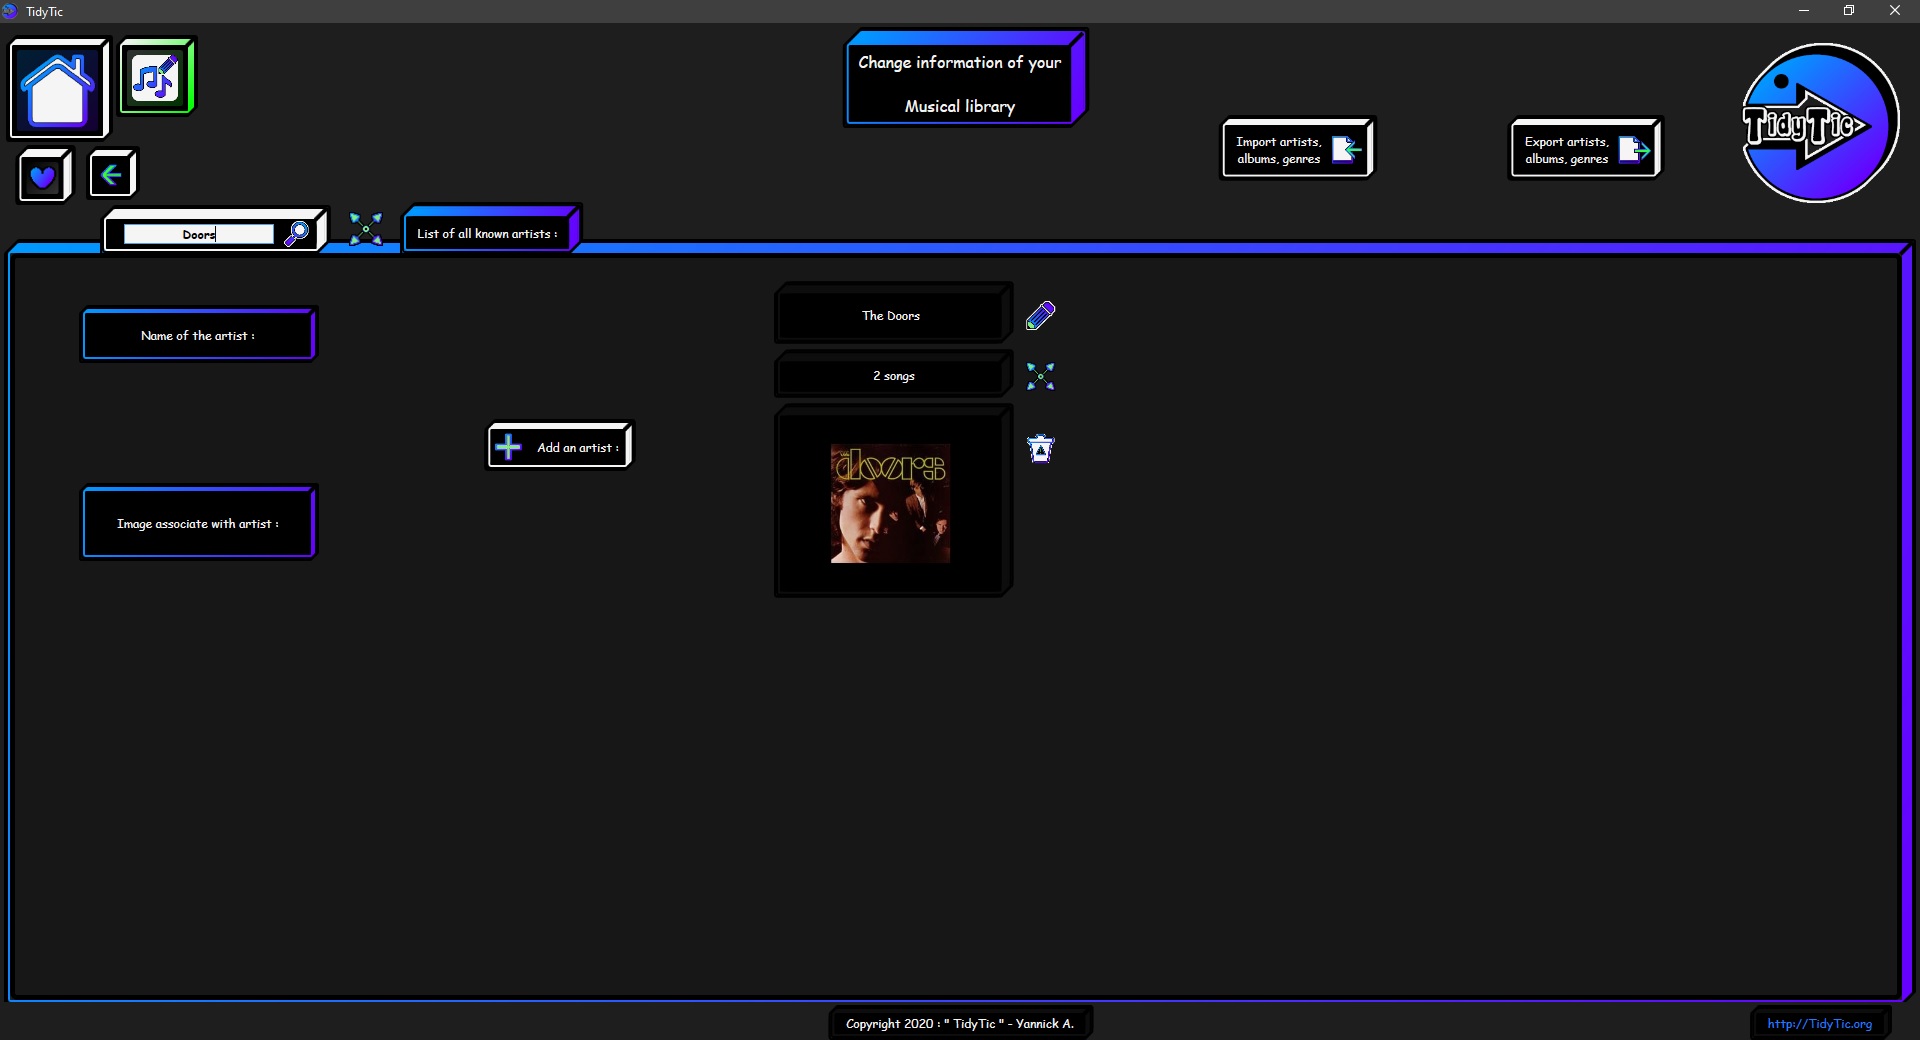
You can ask TidyTic to display only artists on this page in order to easily view them.
You just have to click somewhere in the line containing "List of all known artists :", the one containing the enlarge icon : " ![]() ".
".
 ____
____ 
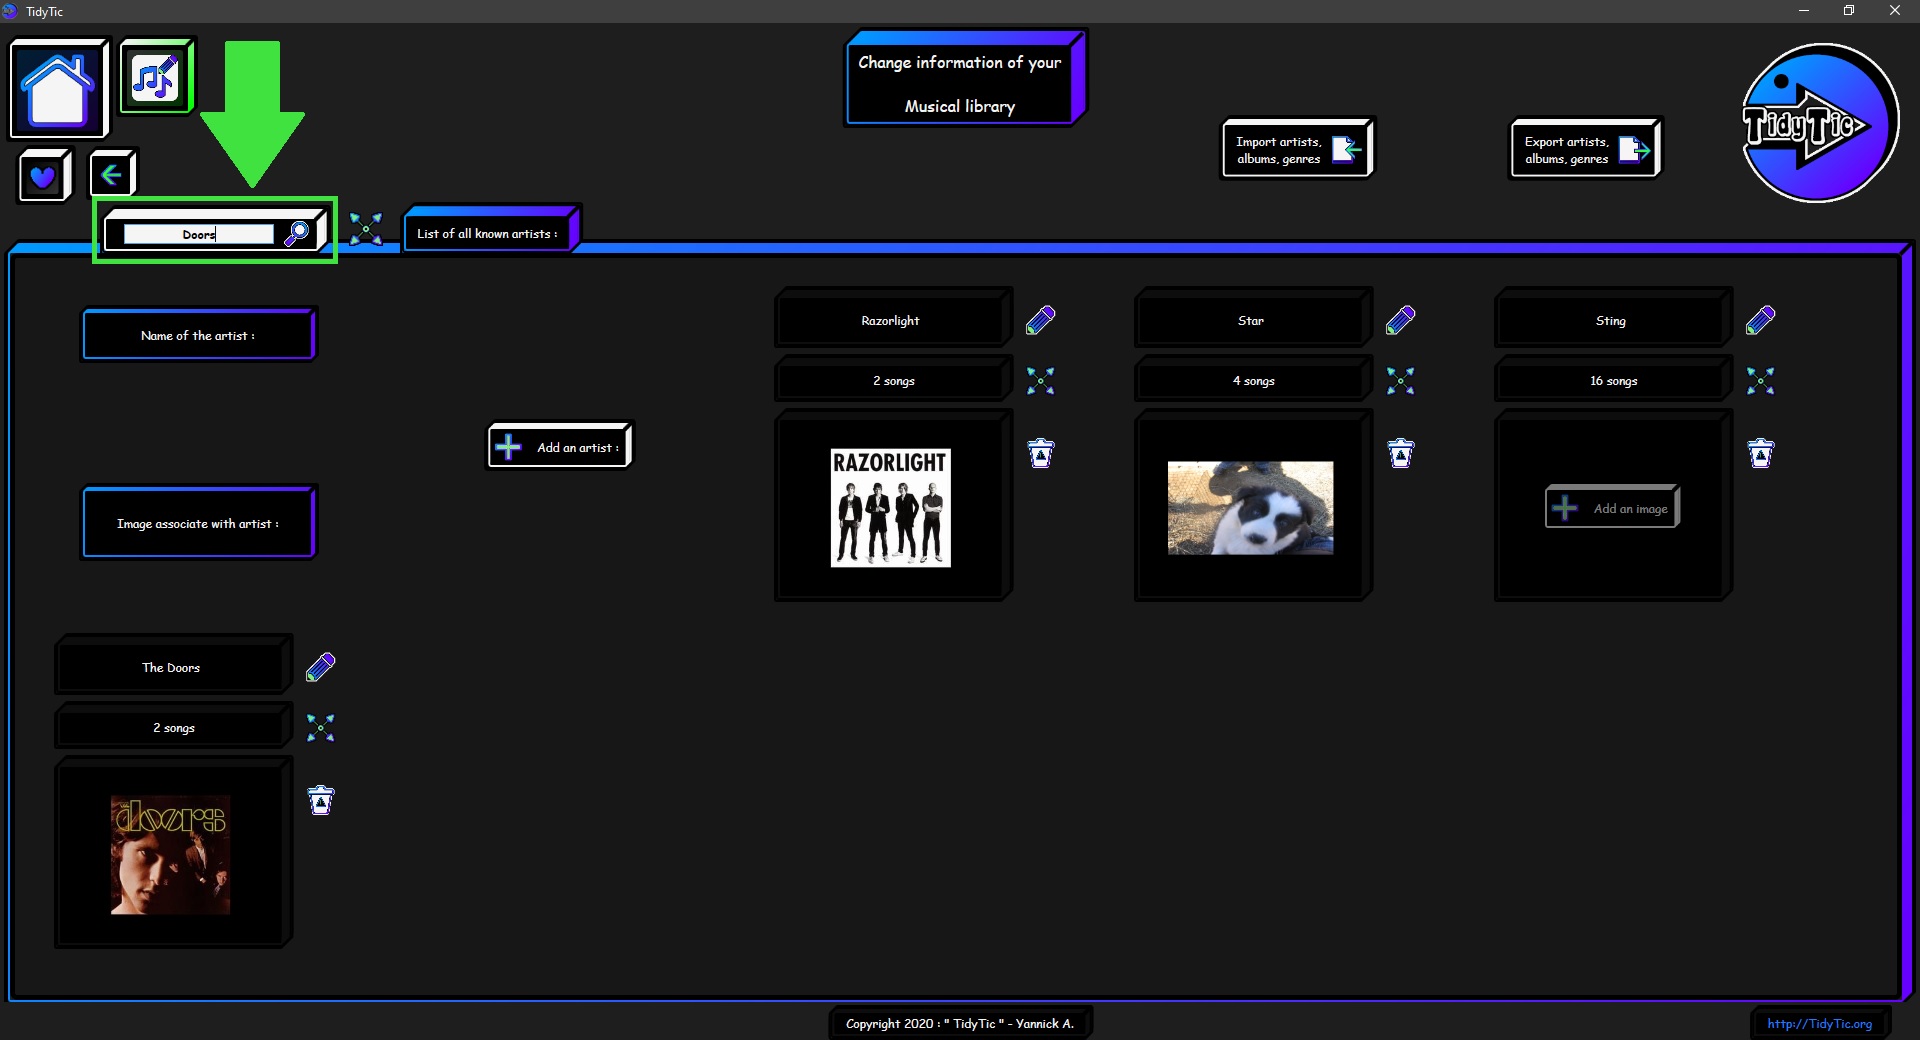
You can also search by artist name using the available box.
Just write your search and press the enter key on your keyboard or the " ![]() " icon to validate the search.
" icon to validate the search.
To cancel a search, empty the box and validate again.
 ____
____ 
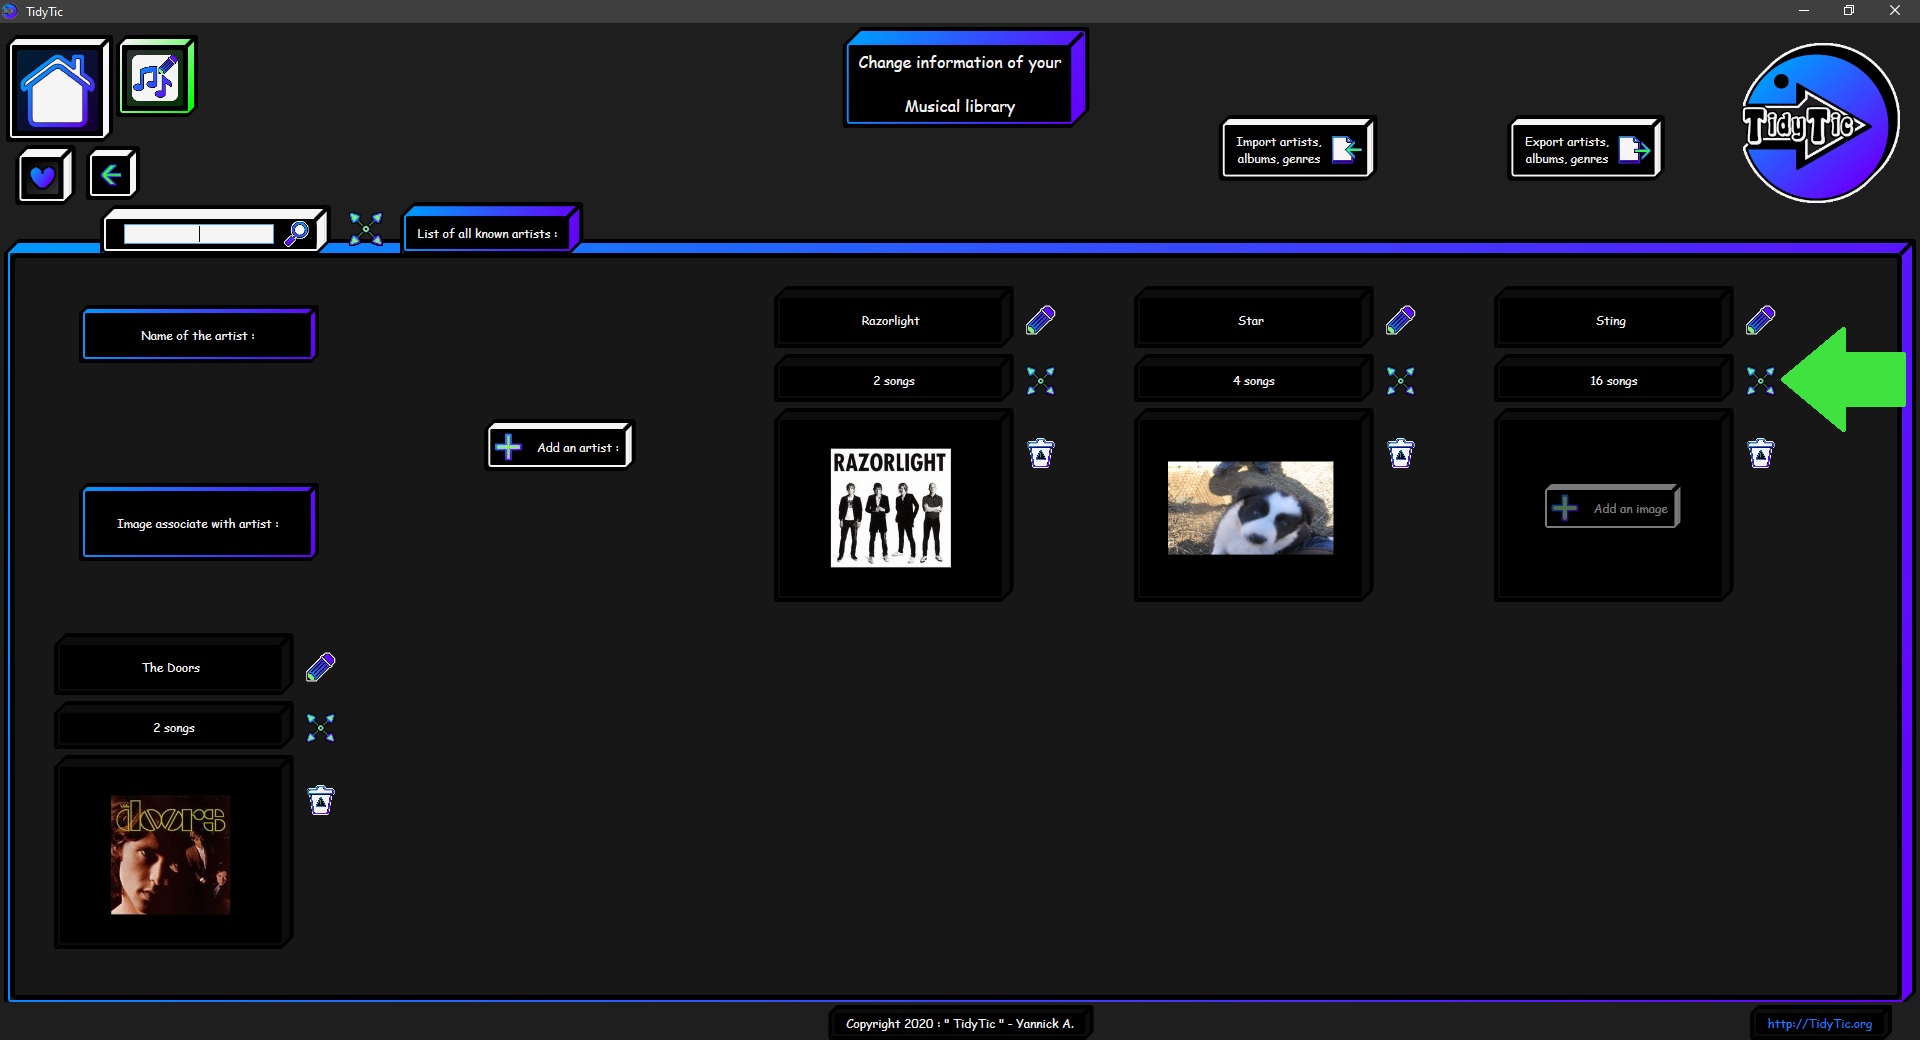
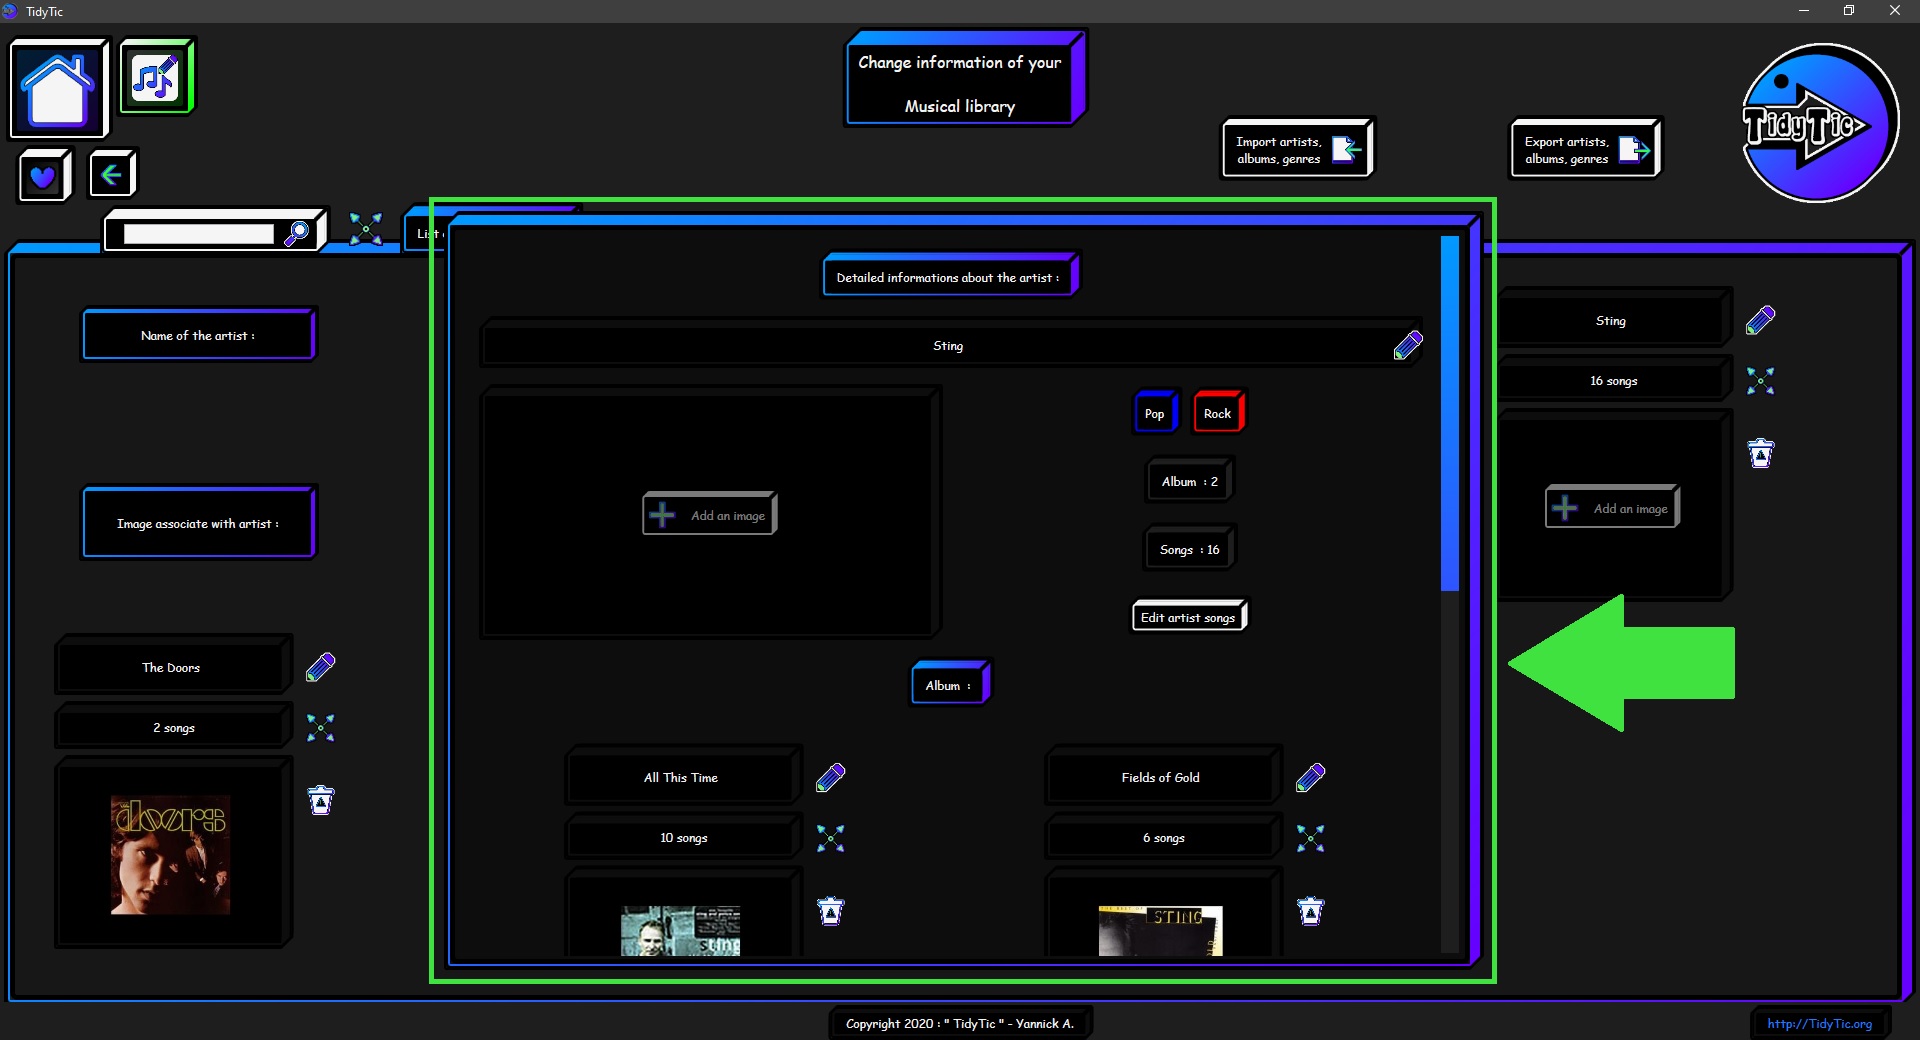
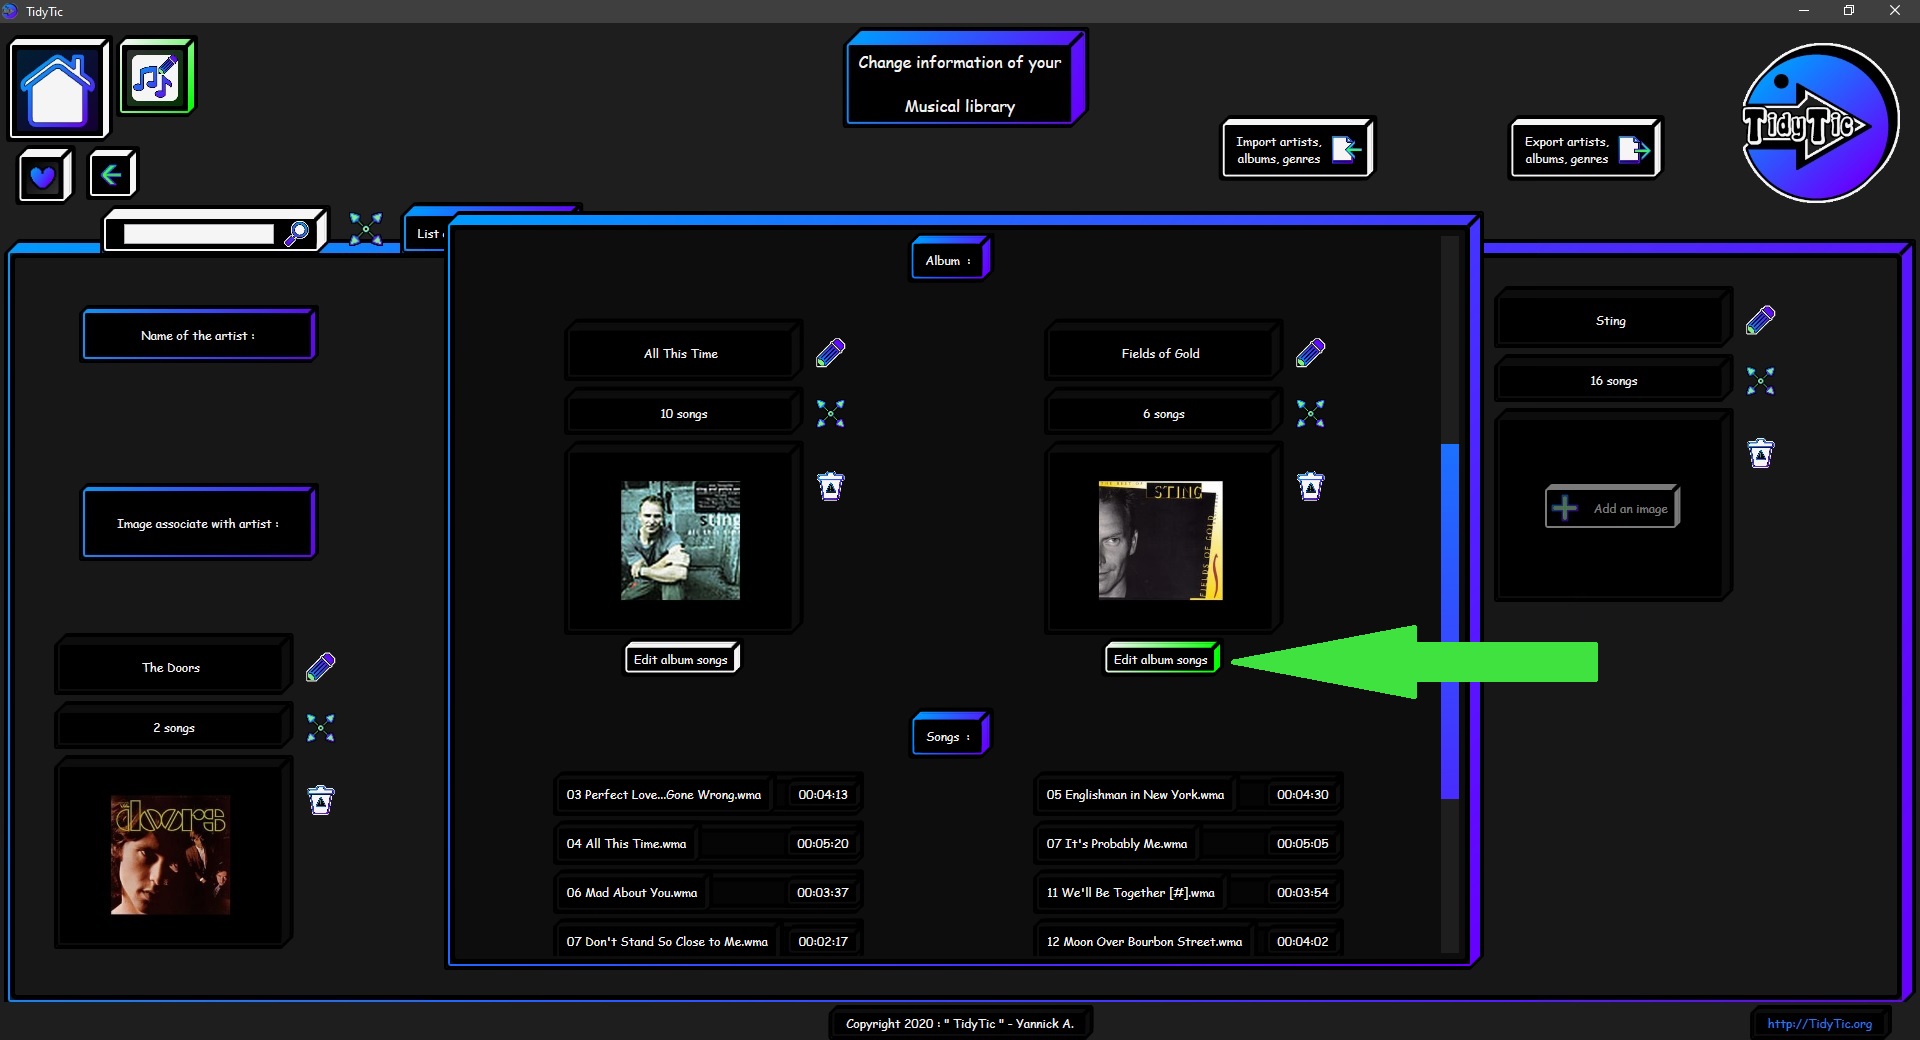
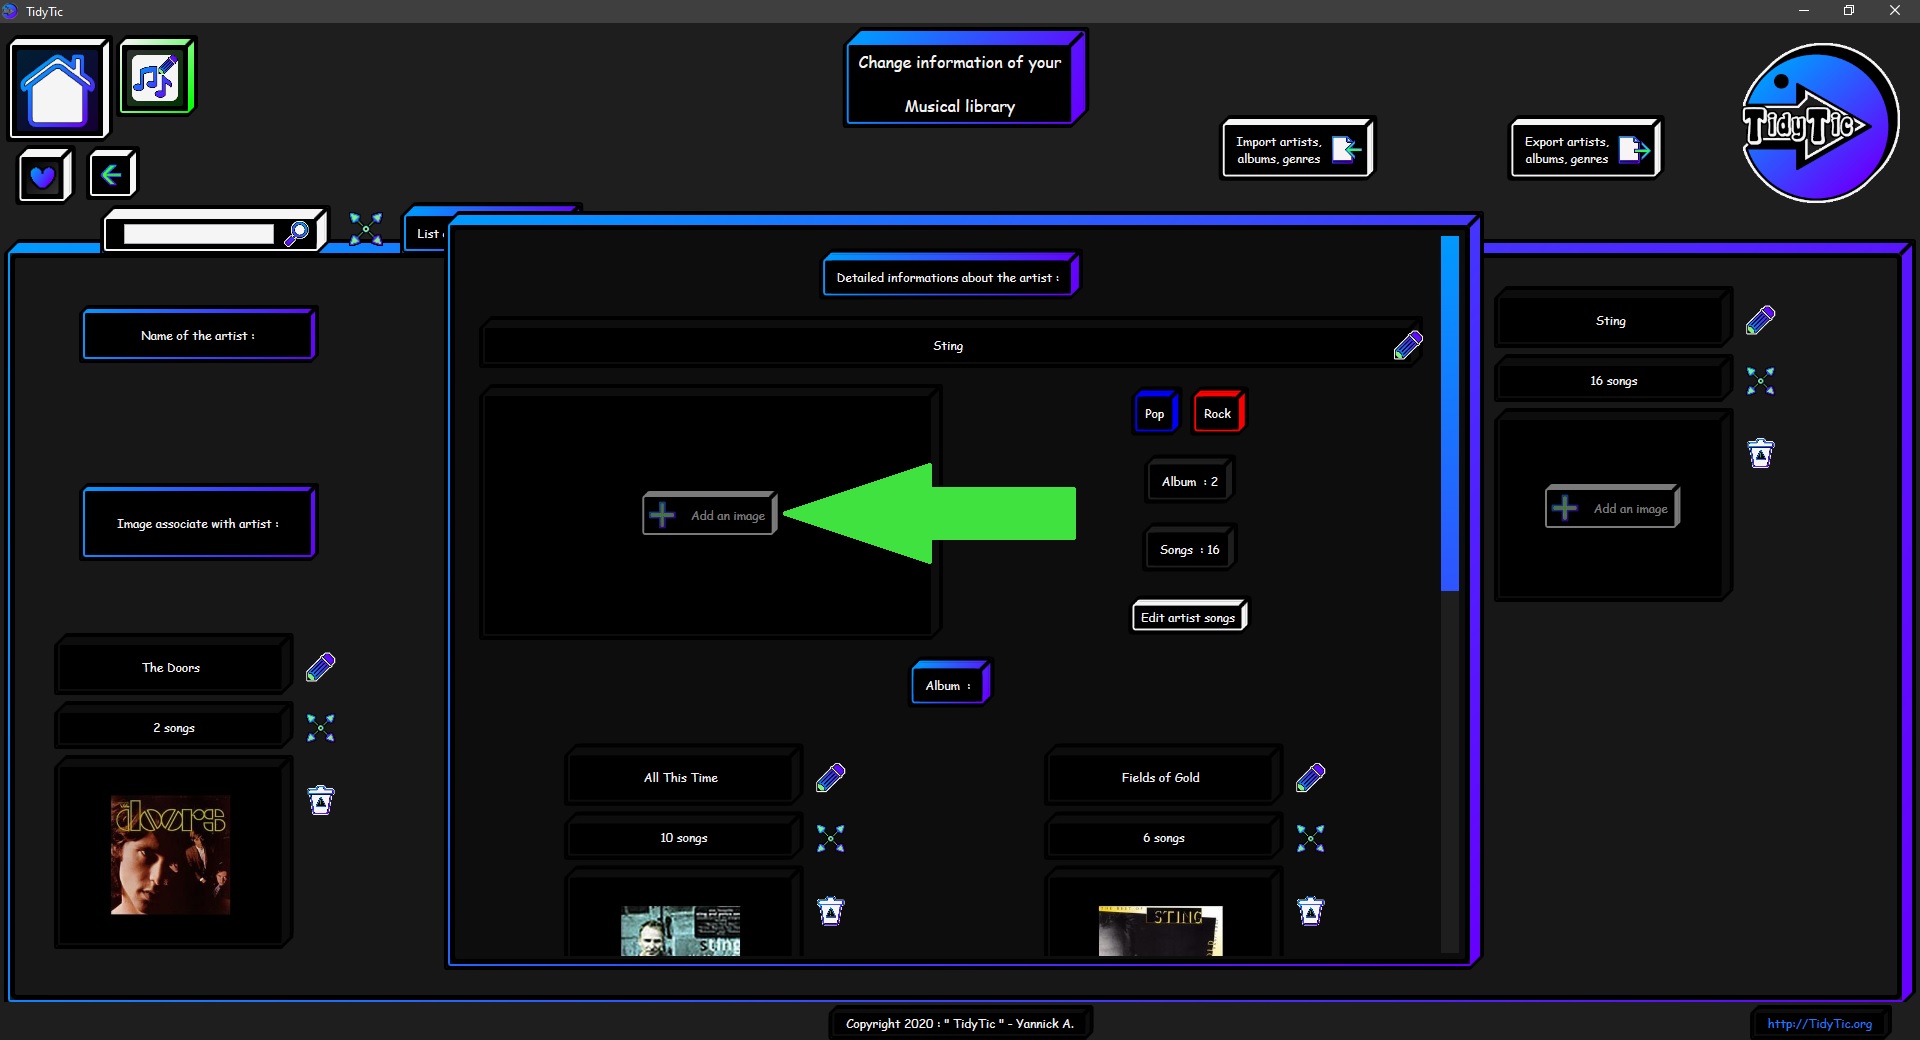
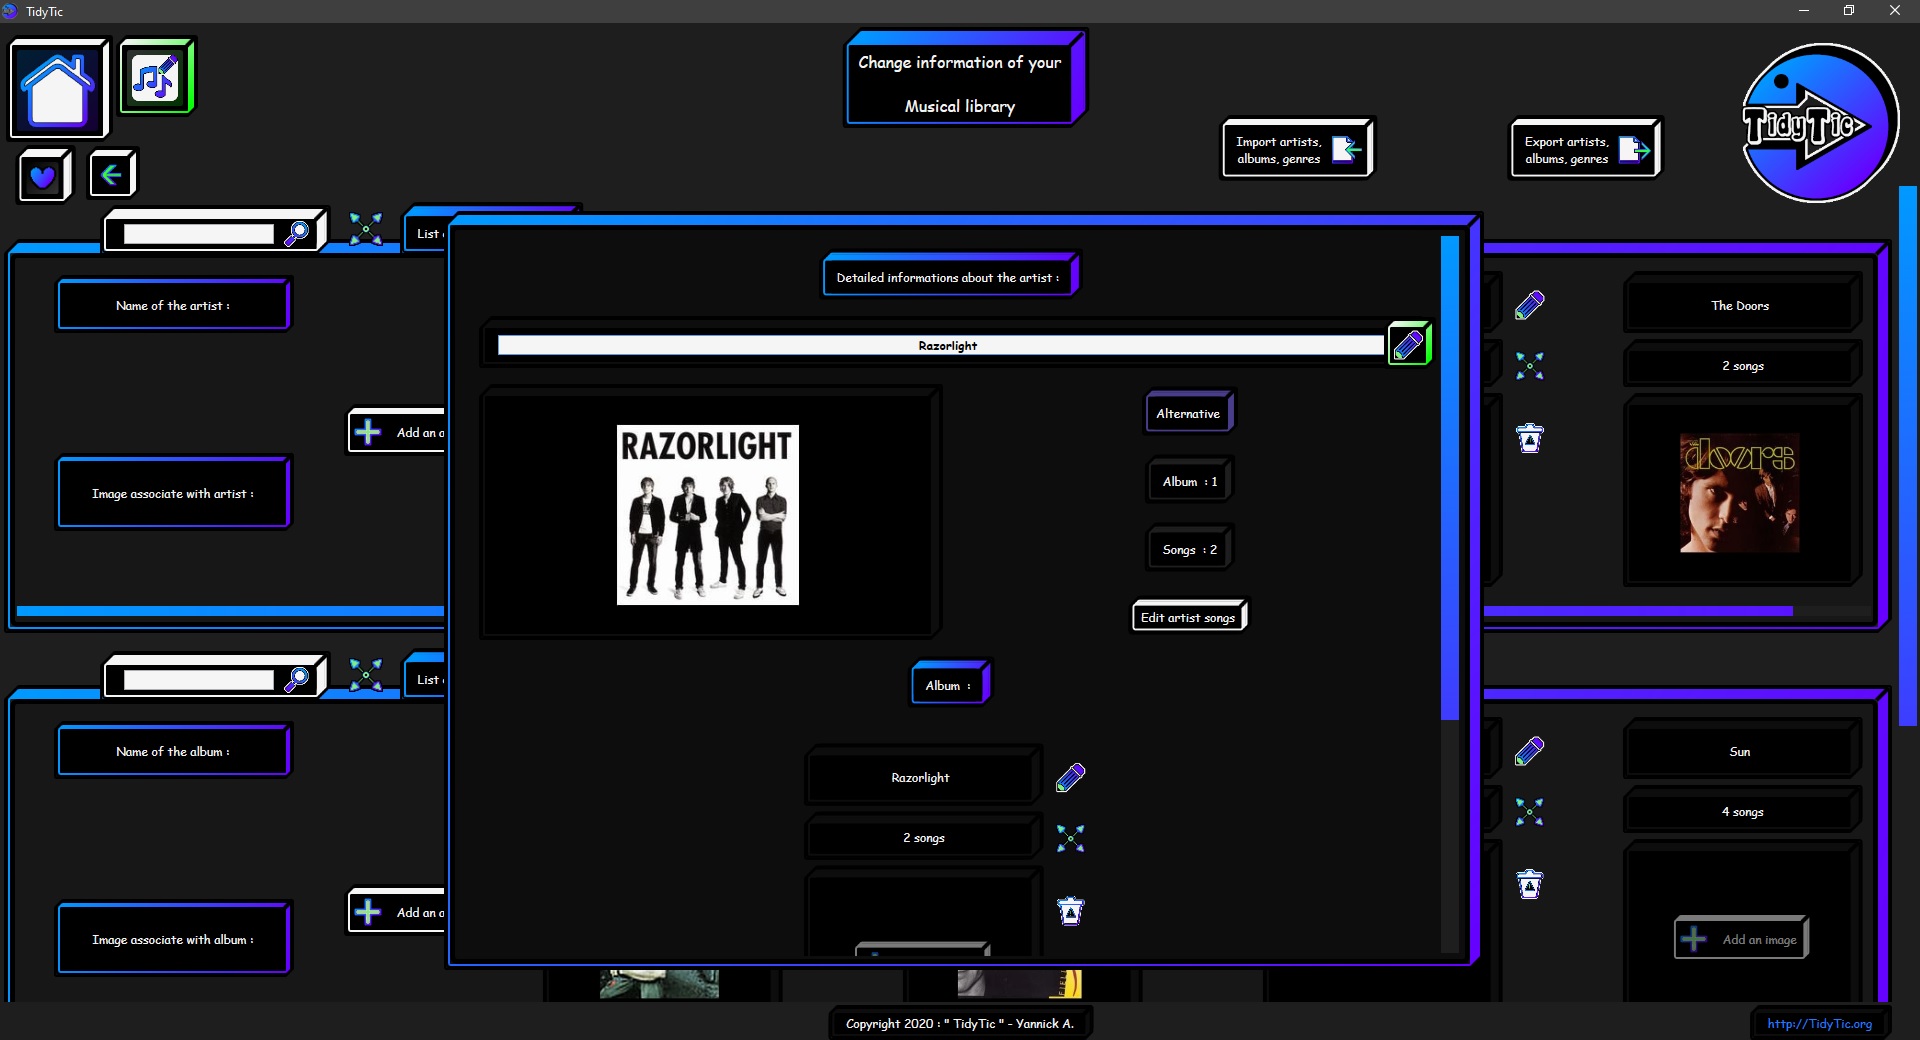
You will find next to each artist an icon “![]() ” you can press to open a window containing all the detailed information known by TidyTic about the artist.
” you can press to open a window containing all the detailed information known by TidyTic about the artist.
Like his name, the number of albums, the number of musics, the list of his albums with their musics and the genre associated with the artist's musics.
 ____
____  ____
____ 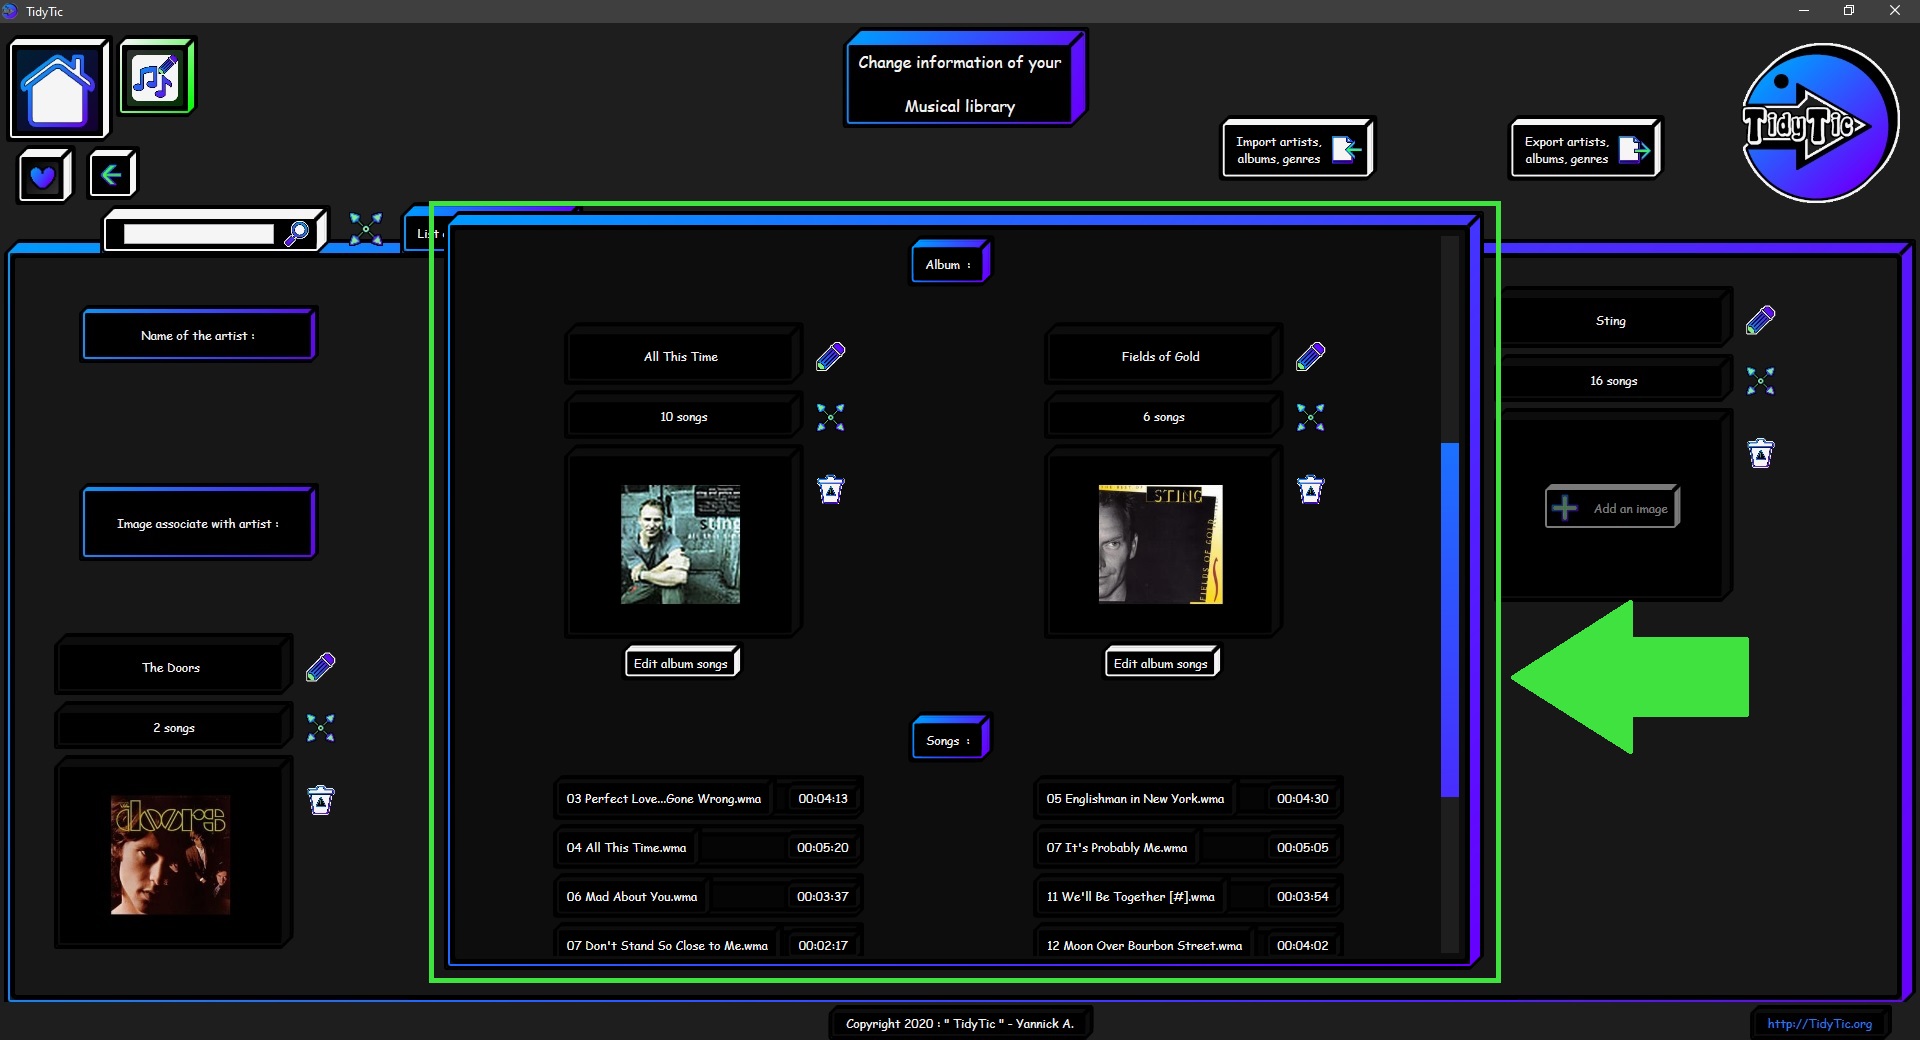
As you are used to with TidyTic, you can open a music directly with a double left click on it.
Or display the detailed information of it with a double right click.
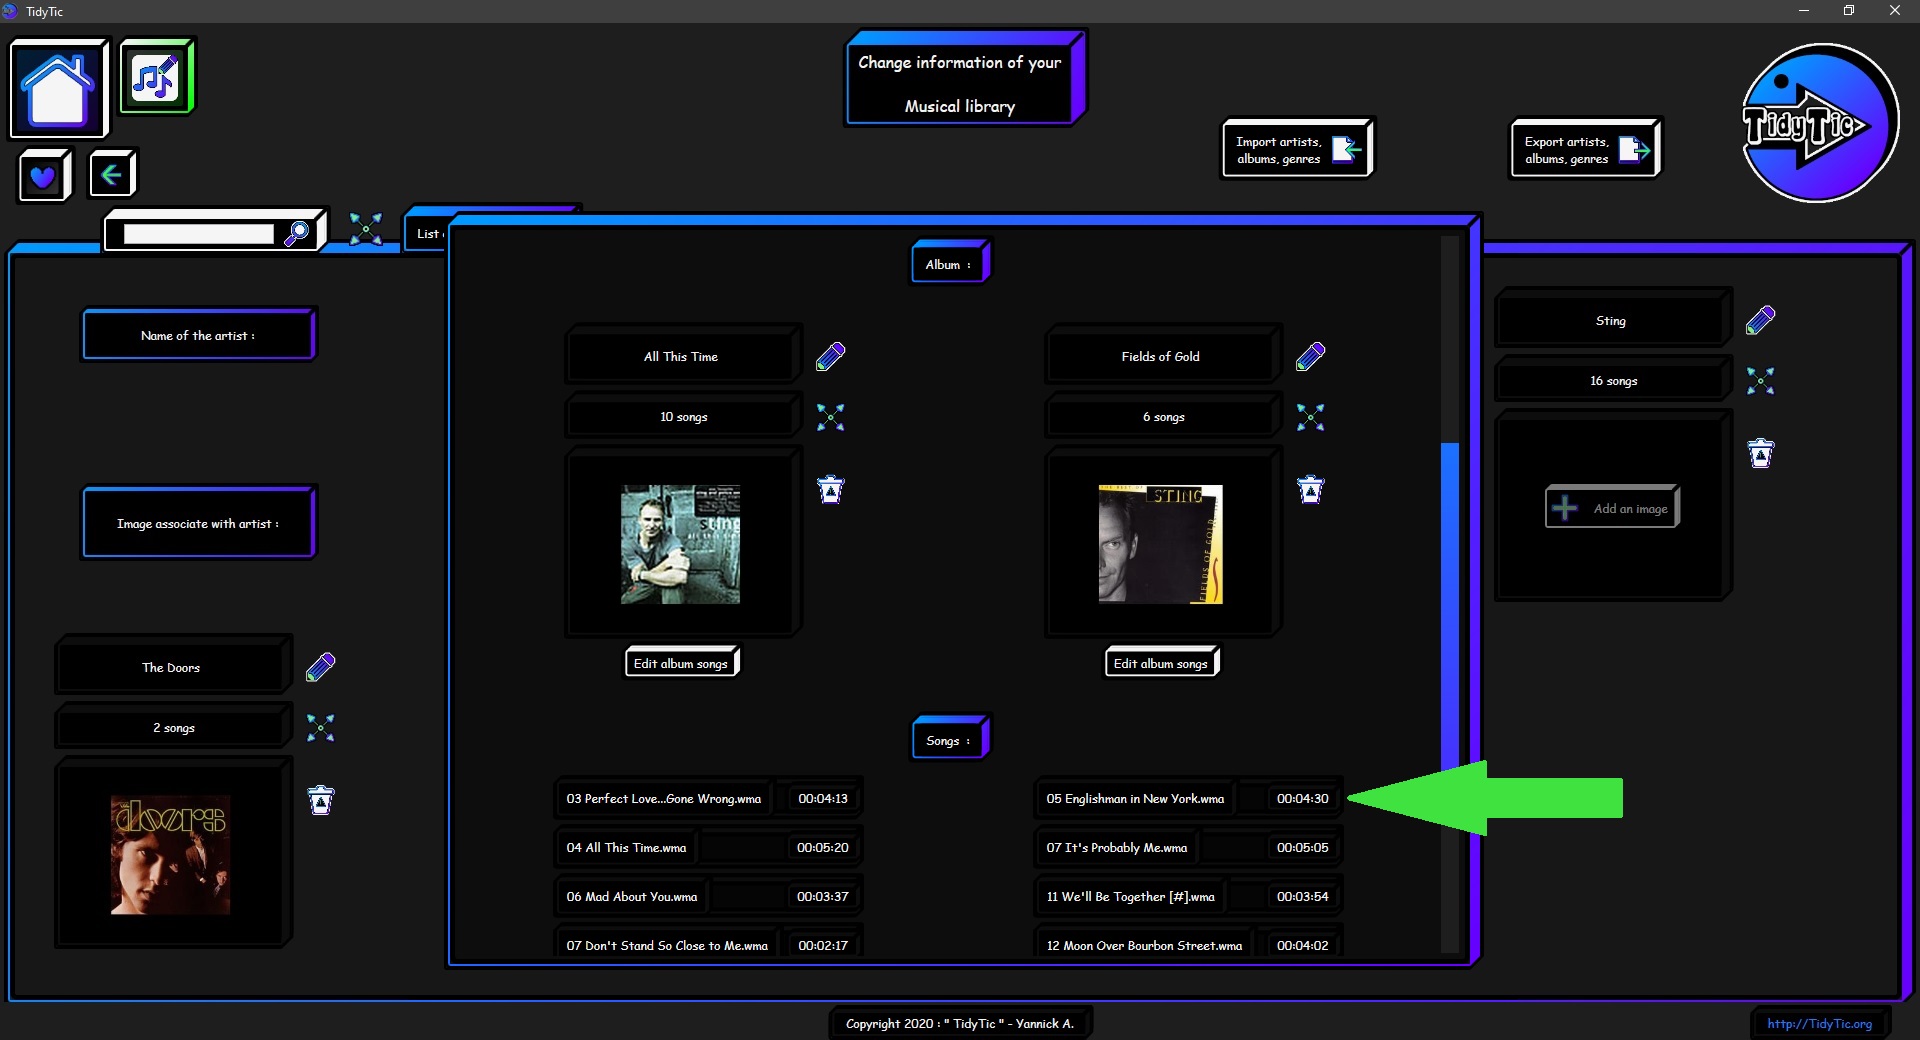
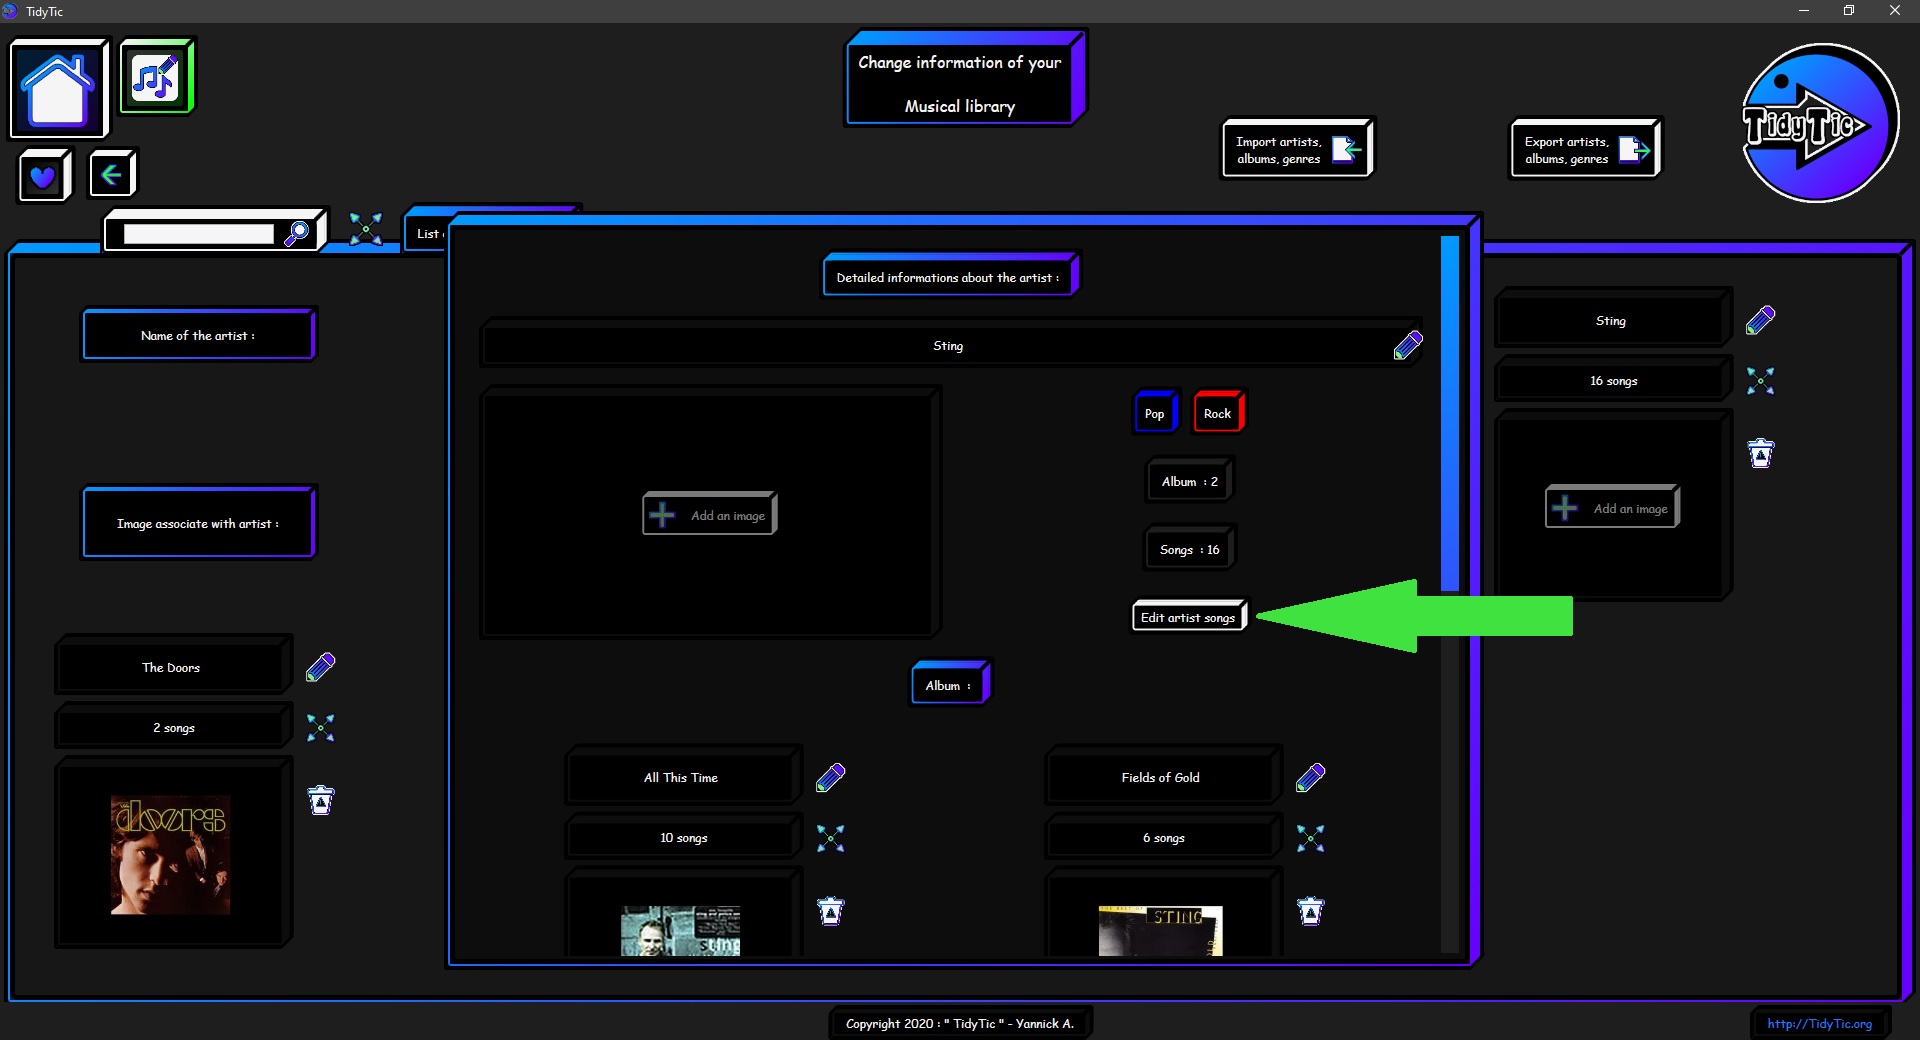
You will also find a shortcut to go to the display by type with preset filters for display only the artist or album chosen.
Thus allowing you to be able to make any modification on these files without fear of modifying other musics. And without having to adjust display filters yourself.
 ____
____ 
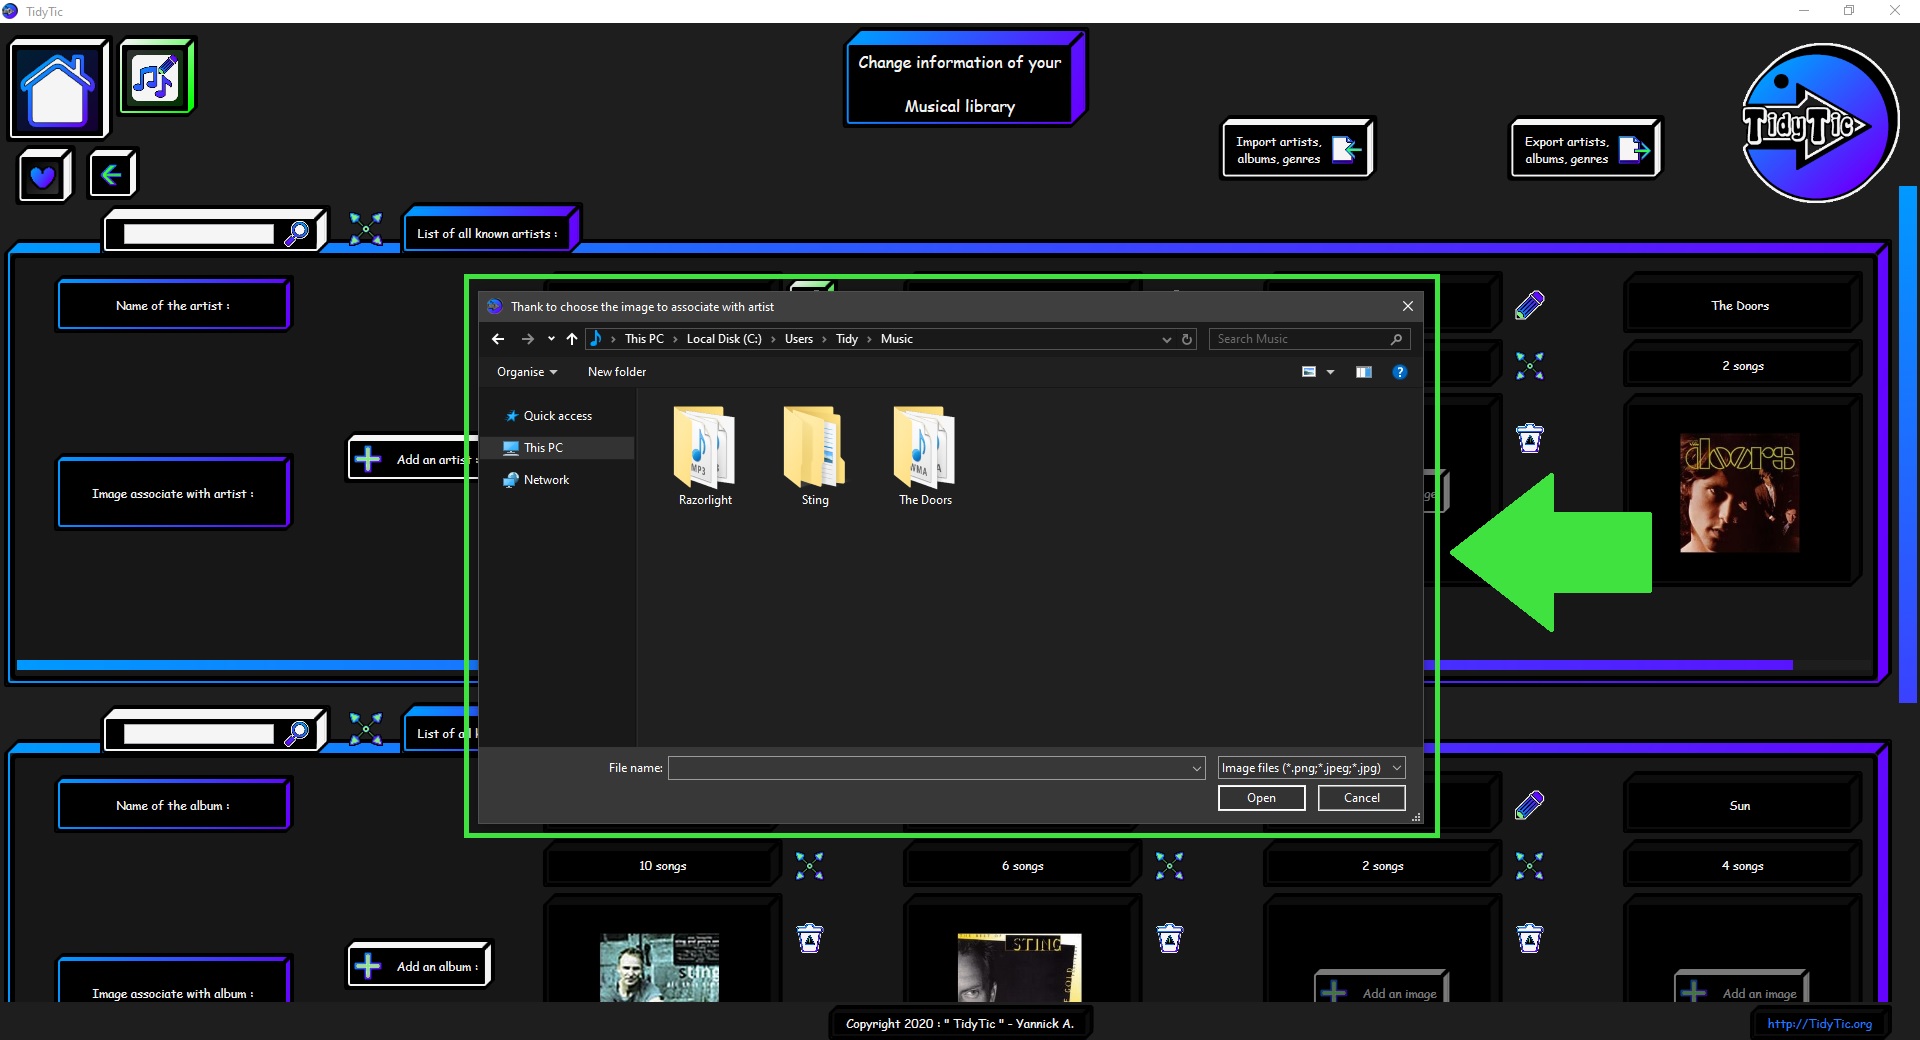
You can also add an image to the artist from this window or from the classic display of your artists.
This image will be used for thumbnails of all musics that is associated with this artist in TidyTic displays.
 ____
____ 
Add an artist to your musical library :
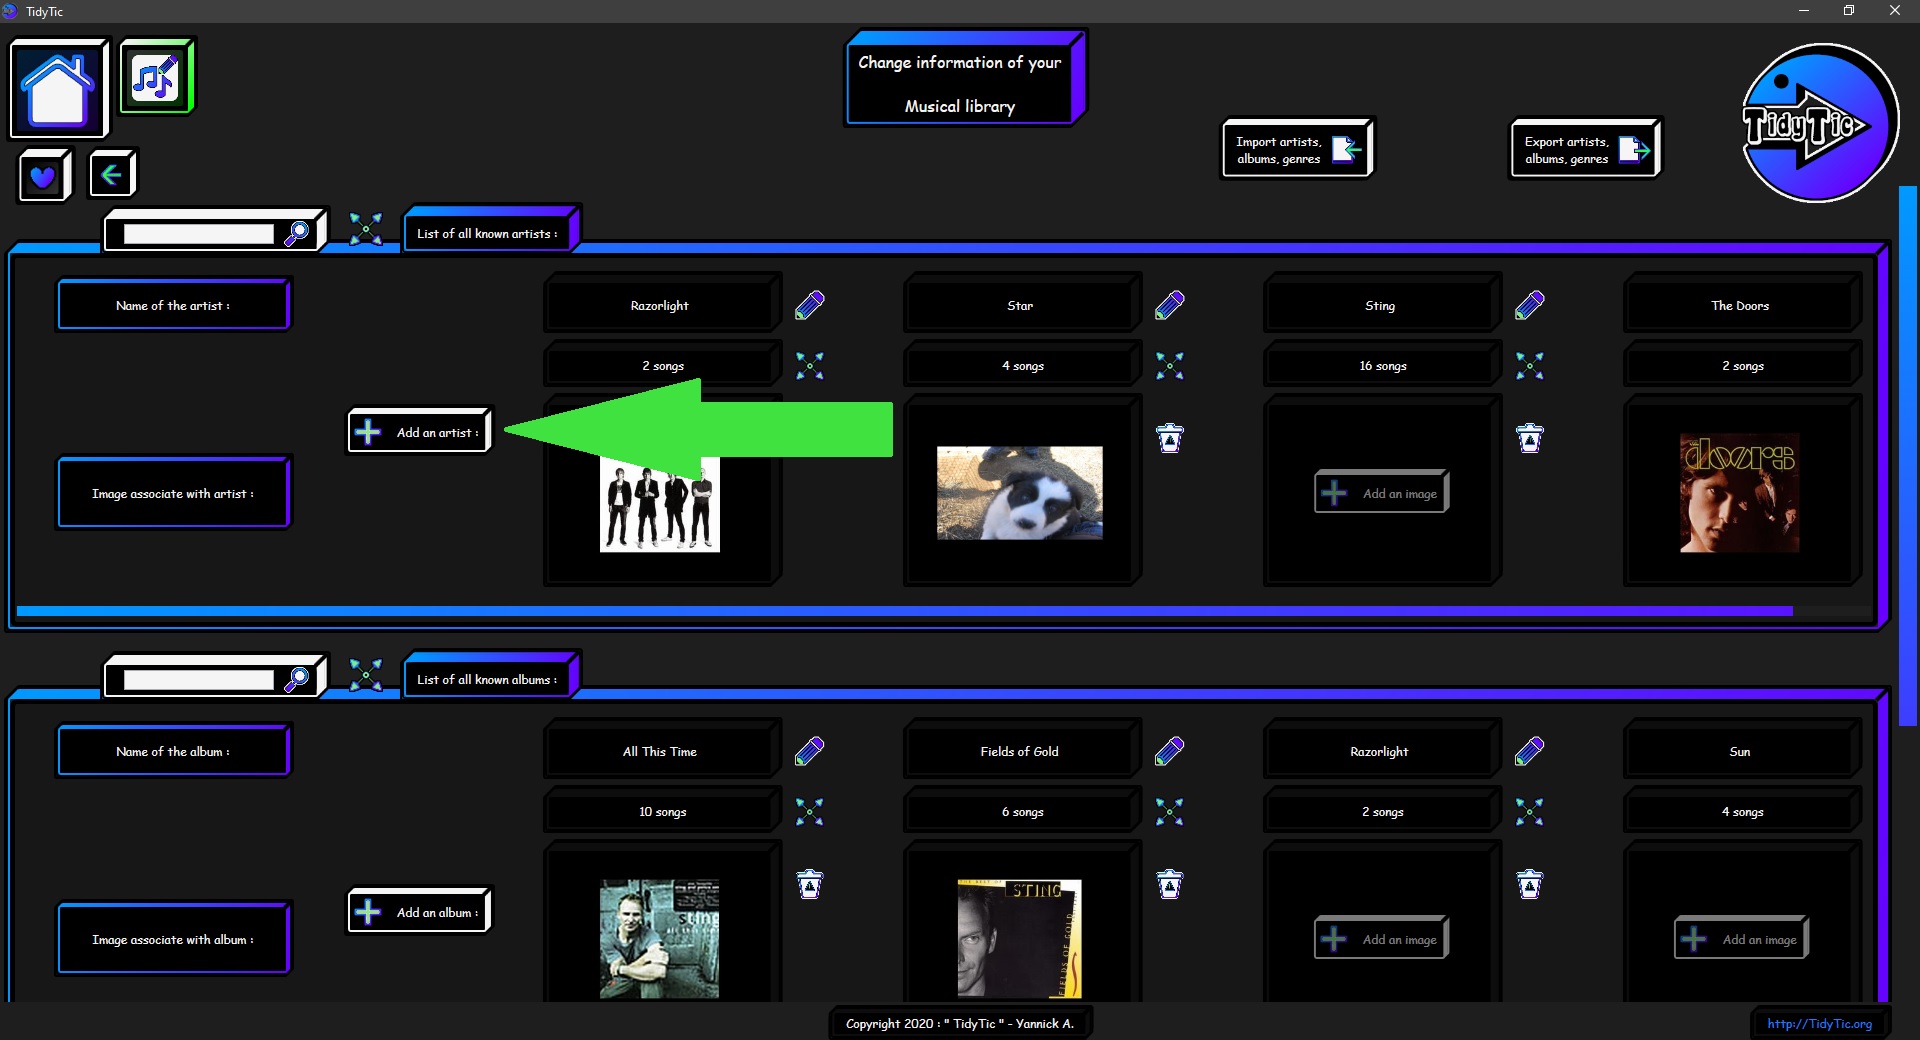
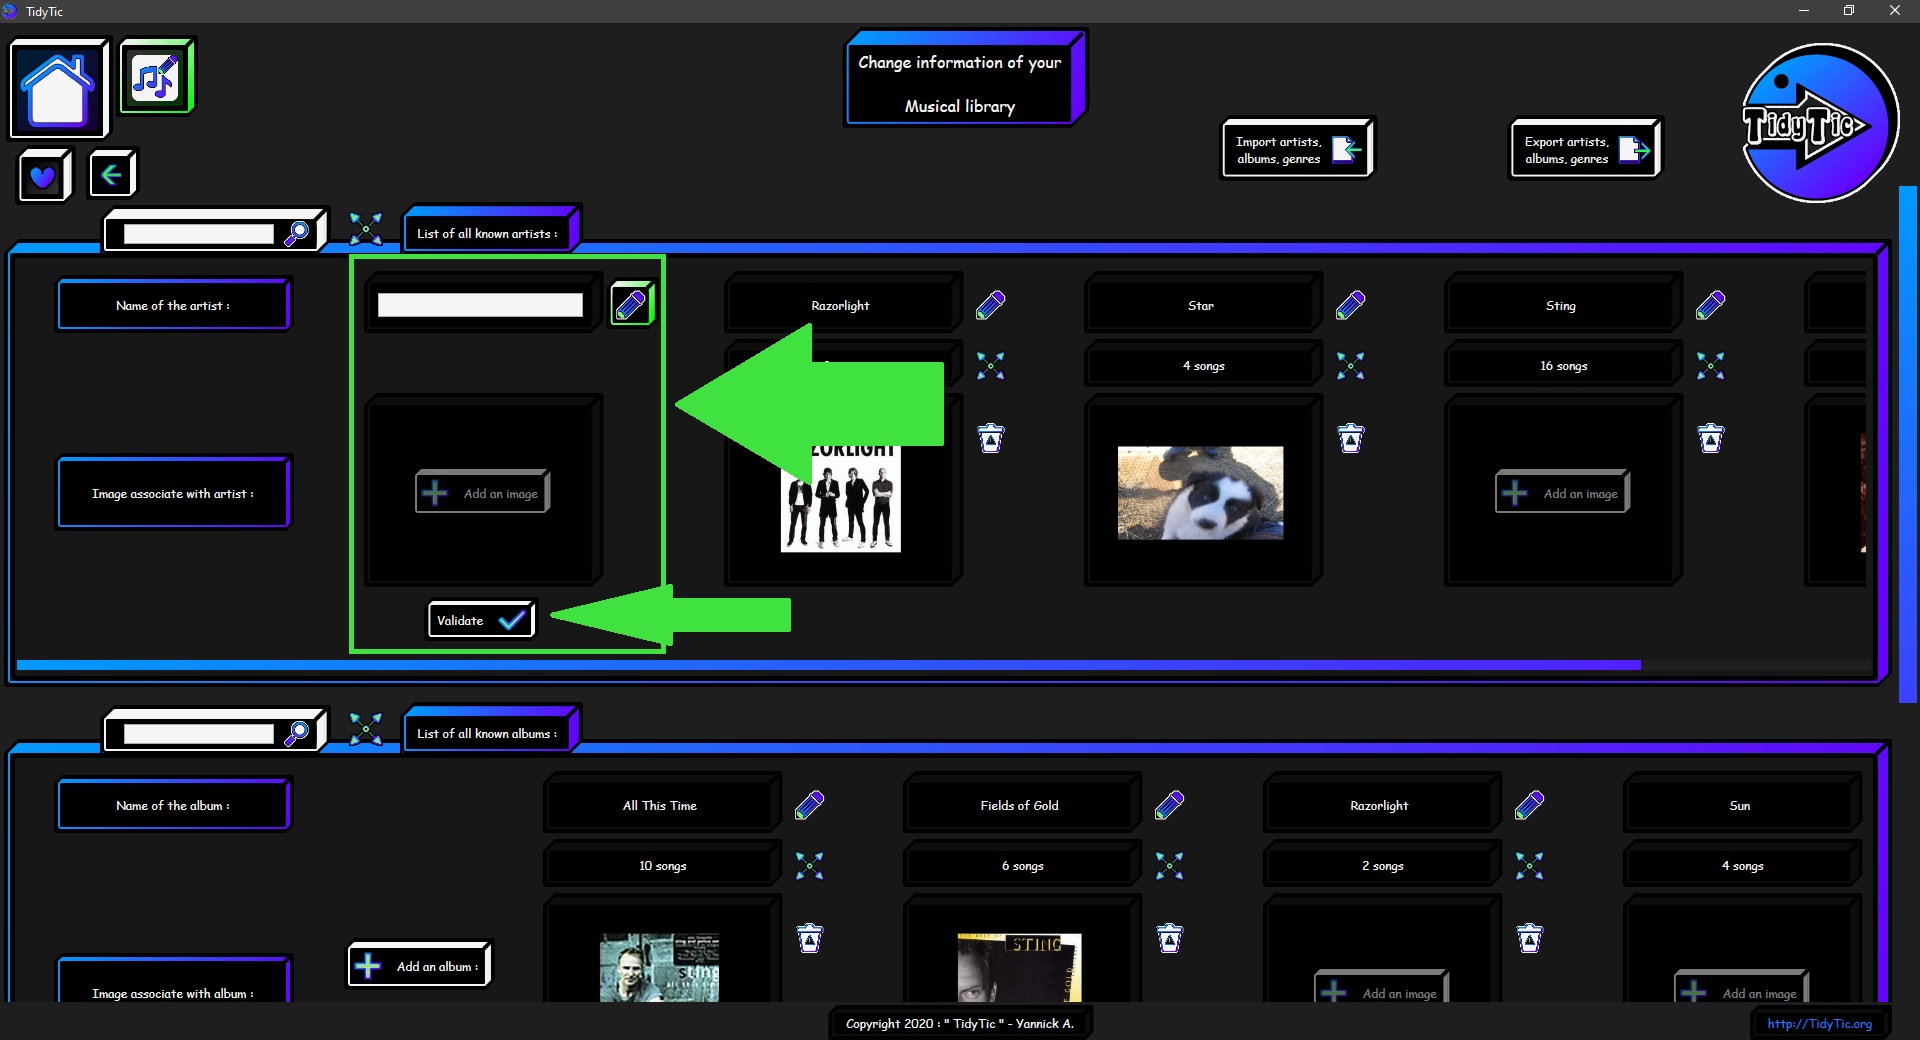
To add an artist you will find a button at the beginning of the list of your artists.
 ____
____ 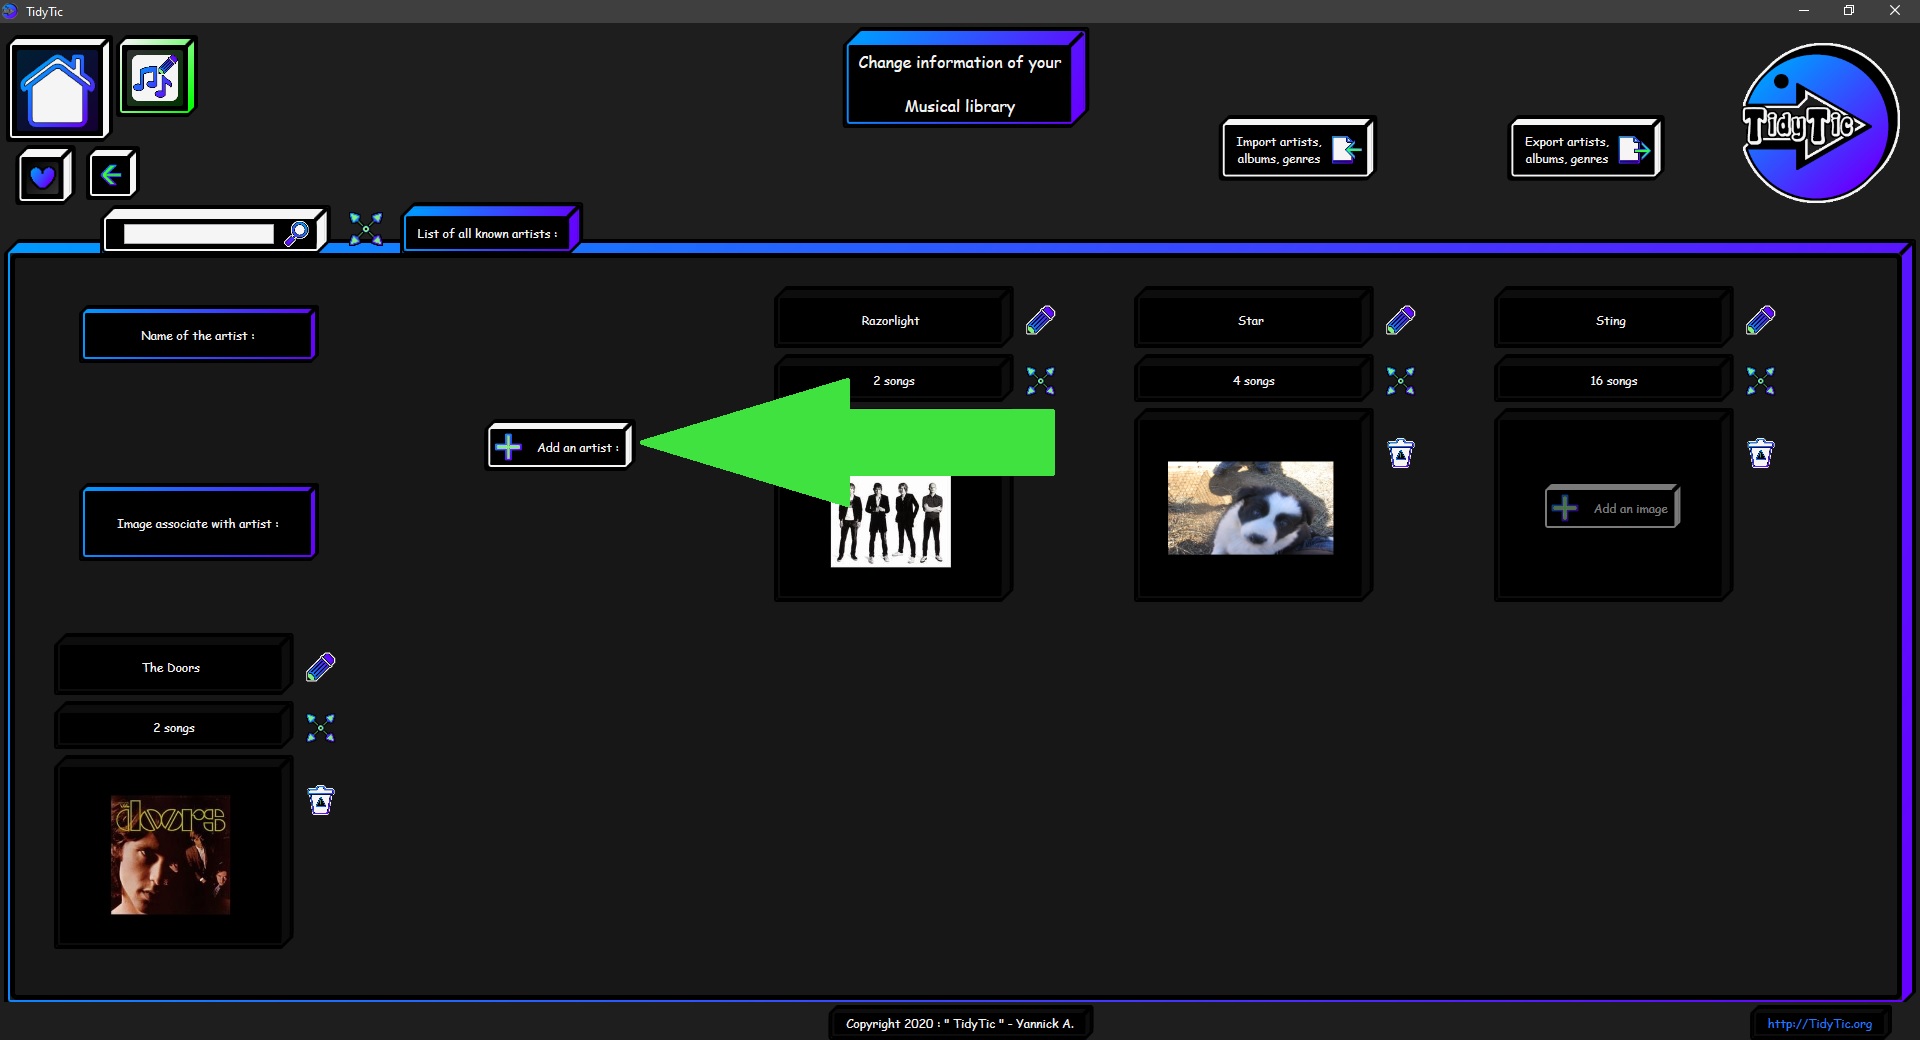
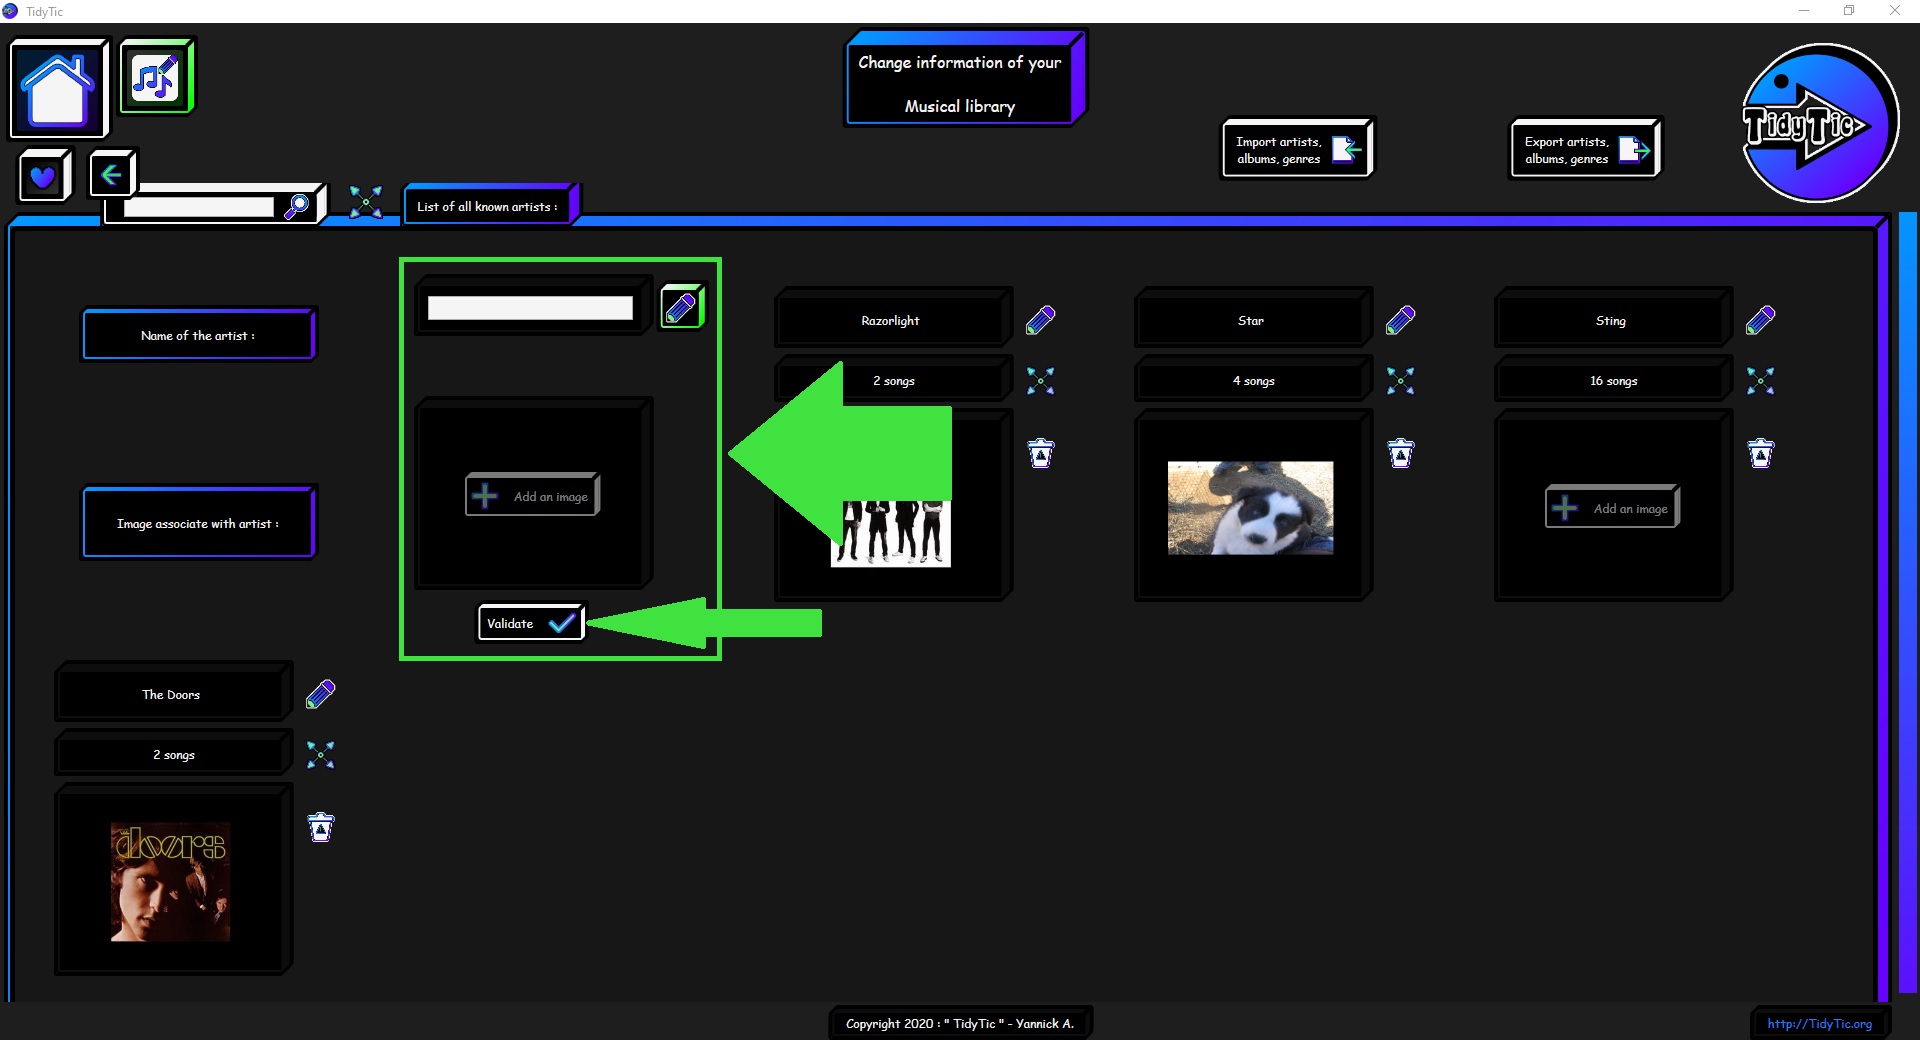
Once click, the button will then be replaced by a space where you can define the name of this new artist as well as associate an image with it.
Then you just need to validate the creation in order to add this artist to the list of those known by TidyTic.
To cancel the creation, just click on the " ![]() " icon.
" icon.
 ____
____ 
To add this artist to one or more of your music, you will have to go through the “Edit files” menu of the display by type or by folder of TidyTic.
Edit an artist of your musical library :
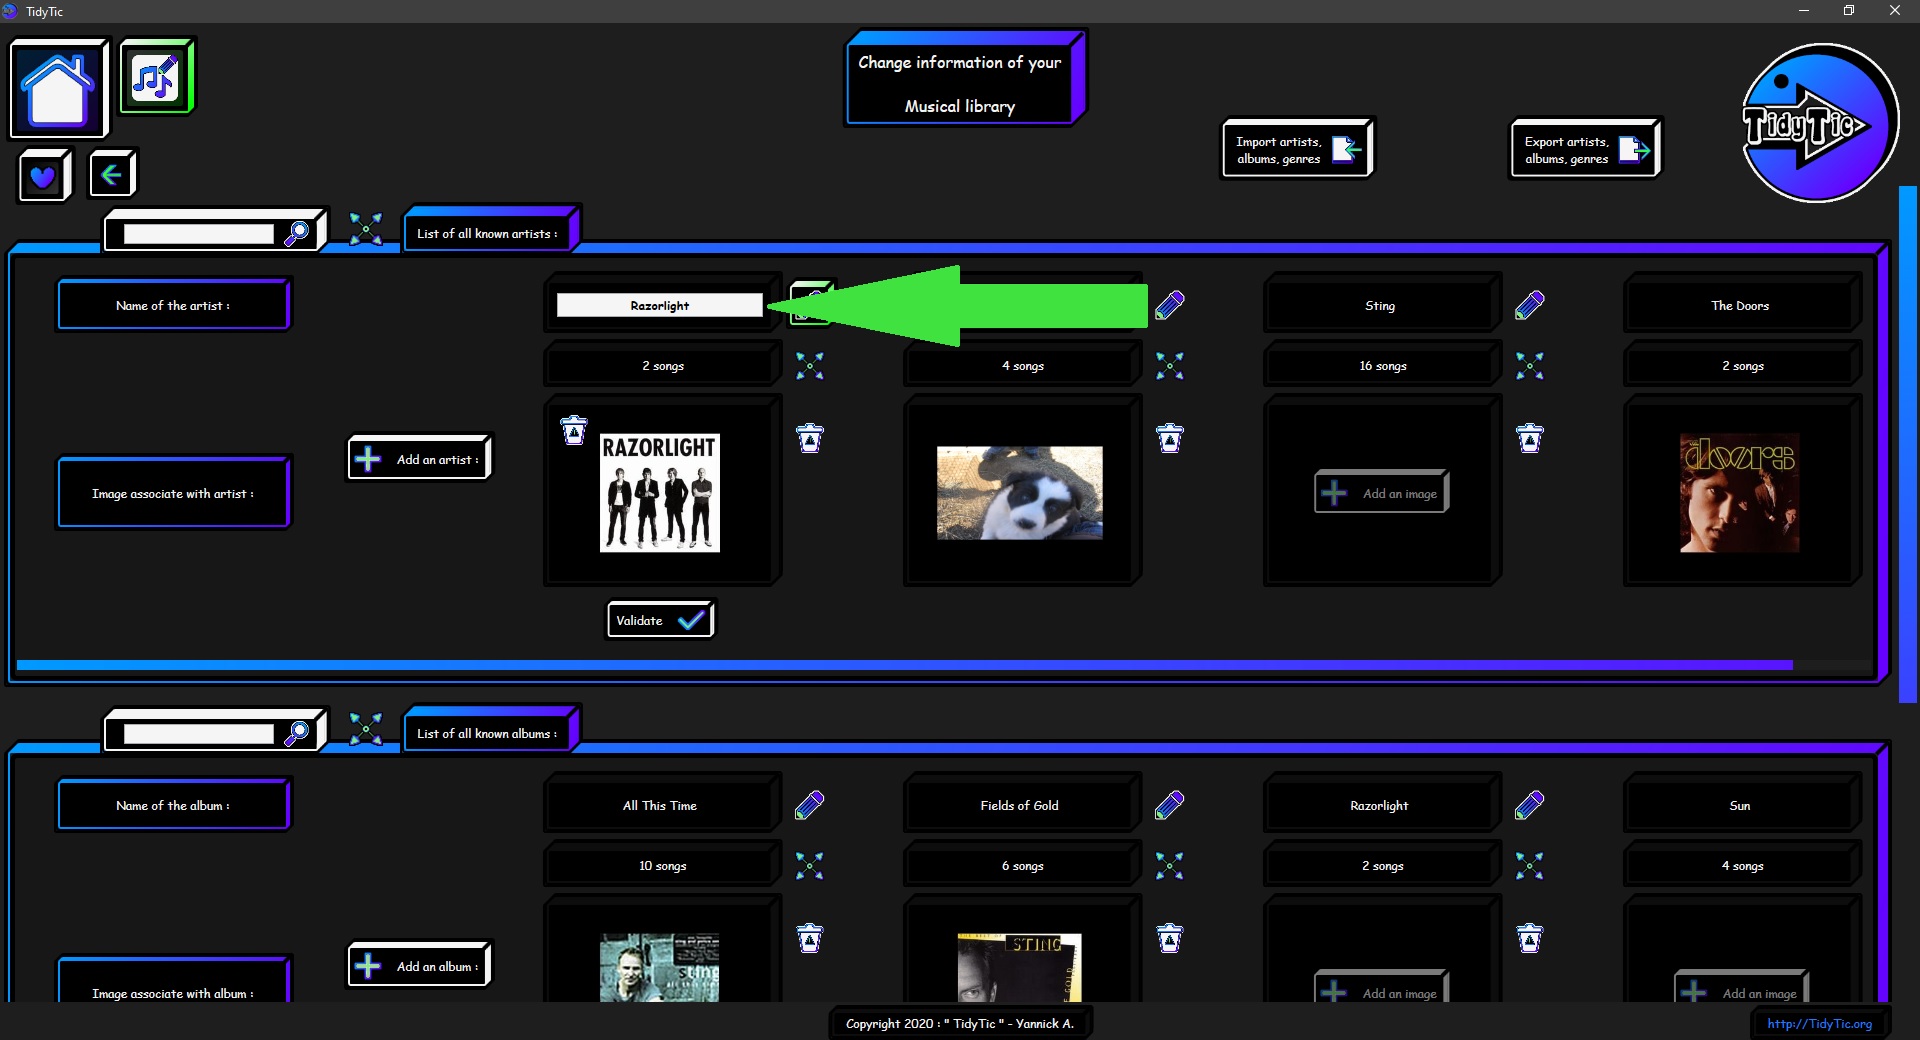
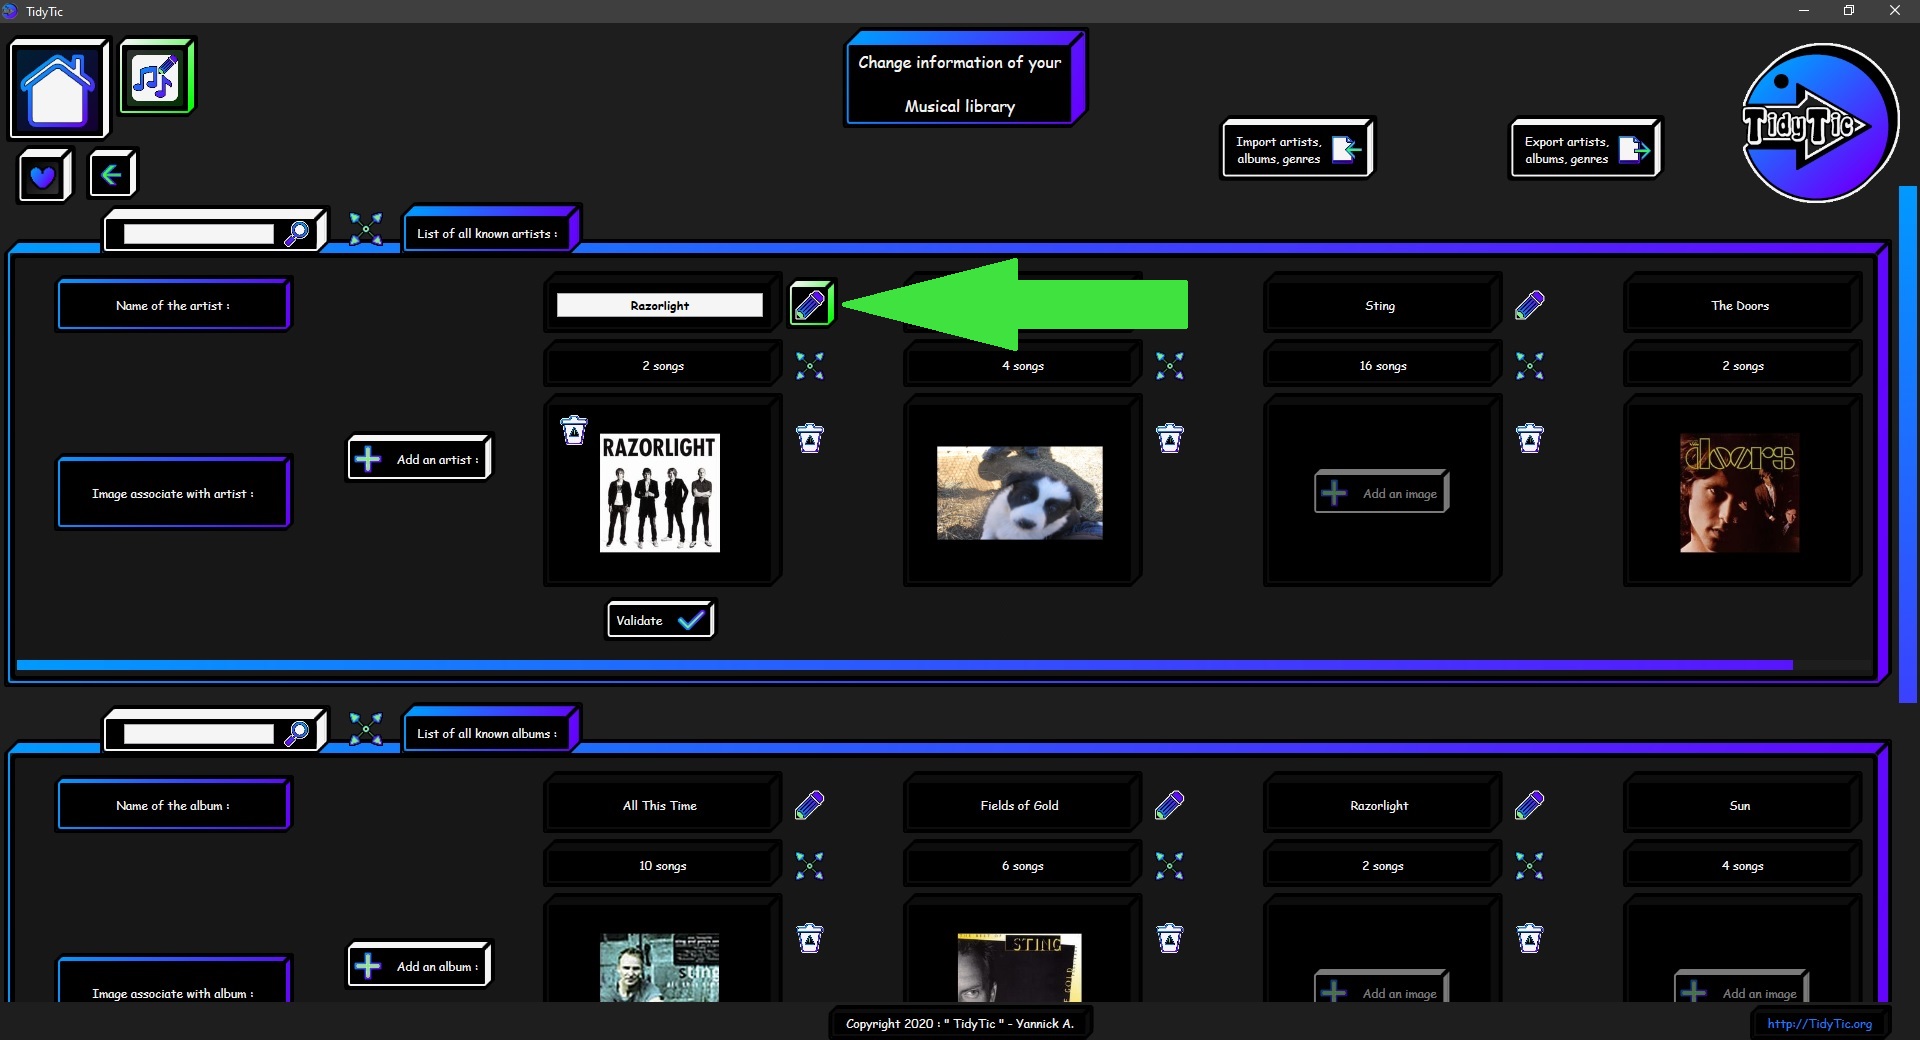
To make a modification on an artist you will find an icon "![]() " next to this one.
" next to this one.
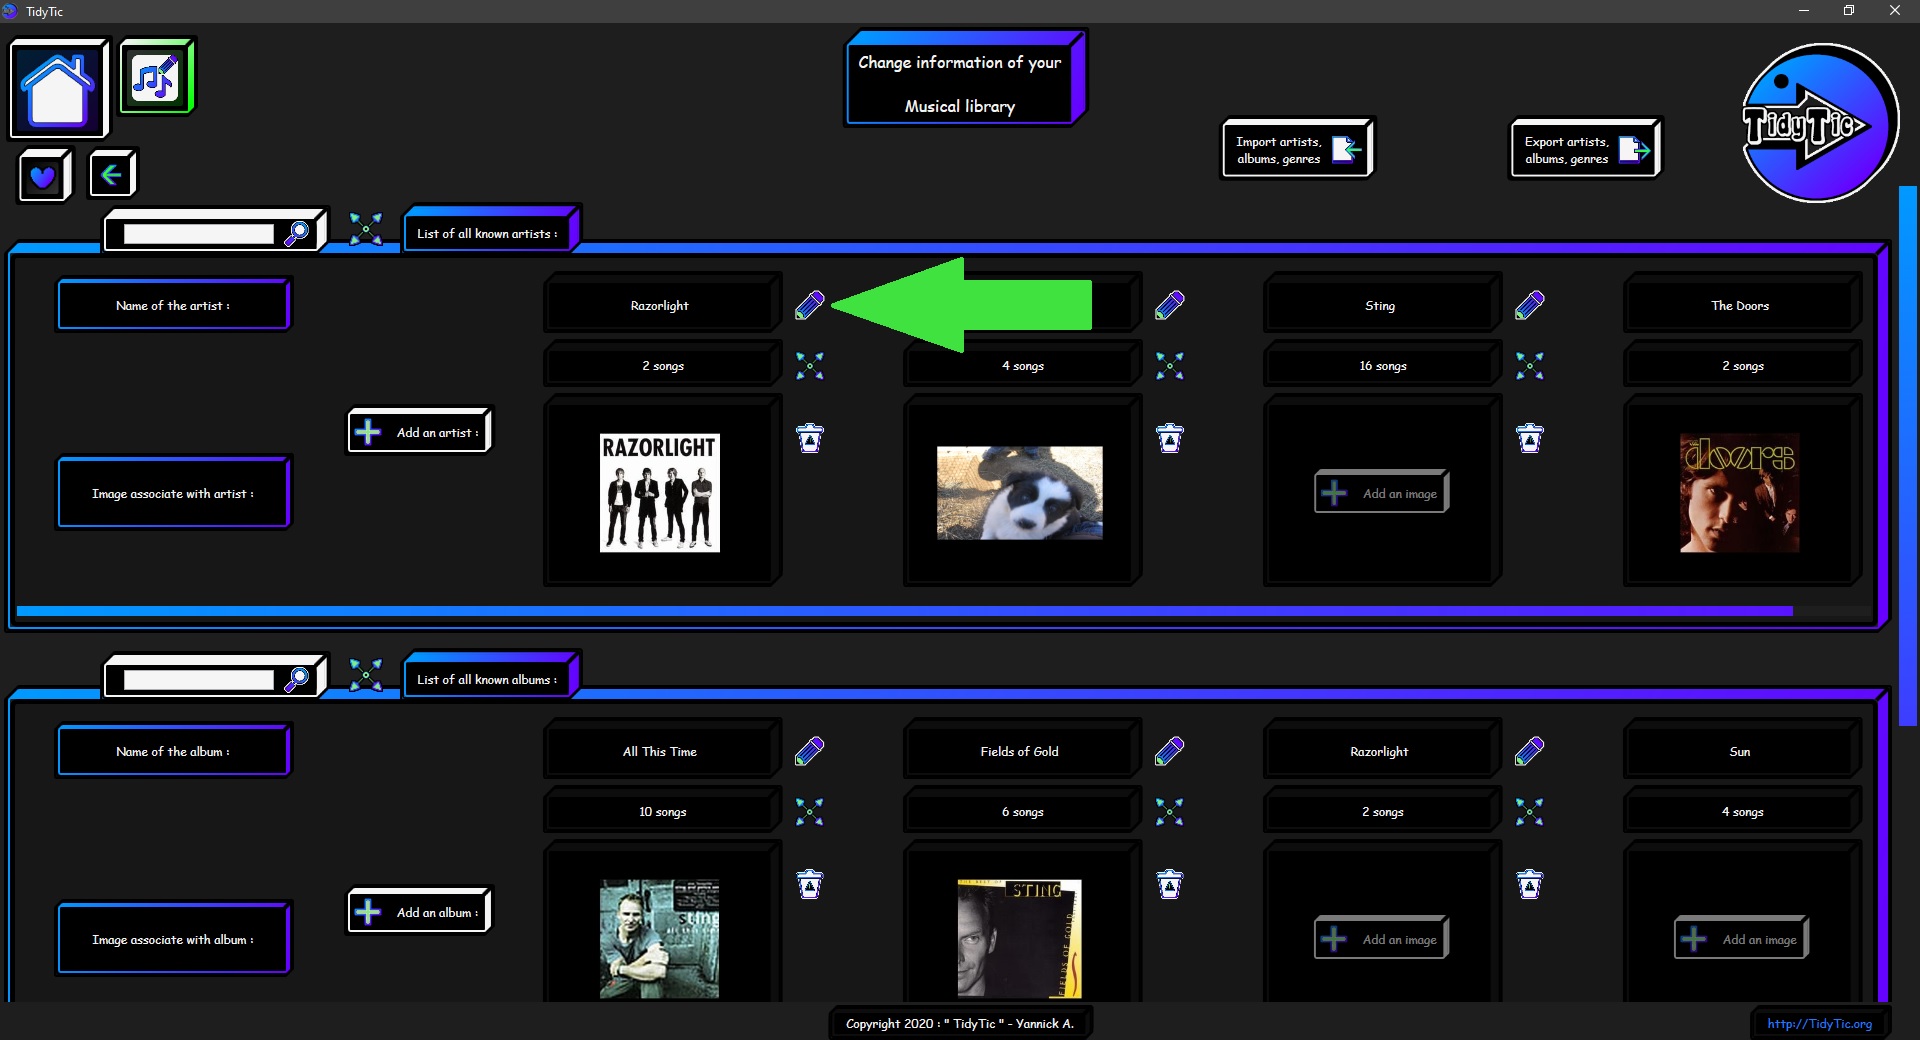 ____
____ 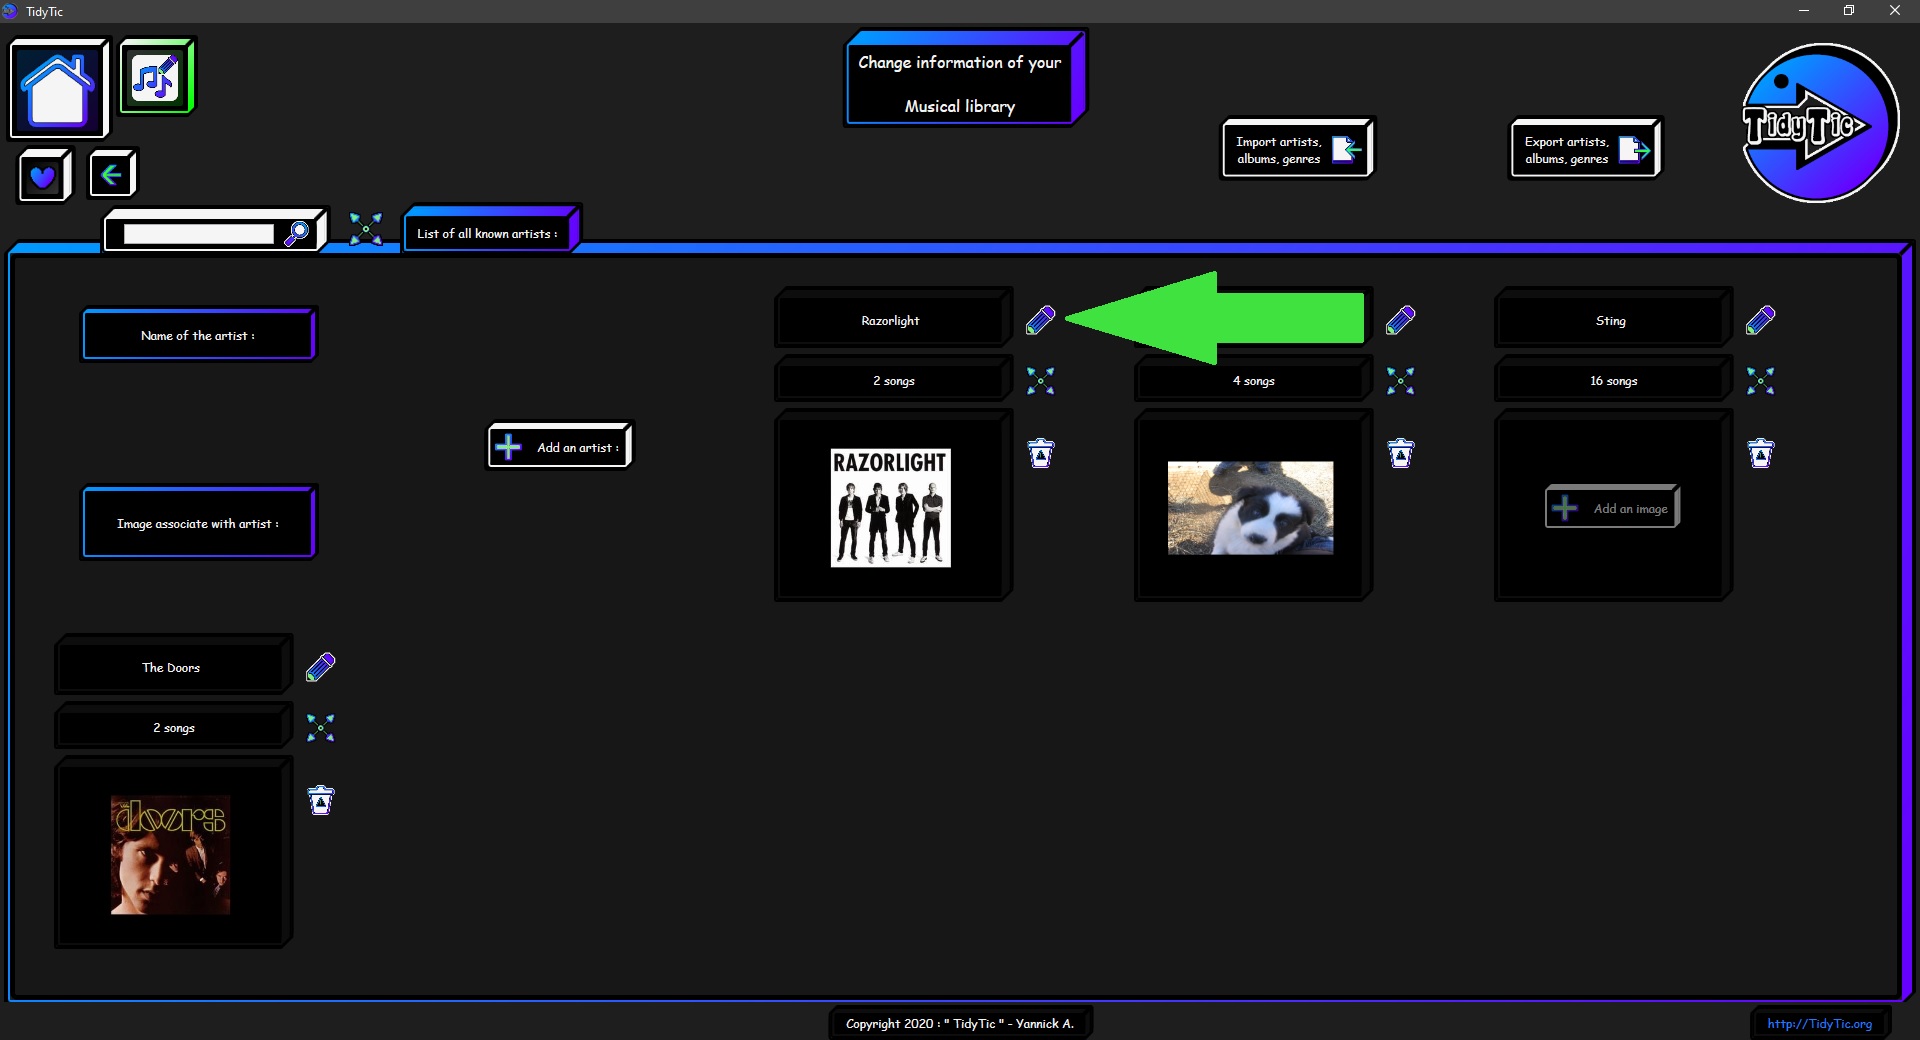
The artist will then go into modification mode.
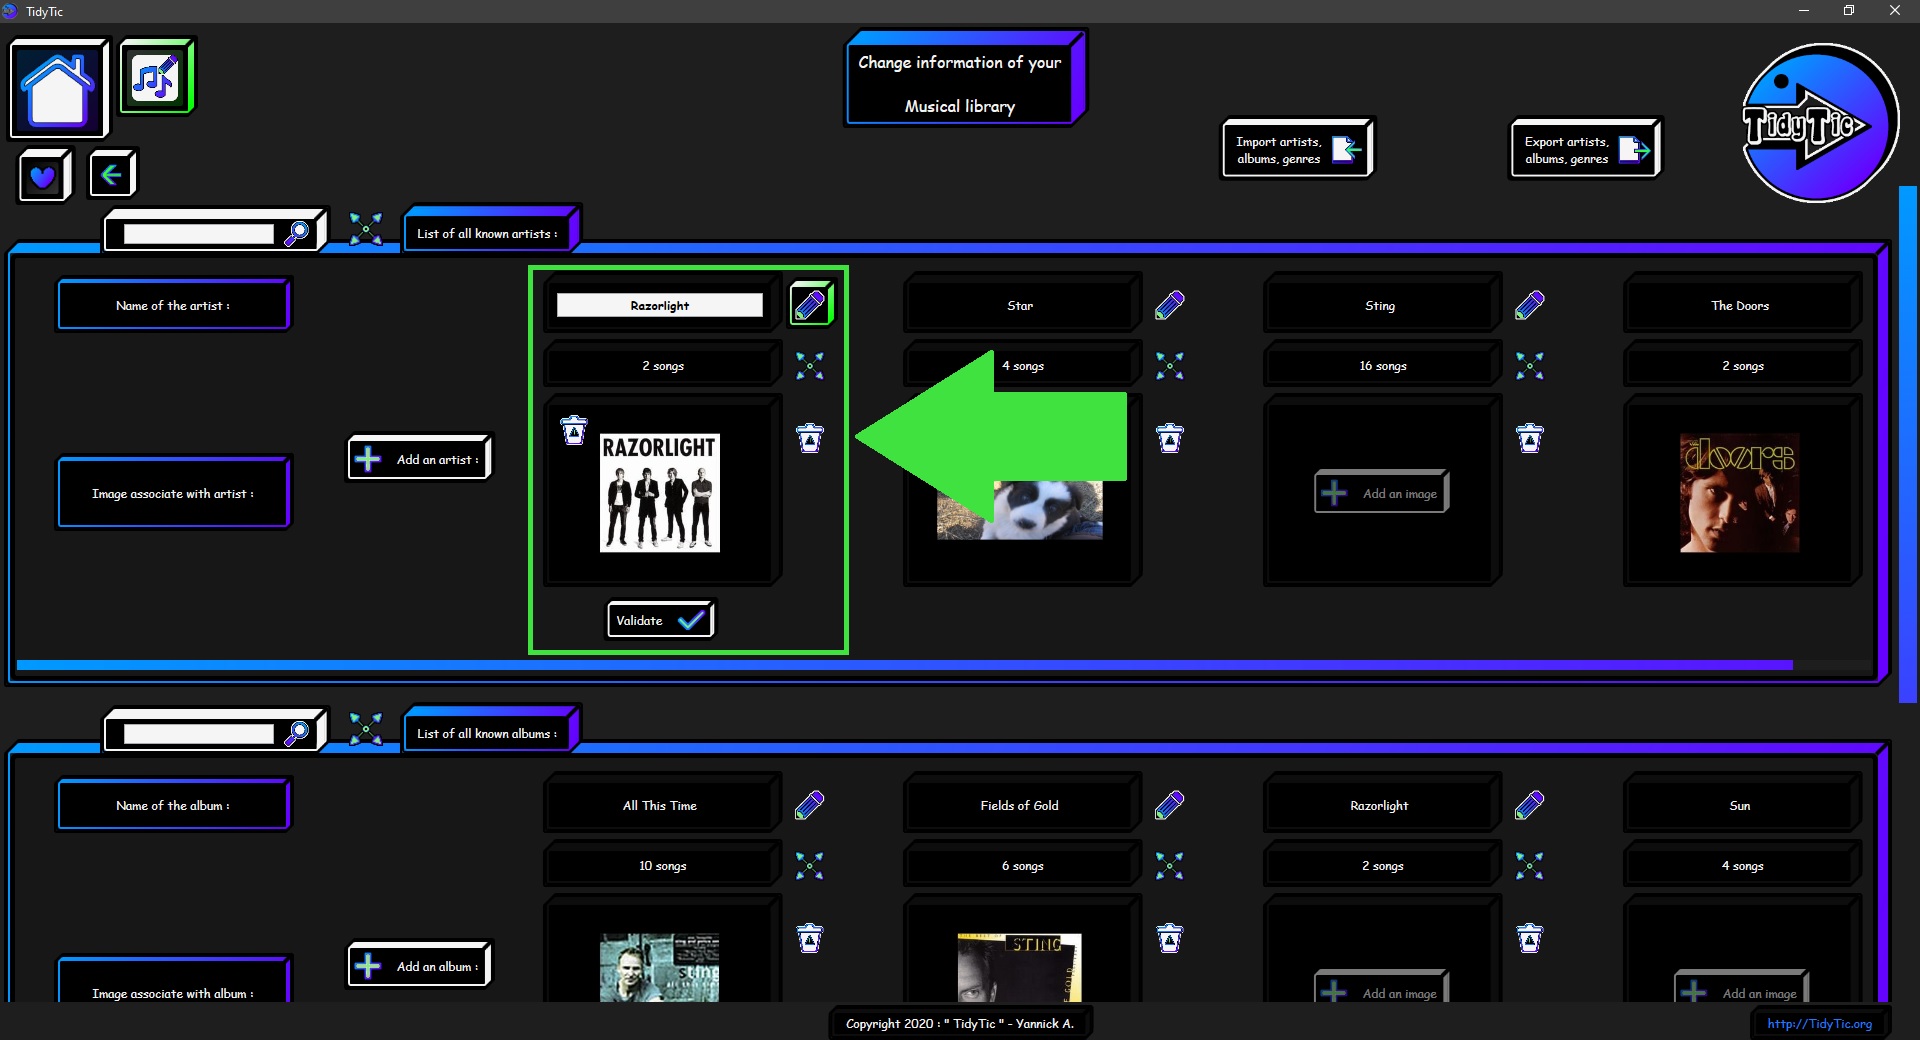
You can then change its name.
When you change the name of an artist from this page, the change will also be made on all music associated with this artist.
The information contained in the file itself will be updated.
So these changes will be visible on all audio player from which you will read the file.
Changing the name is also possible from the "Detailed information about the artist" window.
 ____
____ 
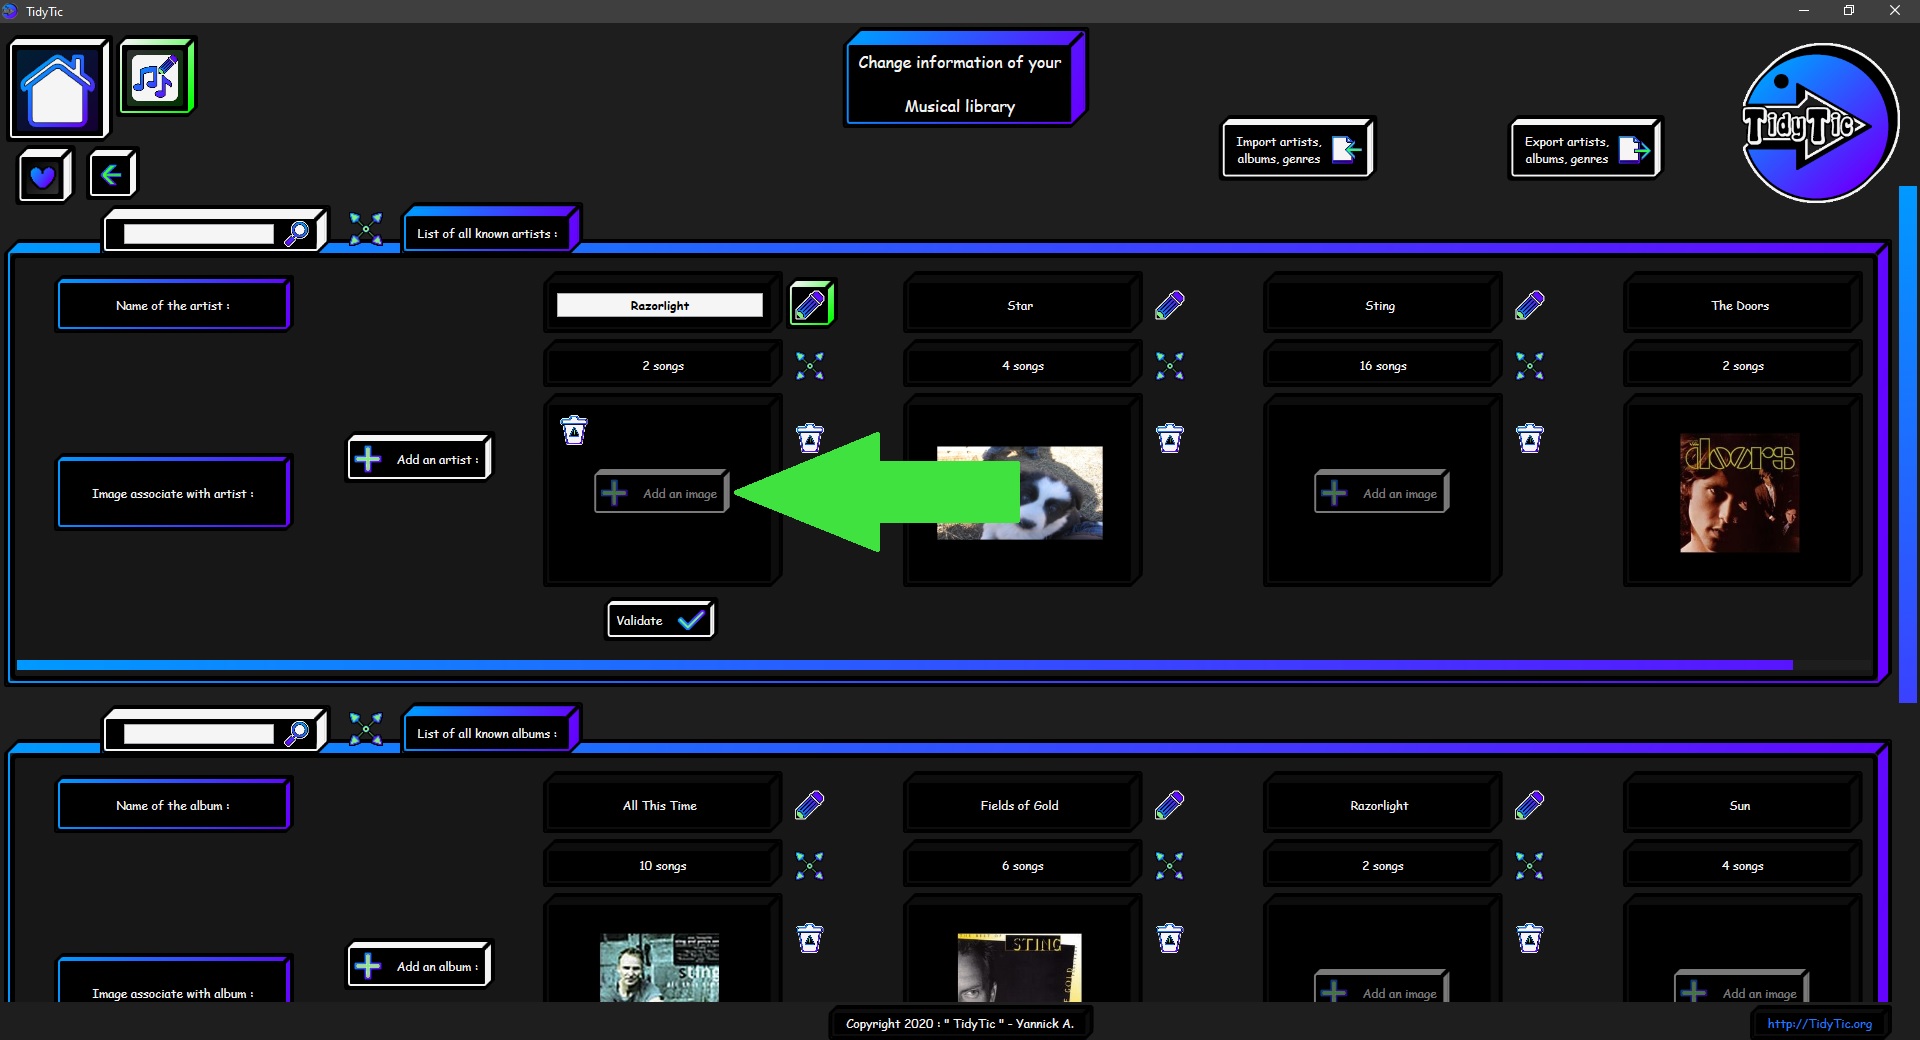
You can also delete the image associated with the artist in order to add a new one.
You just need to double left click on the "![]() " icon.
" icon.
As a reminder, this image is used for the thumbnails of all the music associated with this artist, in the display by folder or by type of TidyTic.
 ____
____  ____
____ 
Once the modifications have been made, you still have to validate it.
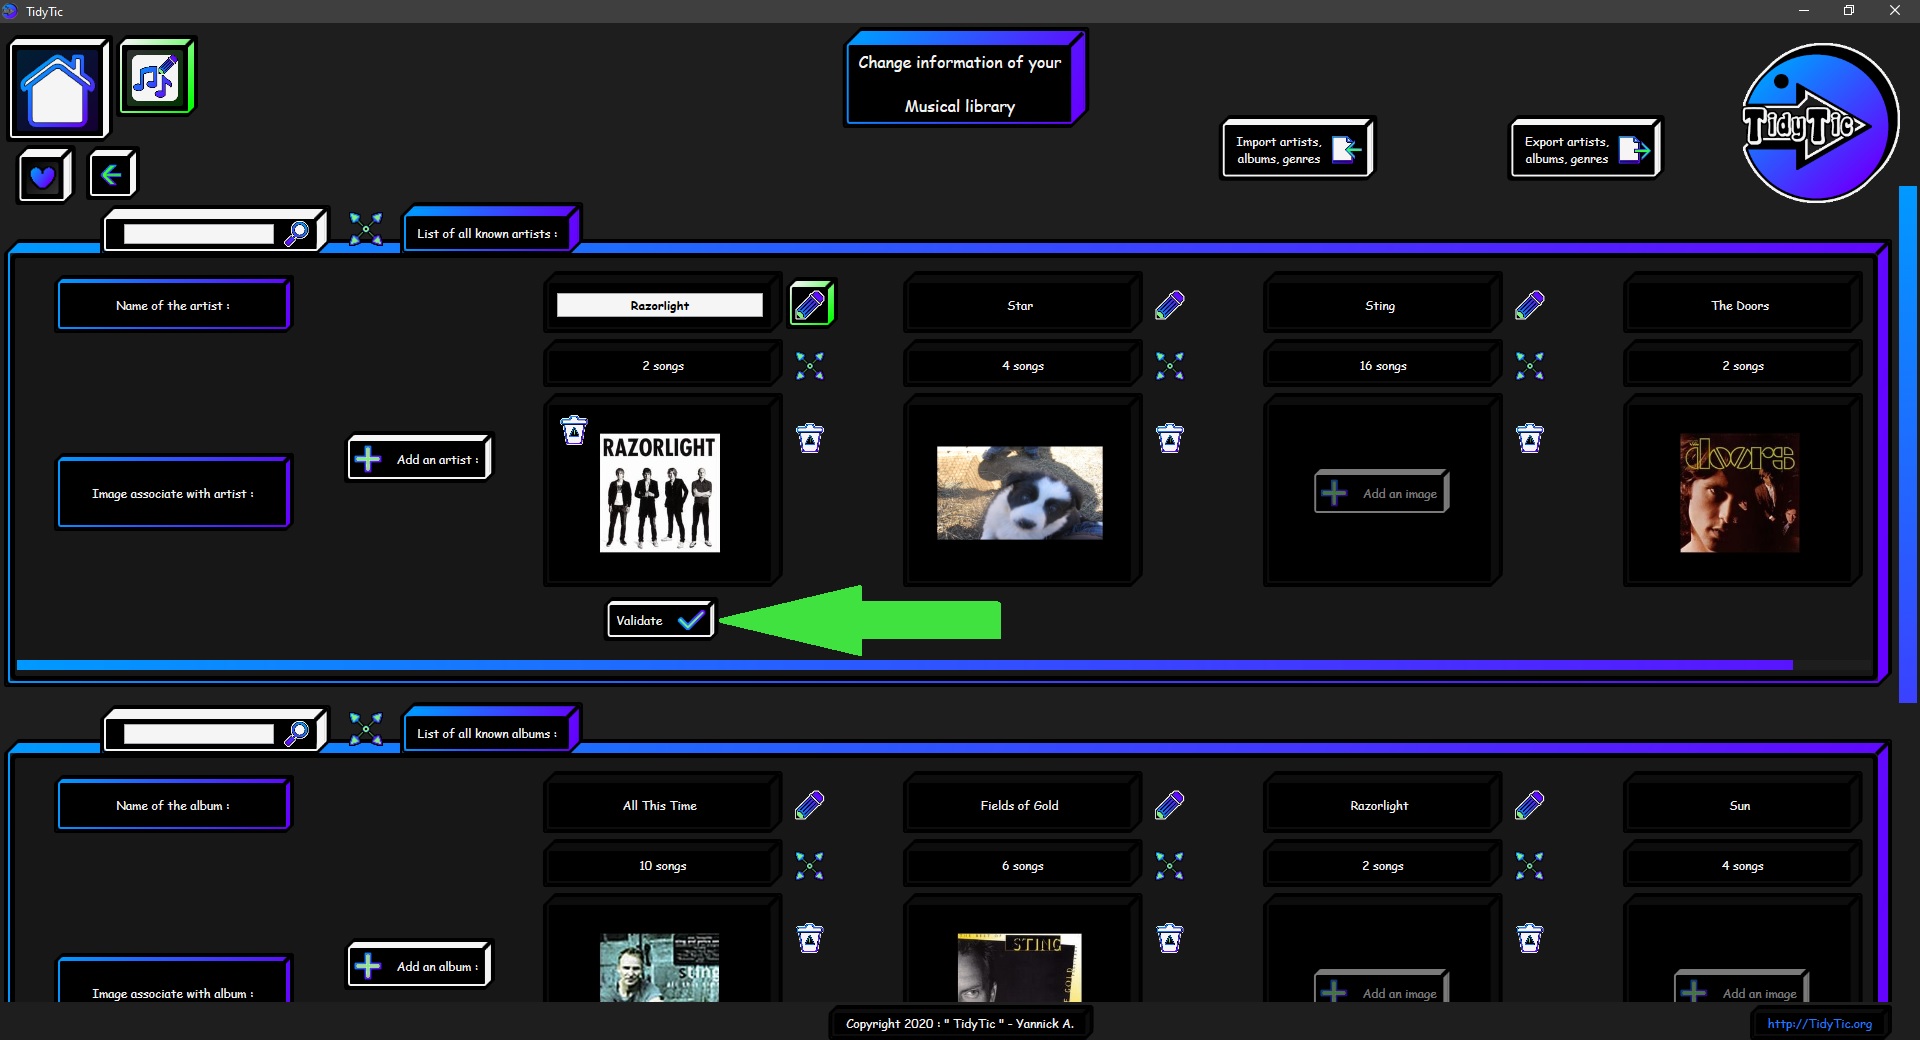
To cancel a modification, simply click on the " ![]() " icon.
" icon.
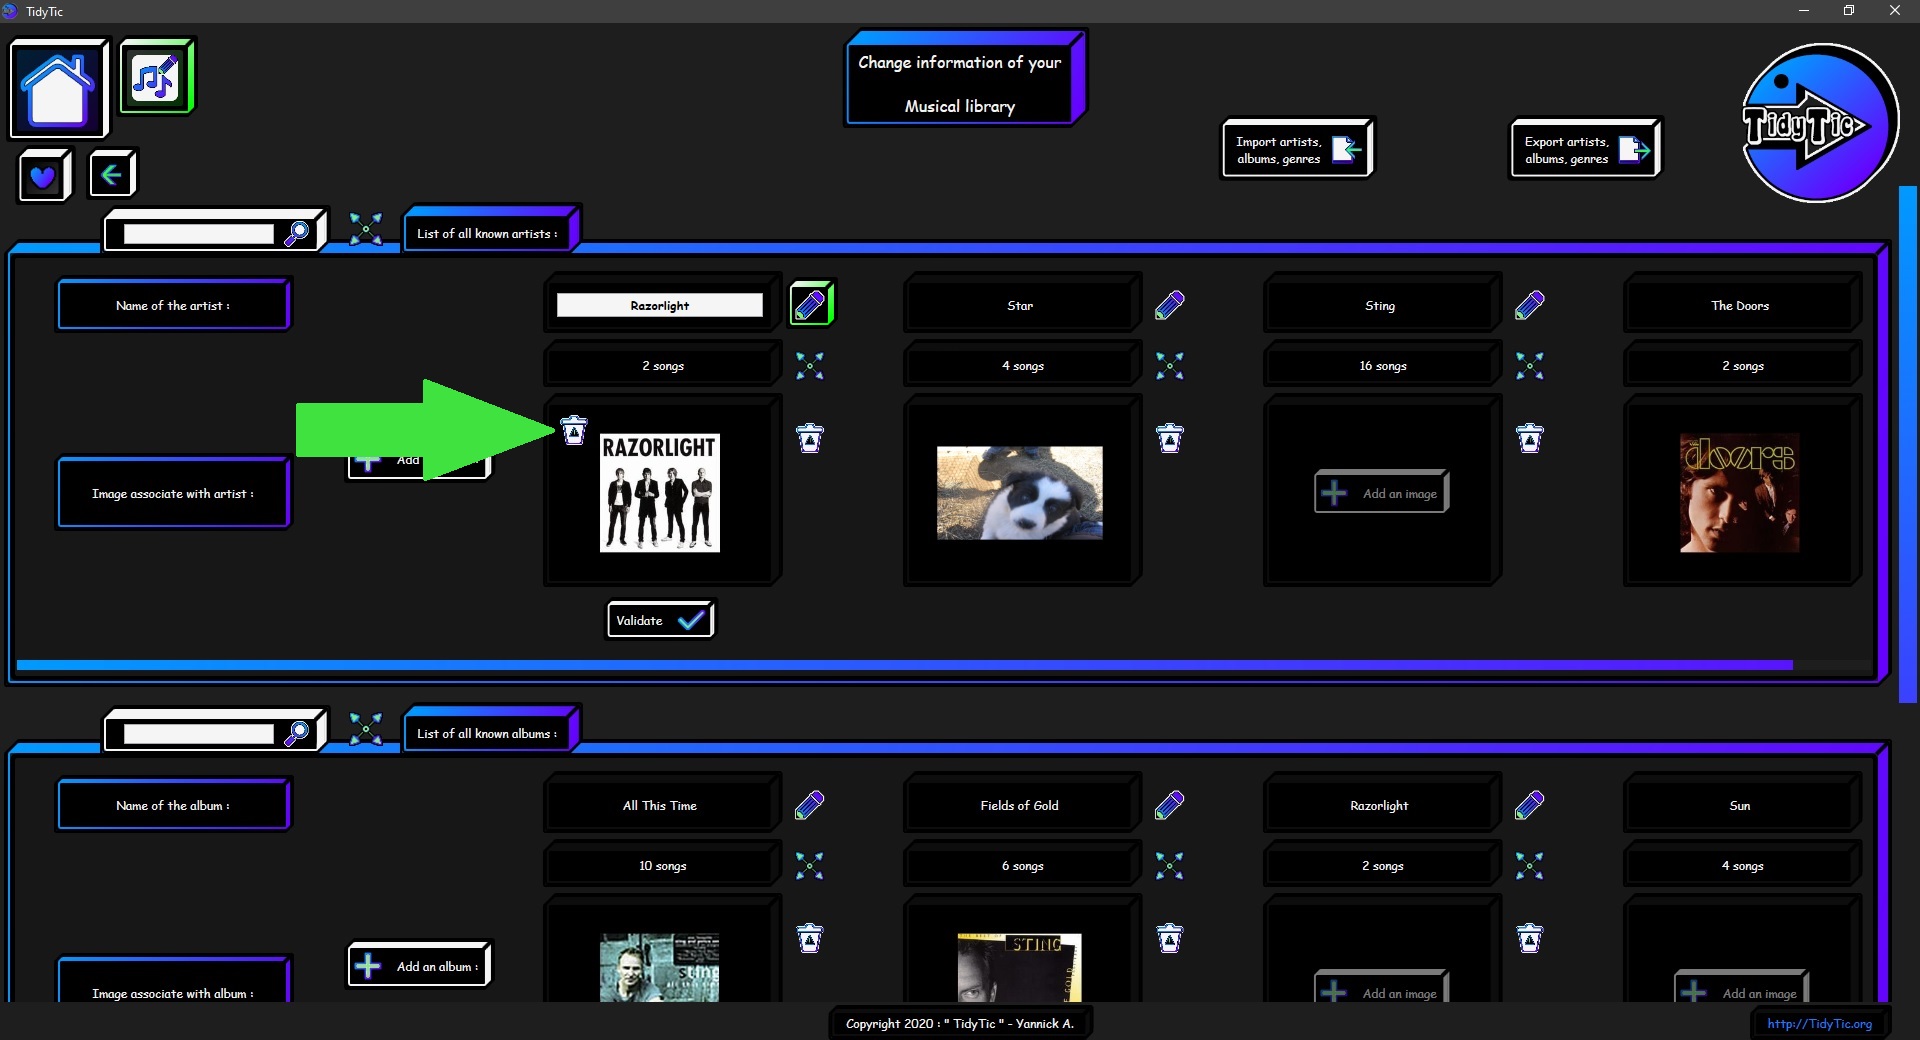
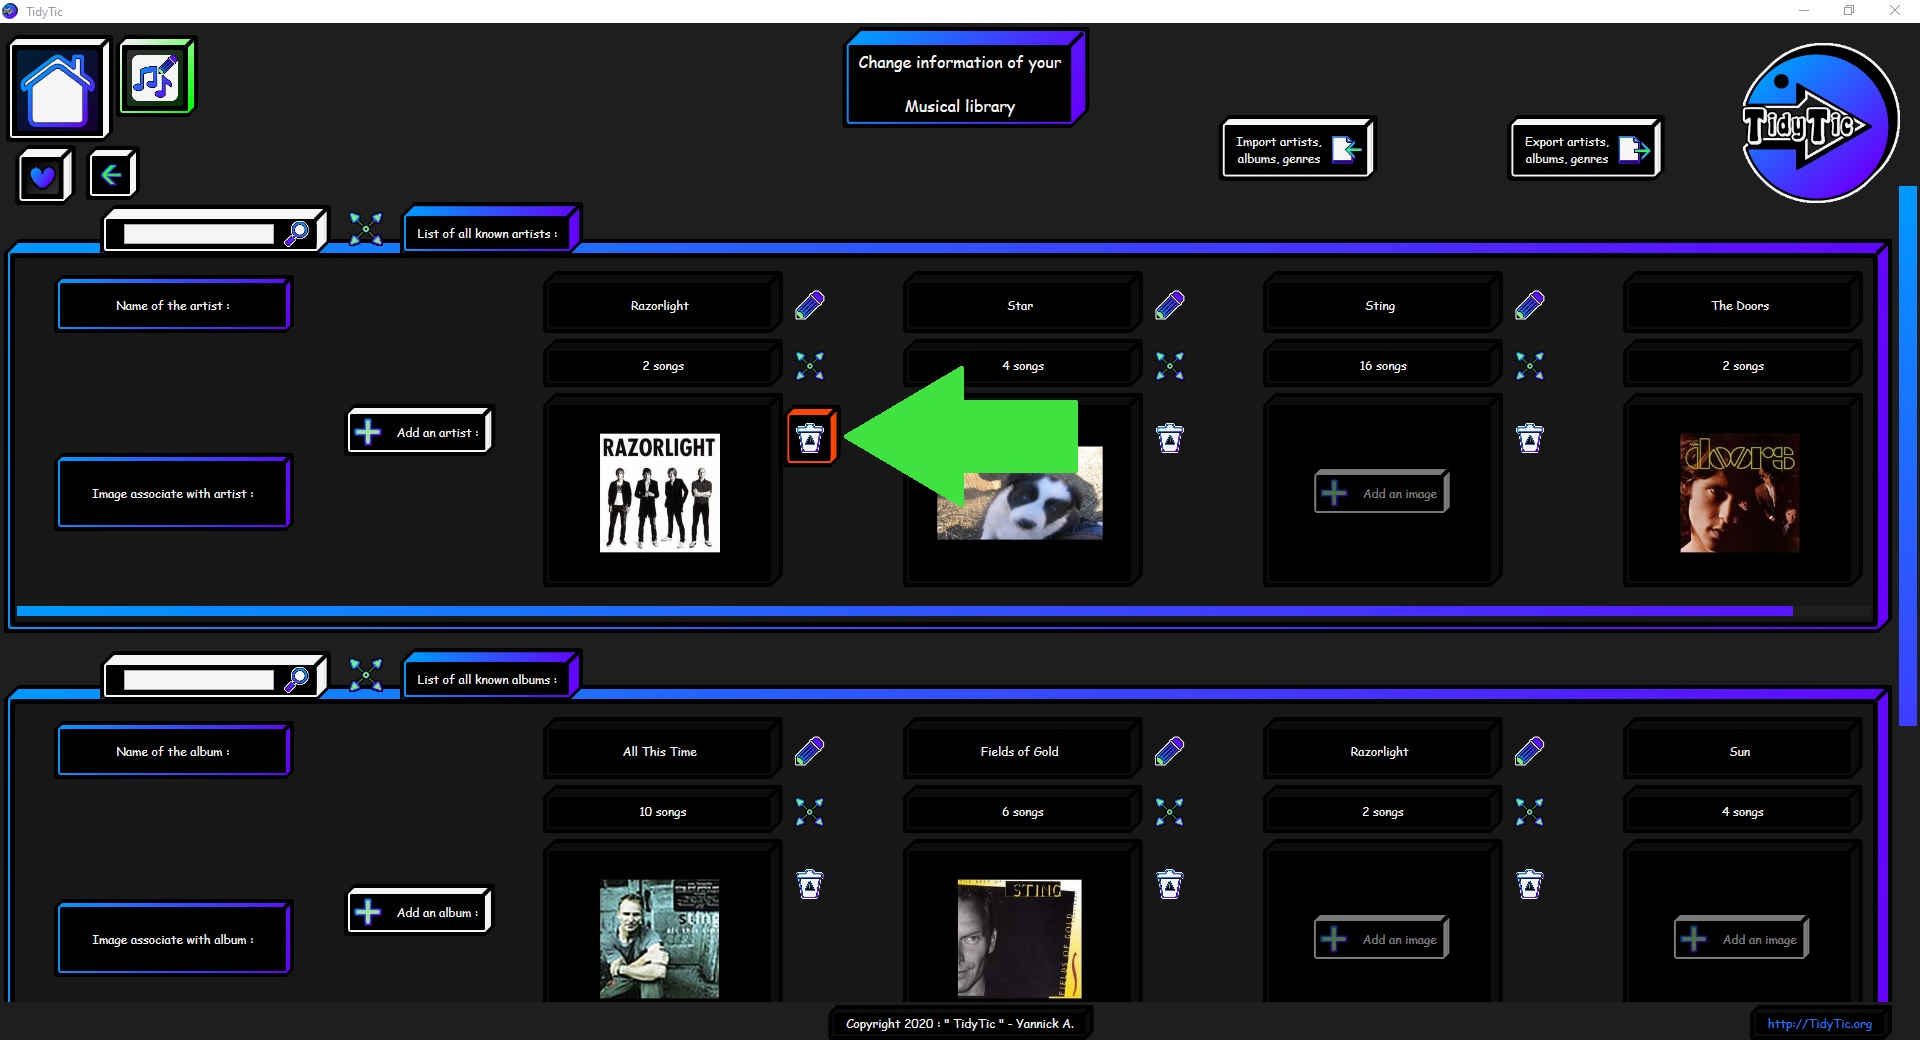
Delete an artist from your musical library :
To delete an artist from your musical library, double left click on the " ![]() " icon.
" icon.
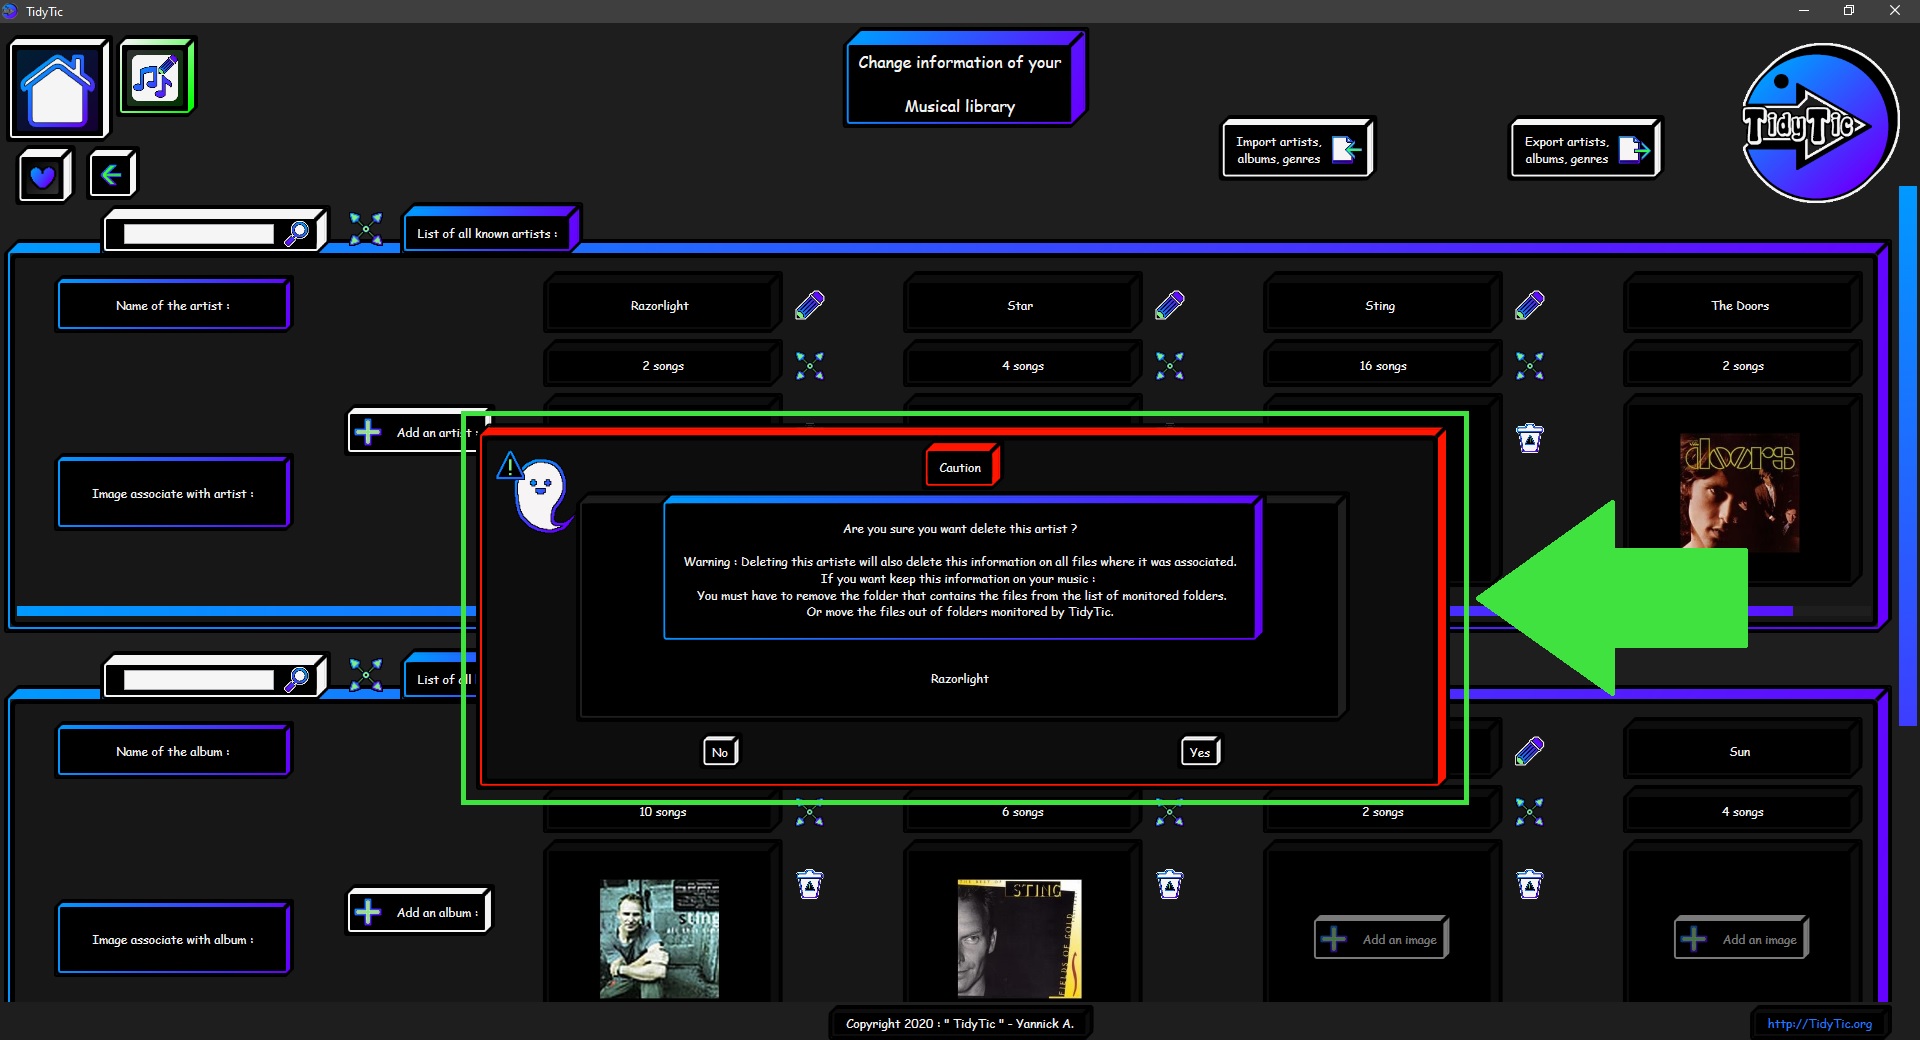
A message will ask you to confirm the deletion of the artist.
If you delete an artist, this artist will also be deleted from the information of all musics with which he was associated.
If you want to keep this information on musics where it is present, you must have to place the files outside of folders monitored by TidyTic.
 ____
____ 
Manage the albums of your musics with TidyTic :
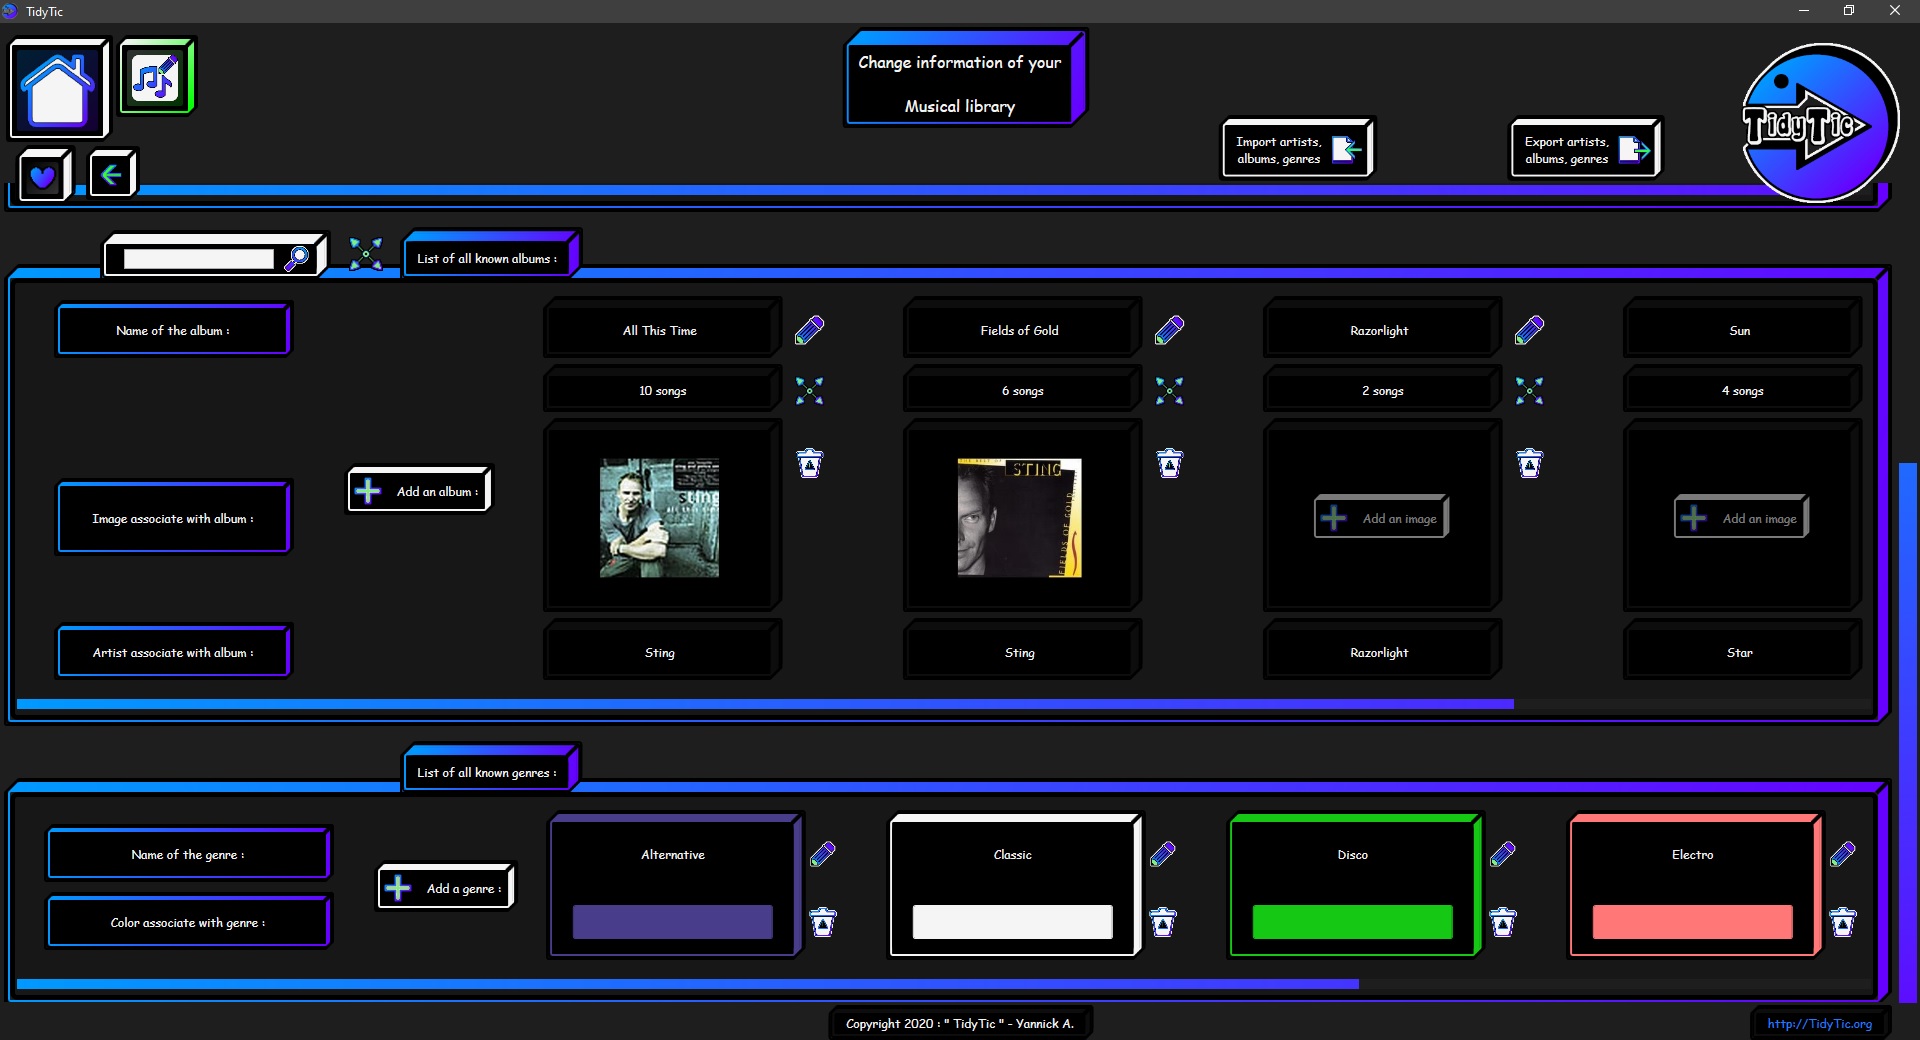
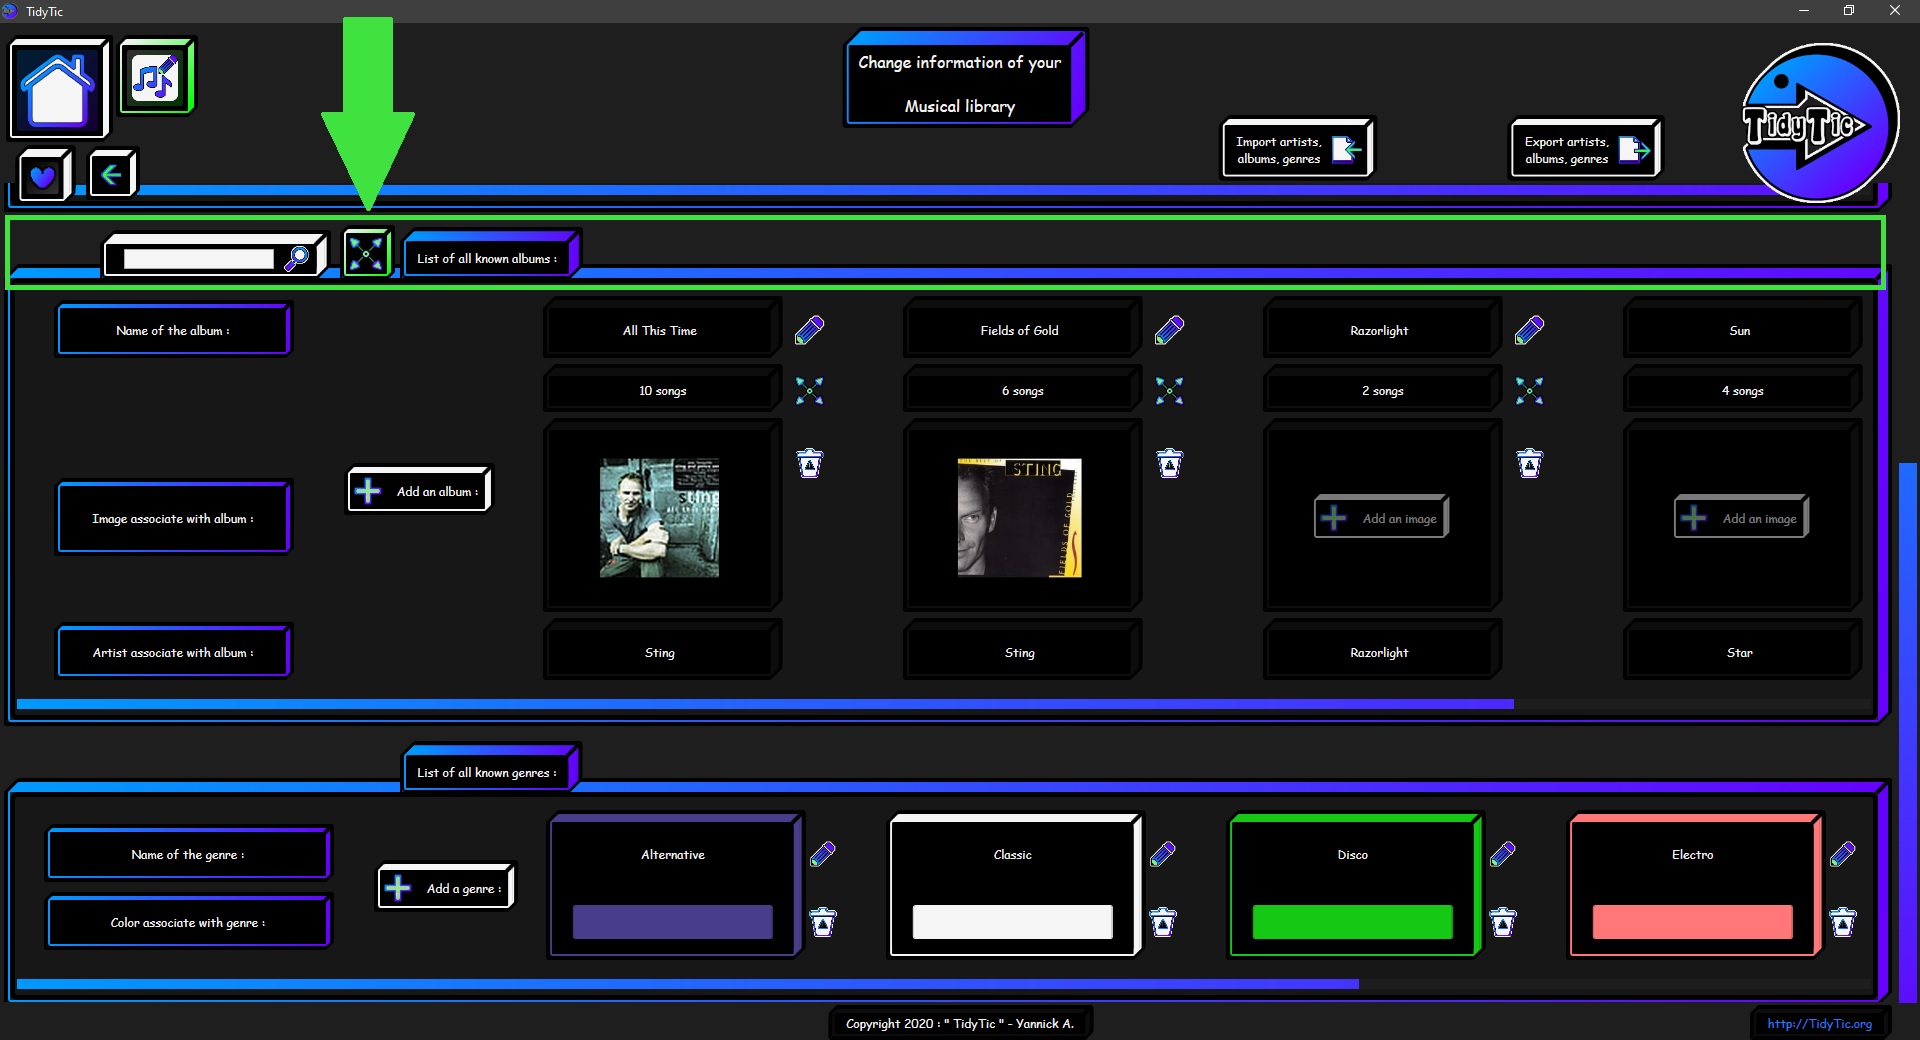
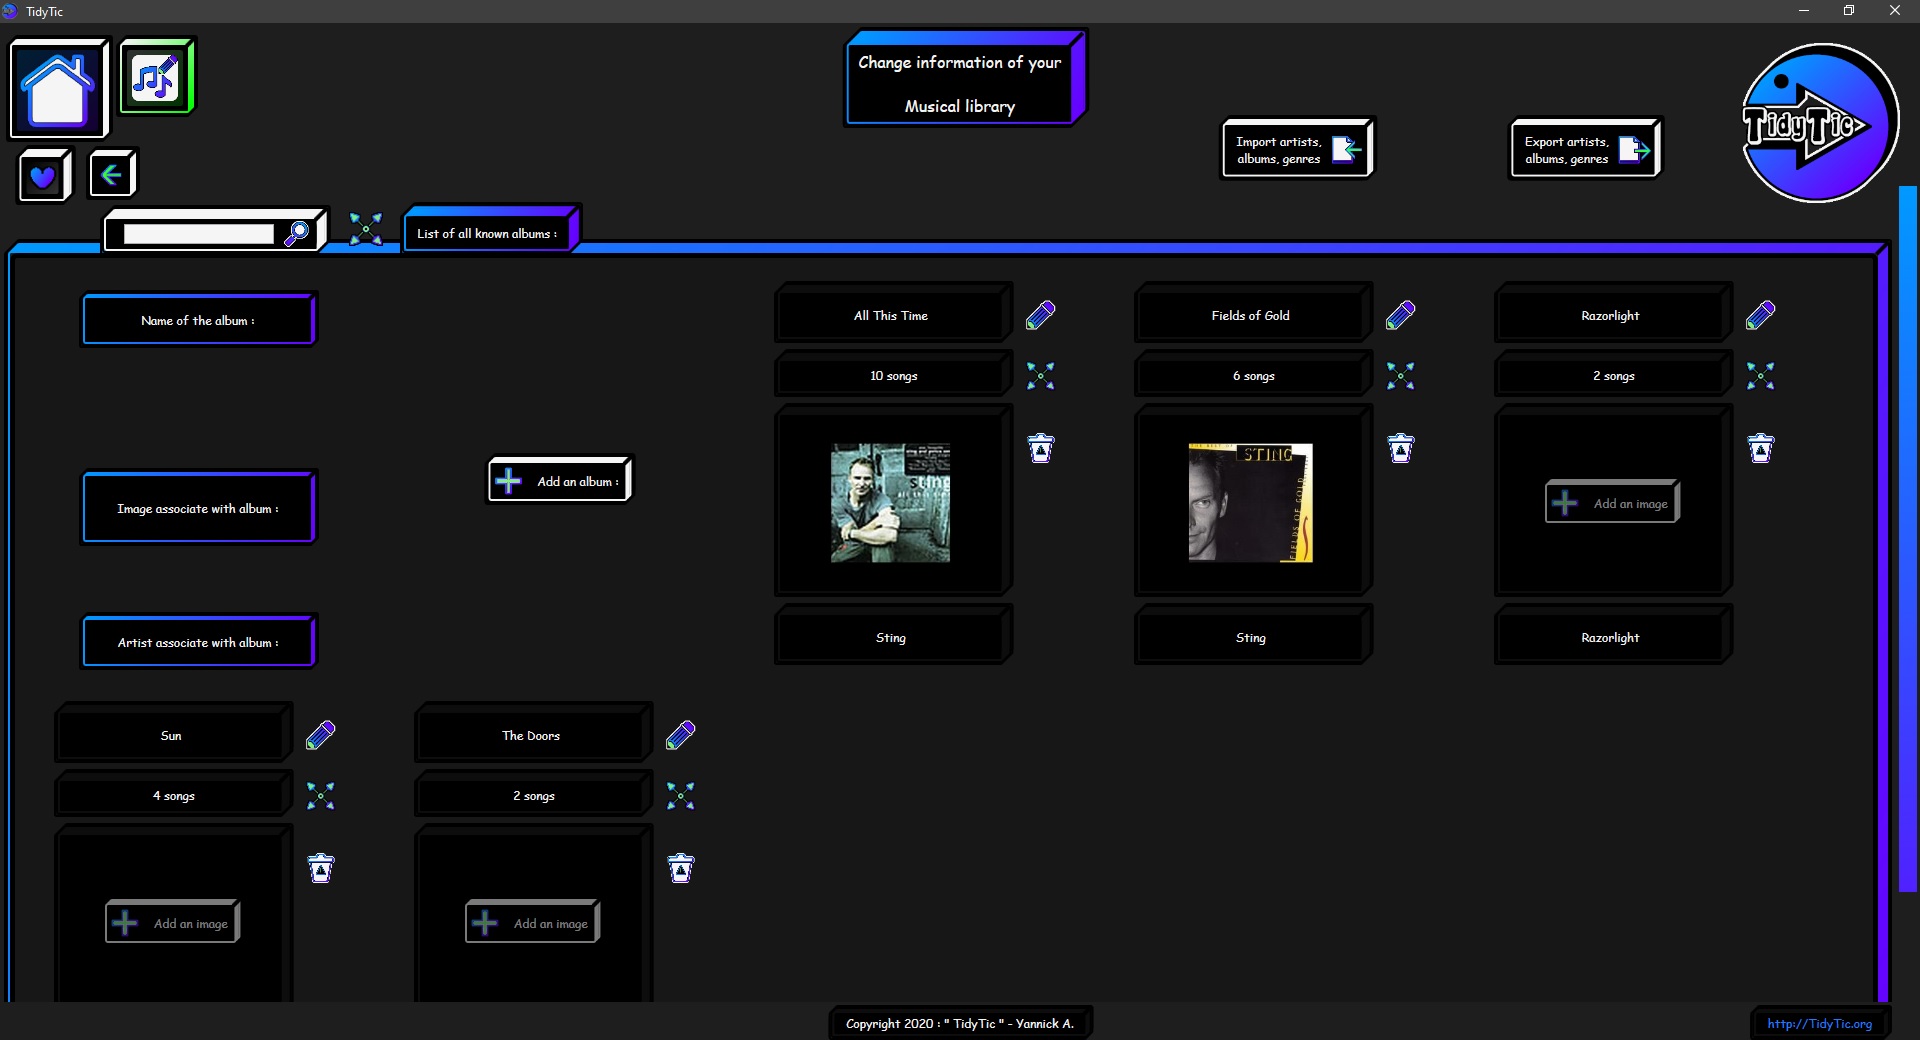
Browse your known albums or search for a particular album :
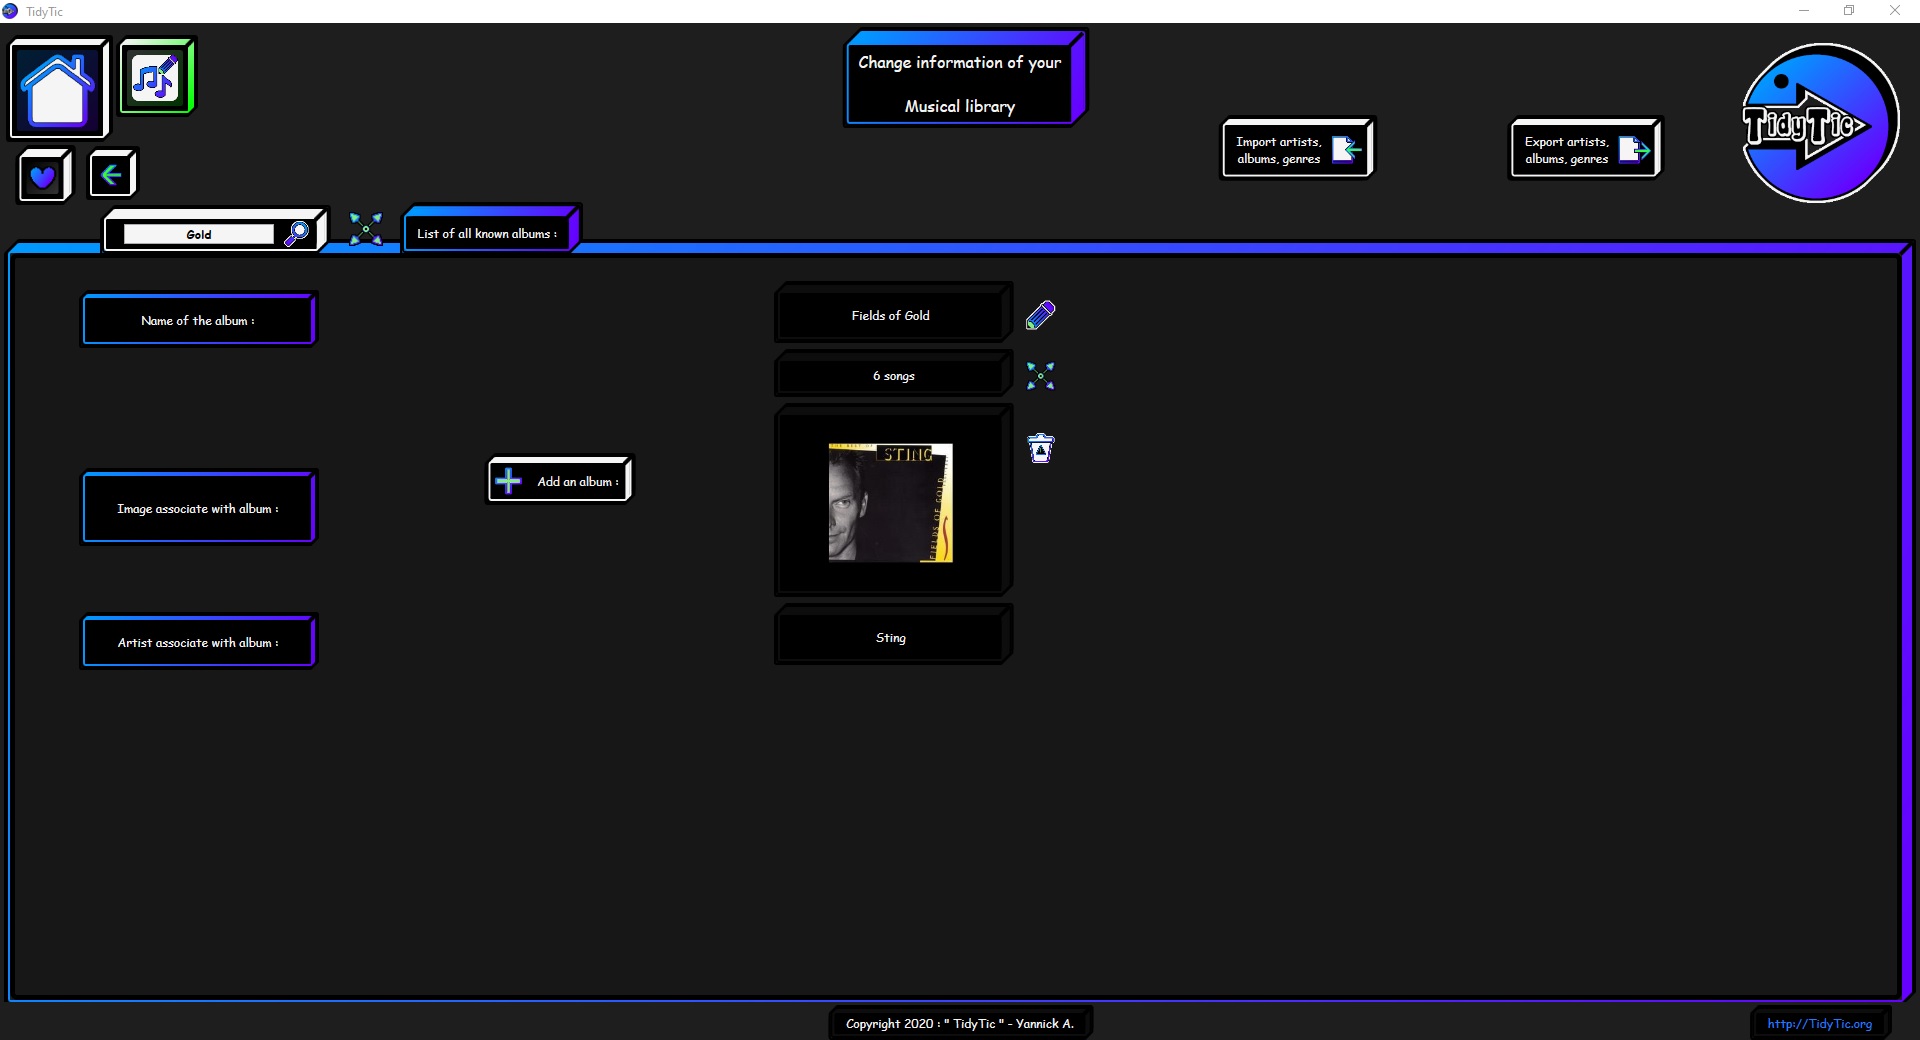
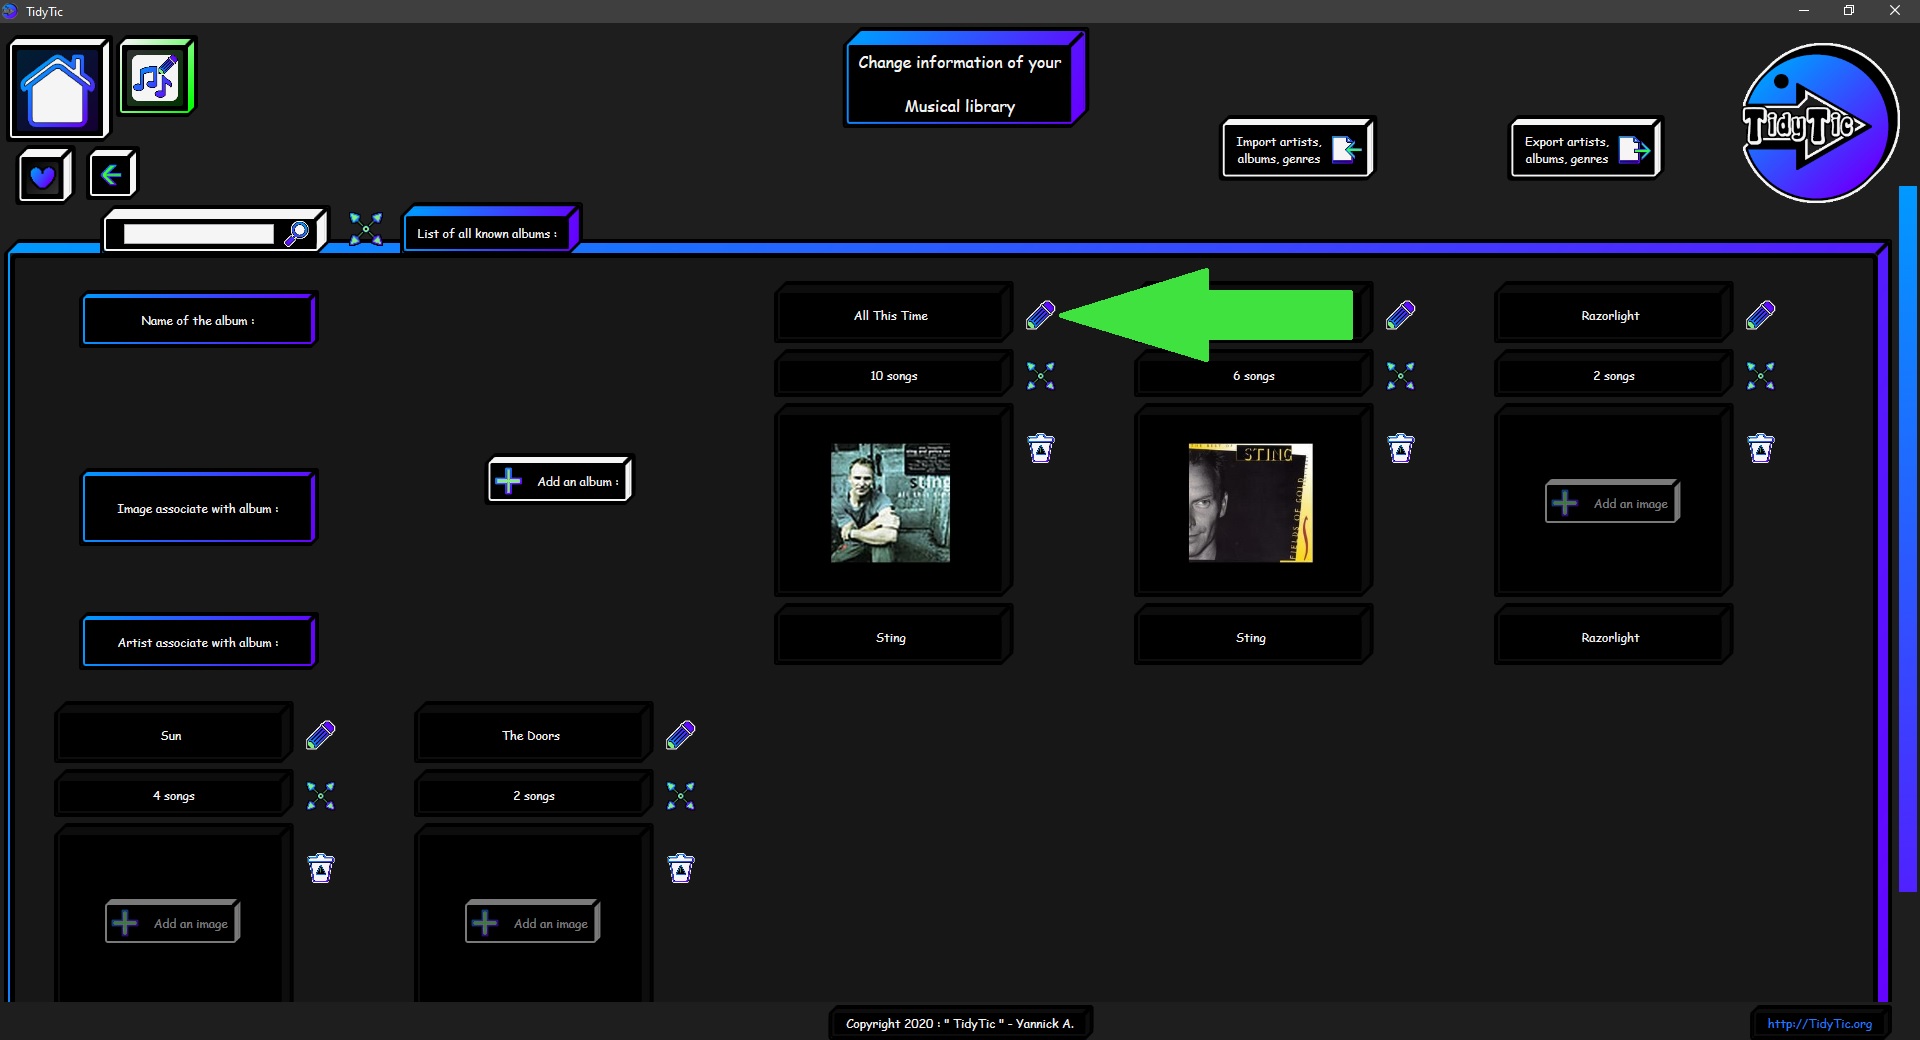
![]() You can ask TidyTic to display only albums on this page in order to easily view them.
You can ask TidyTic to display only albums on this page in order to easily view them.
You just have to click somewhere in the line containing "List of all known albums :", the one containing the enlarge icon : " ![]() "
"
 ____
____ 
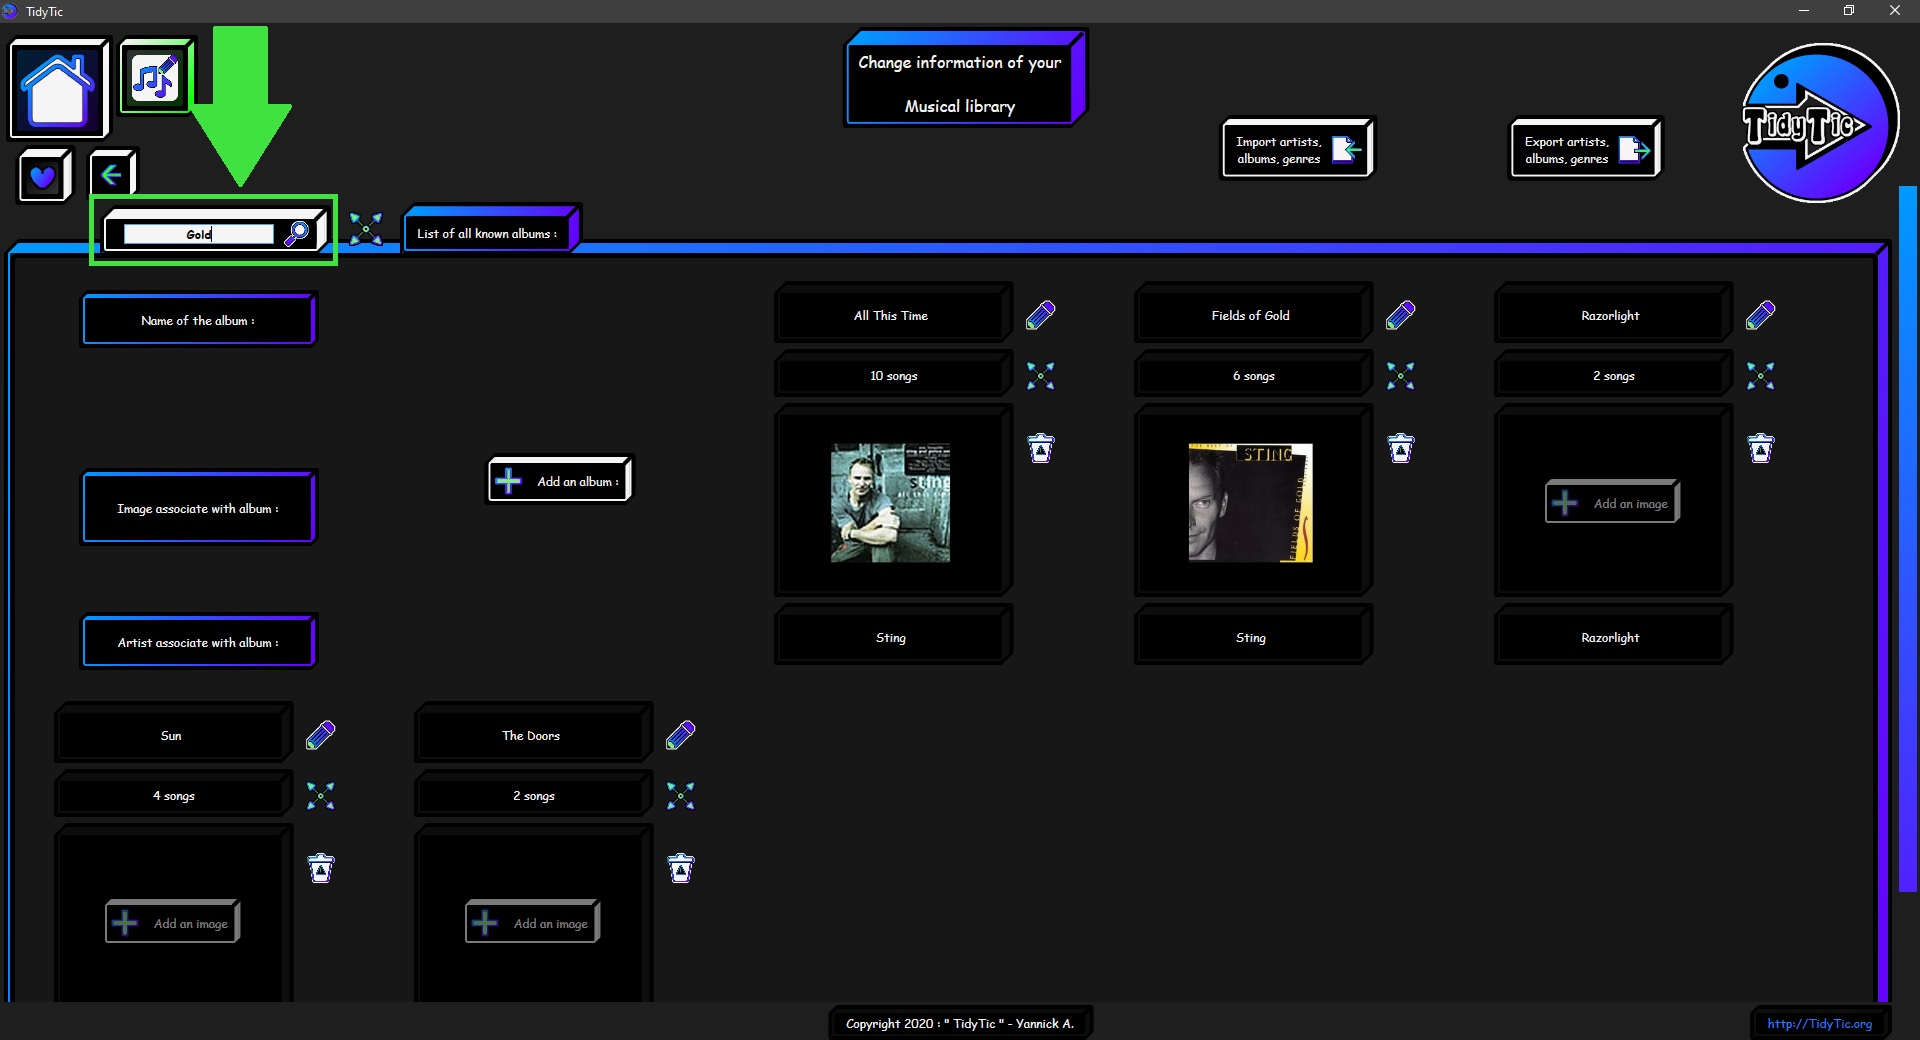
You can also search by album name using the available box.
Just write your search and press the enter key on your keyboard or the " ![]() " icon to validate the search.
" icon to validate the search.
To cancel a search, empty the box and validate again.
 ____
____ 
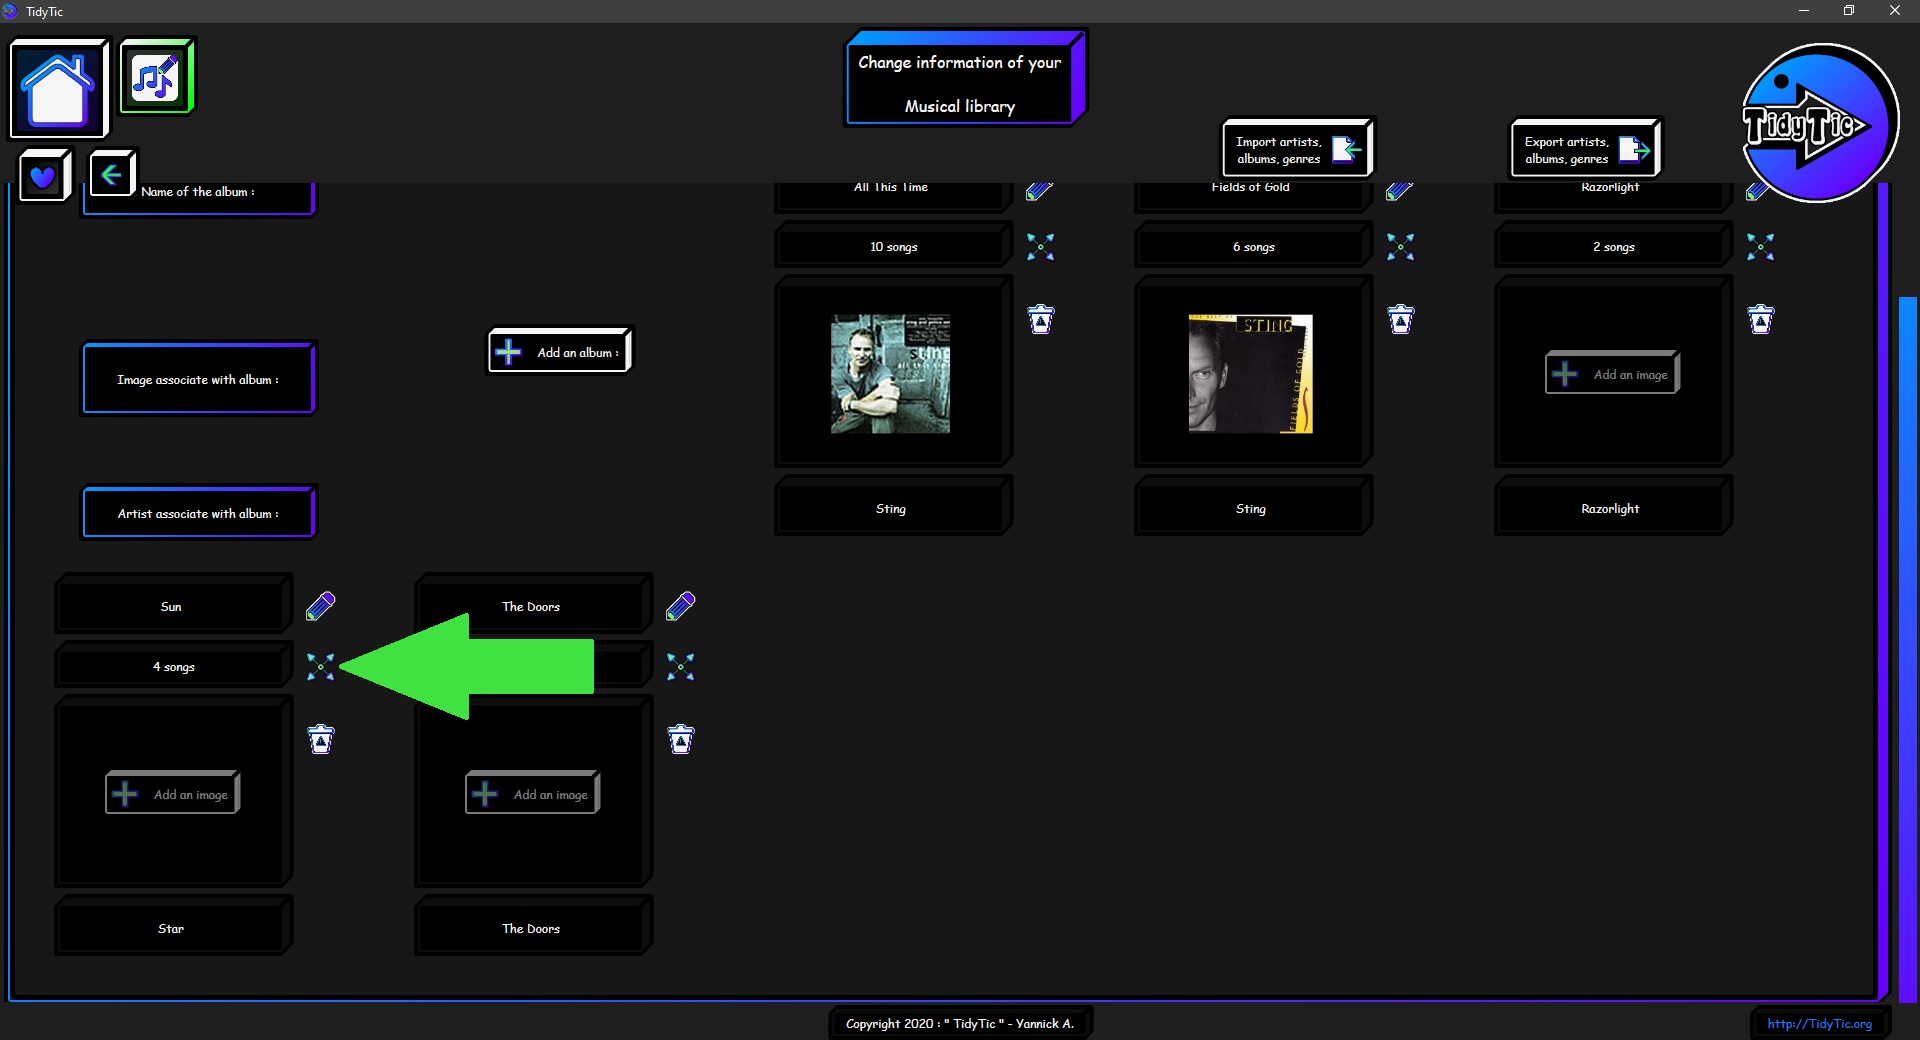
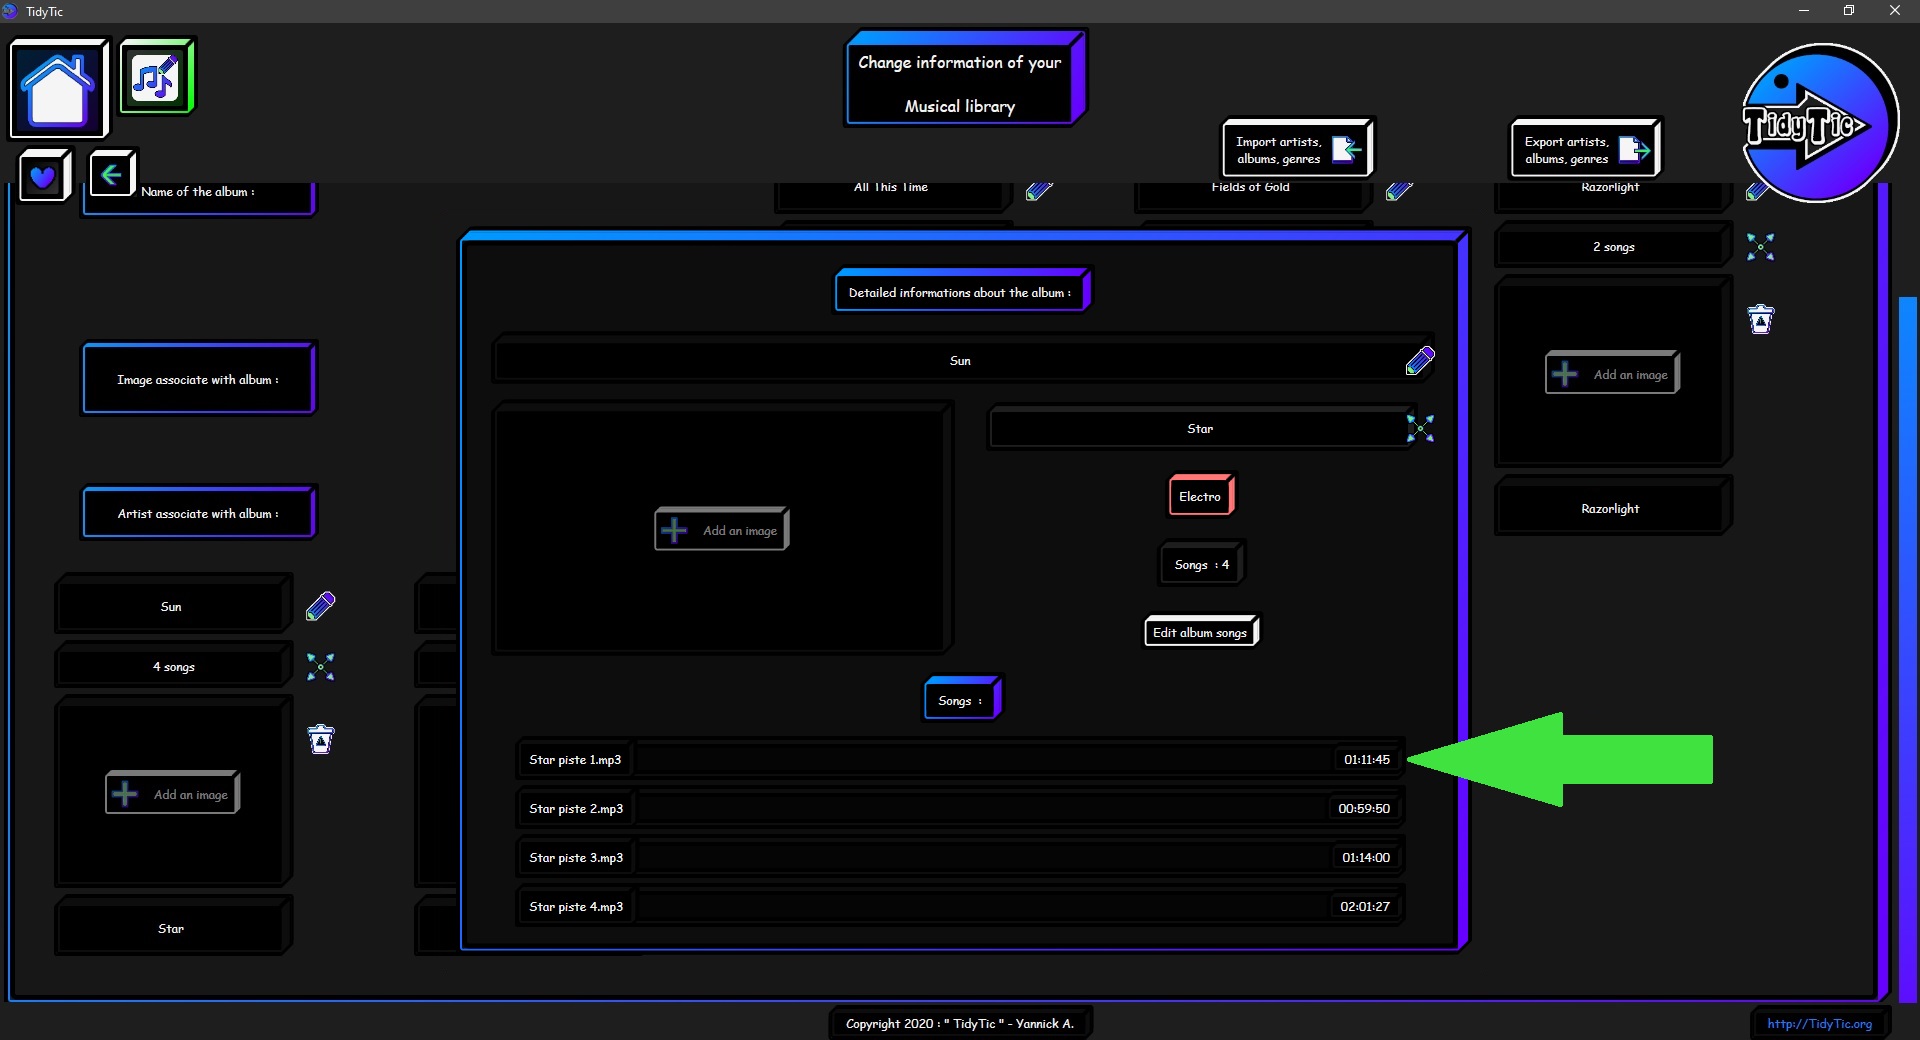
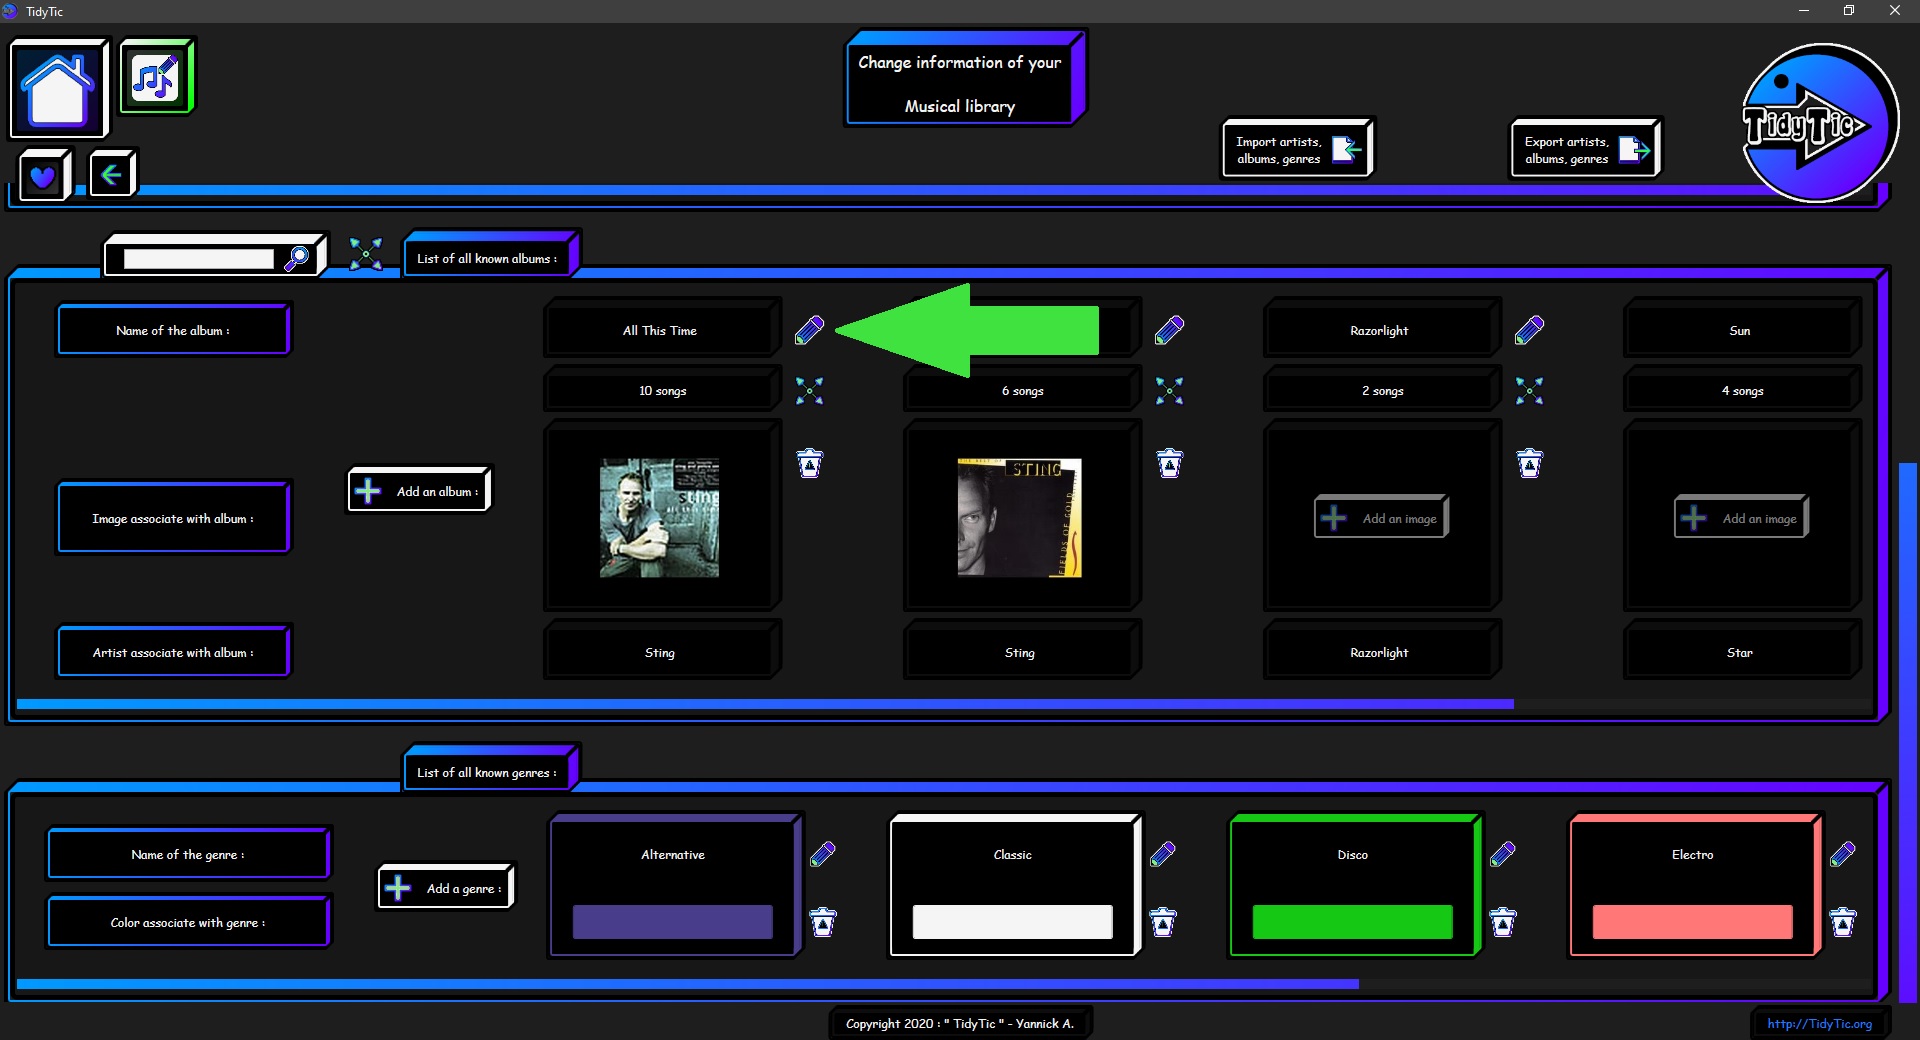
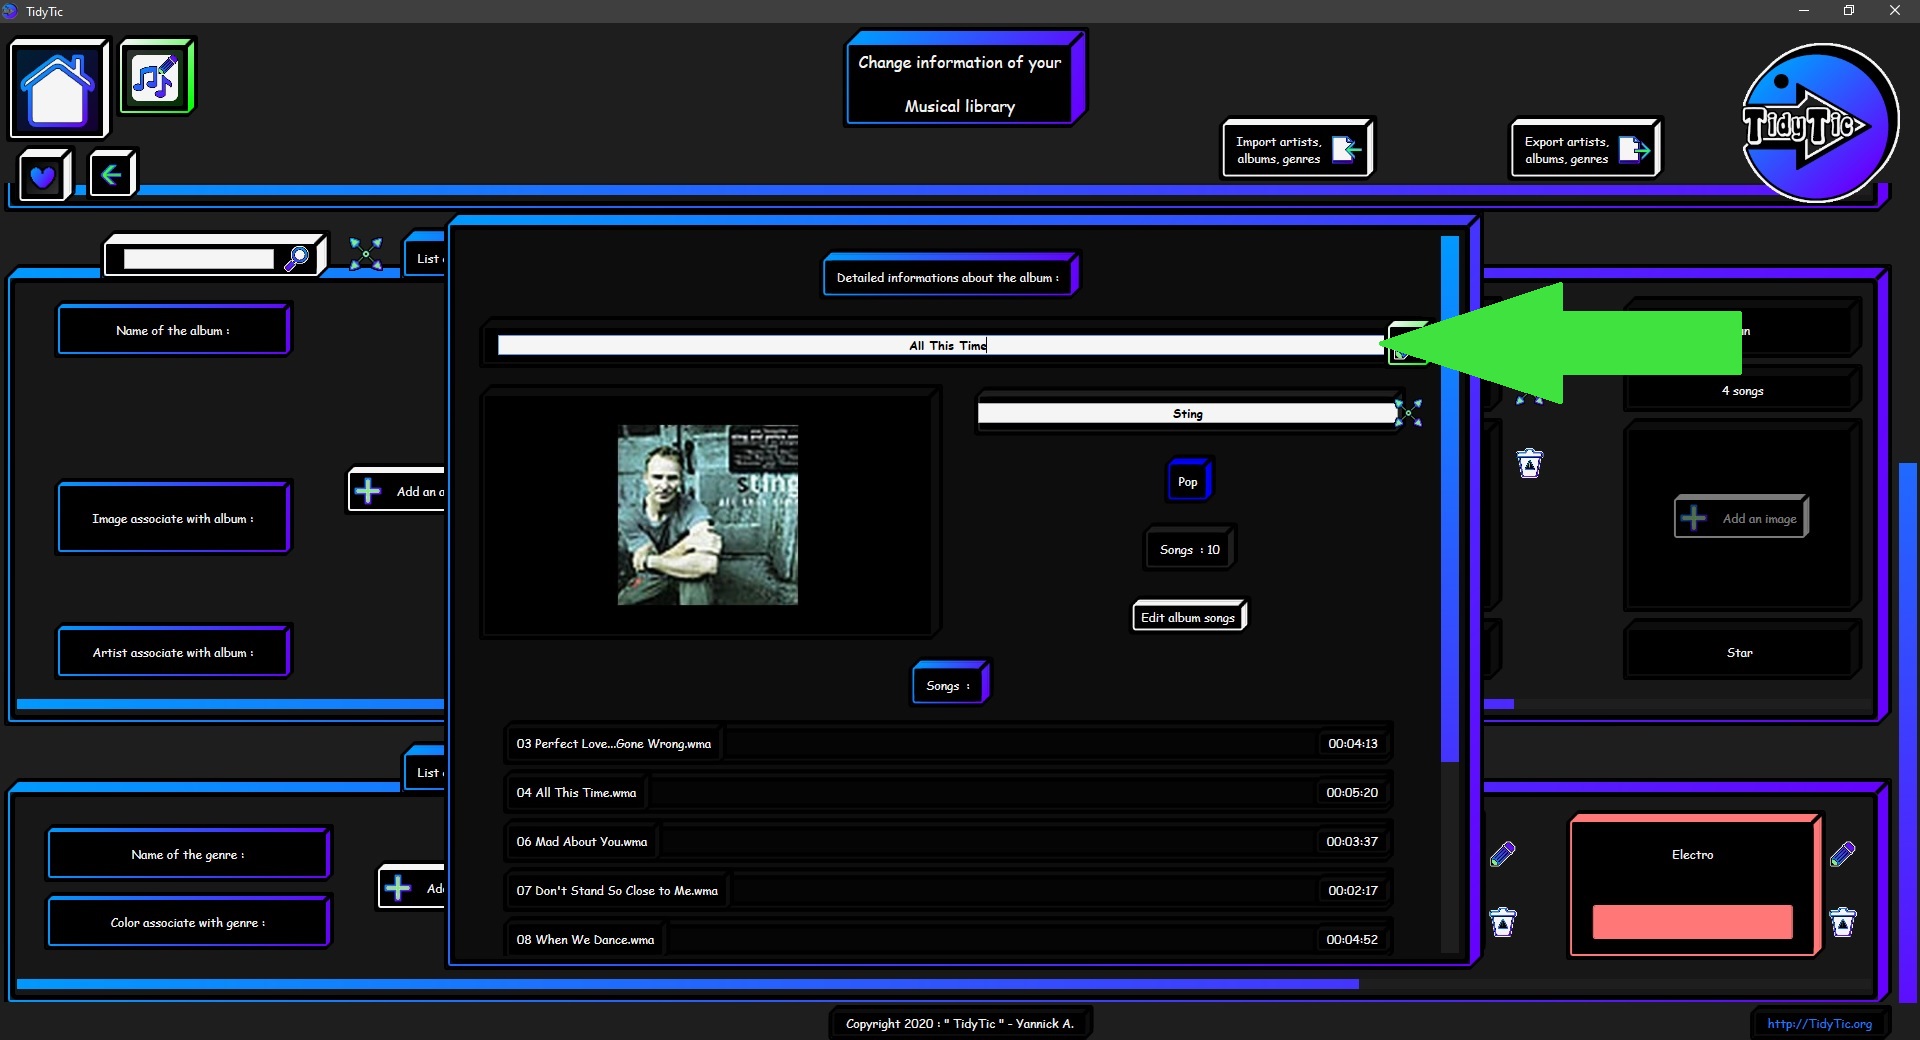
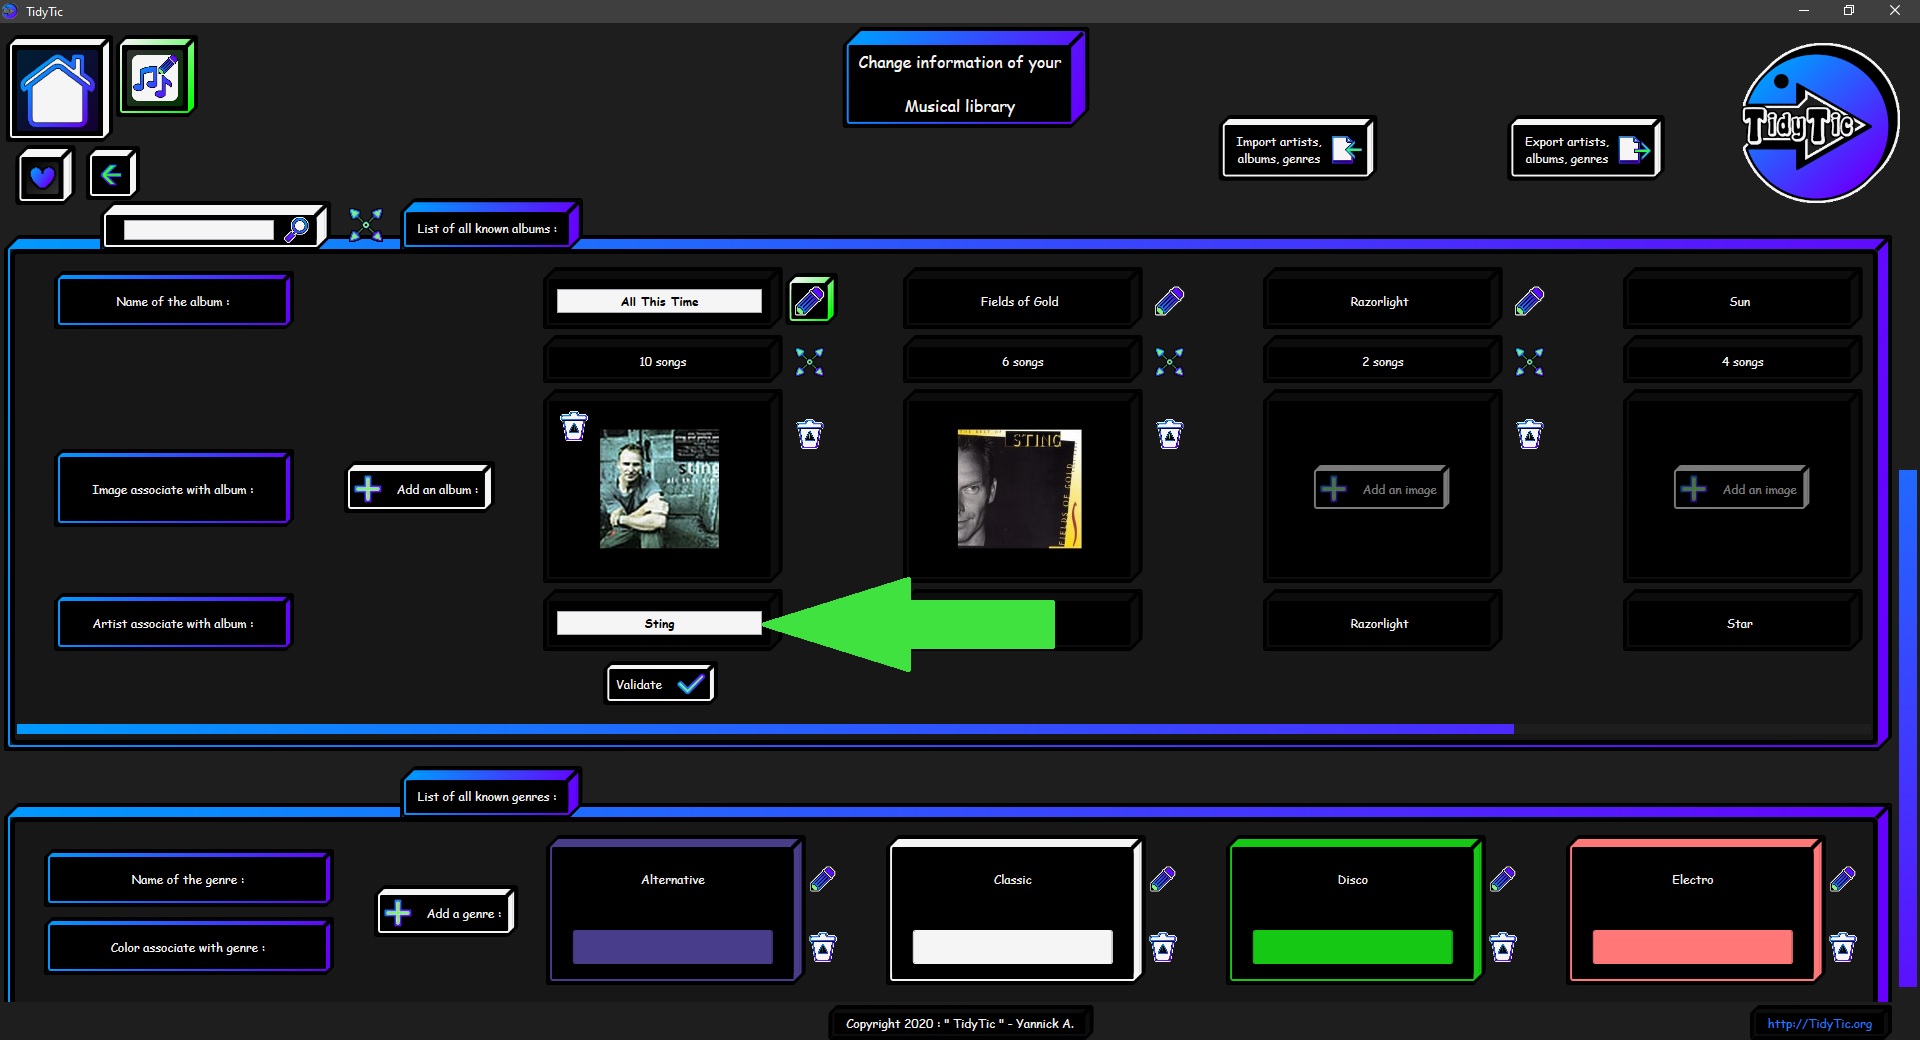
You will find next to each album an icon “ ![]() ” you can press to open a window containing all the detailed information known by TidyTic about the album.
” you can press to open a window containing all the detailed information known by TidyTic about the album.
Like his name, the artist associated with this album, the number of musics and the list of musics in this album as well as the genre associated with his musics.
 ____
____ 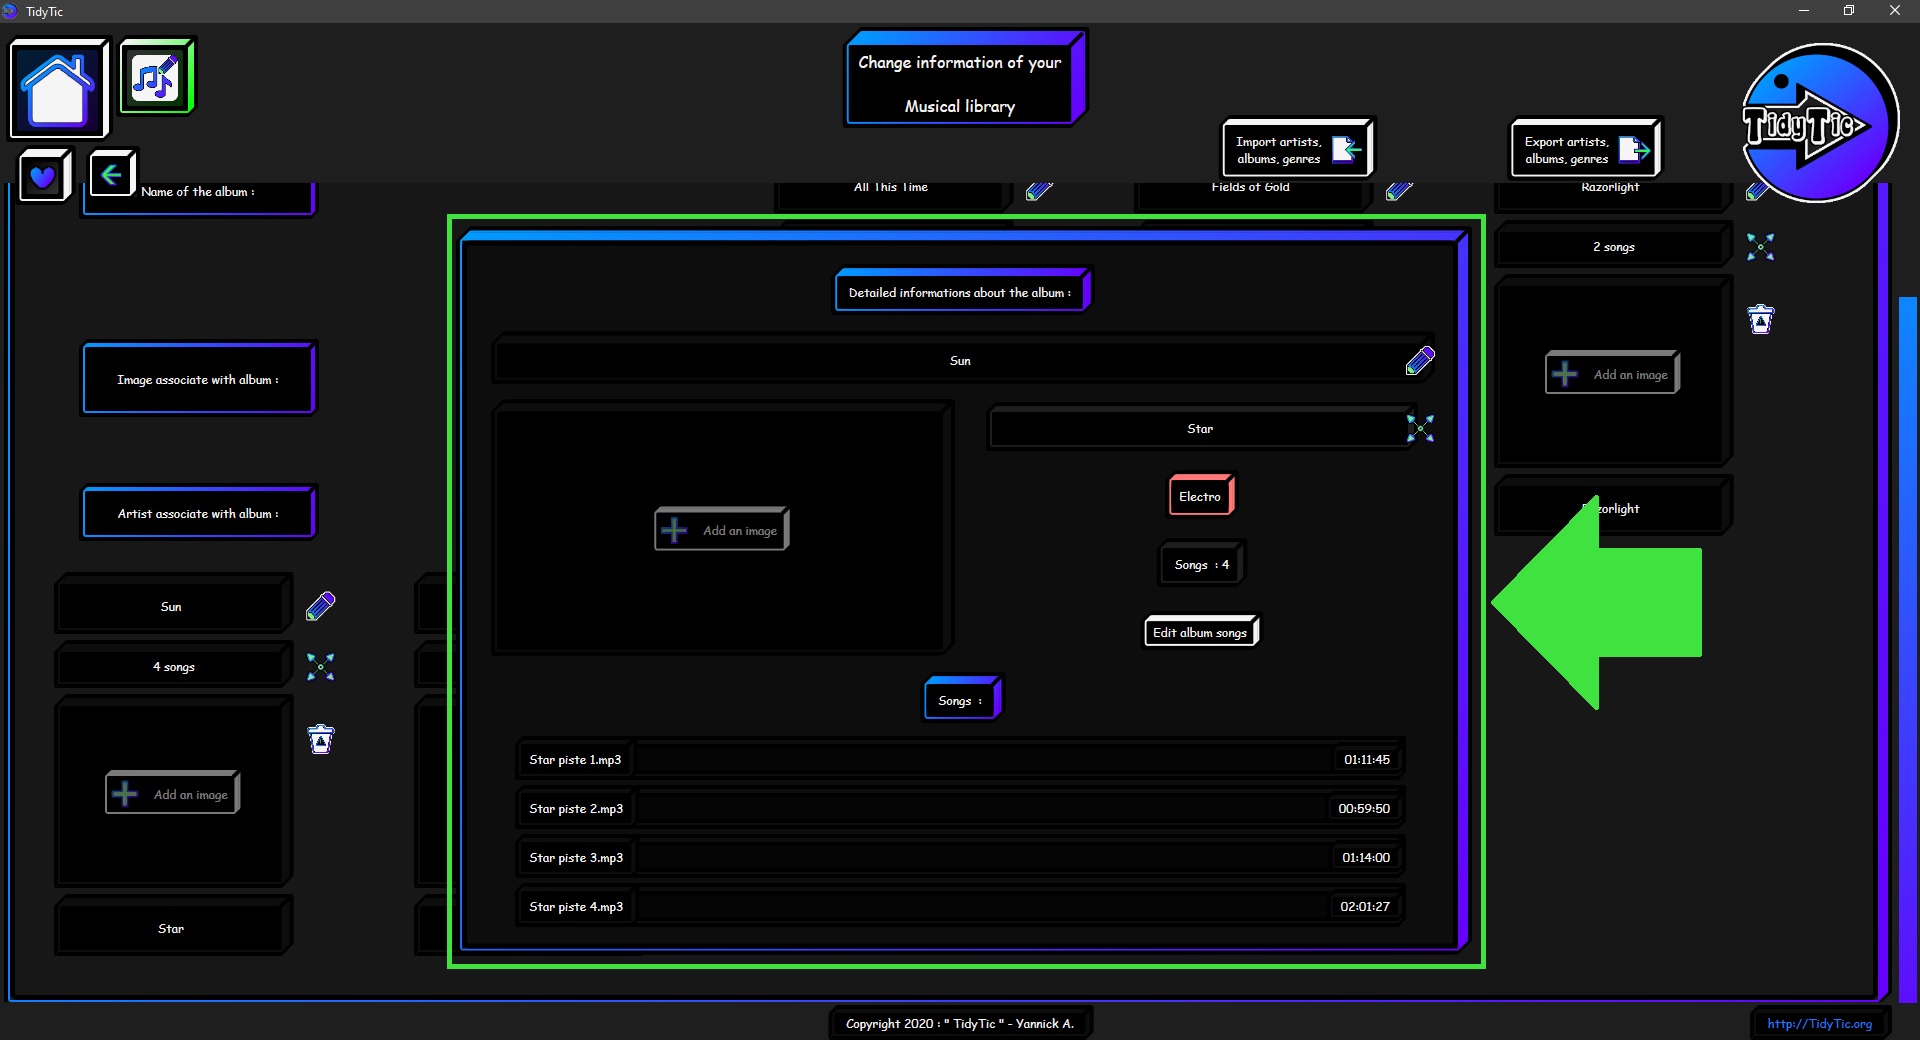
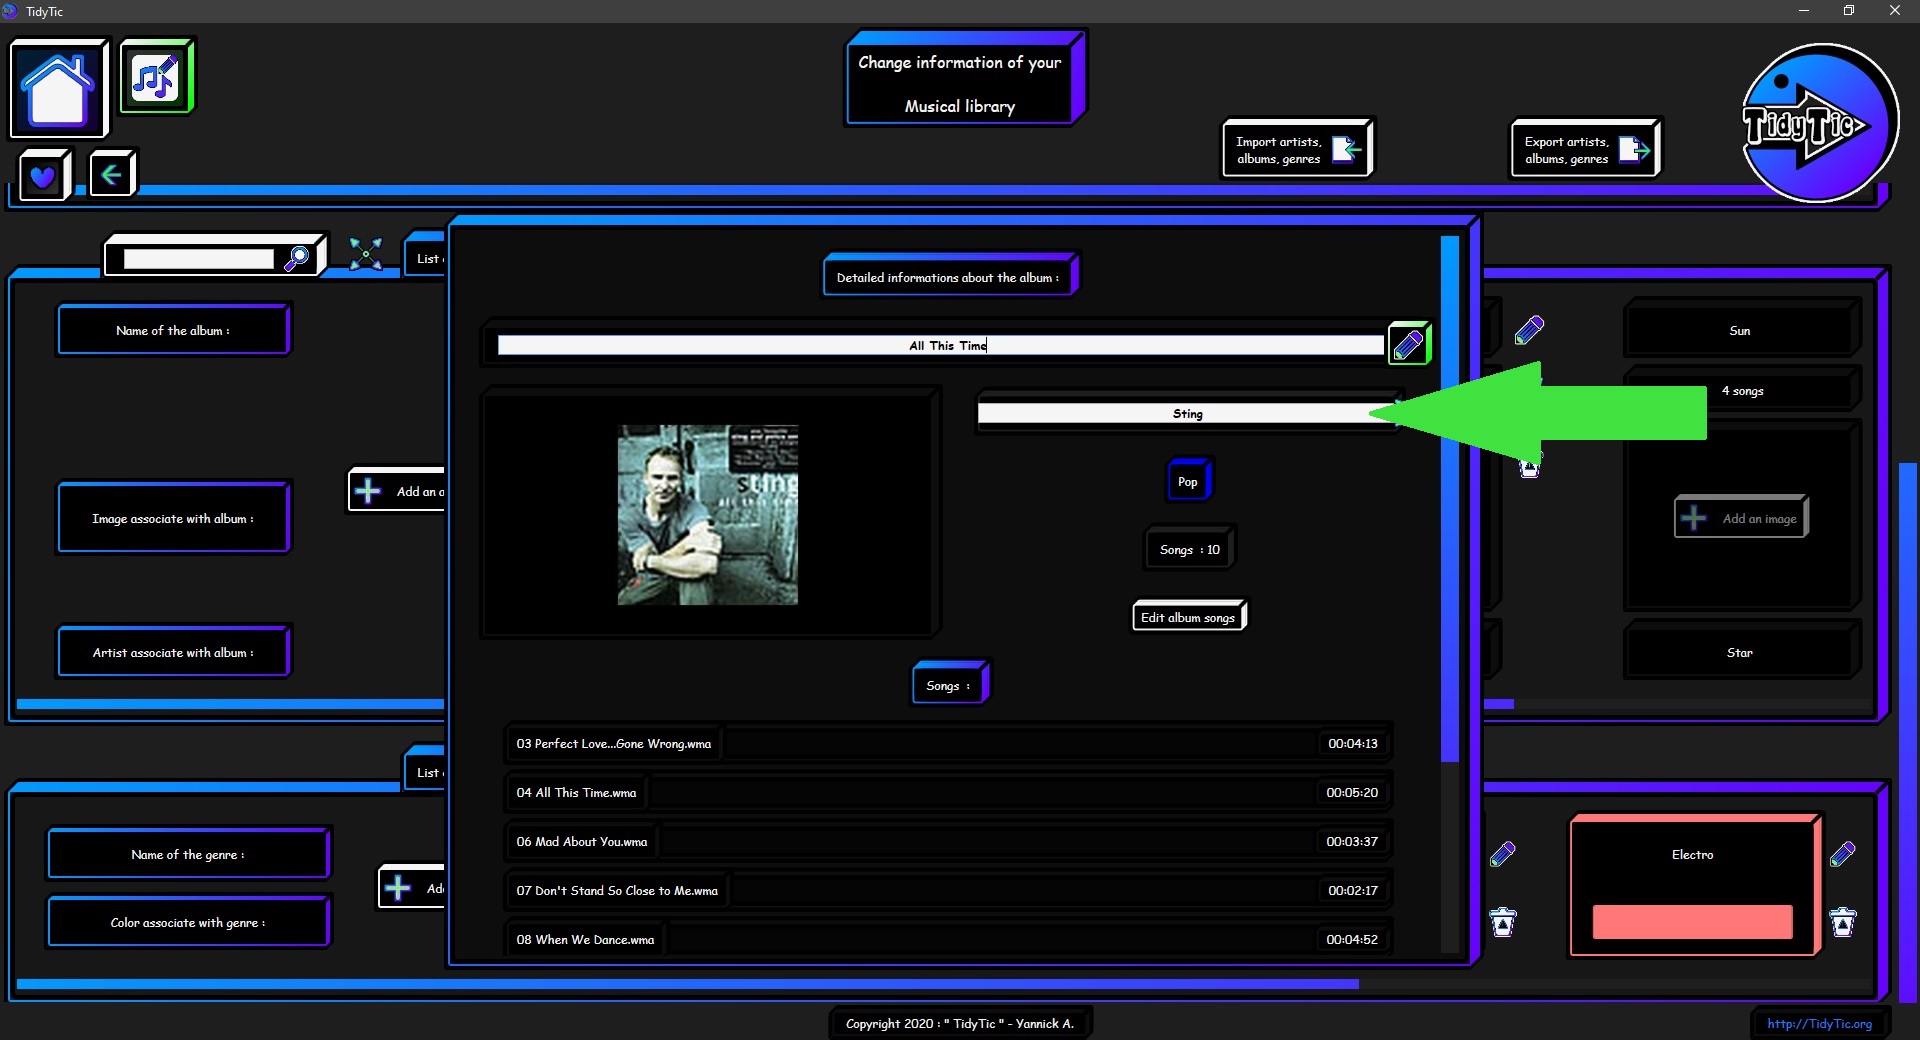
As you are used to with TidyTic, you can open a music directly with a double left click on it.
Or display the detailed information of it with a double right click.
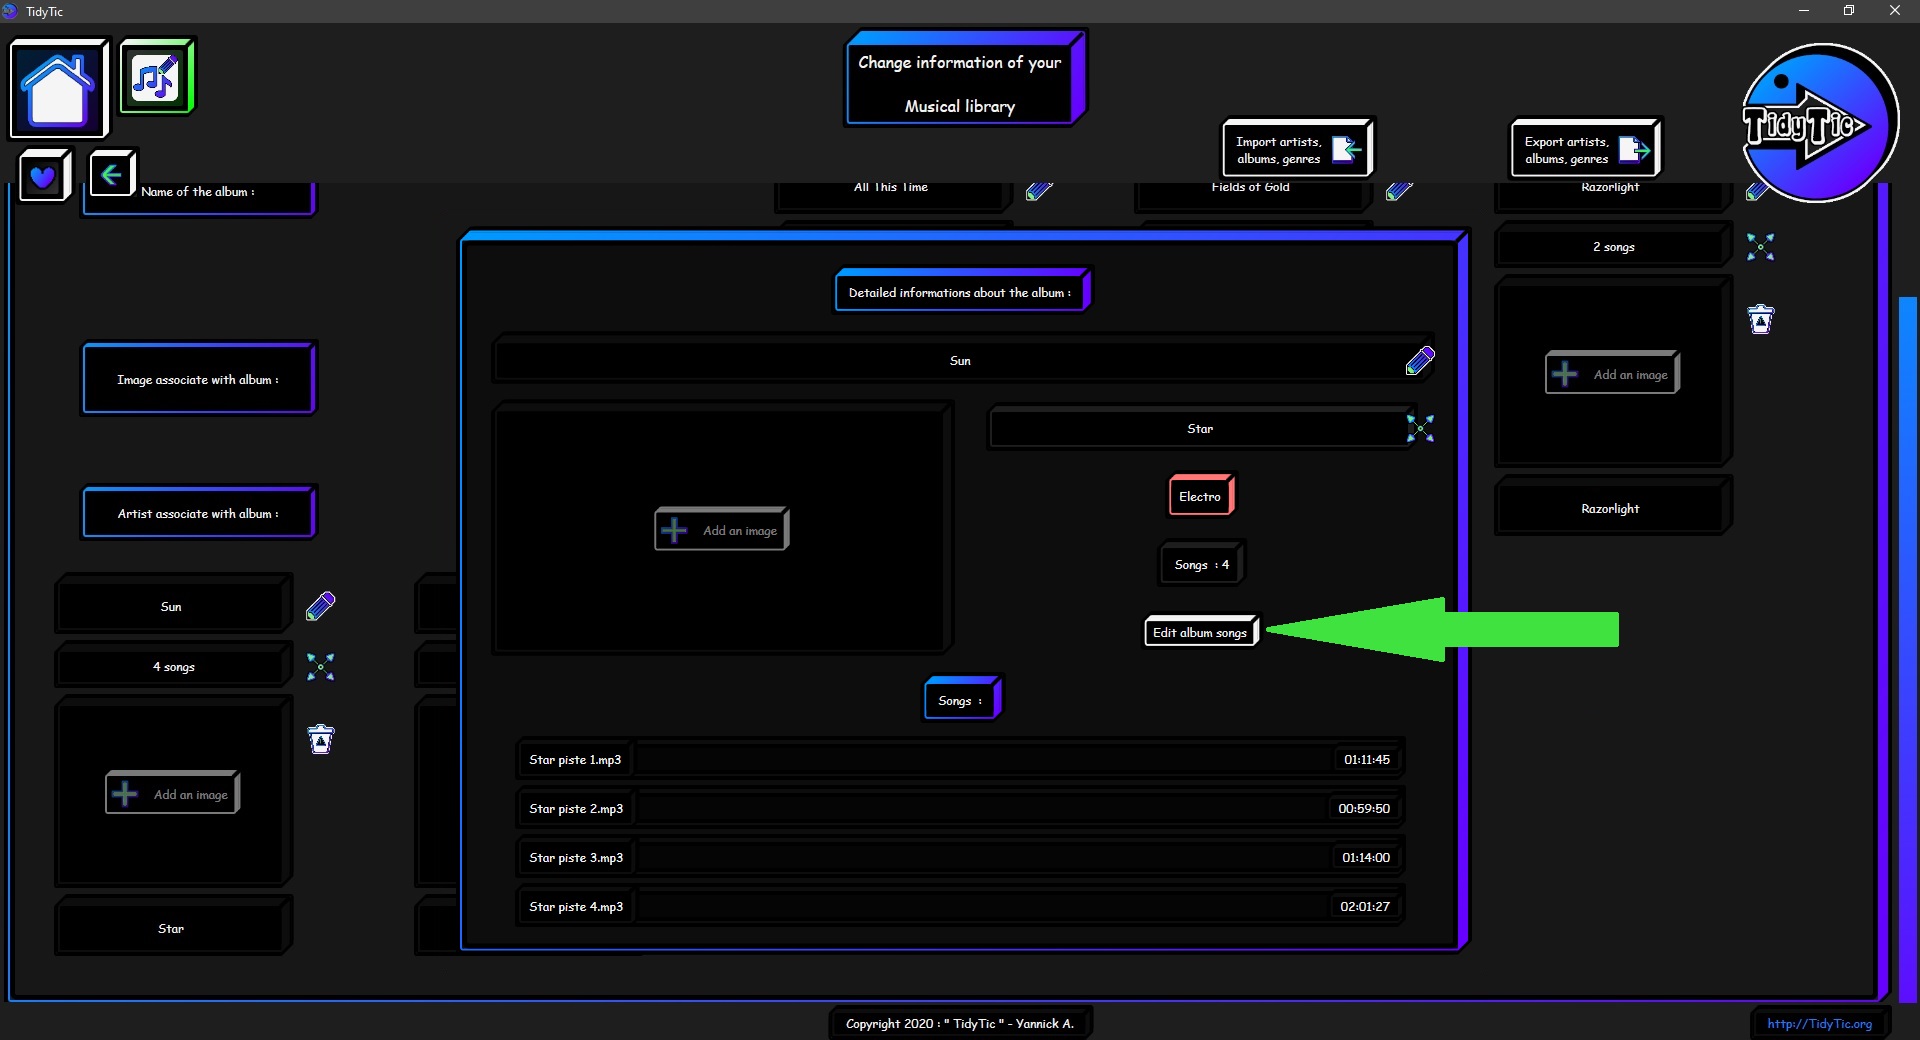
You will also find a shortcut to go to the display by type with preset filters for display only the album.
Thus allowing you to be able to make any modification on these files without fear of modifying other musics. And without having to adjust display filters yourself.
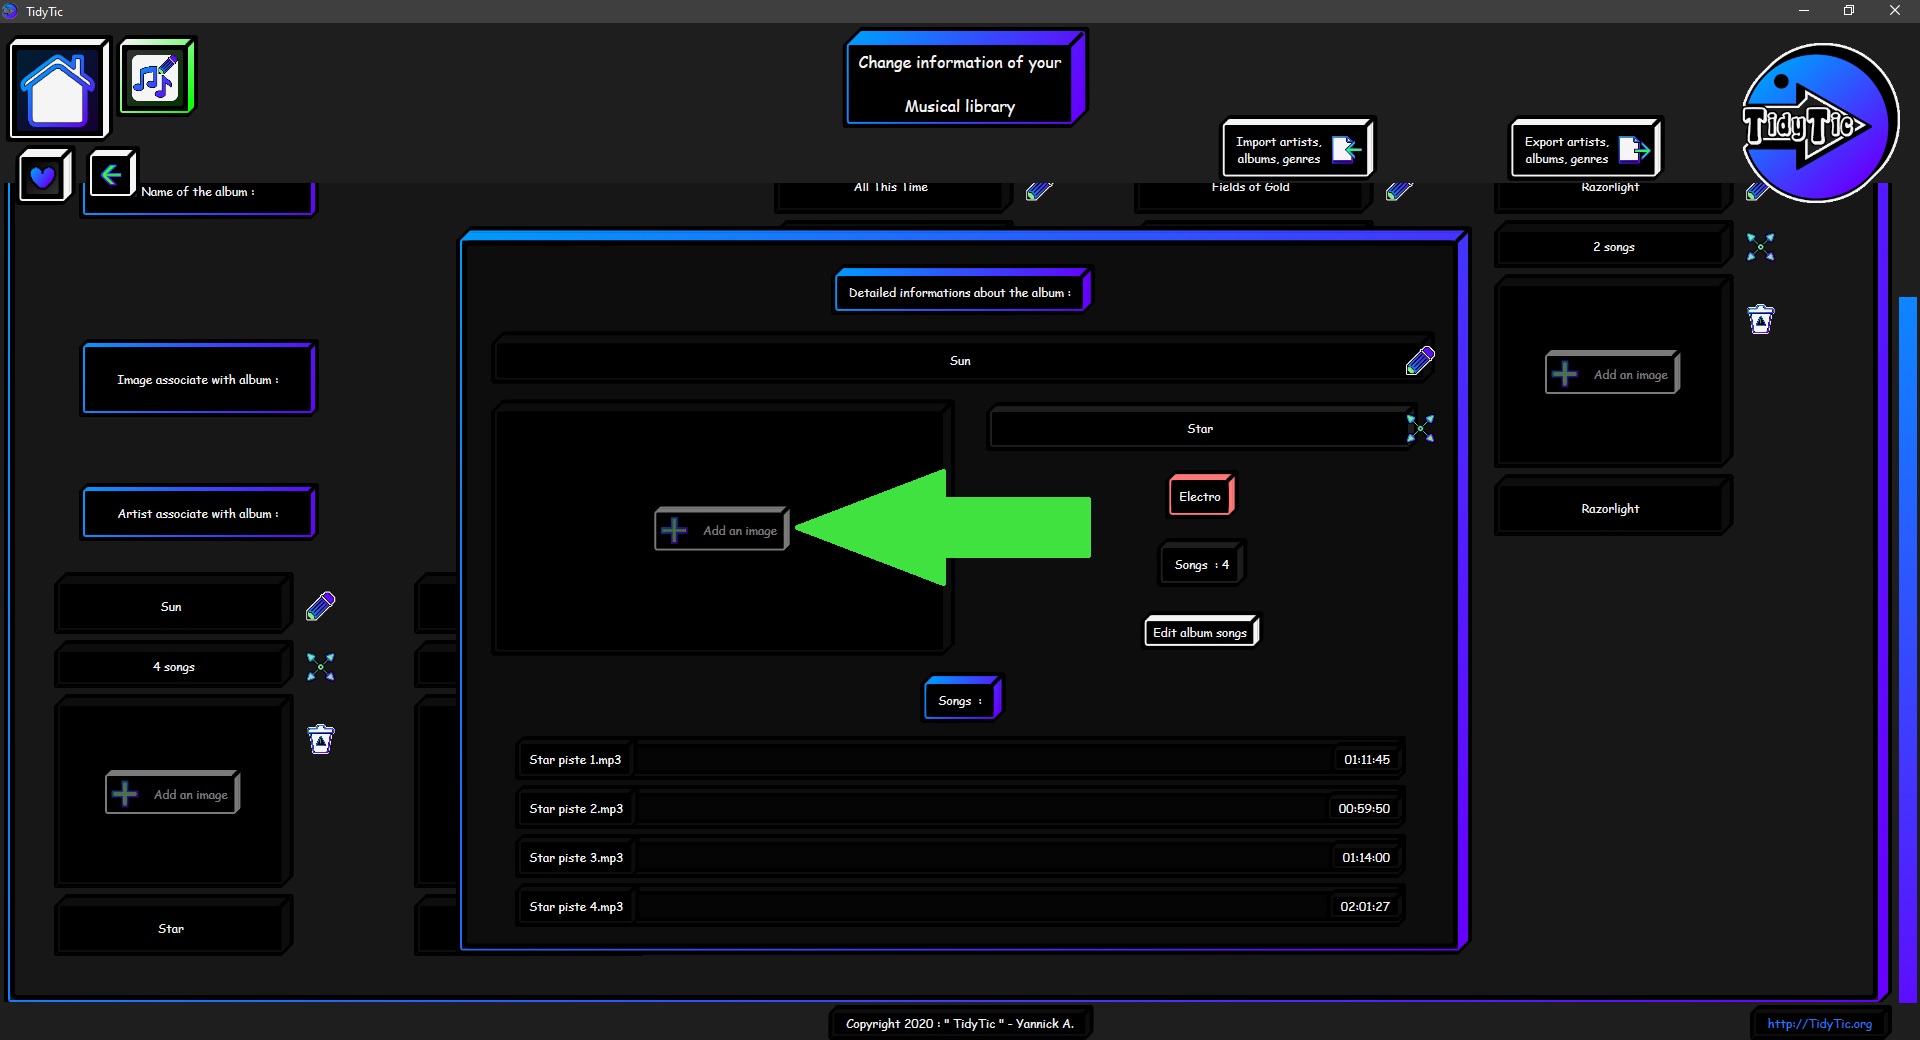
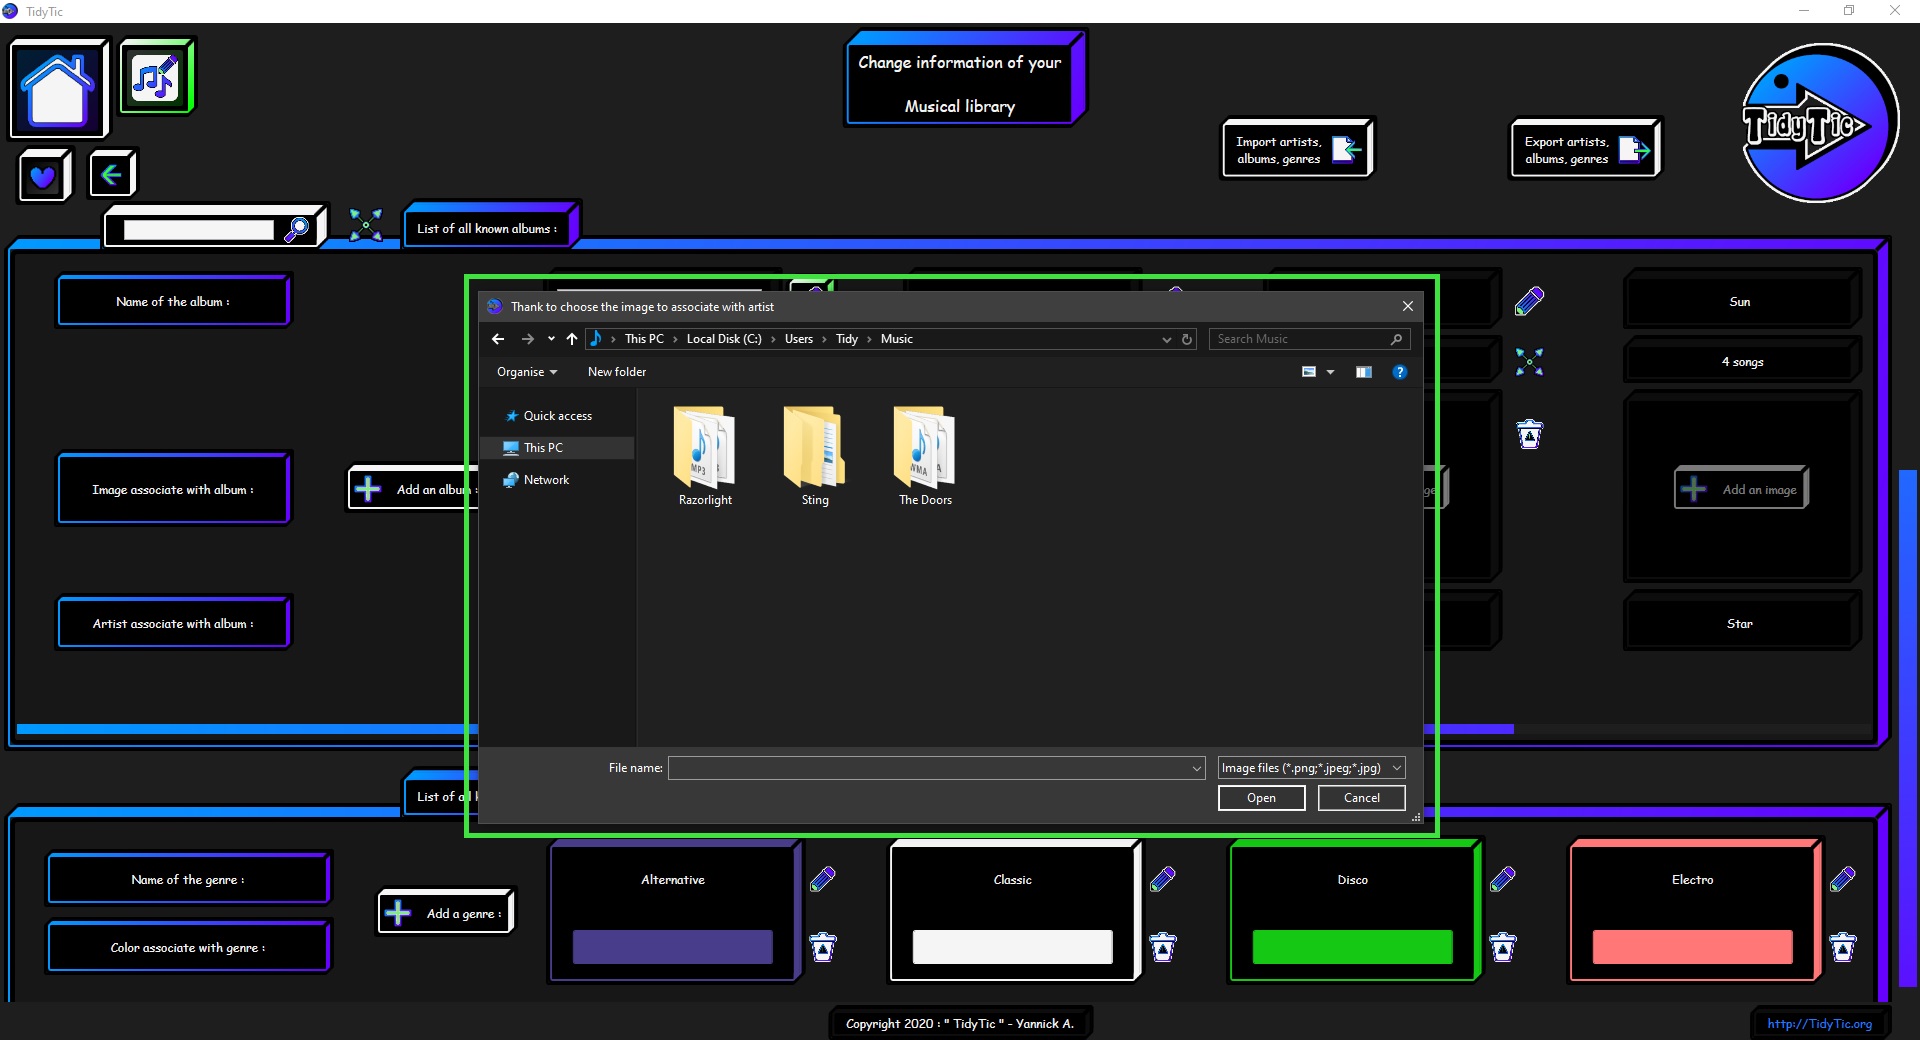
You can also add an image to the album from this window or from the classic display of your albums.
This image will be used for thumbnails of all musics that is associated with this album in TidyTic displays.
If no image is associated with the album, TidyTic will use the one associated with the artist.
If no image is associated either with the album or with the artist, TidyTic will use the default icon used by Windows for your musics.
 ____
____ 
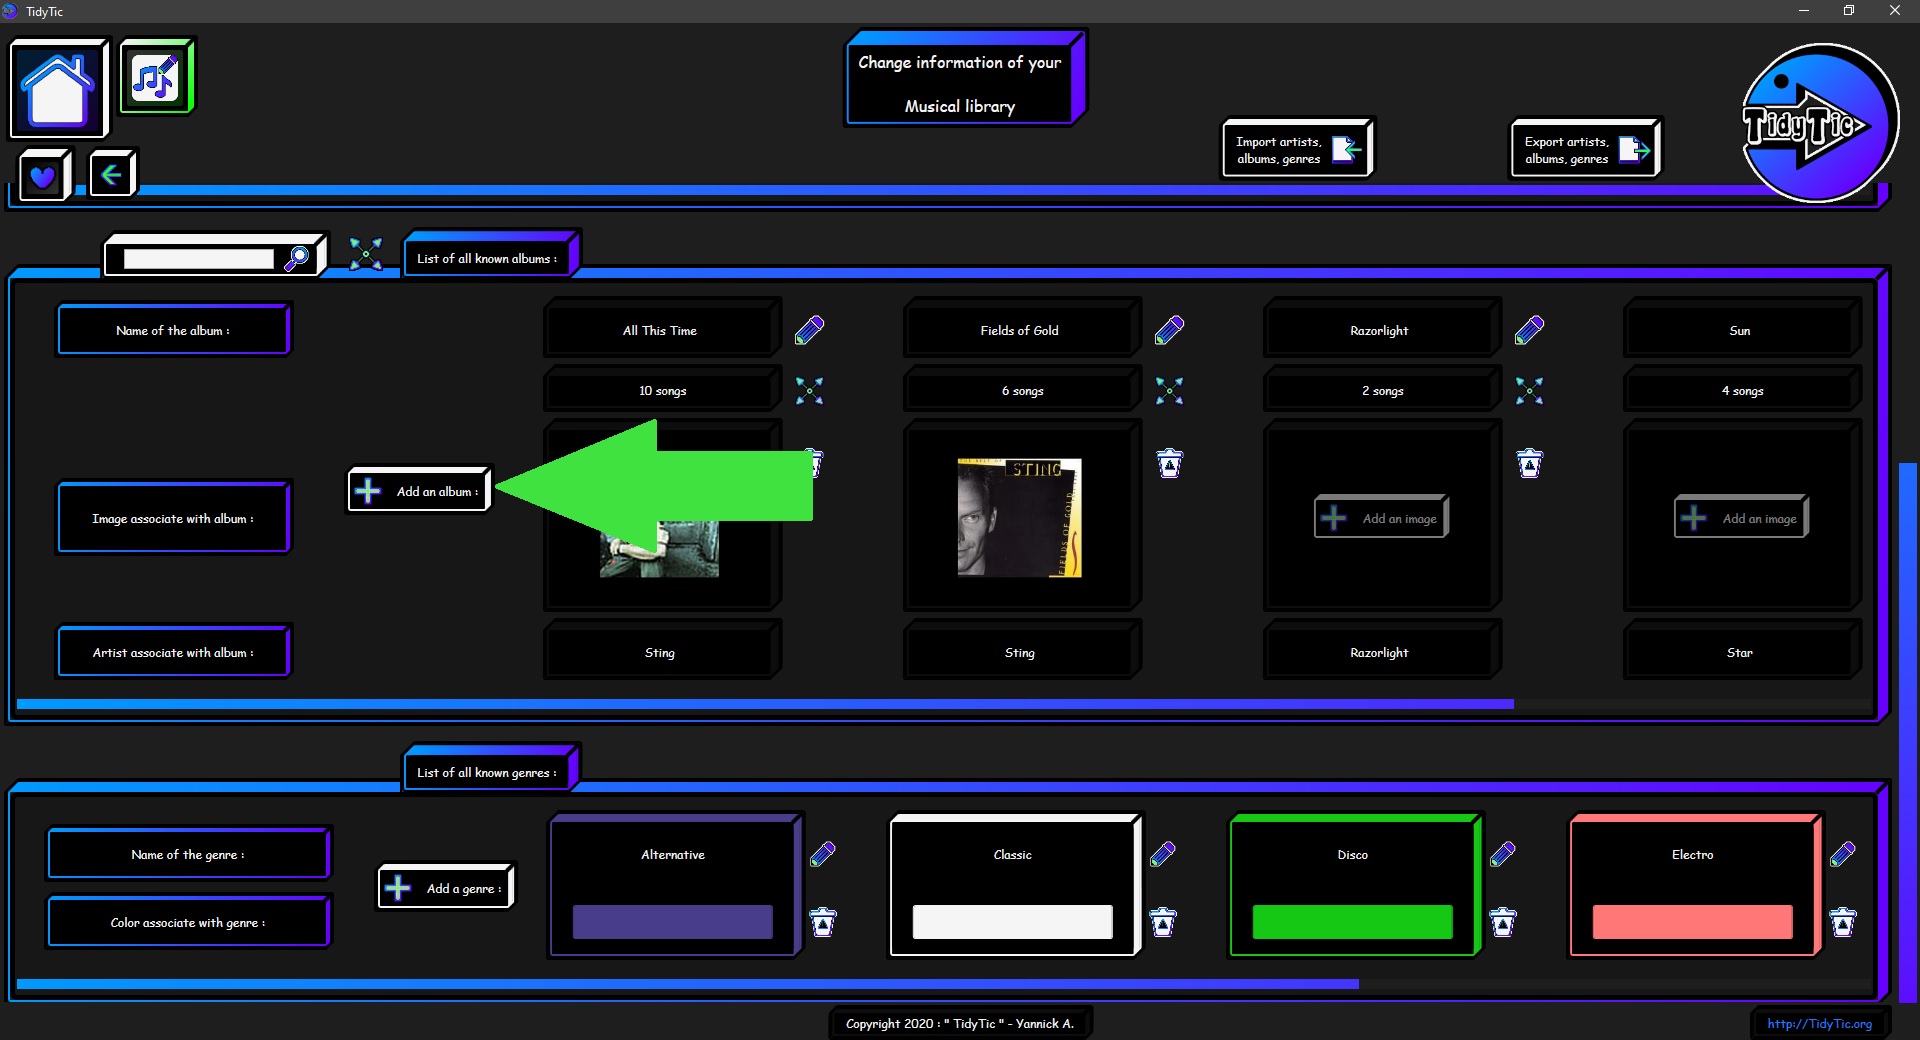
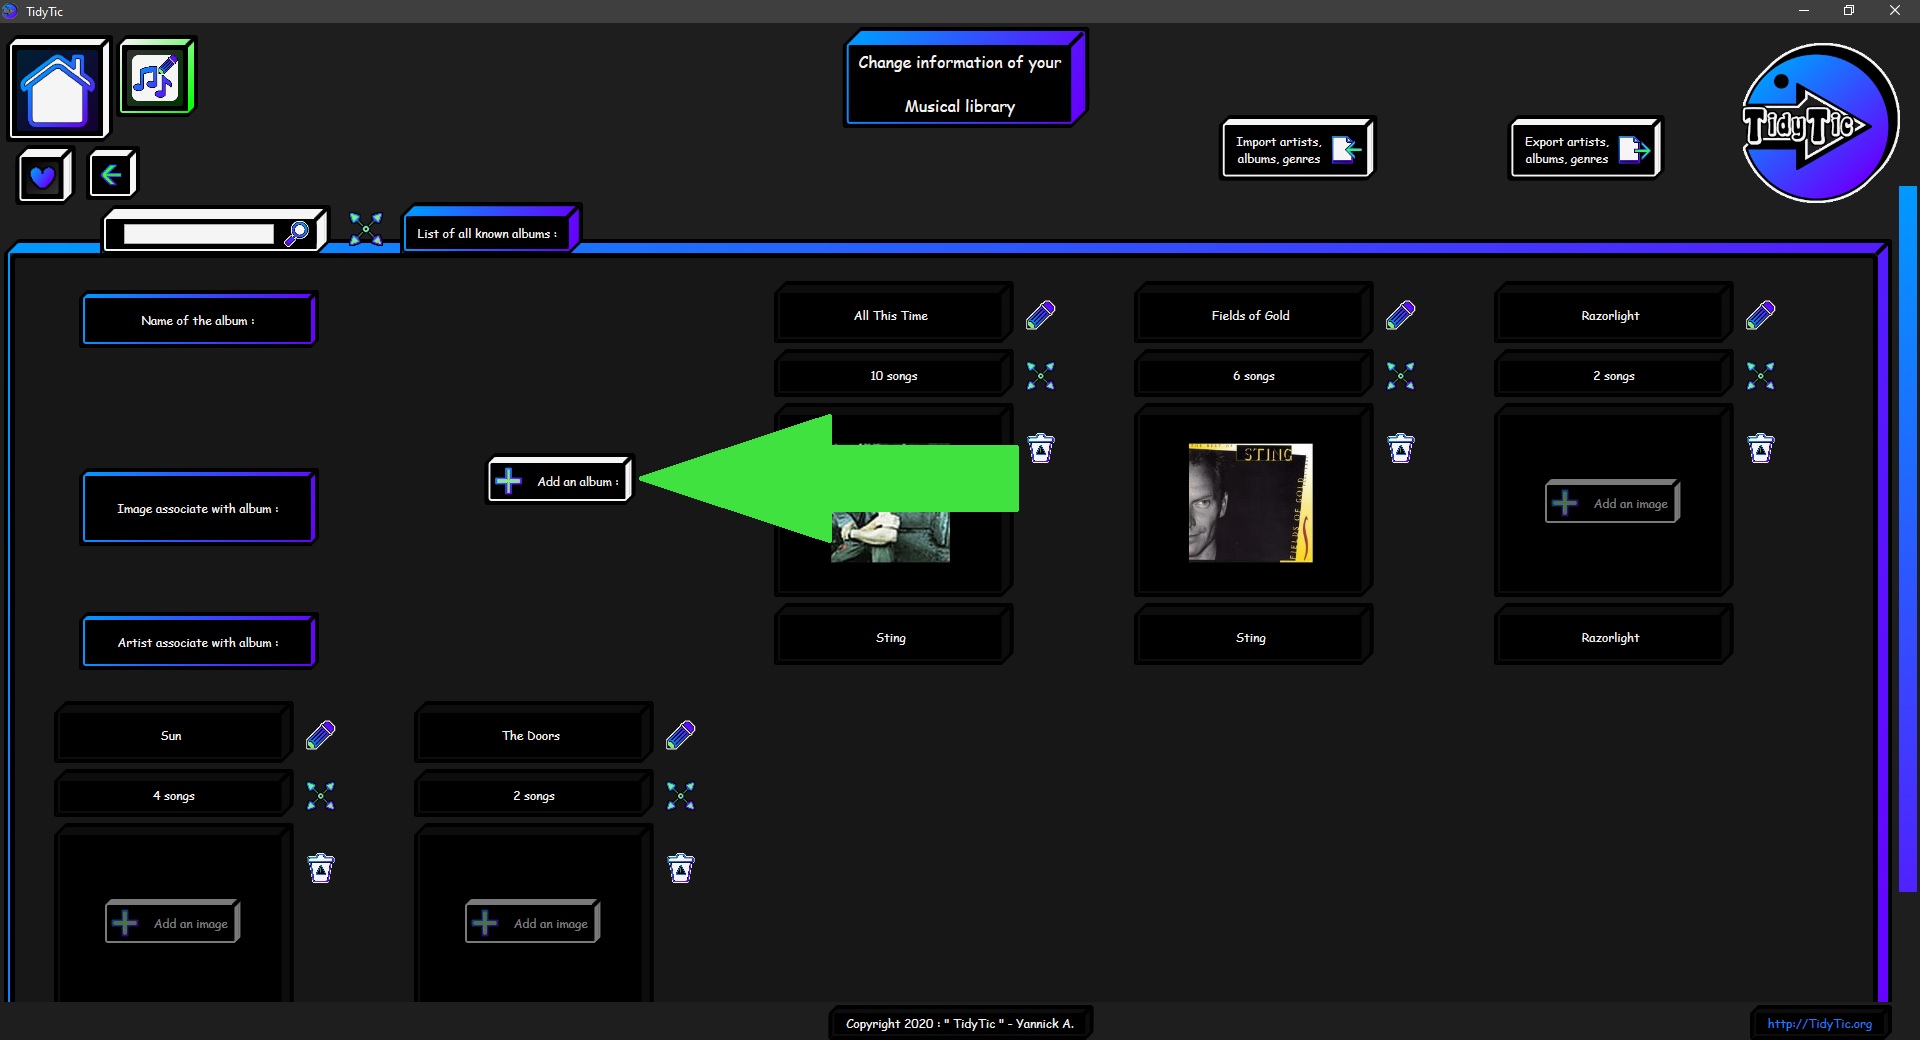
Add an album to your musical library :
To add an album you will find a button at the beginning of the list of your albums.
 ____
____ 
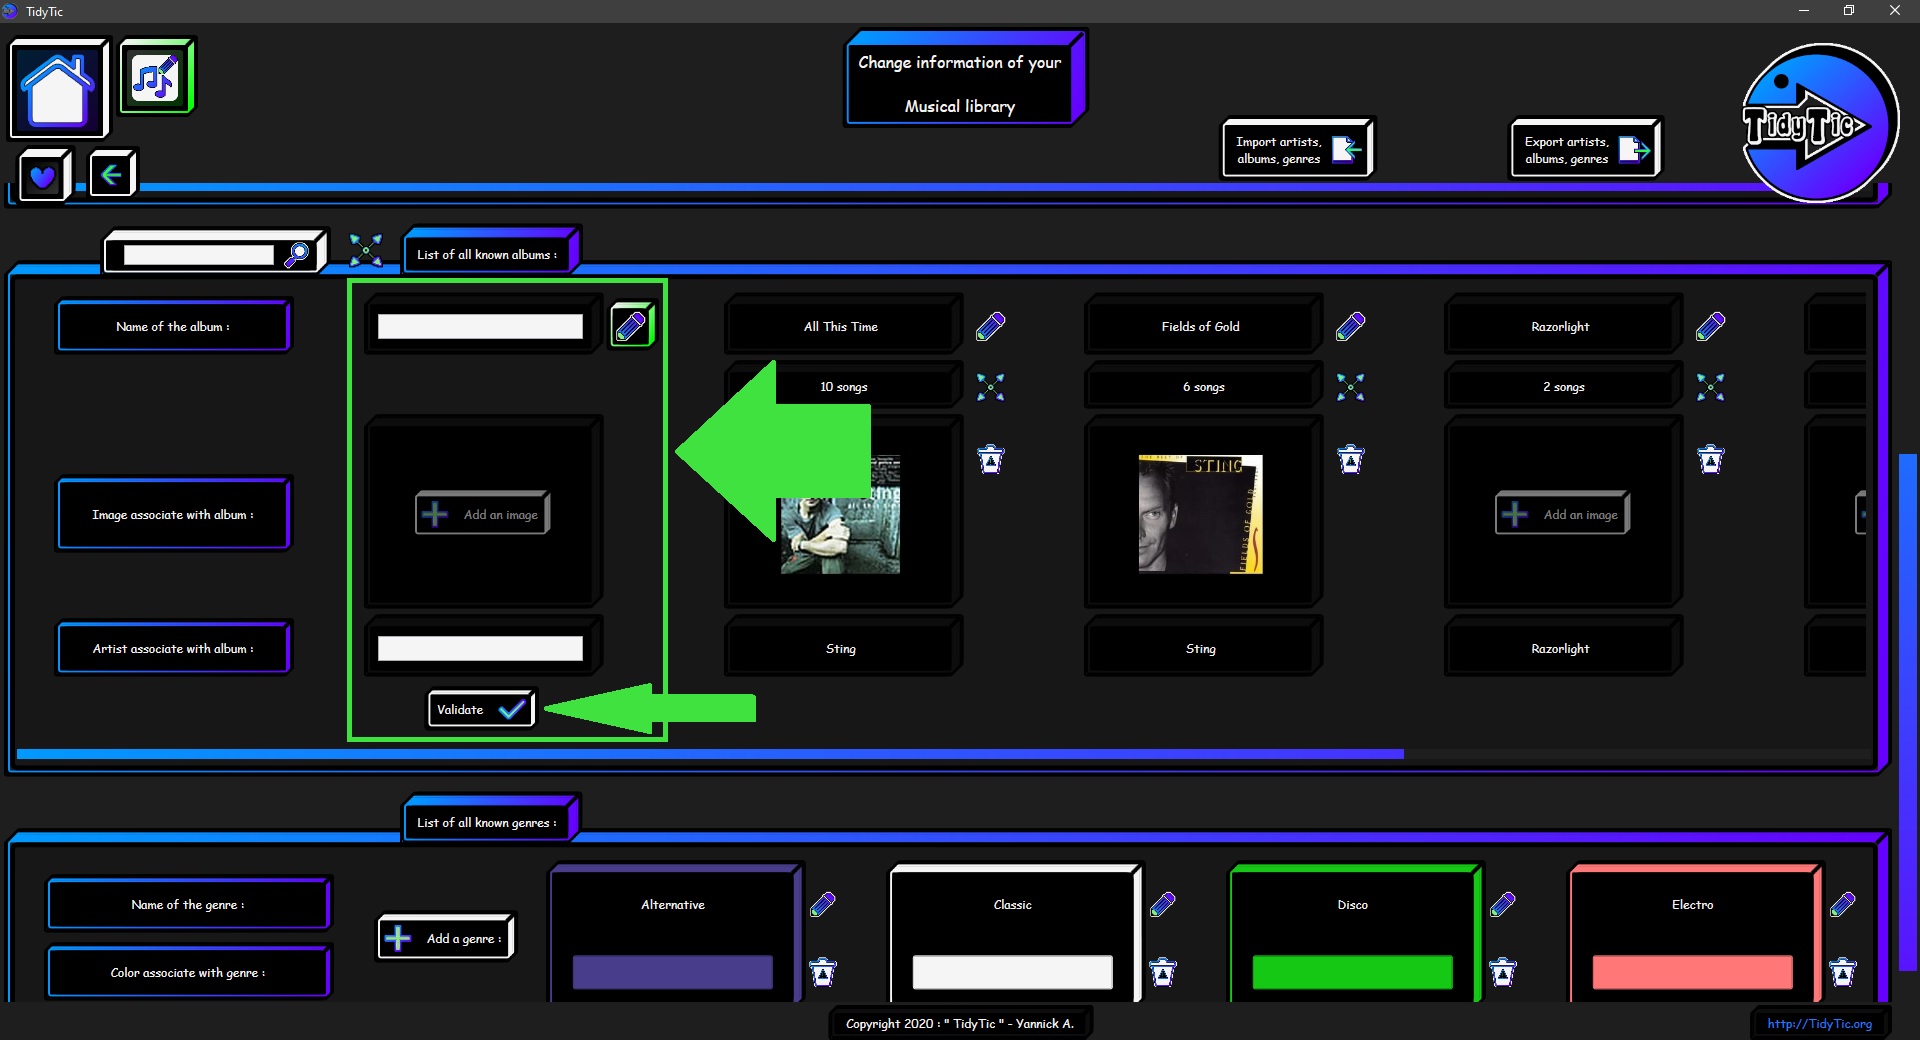
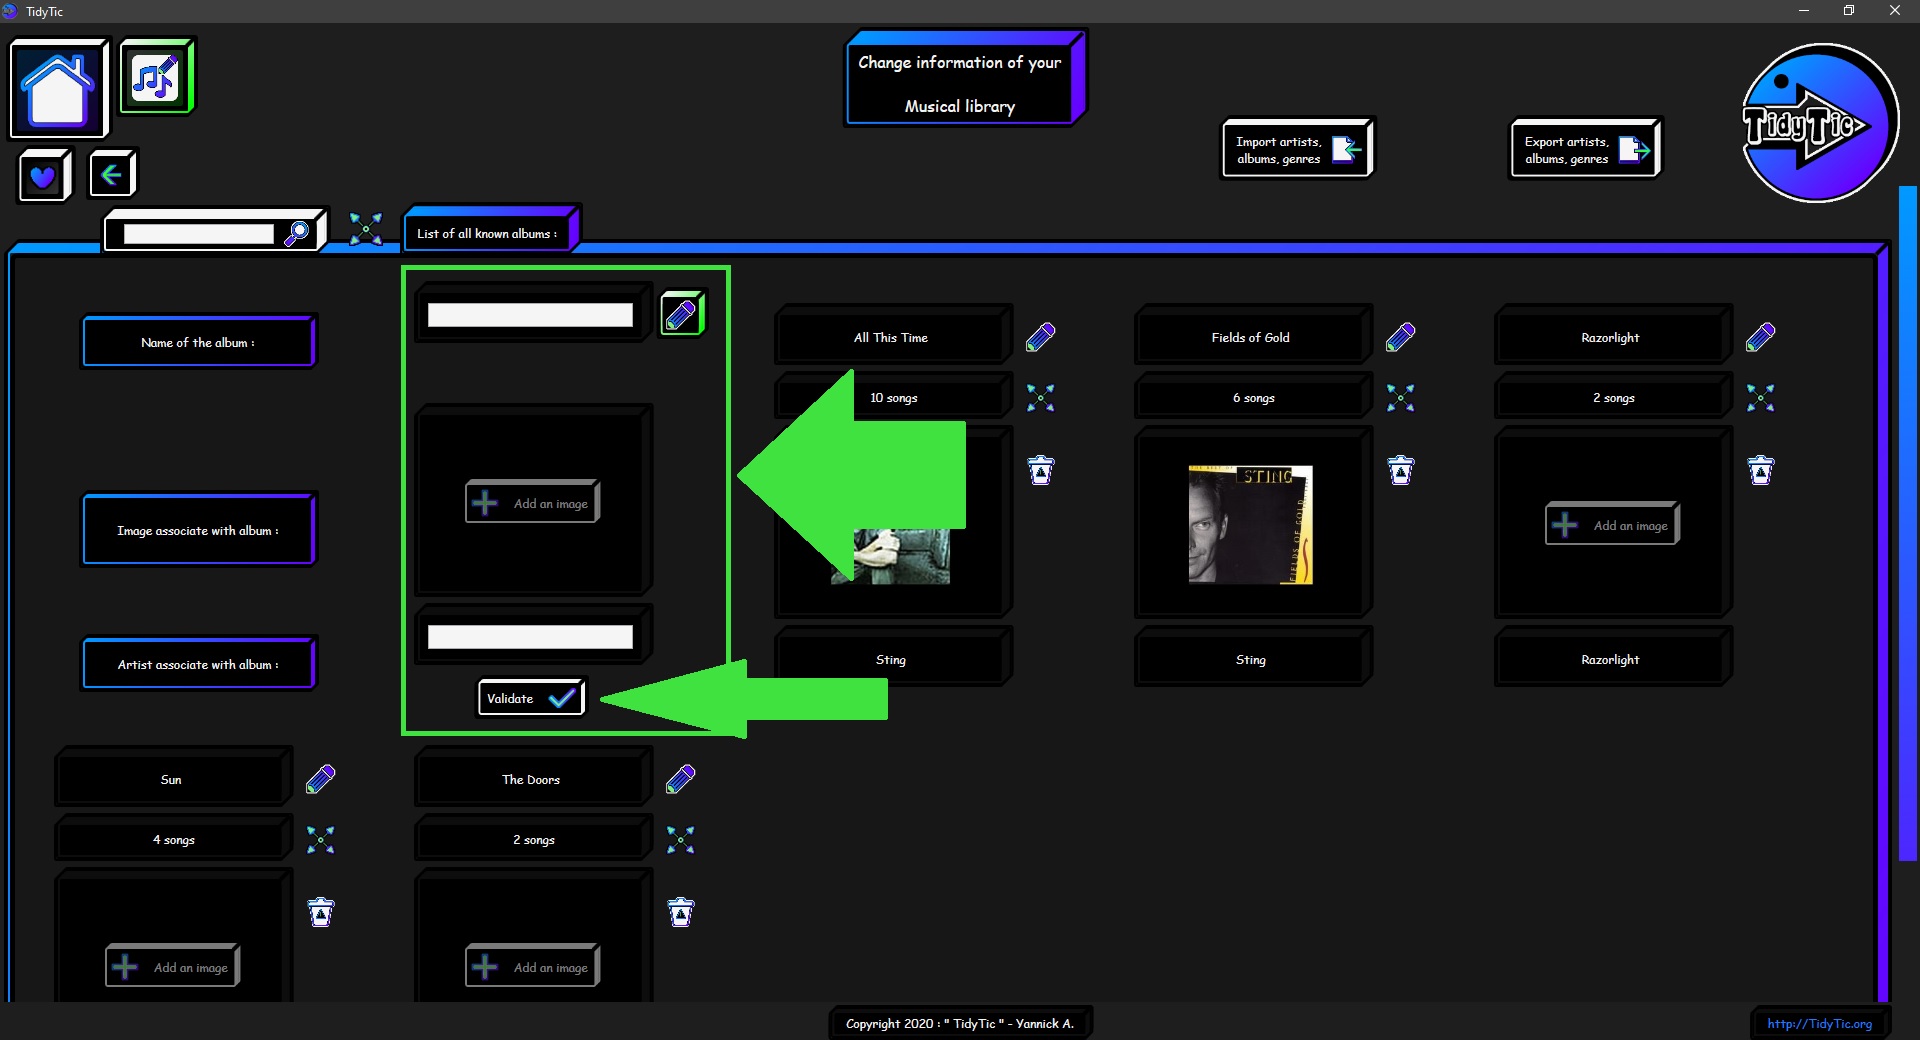
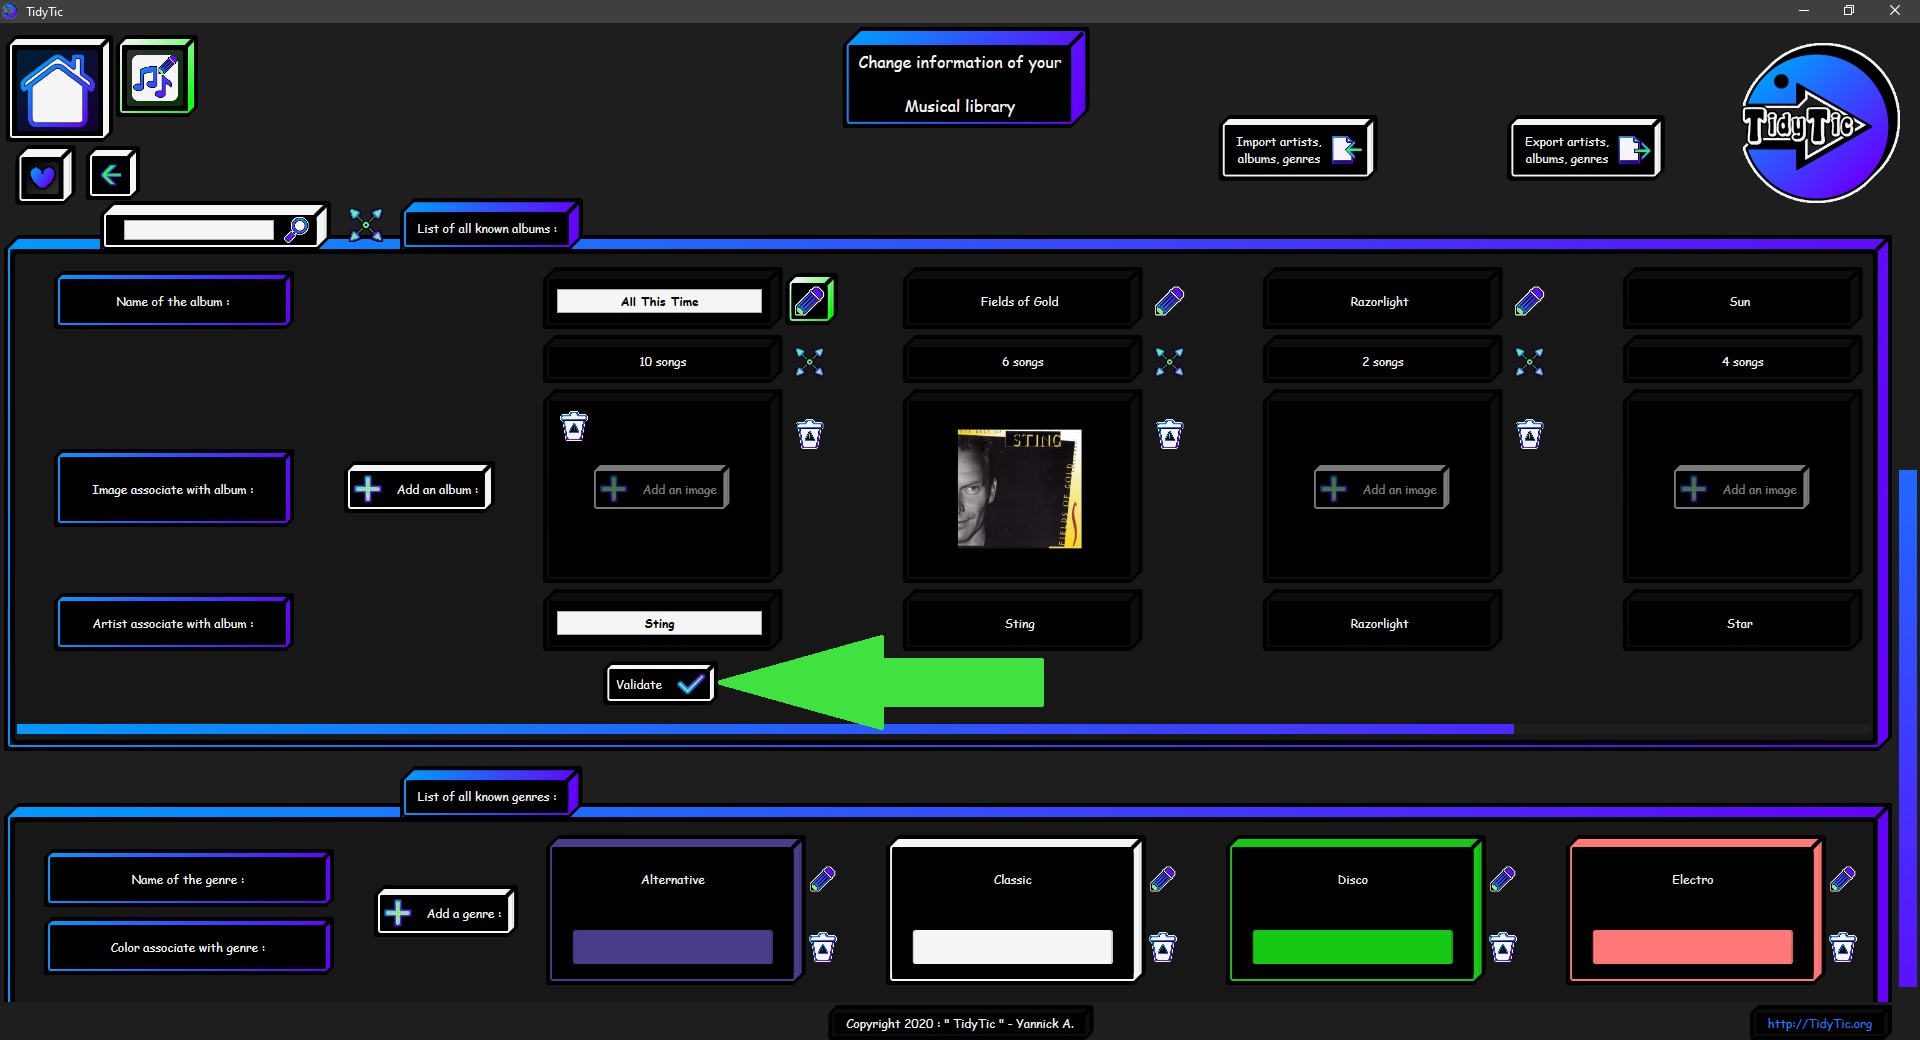
Once click, the button will then be replaced by a space where you can define the name of this new album as well as associate an image with it and define the artist associated with this album.
Then you just need to validate the creation in order to add this album to the list of those known by TidyTic.
To cancel the creation, just click on the " ![]() " icon.
" icon.
 ____
____ 
To add this album to one or more of your music, you will have to go through the “Edit files” menu of the display by type or by folder of TidyTic.
Edit an album of your musical library :
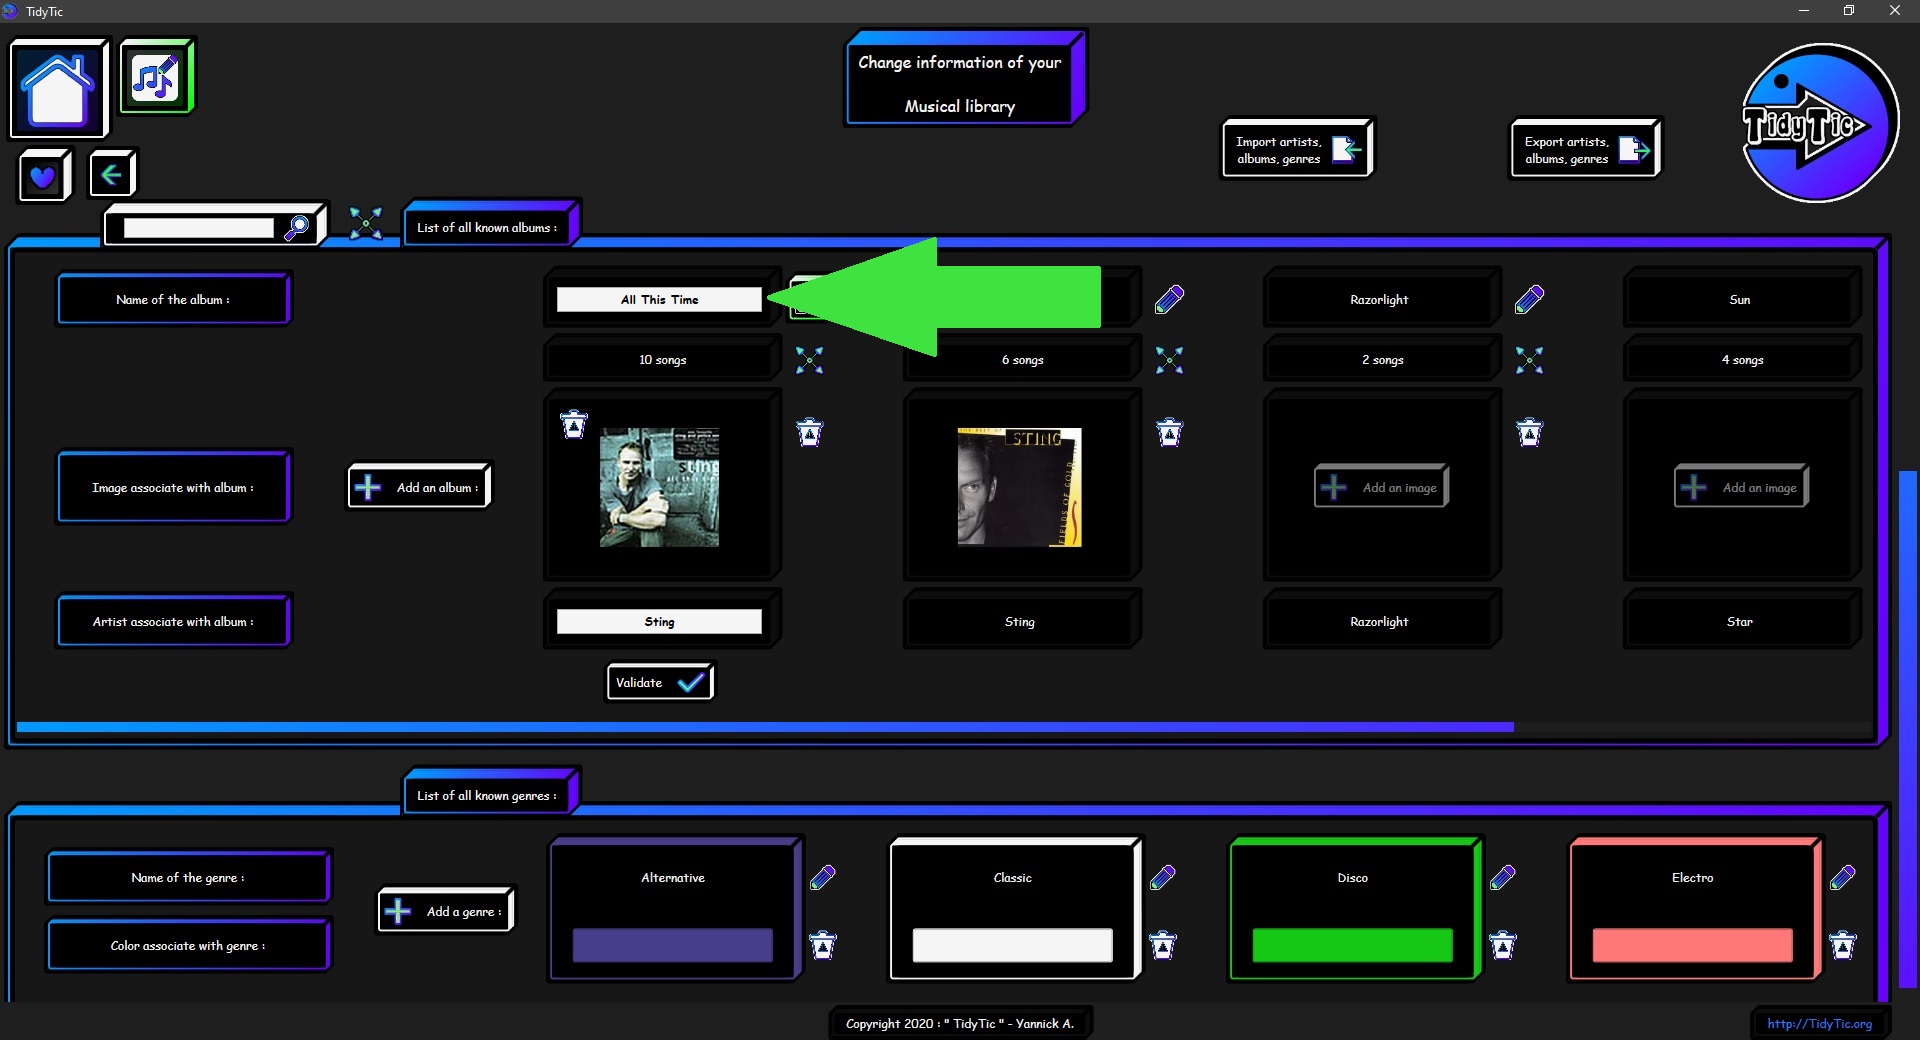
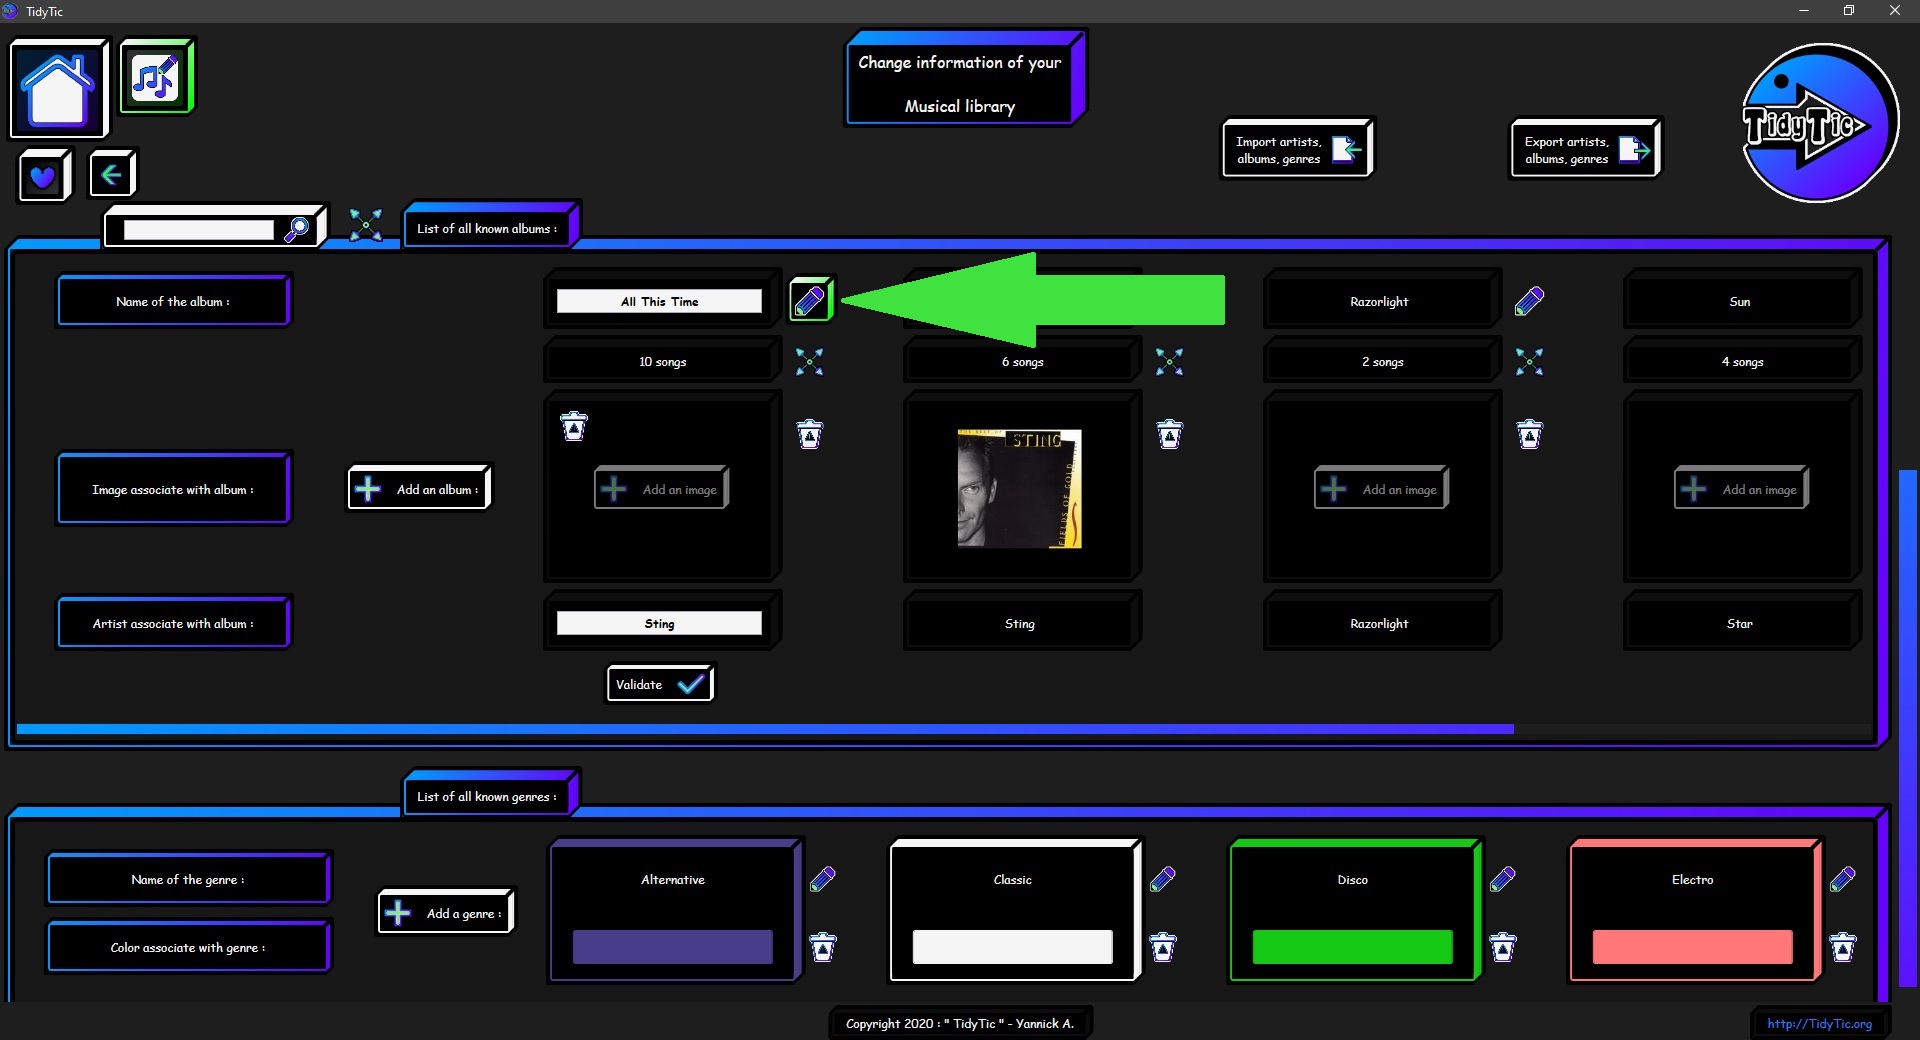
To make a modification on an album you will find an icon " ![]() " next to this one.
" next to this one.
 ____
____ 
The album will then go into modification mode.

You can then change its name.
When you change the name of an album from this page, the change will also be made on all music associated with this album.
The information contained in the file itself will be updated.
So these changes will be visible on all audio player from which you will read the file.
Changing the name is also possible from the "Detailed information about the album" window.
 ____
____ 
You can also modify the artist associated with the album.
Allowing you to have this album correctly associated in the artist's album list.
And therefore to have your musical library completely consistent between the artists and their albums.
The modification of the associated artist is also possible from the "Detailed information about the album" window.
 ____
____ 
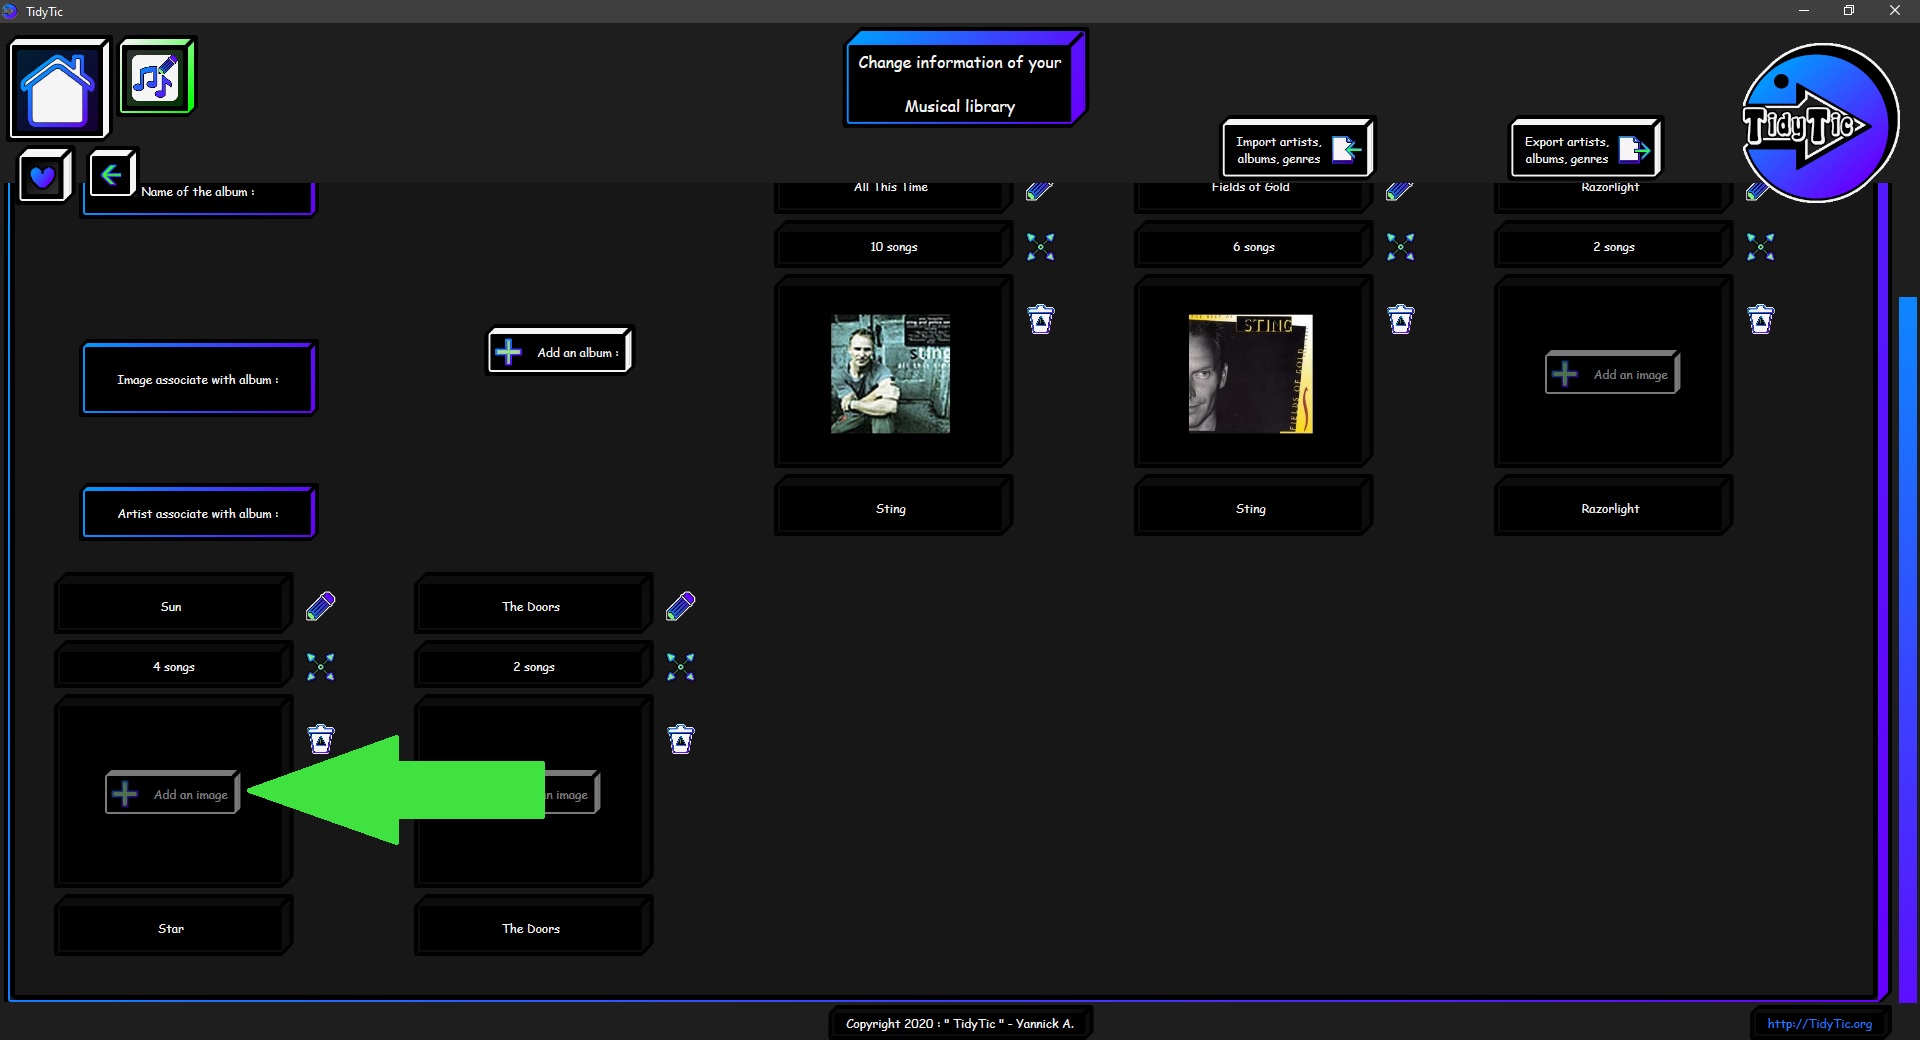
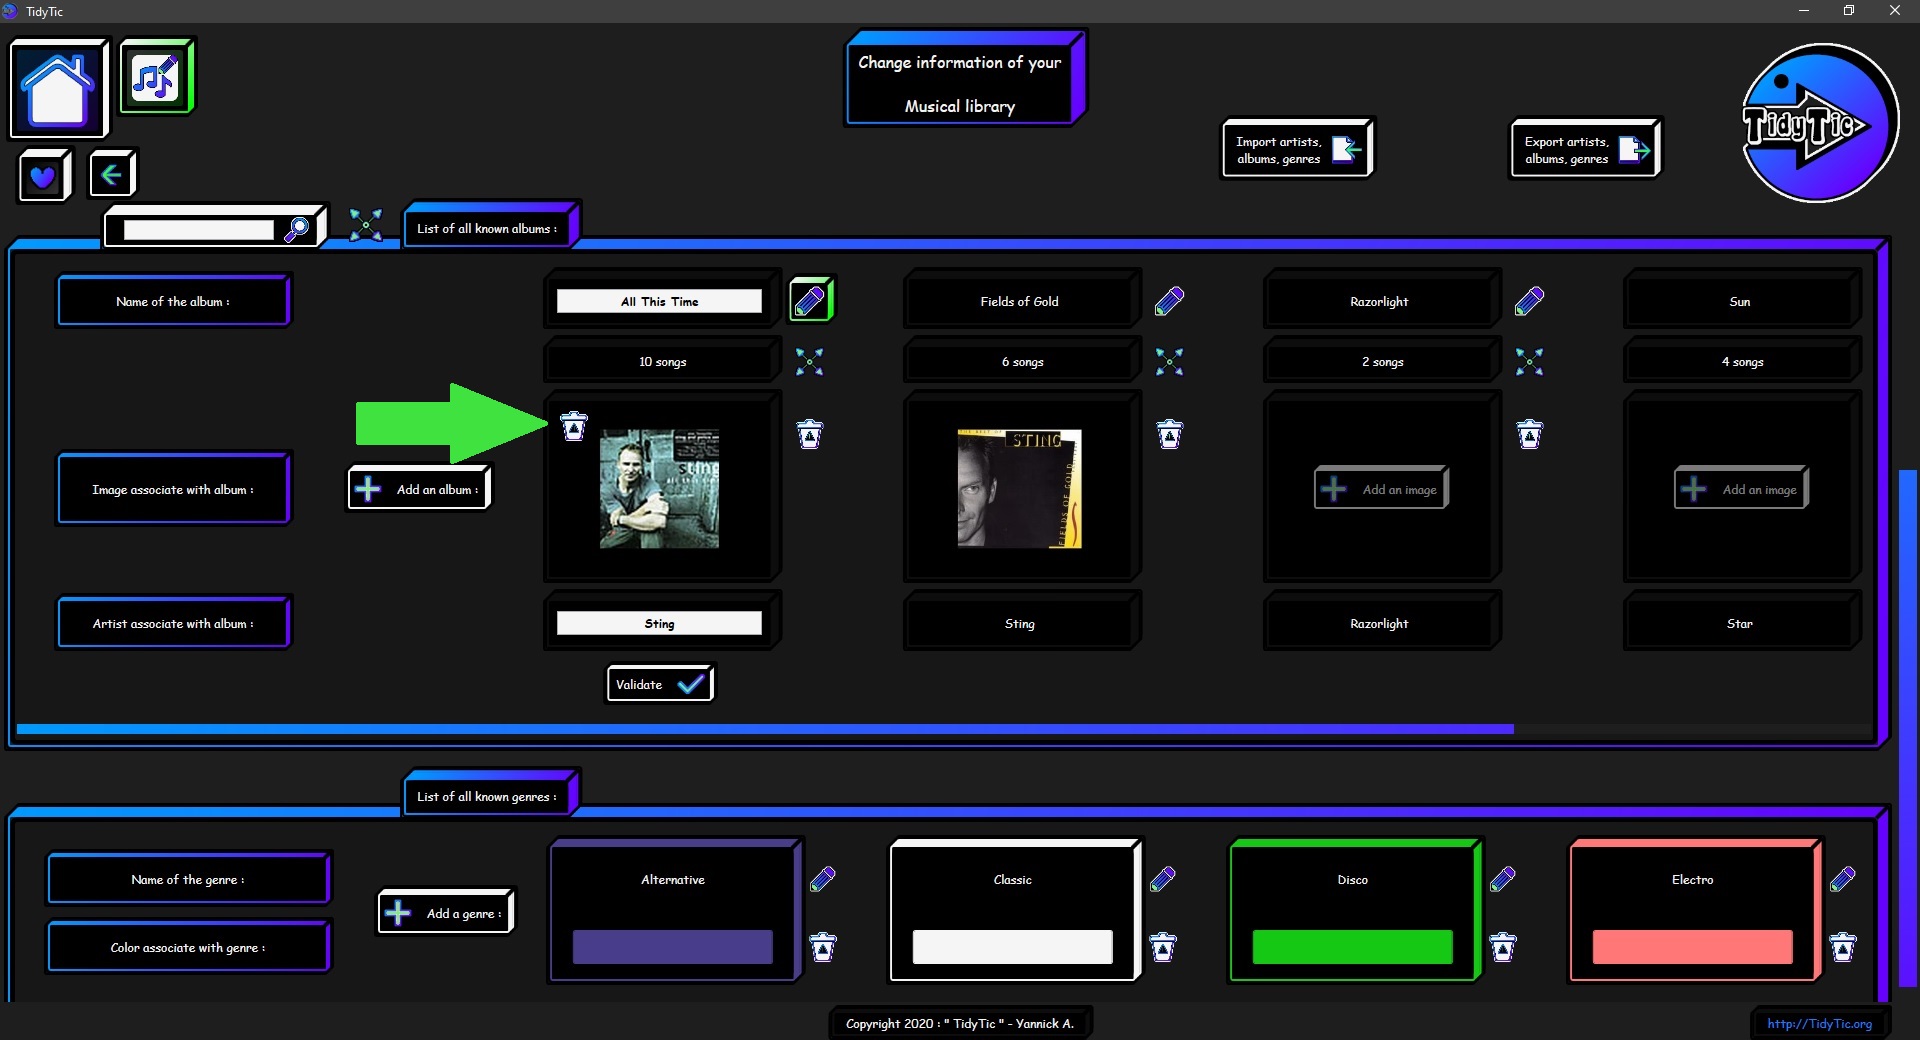
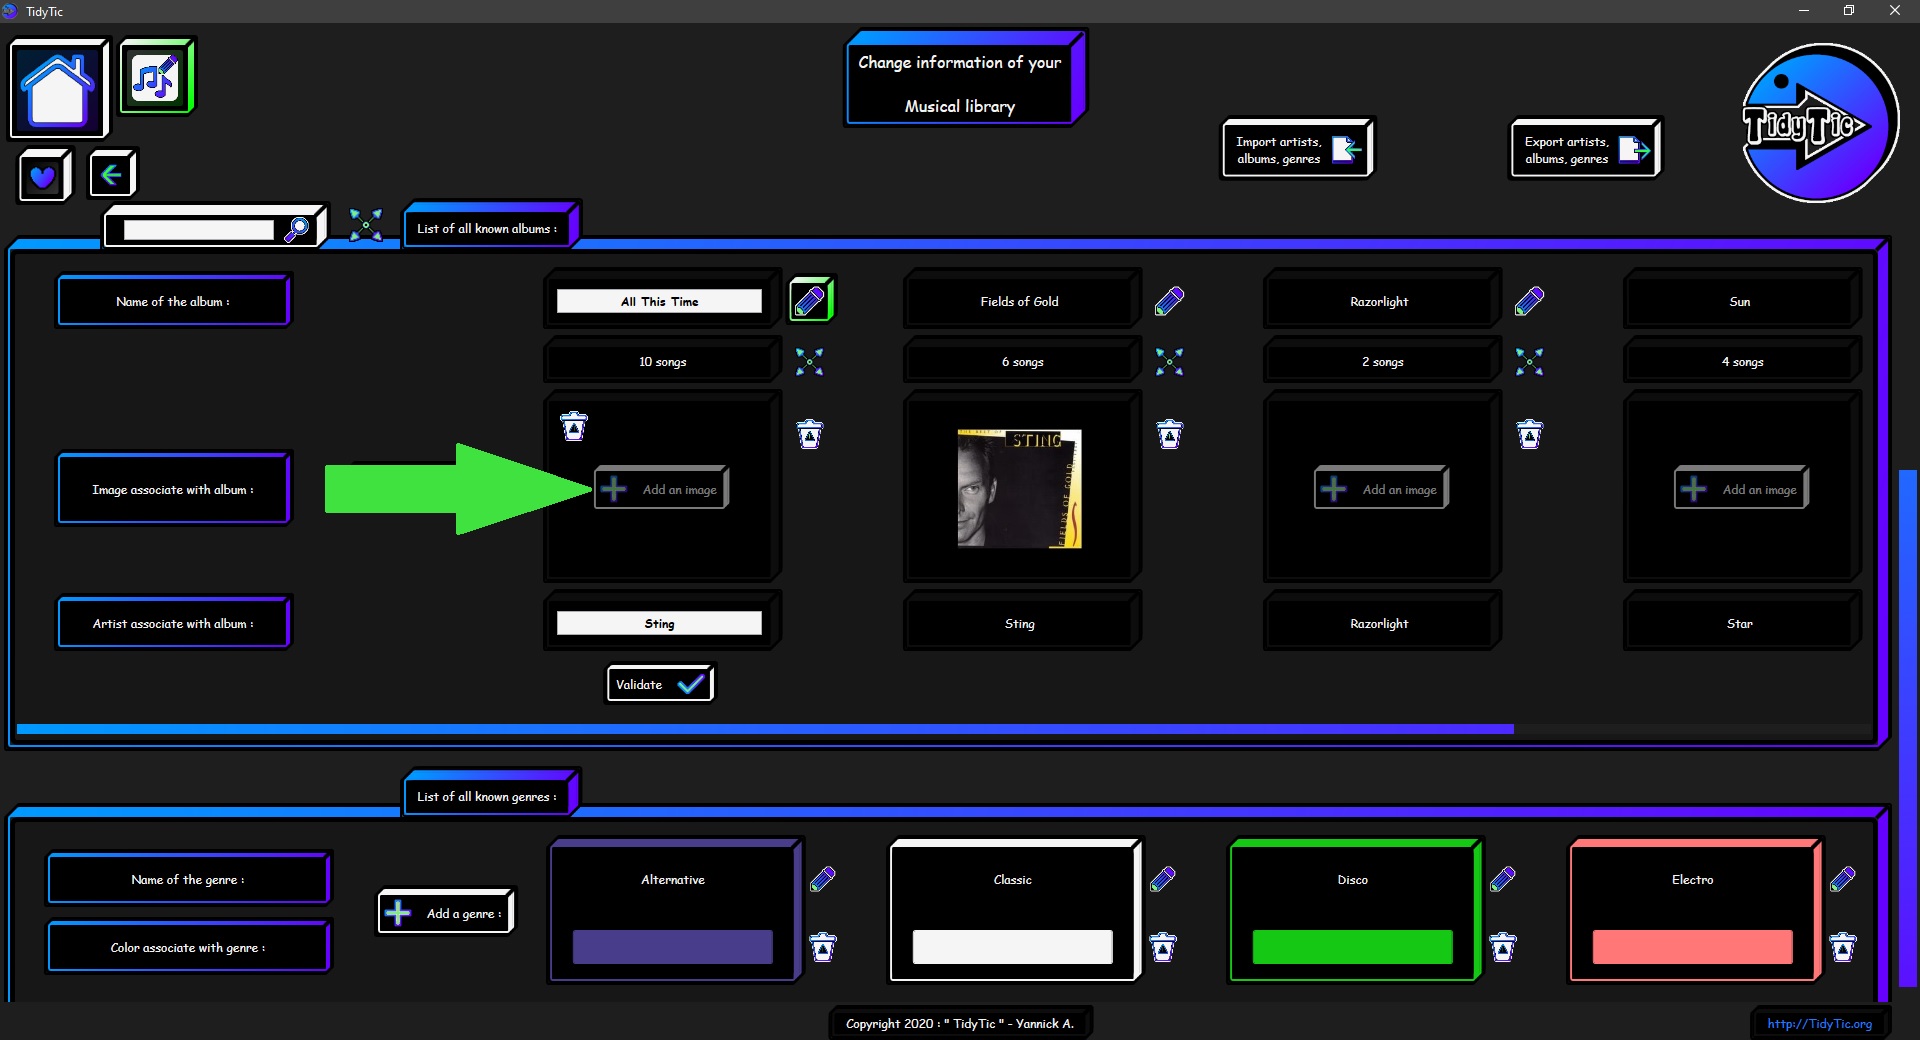
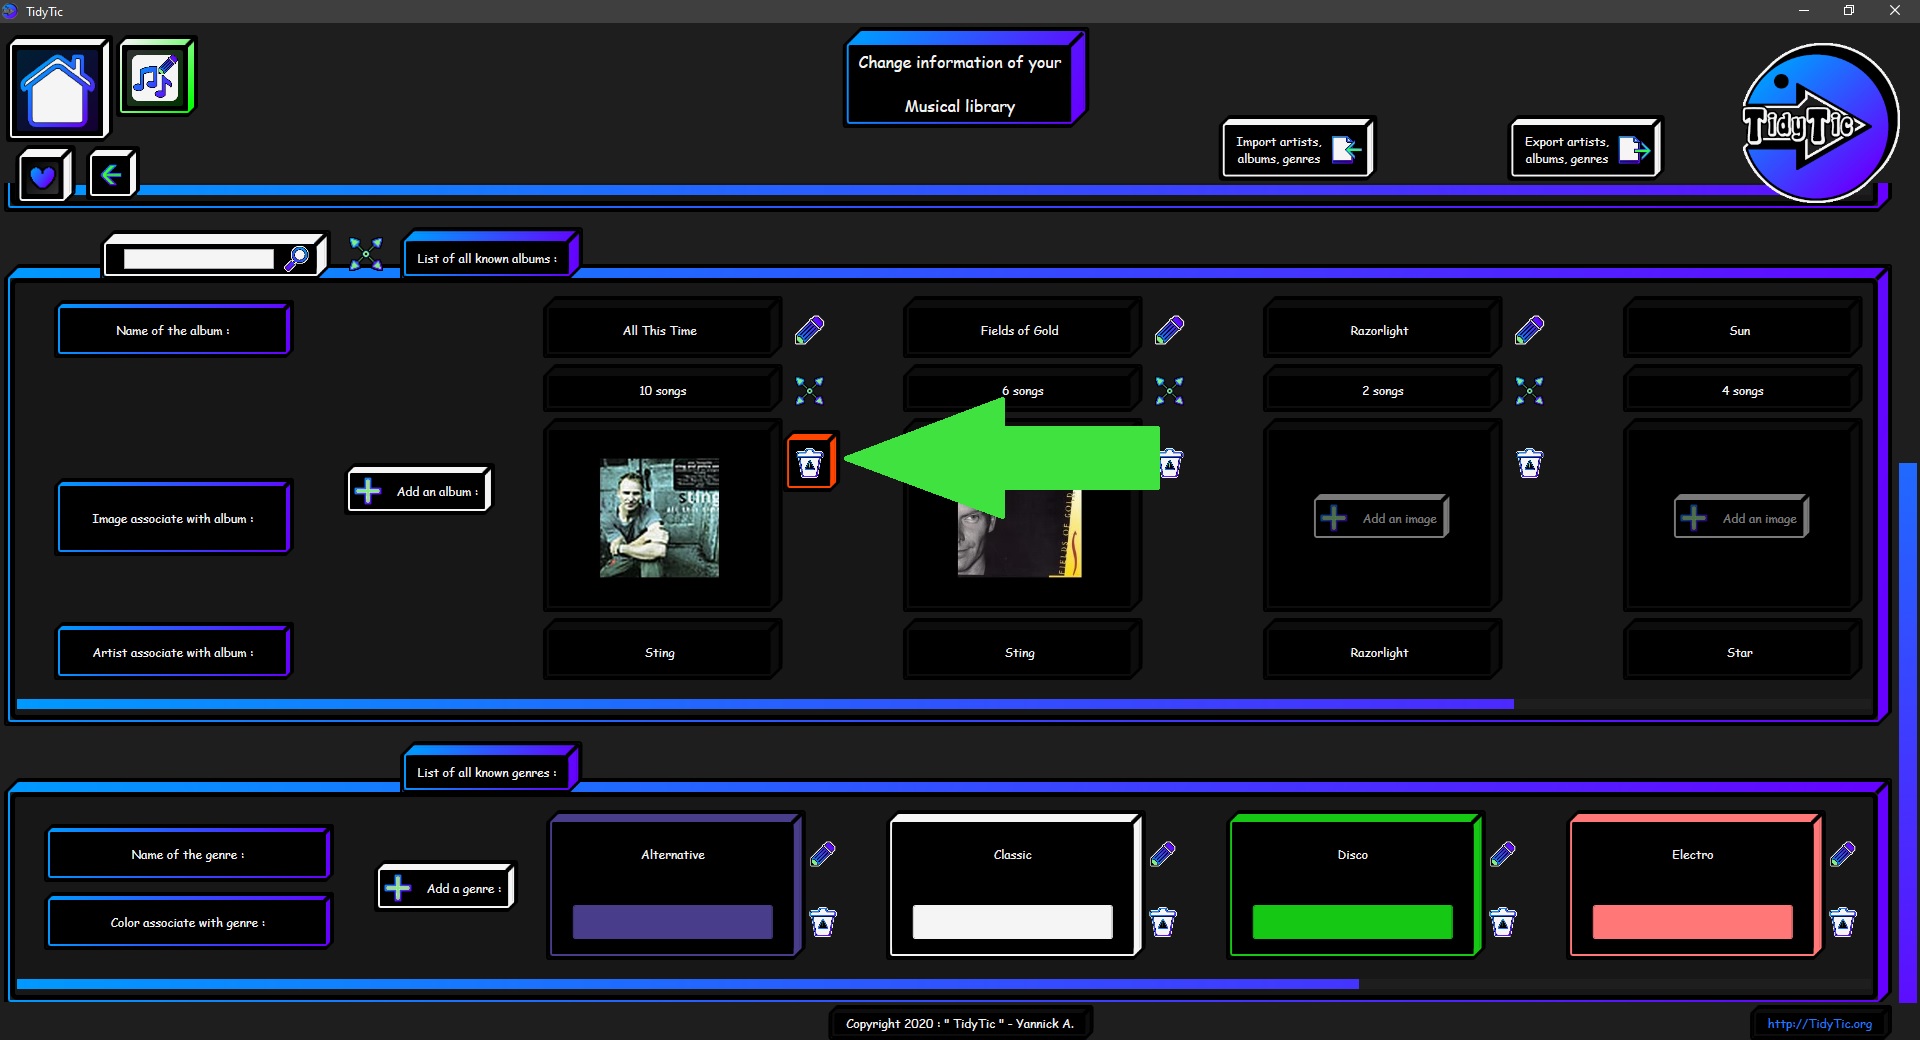
You can also delete the image associated with the album in order to add a new one.
You just need to double left click on the "![]() " icon.
" icon.
As a reminder, this image is used for the thumbnails of all the music associated with this album, in the display by folder or by type of TidyTic.
 ____
____  ____
____ 
Once the modifications have been made, you still have to validate it.
To cancel a modification, simply click on the " ![]() " icon.
" icon.
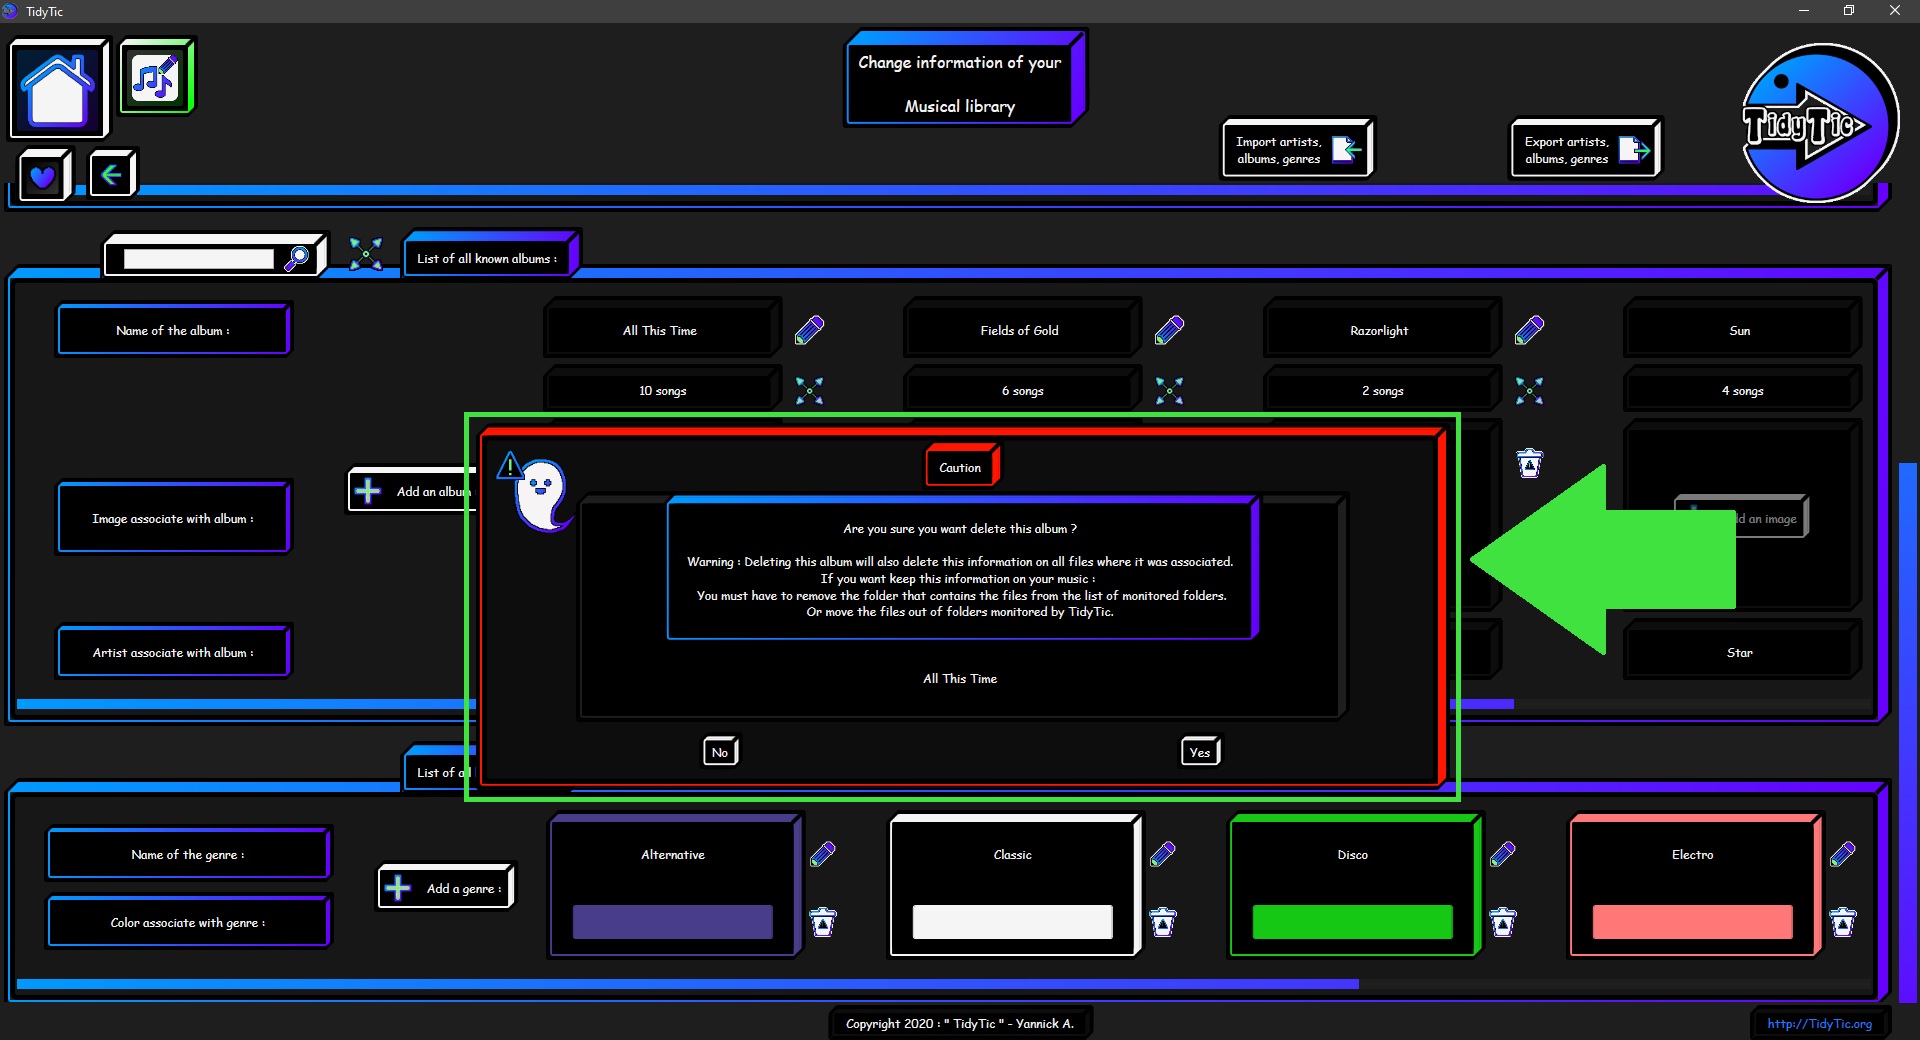
Delete an album from your musical library :
To delete an album from your musical library, double left click on the " ![]() " icon.
" icon.
A message will ask you to confirm the deletion of the album.
If you delete an album, this album will also be deleted from the information of all musics with which he was associated.
If you want to keep this information on musics where it is present, you must have to place the files outside of folders monitored by TidyTic.
 ____
____ 
Manage the genres of your musics with TidyTic :
The genre of your music will be displayed in the column of the tags of your files in the display by type or by folder of TidyTic.
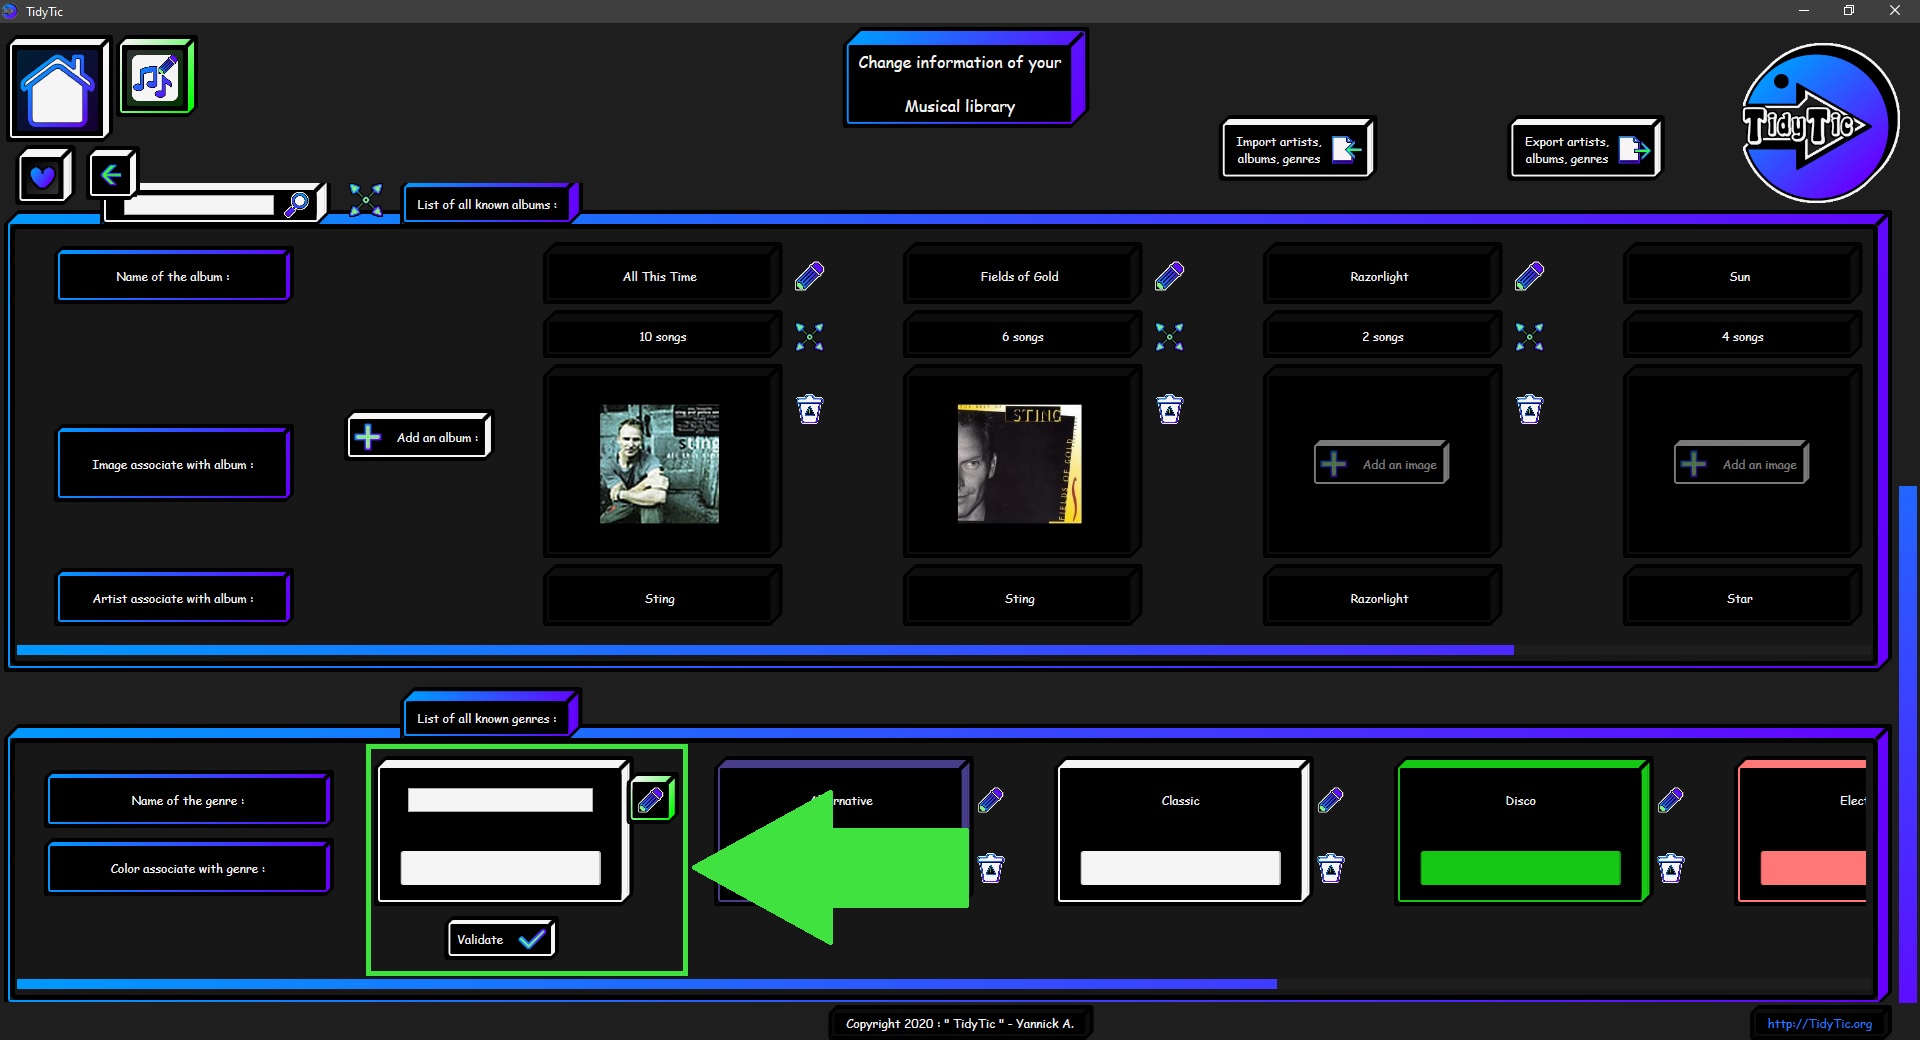
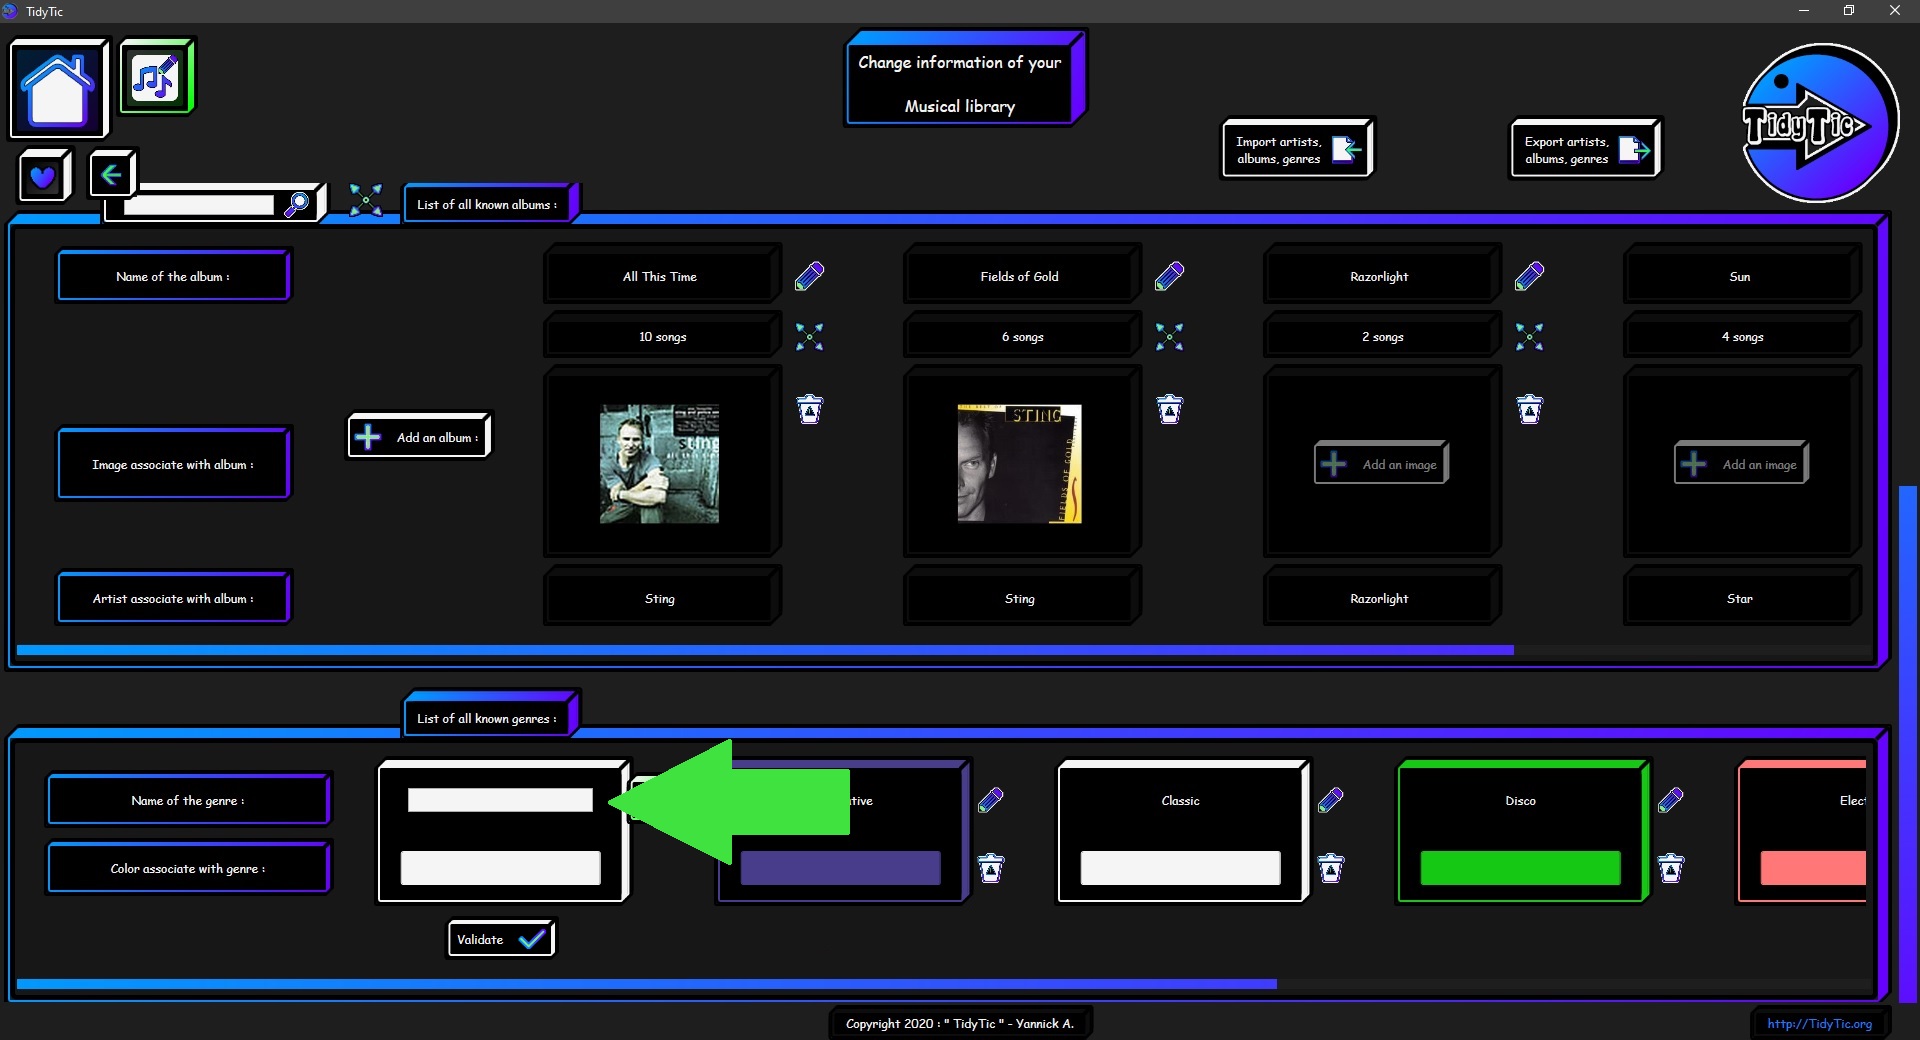
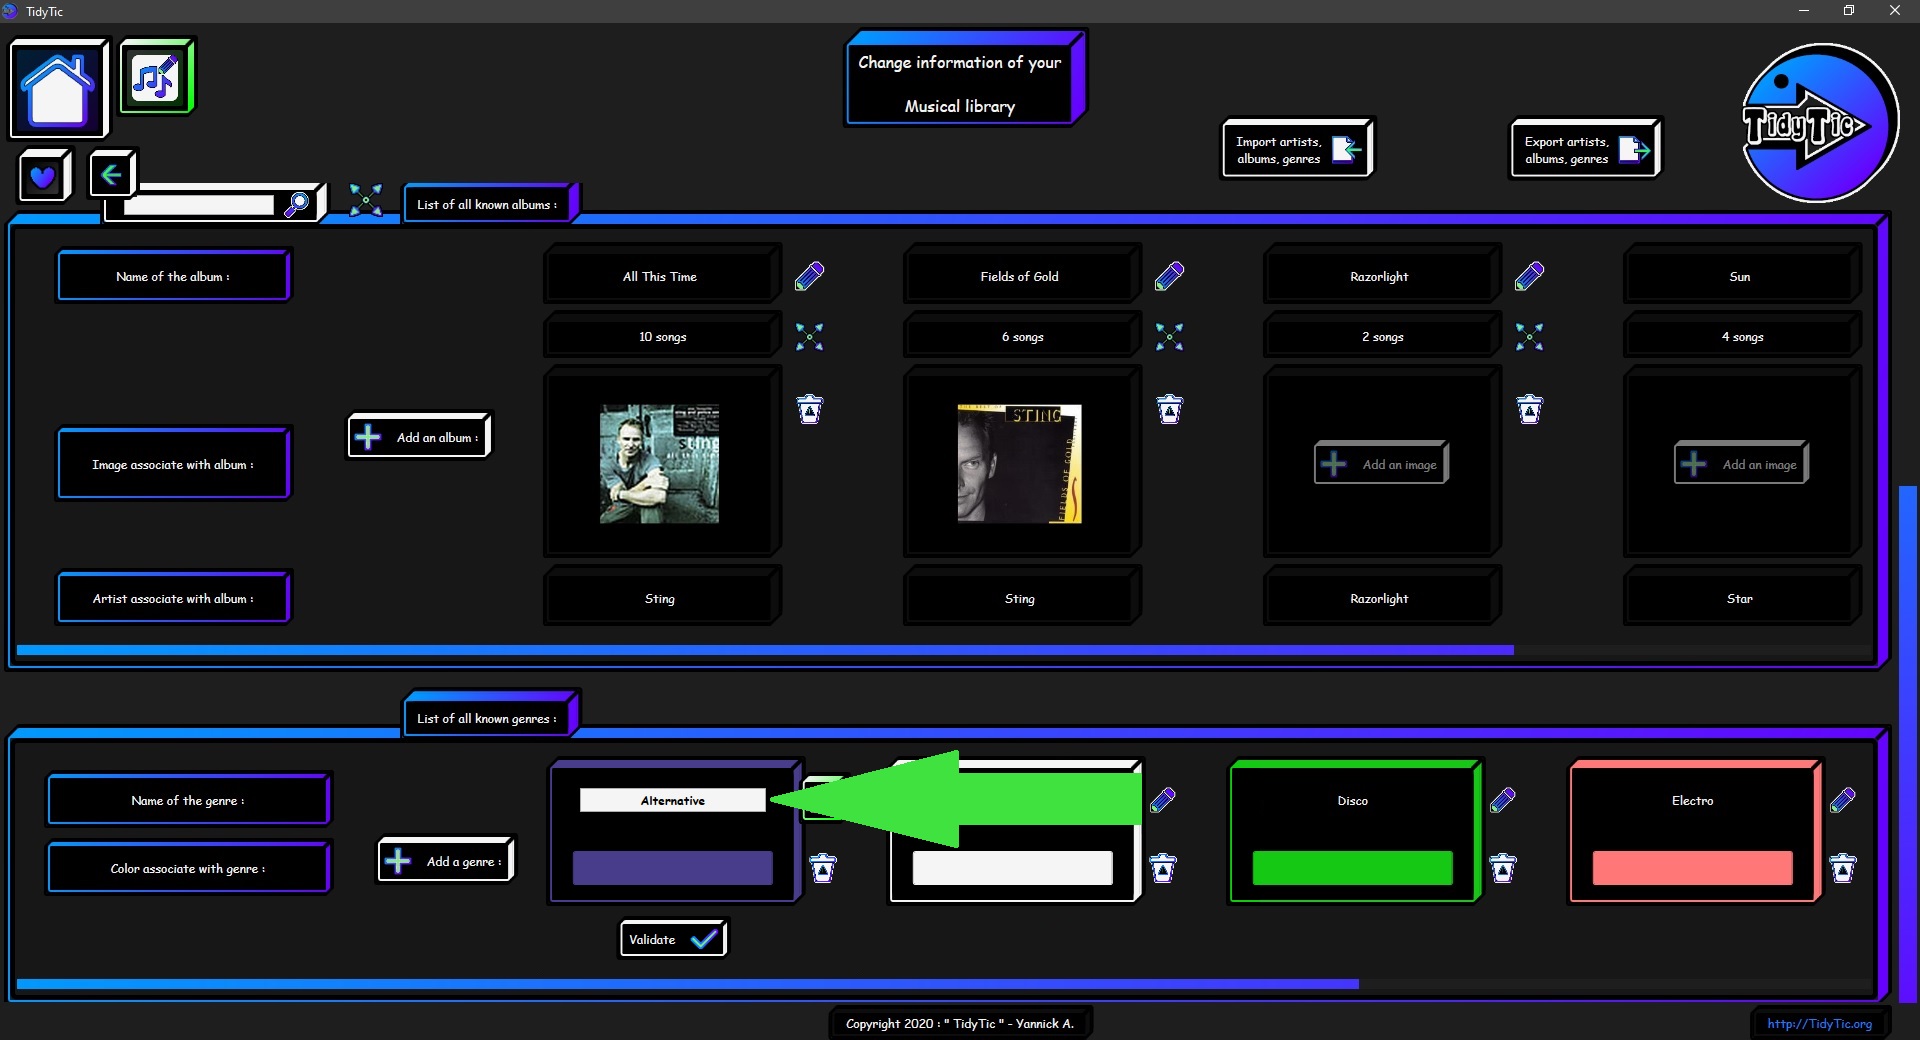
Add an genre to your musical library :
To add an genre you will find a button at the beginning of the list of your genres.

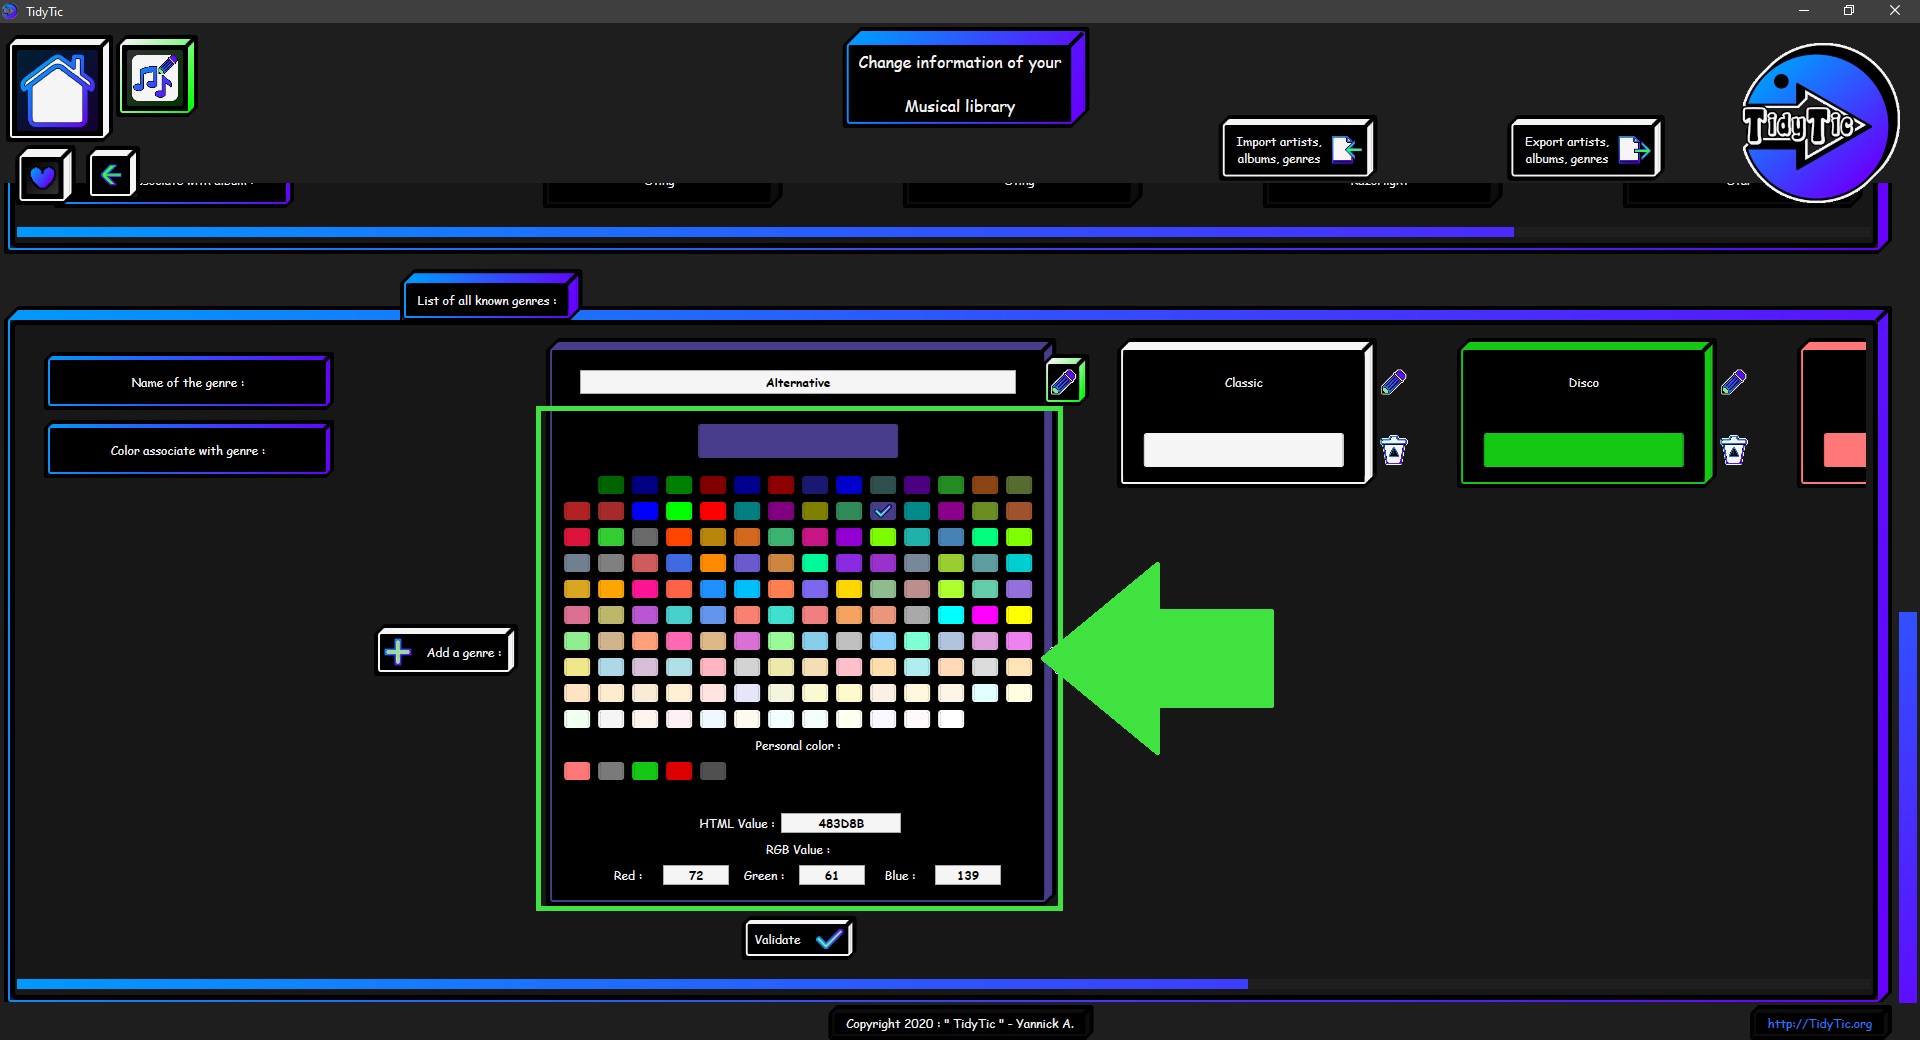
Once click, the button will then be replaced by a space where you can write the name of the new genre as well as associate a color with this genre.
To choose the color, just click on the color square to open colors selection menu.
 ____
____  ____
____ 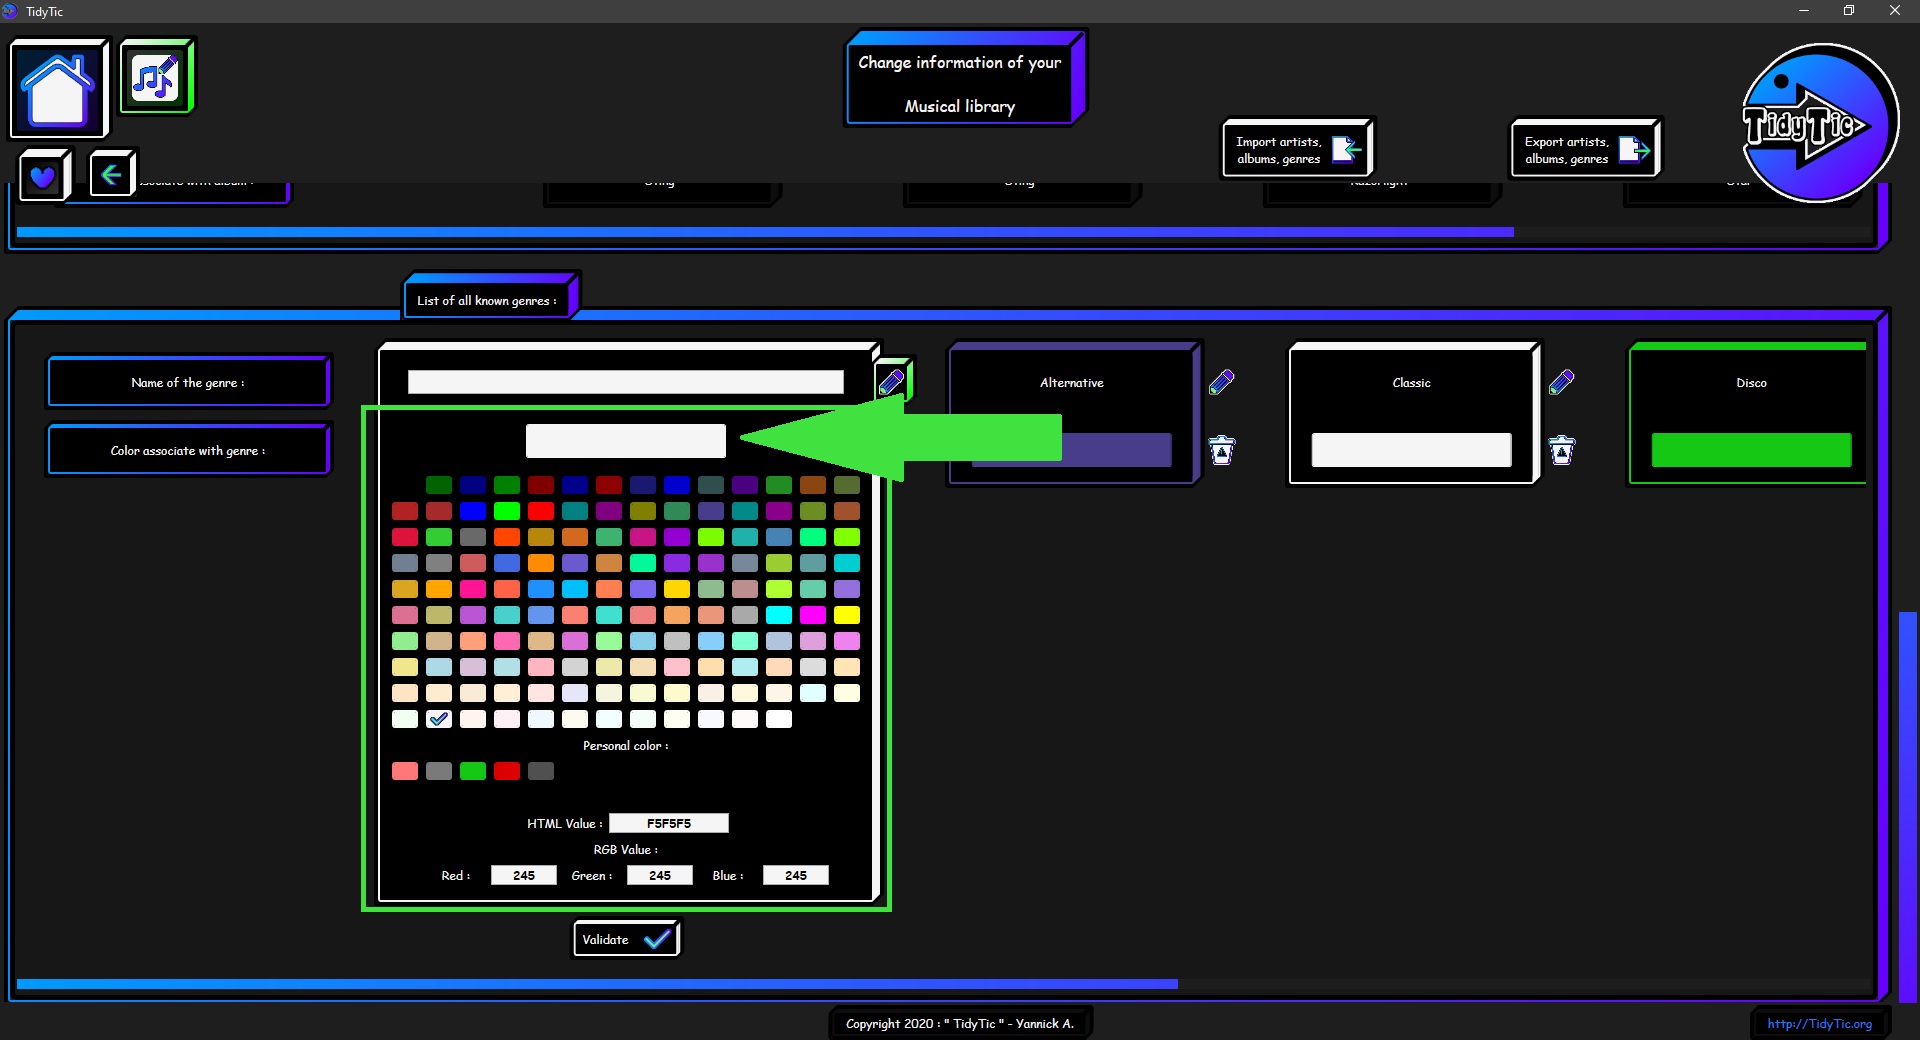
Then you just need to validate the creation in order to add this genre to the list of those known by TidyTic.
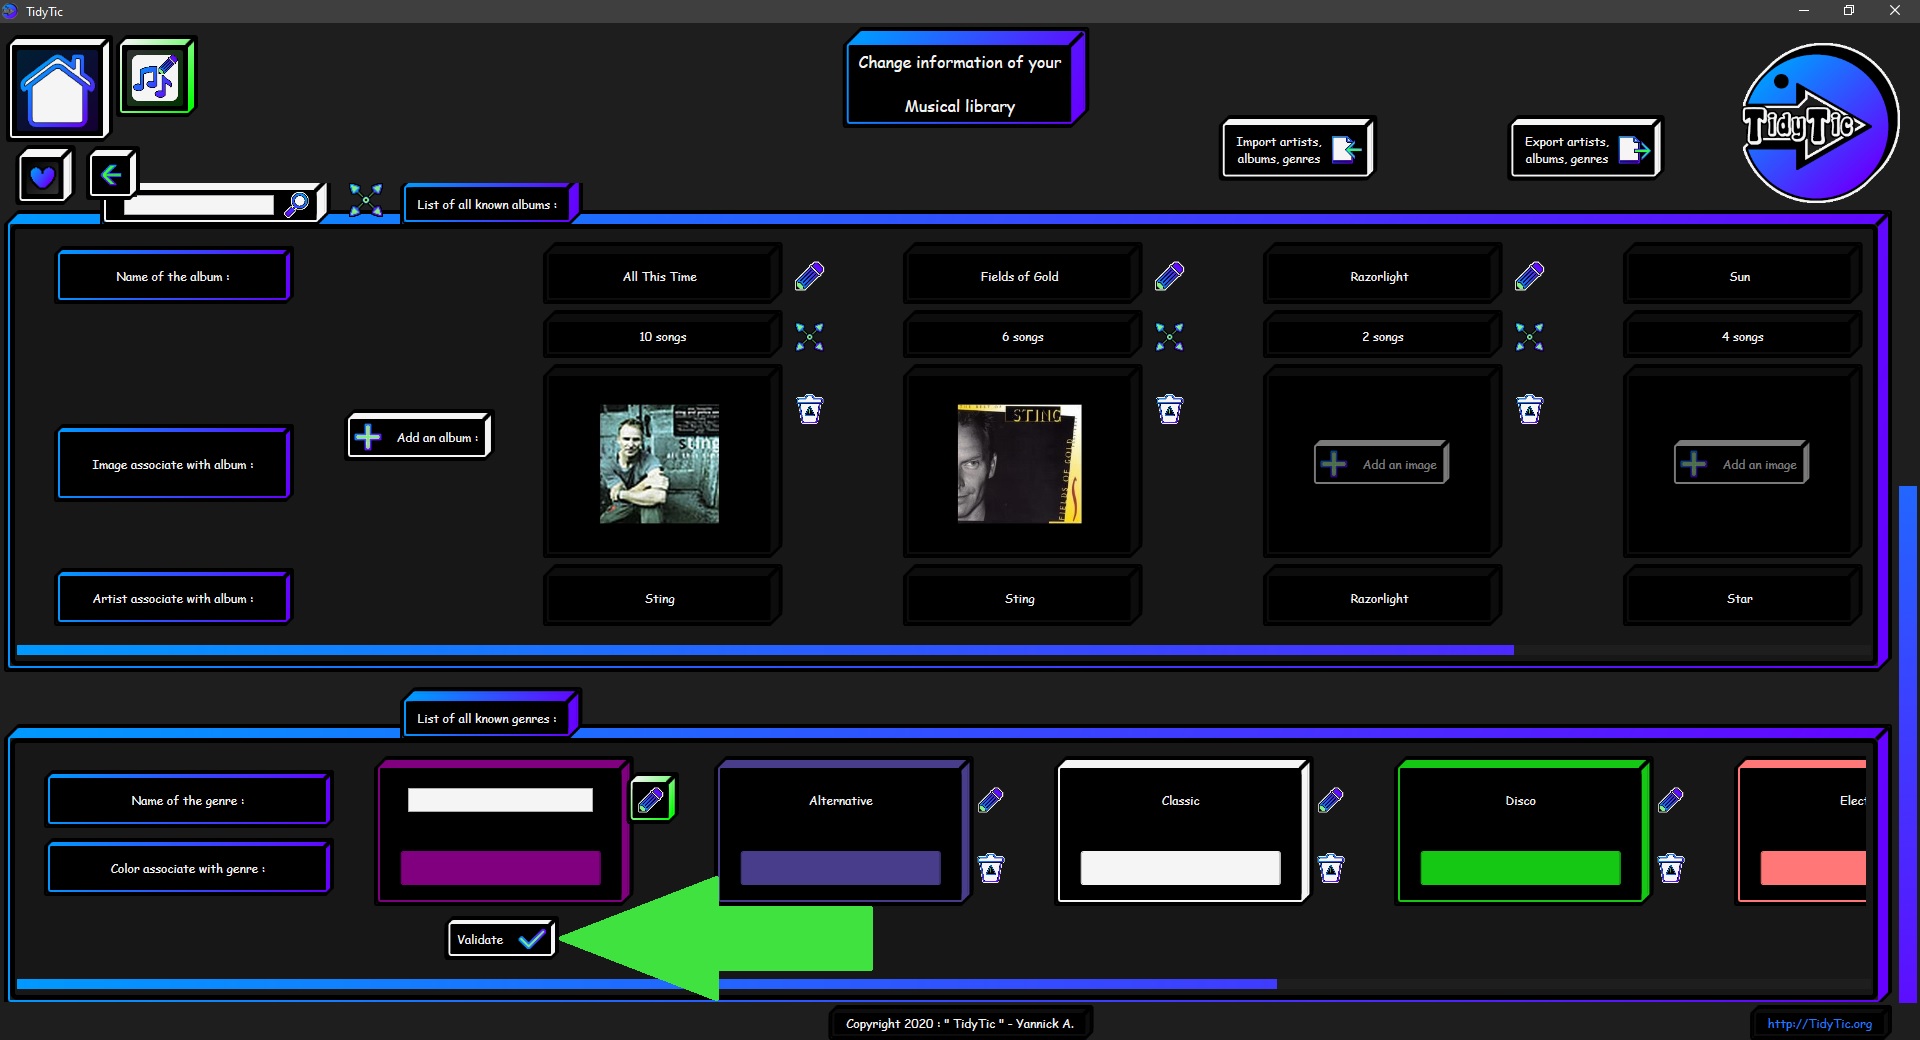
To cancel the creation, just click on the " ![]() " icon.
" icon.
To add this genre to one or more of your music, you will have to go through the “Edit files” menu of the display by type or by folder of TidyTic.
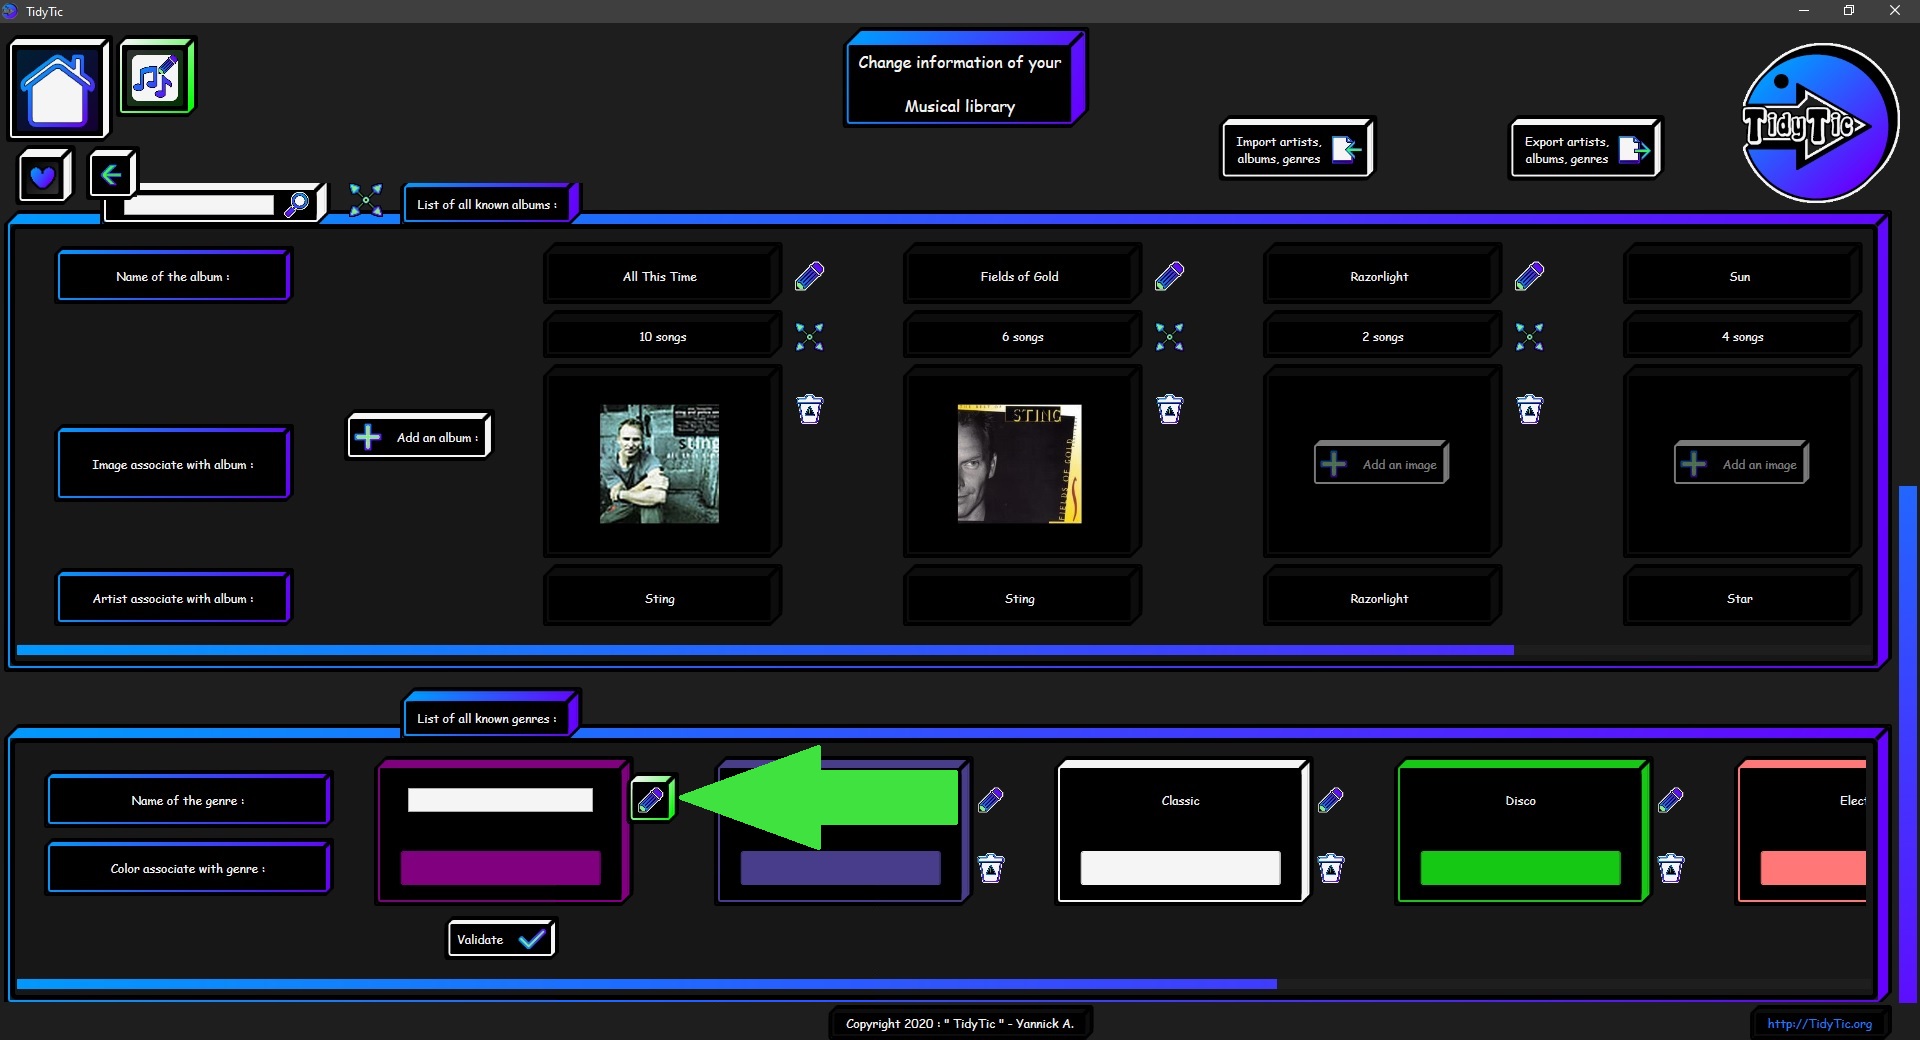
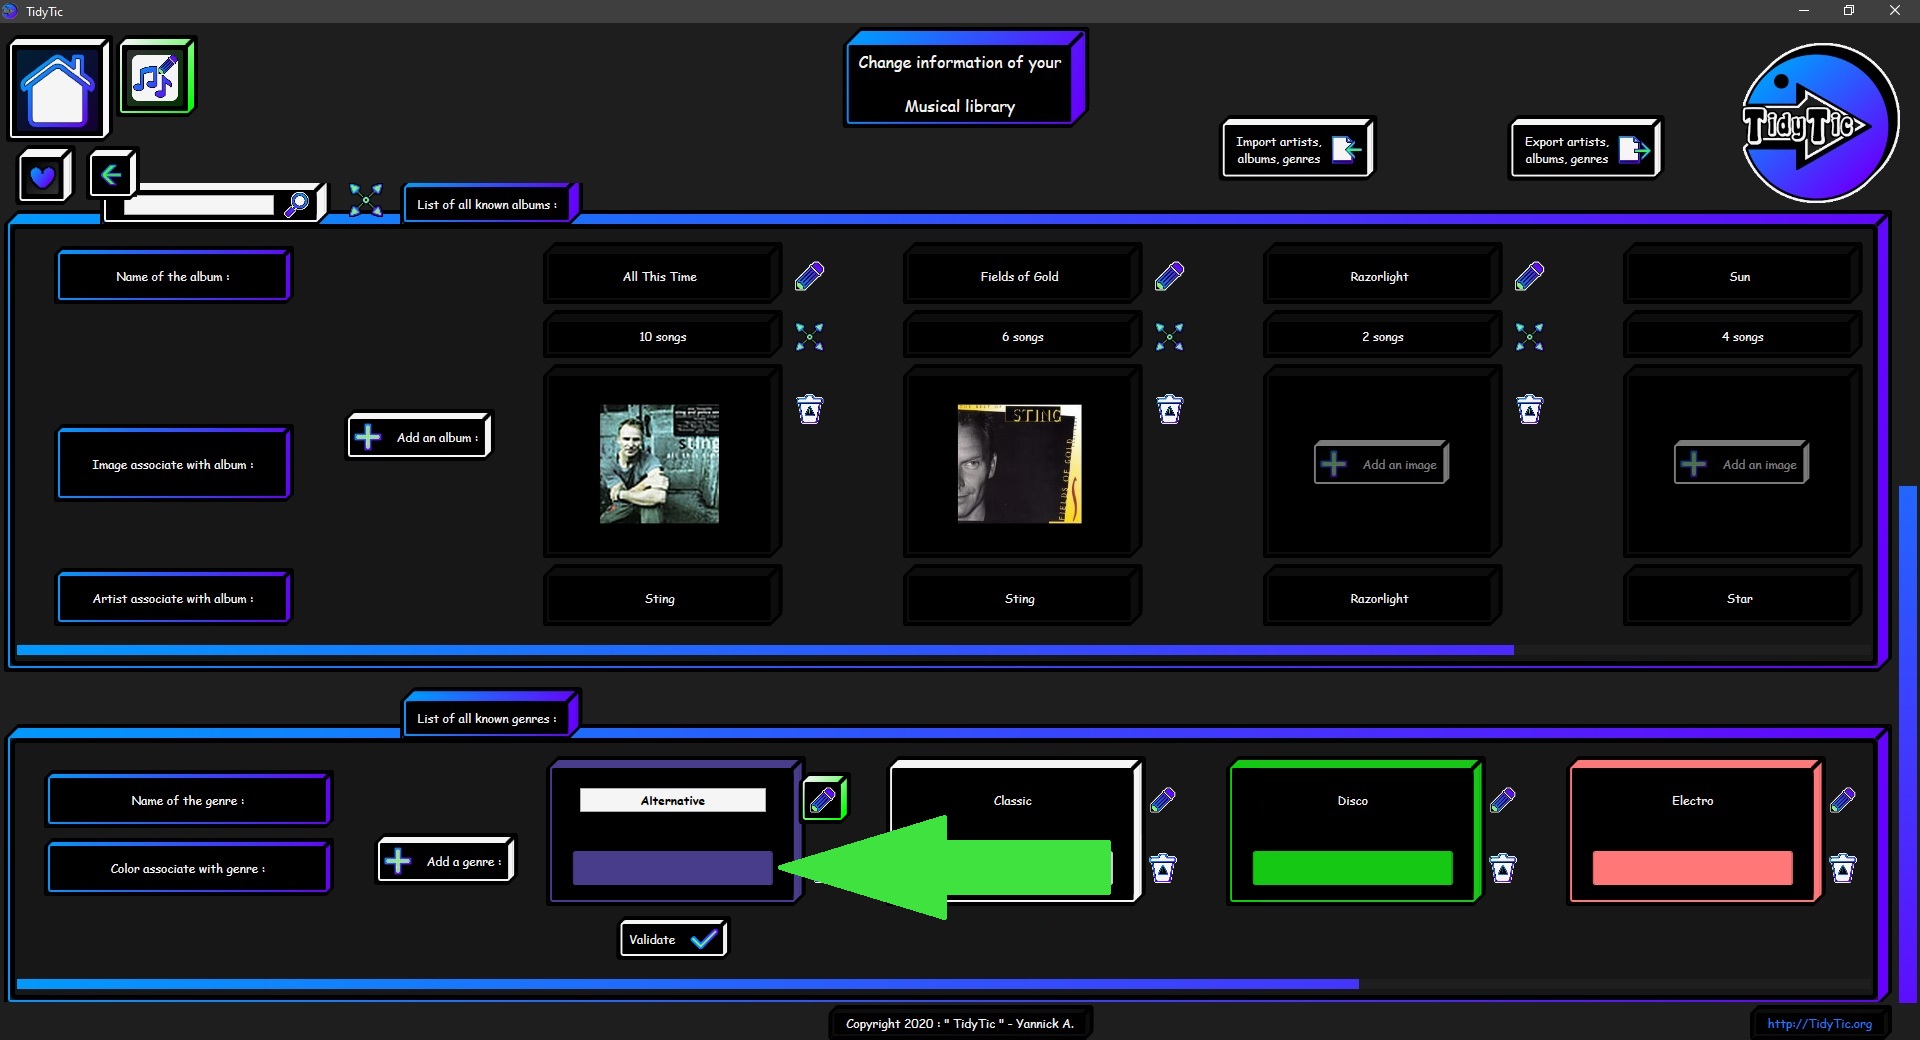
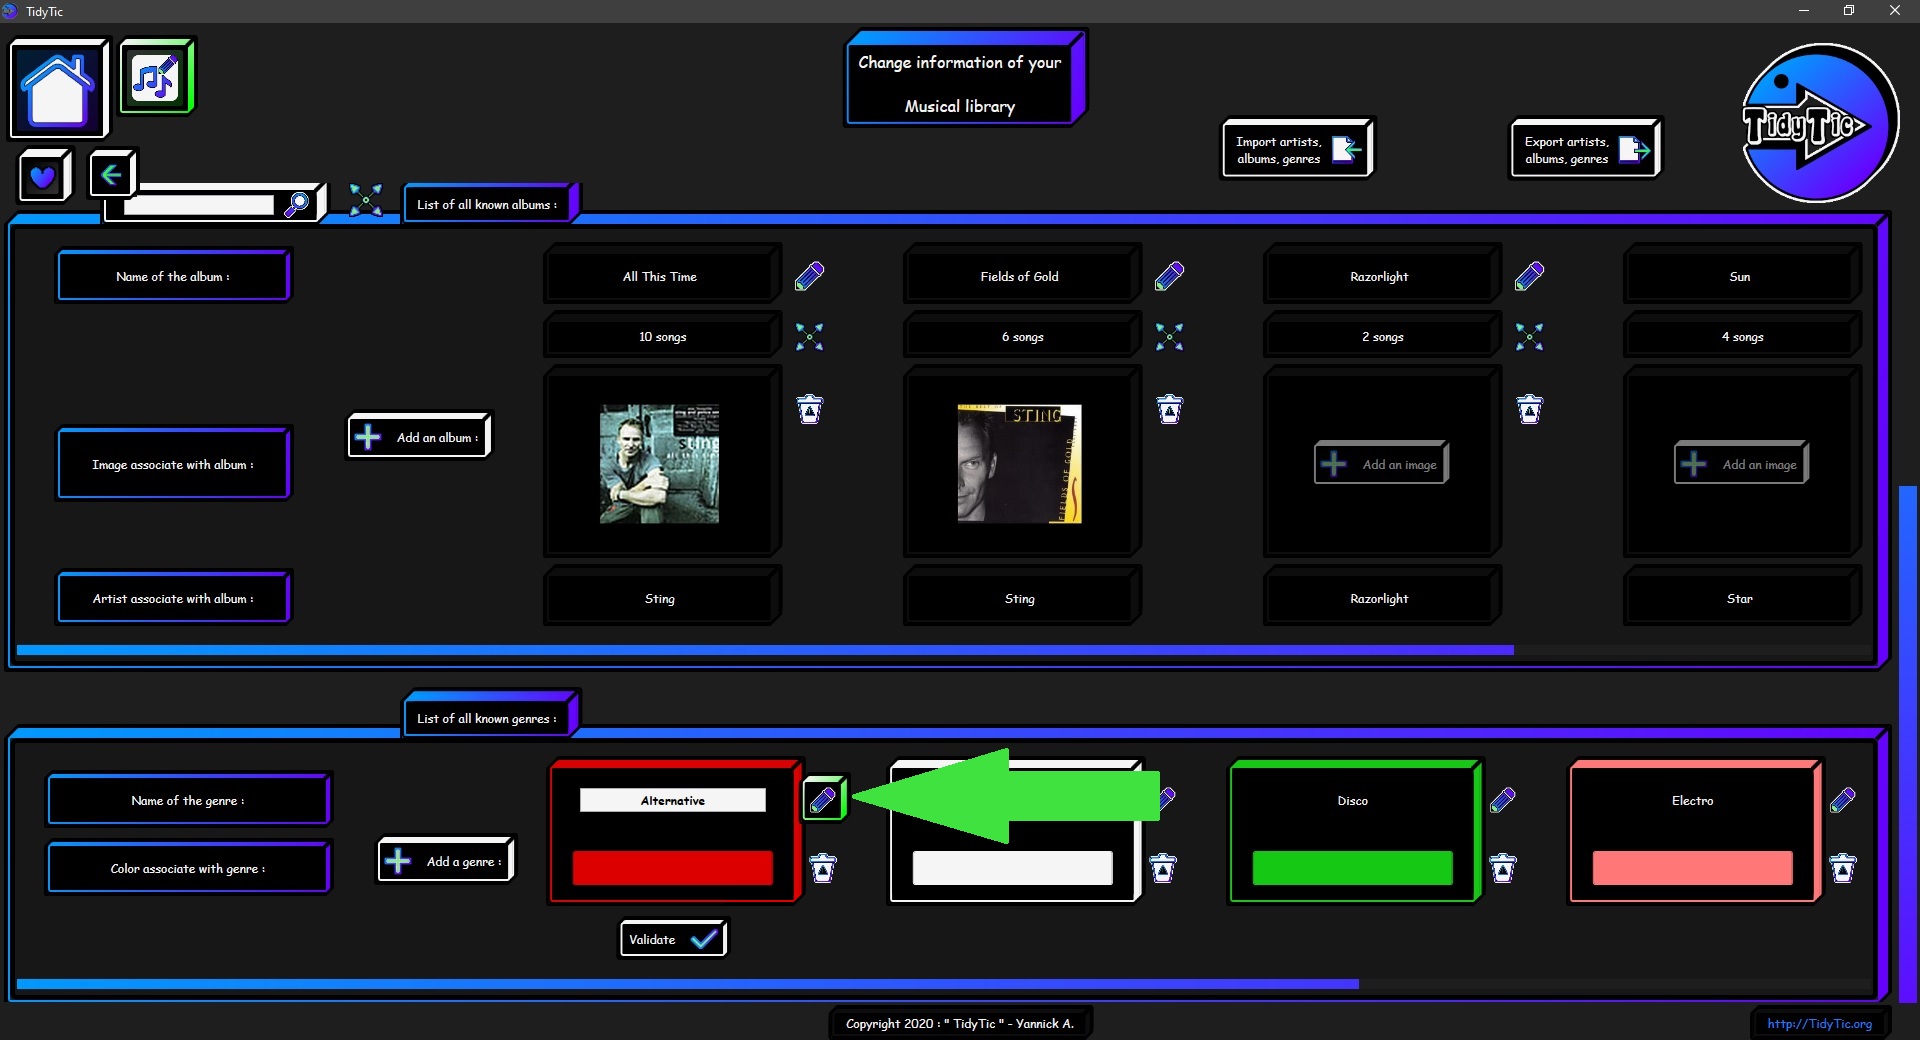
Edit an genre of your musical library :
To make a modification on an genre you will find an icon " ![]() " next to this one.
" next to this one.
The genre will then go into modification mode.
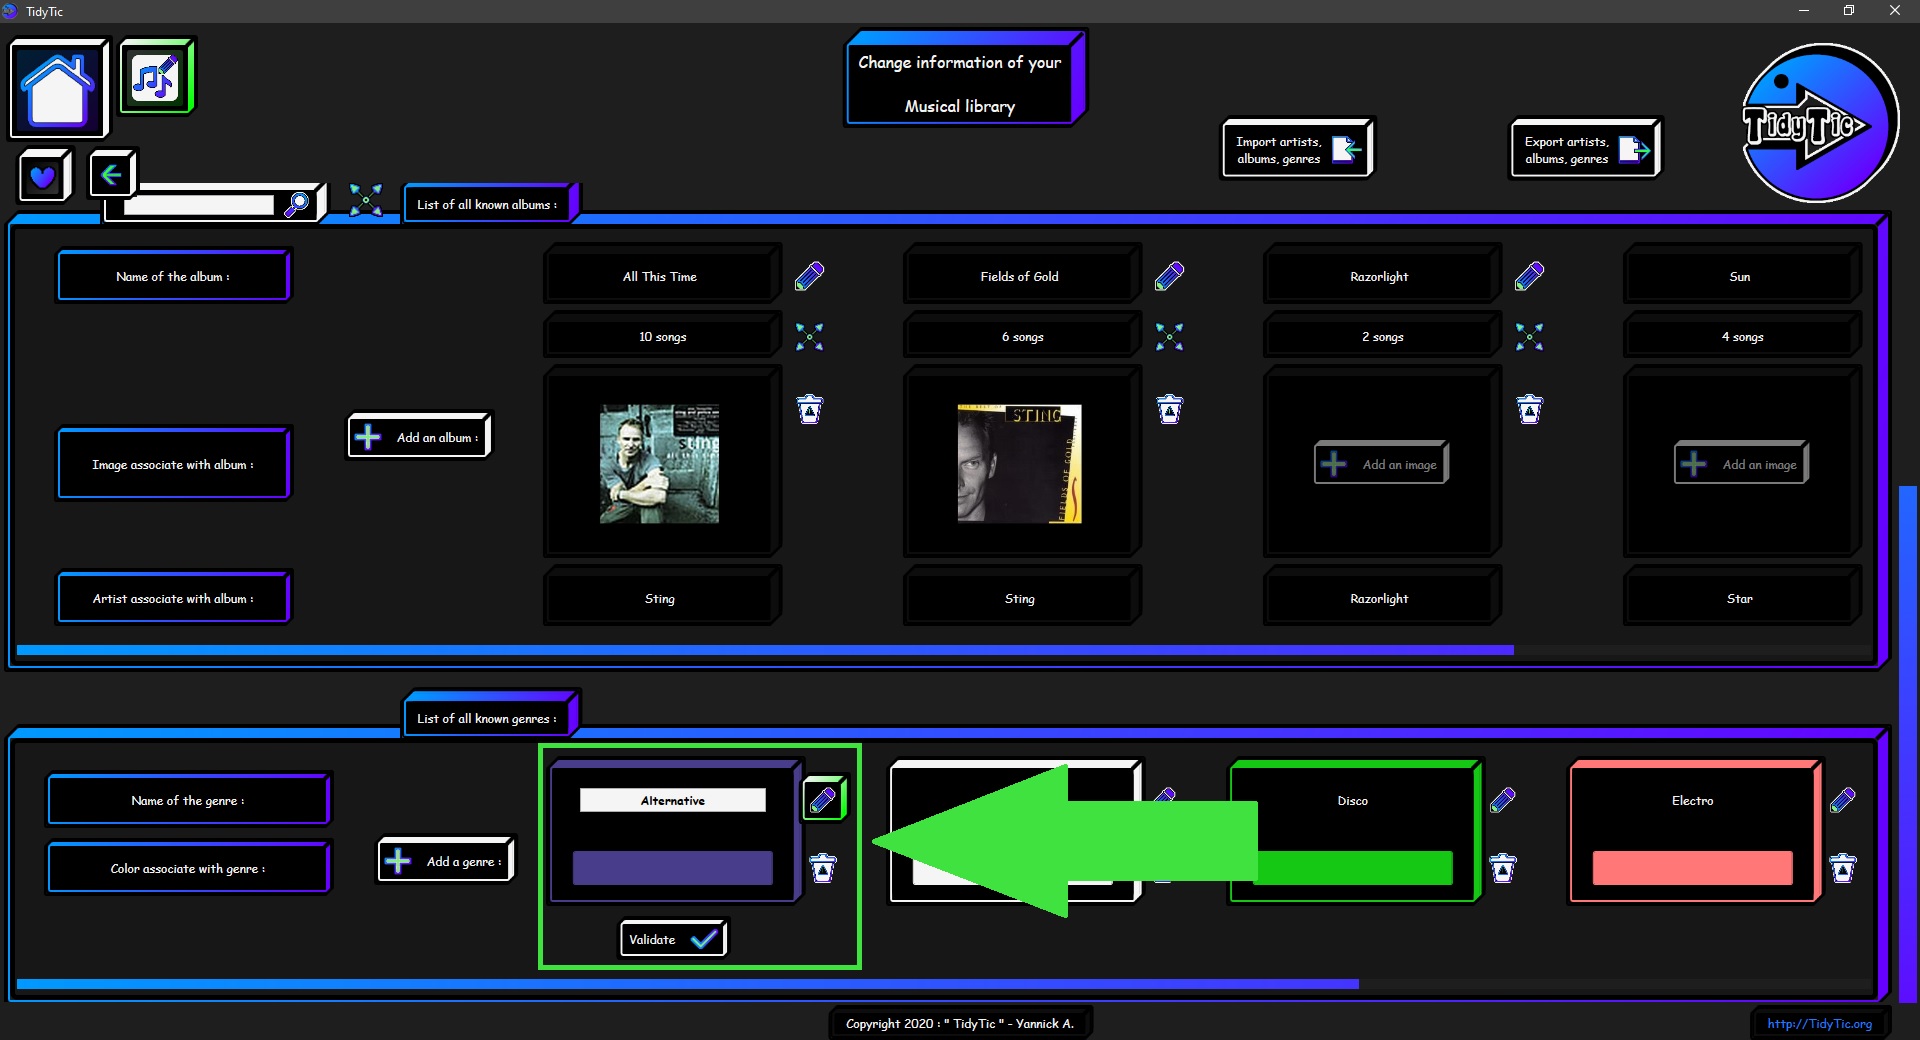
You can then change its name.
When you change the name of an genre from this page, the change will also be made on all music associated with this genre.
The information contained in the file itself will be updated.
So these changes will be visible on all audio player from which you will read the file.
You can also change the color associated with the genre.
 ____
____ 
Once the modifications have been made, you still have to validate it.
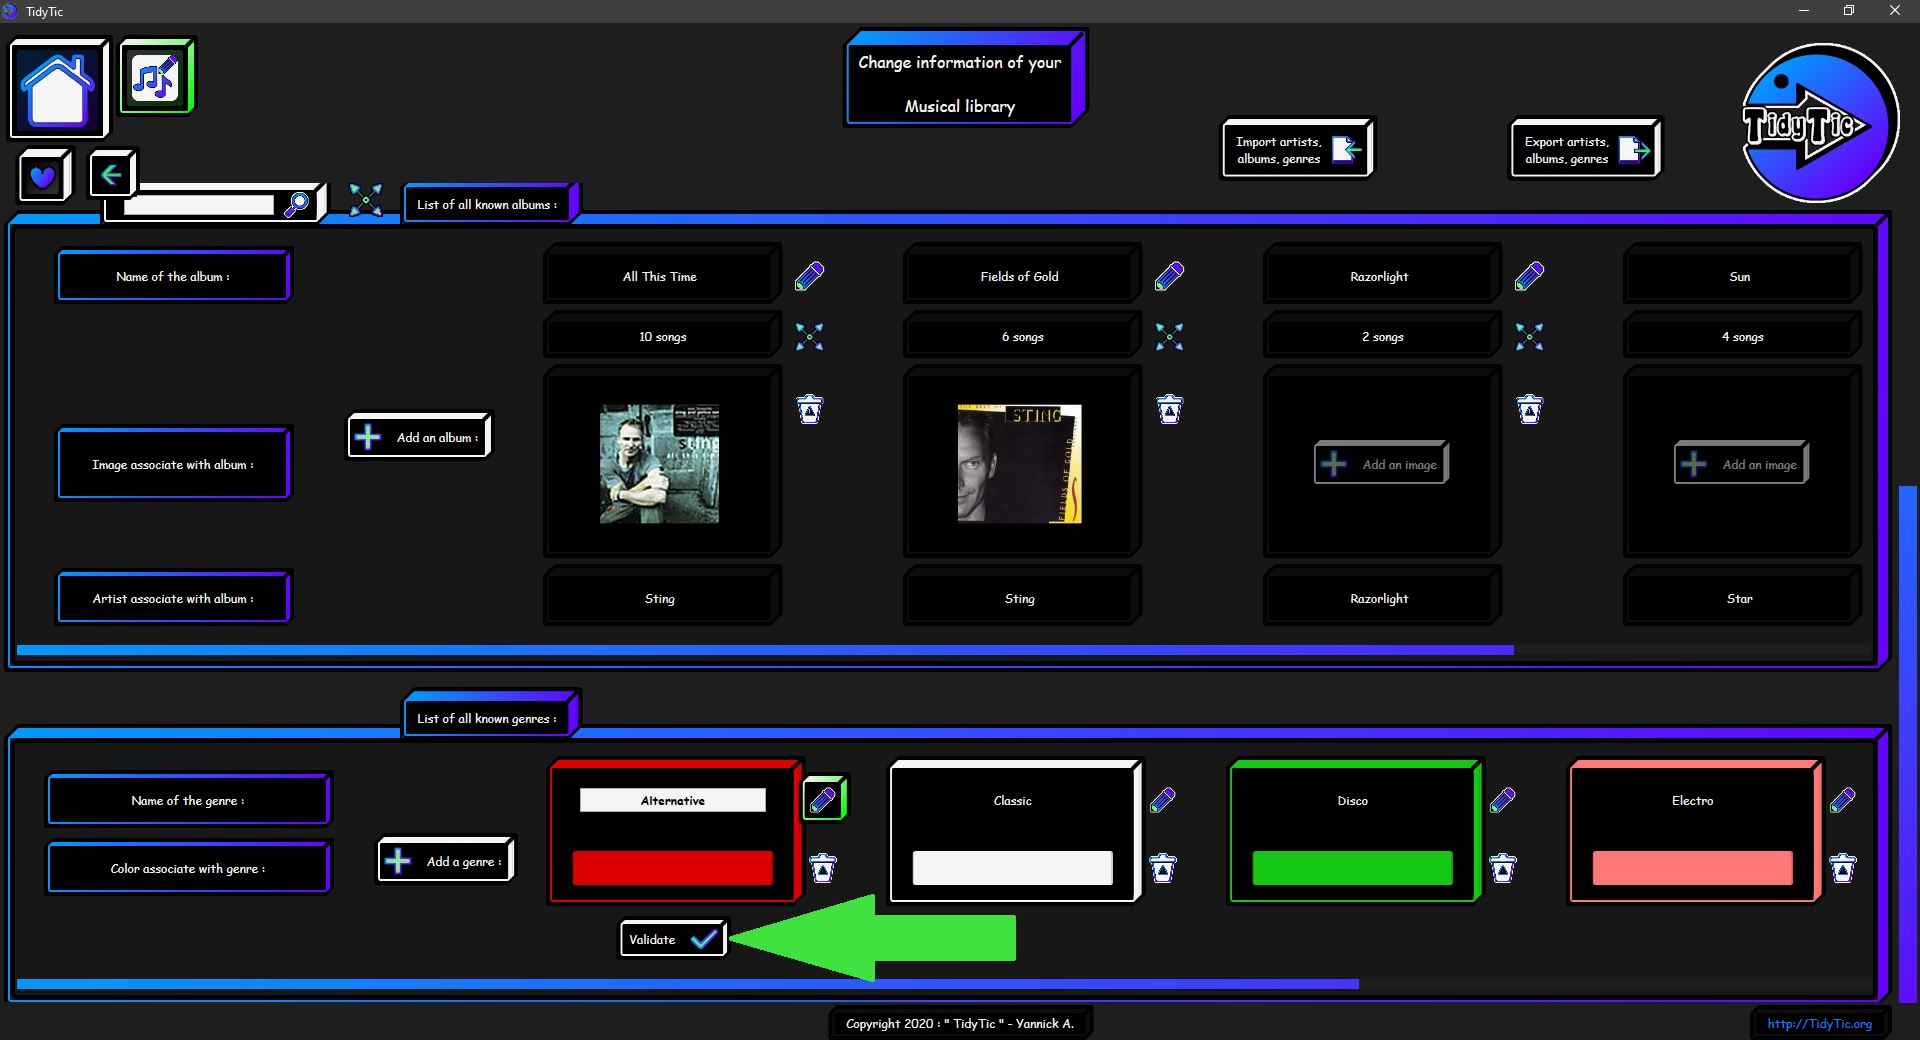
To cancel a modification, simply click on the " ![]() " icon.
" icon.
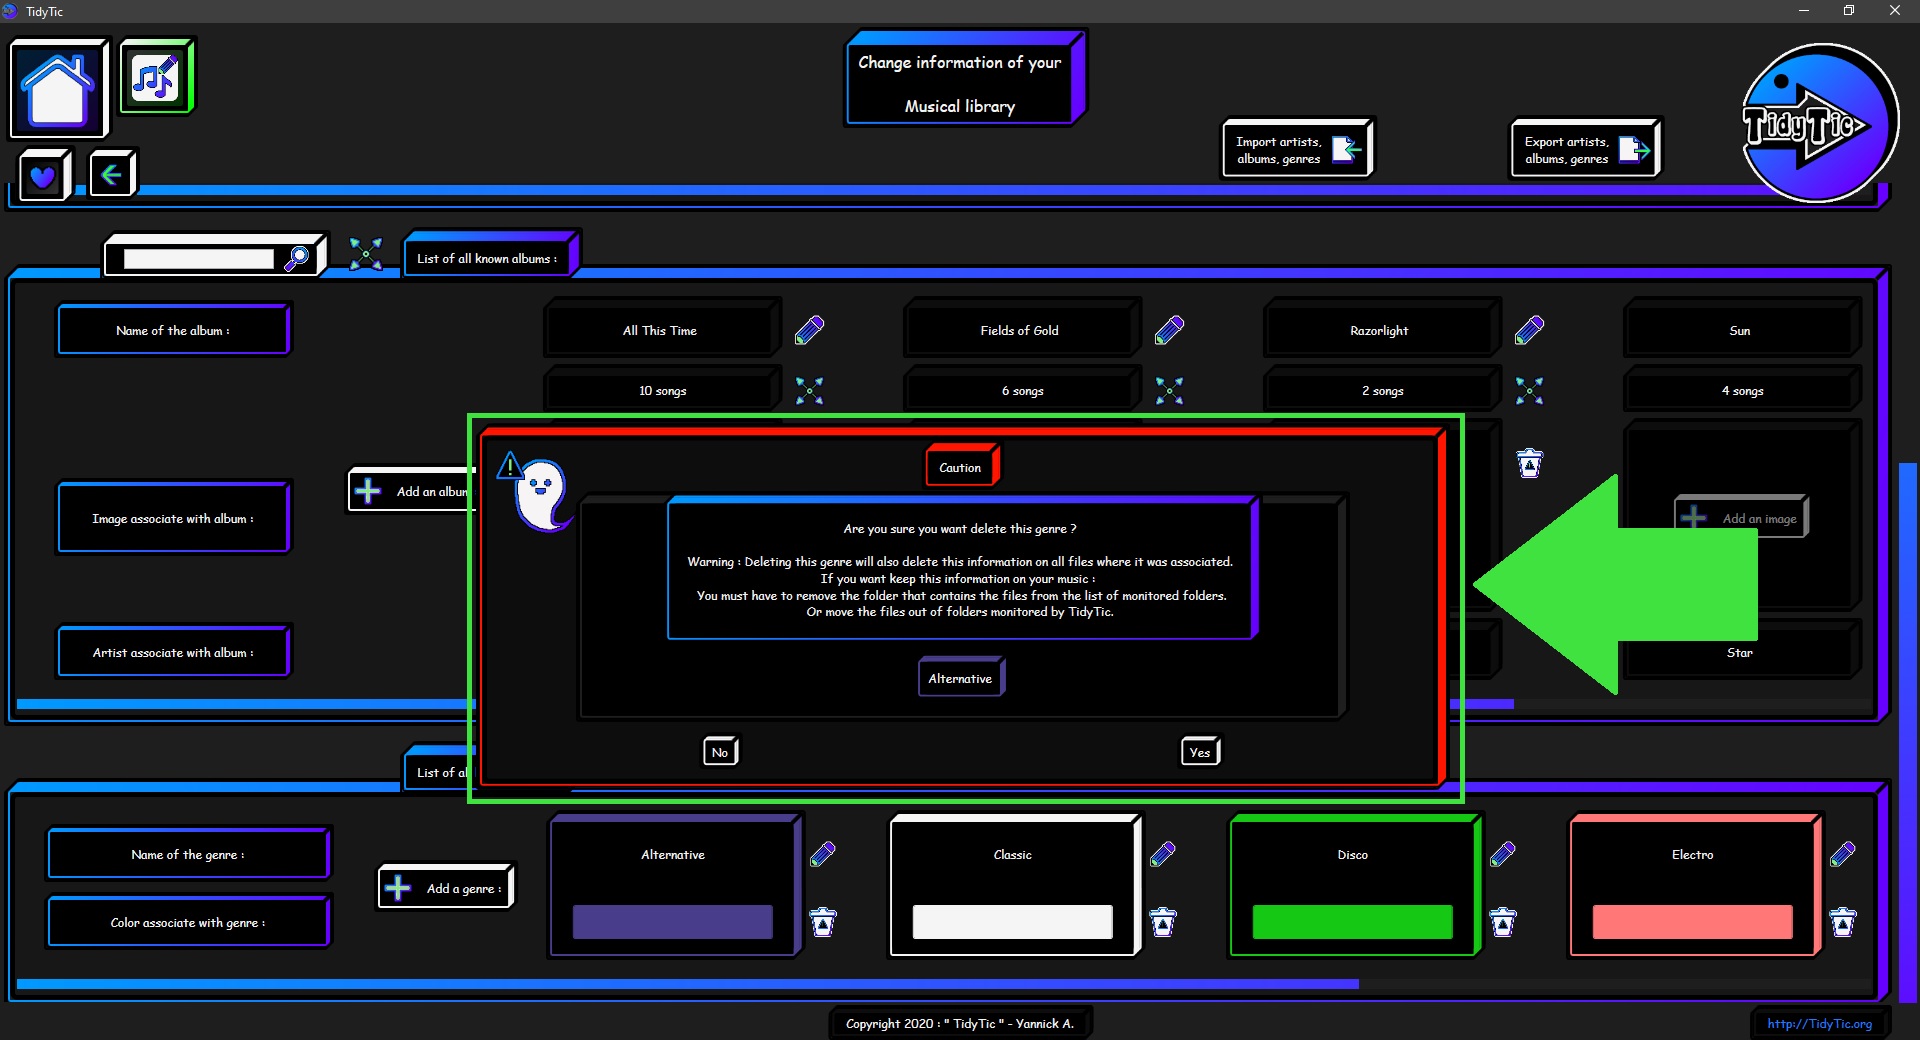
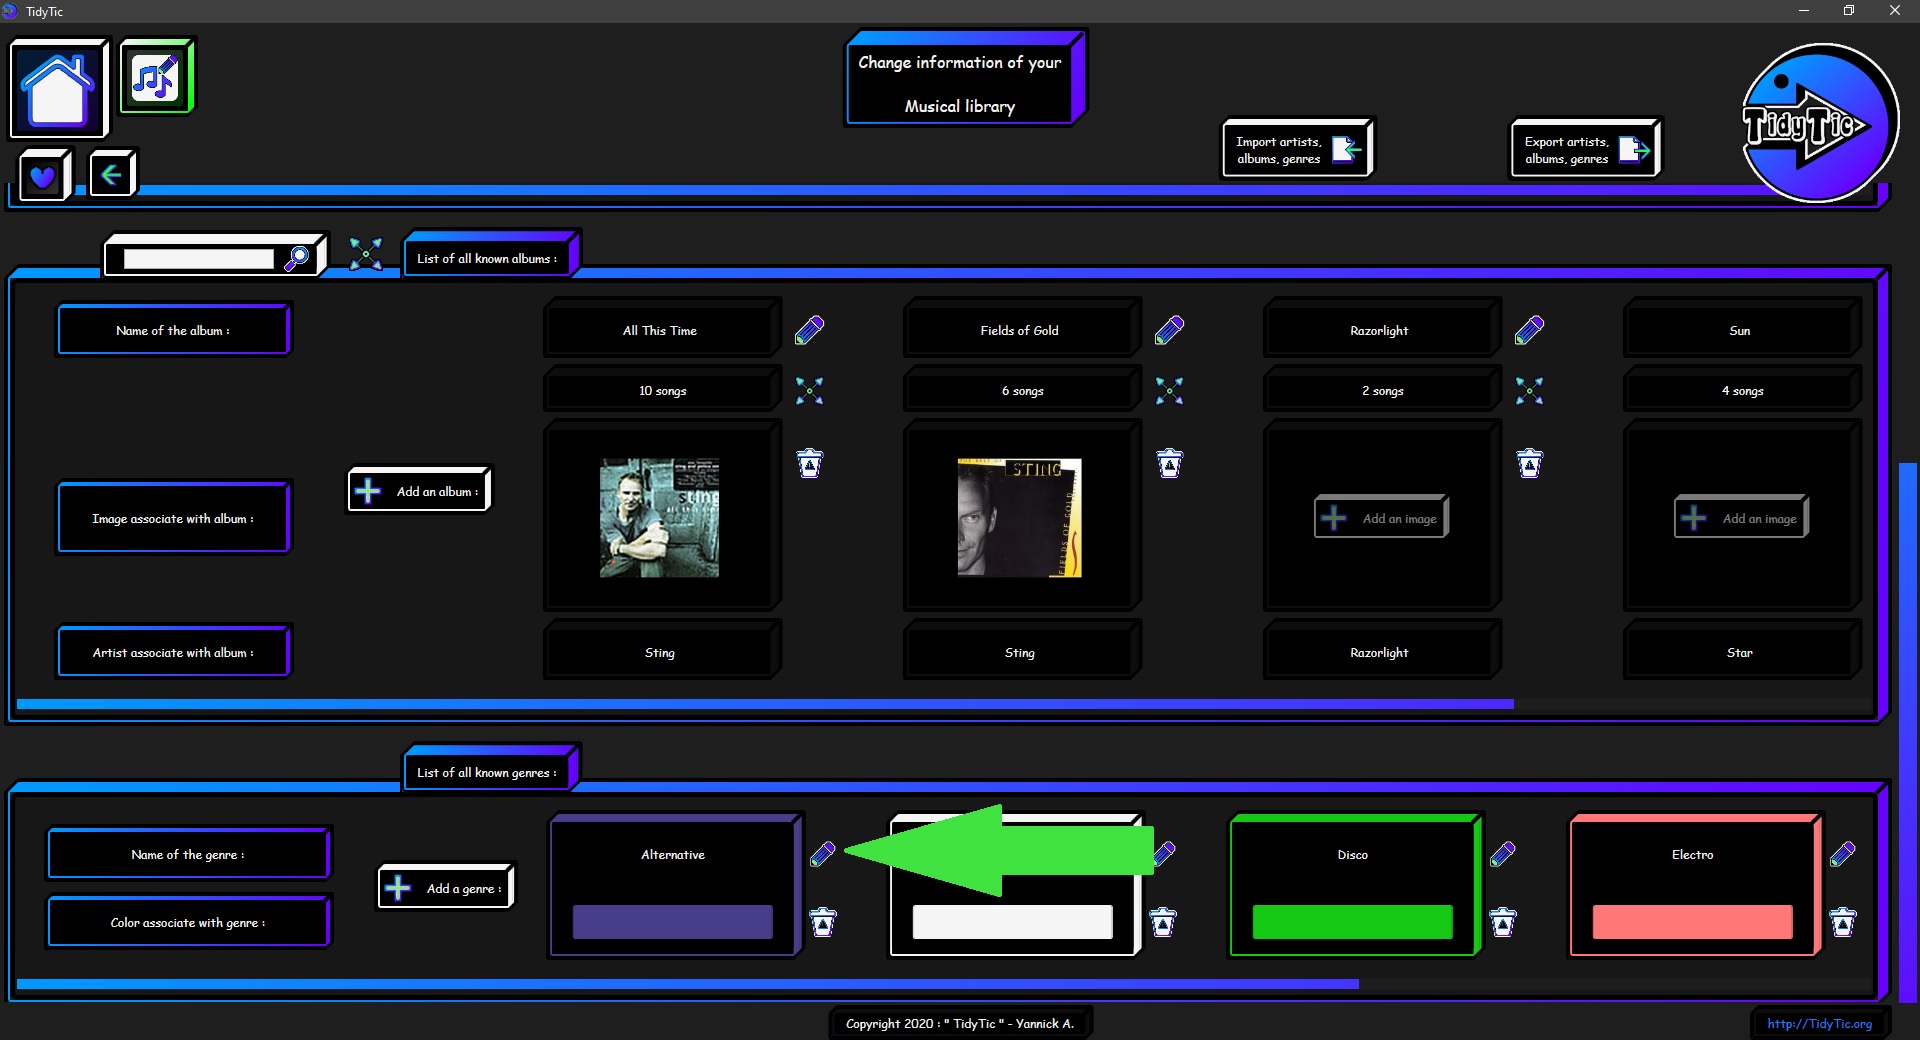
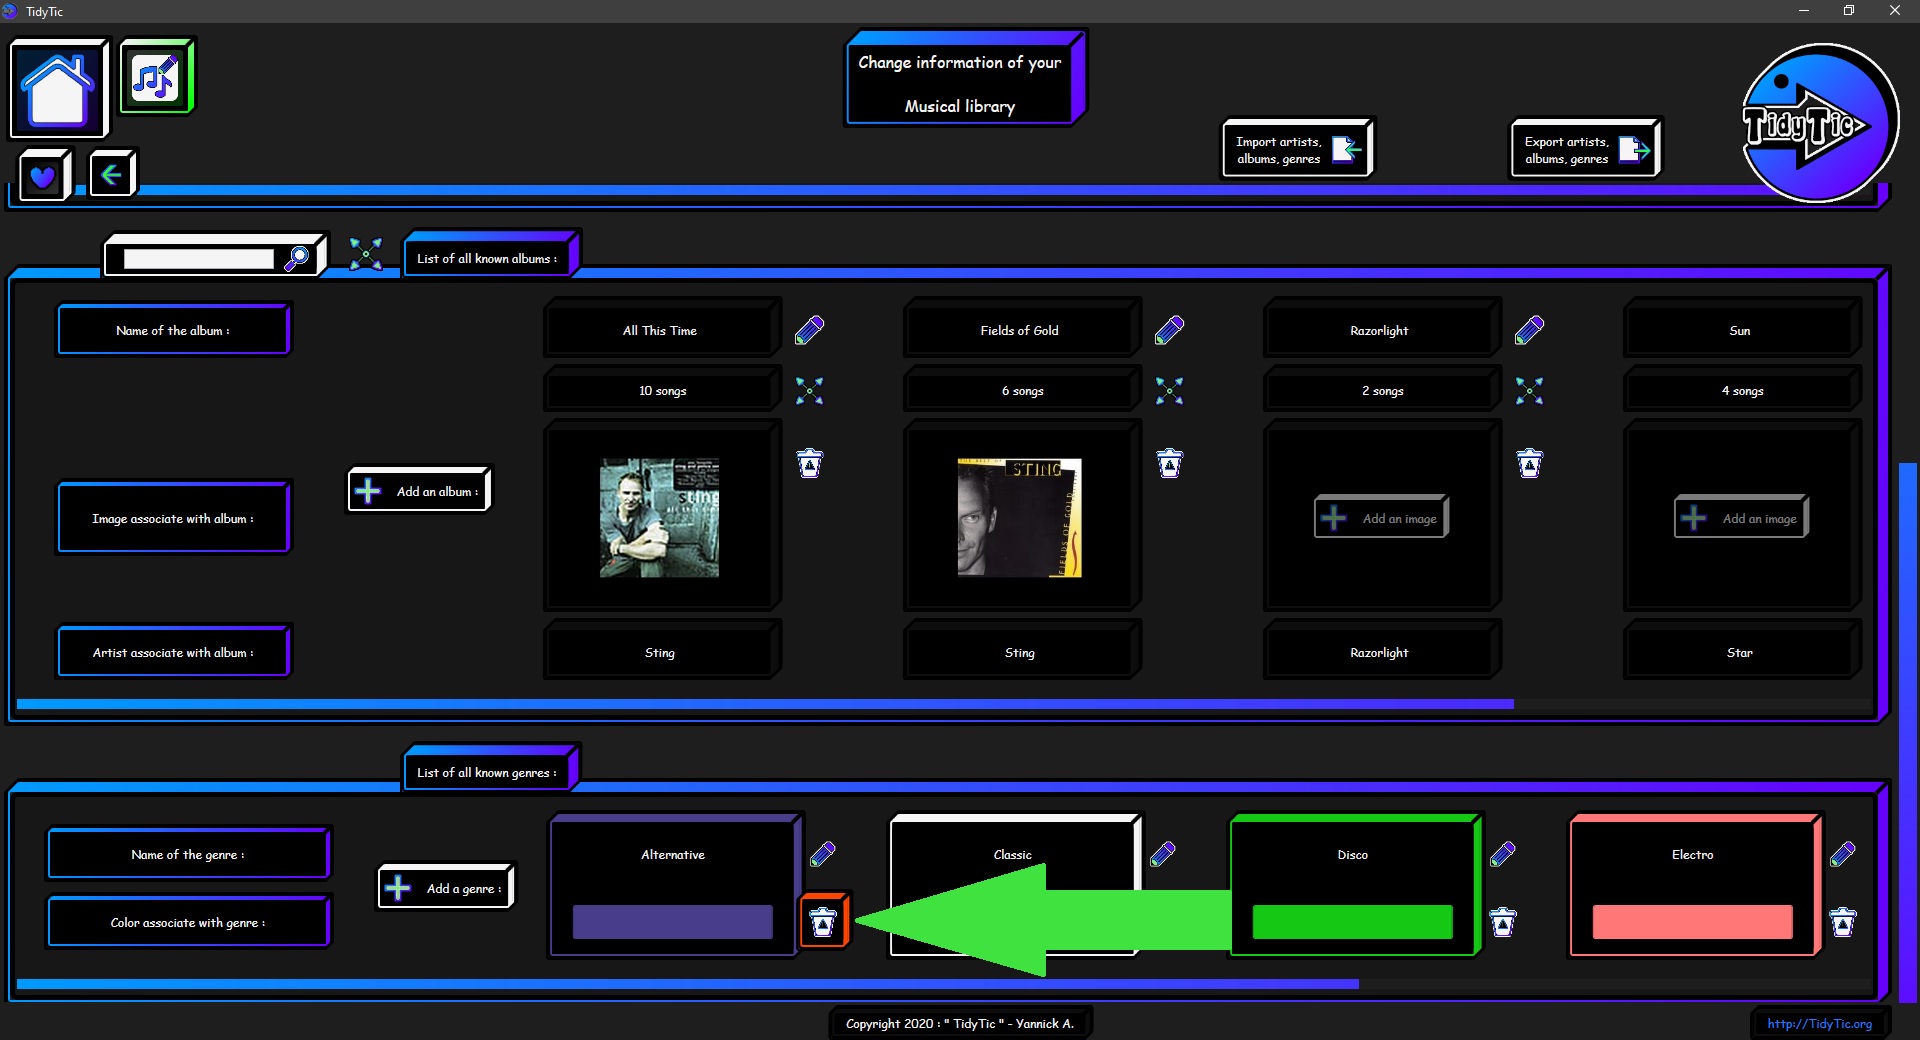
Delete an genre from your musical library :
To delete an genre from your musical library, double left click on the " ![]() " icon.
" icon.
A message will ask you to confirm the deletion of the genre.
If you delete an genre, this genre will also be deleted from the information of all musics with which he was associated.
If you want to keep this information on musics where it is present, you must have to place the files outside of folders monitored by TidyTic.
 ____
____