How to modify and personalize the types, subtypes, tags in TidyTic ?
All the types, subtypes, tags that you have in TidyTic can be completely personalized.
They are the ones that allow you to use the full potential of the software : they allow you to view all your files more easily by viewing by type or by filters, for example.
TidyTic lets you modify them as you see fit : create new ones, change the color or name of those already present, change the file formats that are associated with the type.
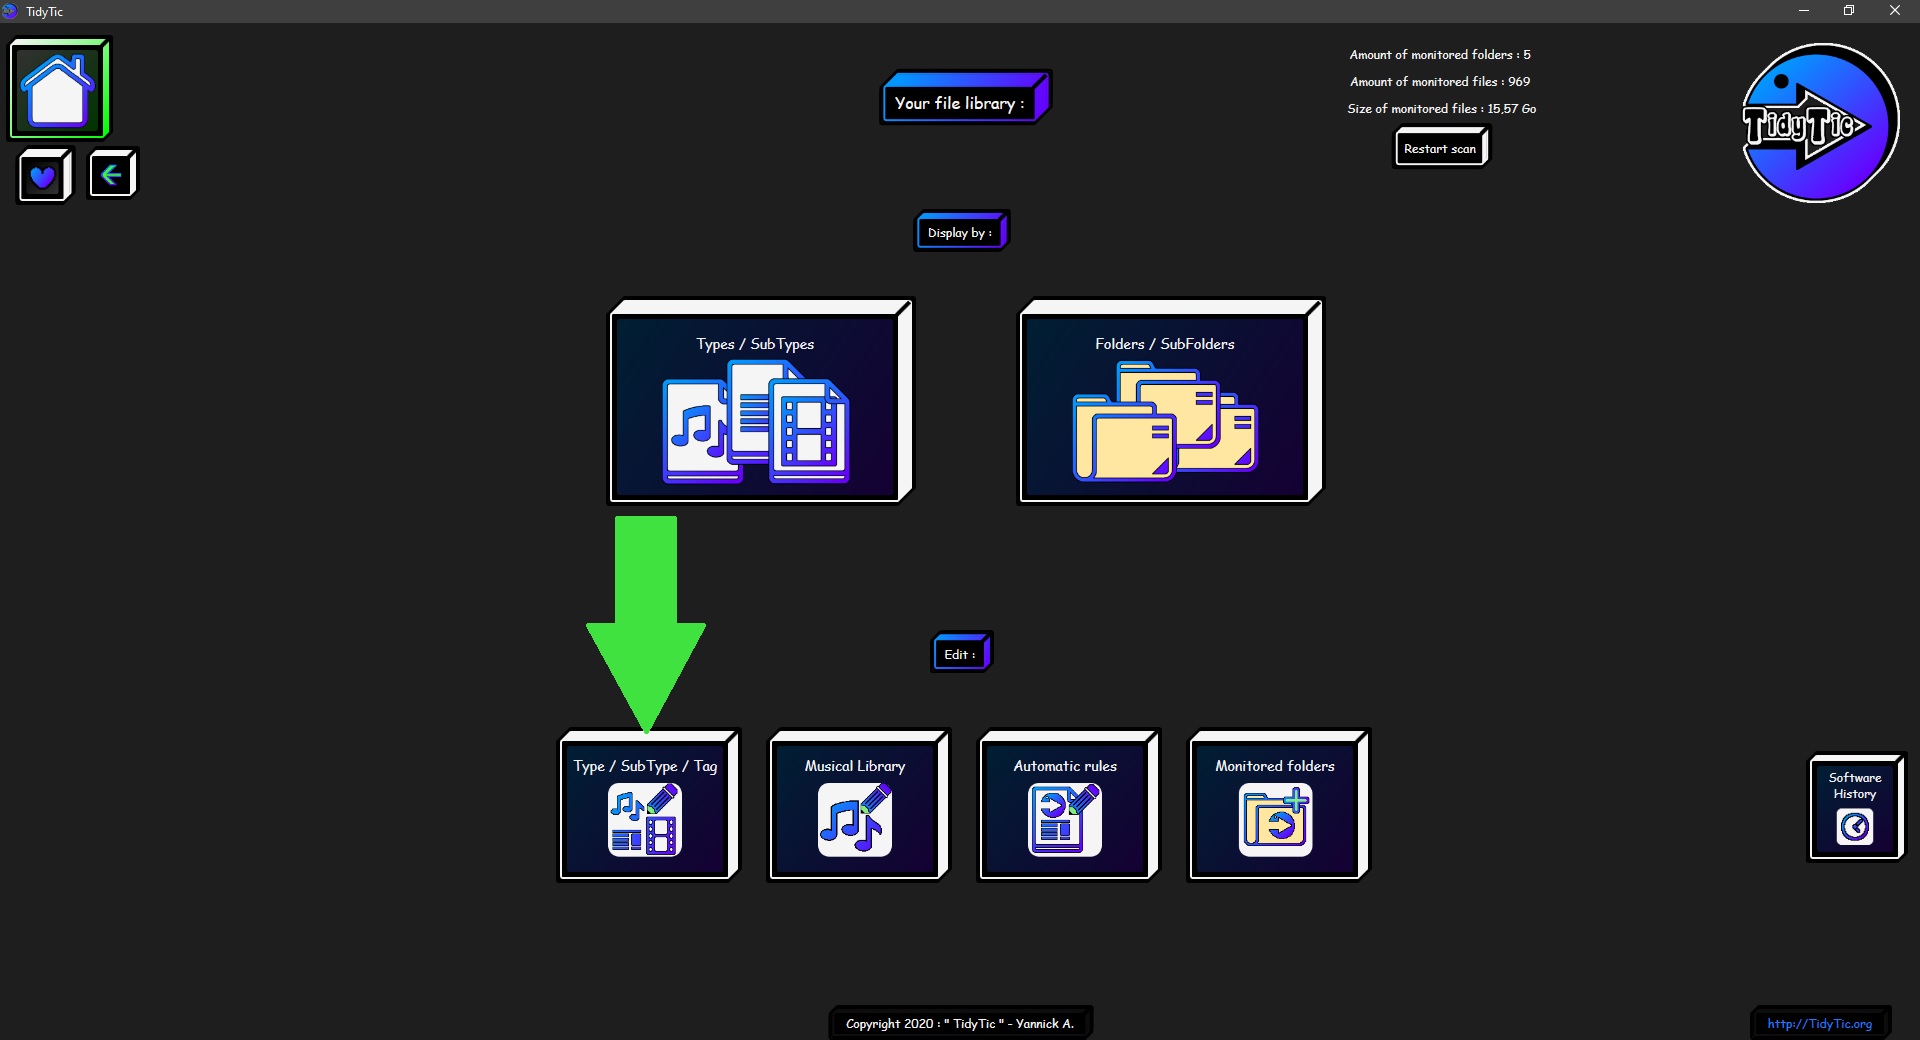
To make all these modifications, go to the edit : “Type / Sub-type / Tag” page of the software.
You will find the shortcut for this page on the software home page.
Types and subtypes in TidyTic :
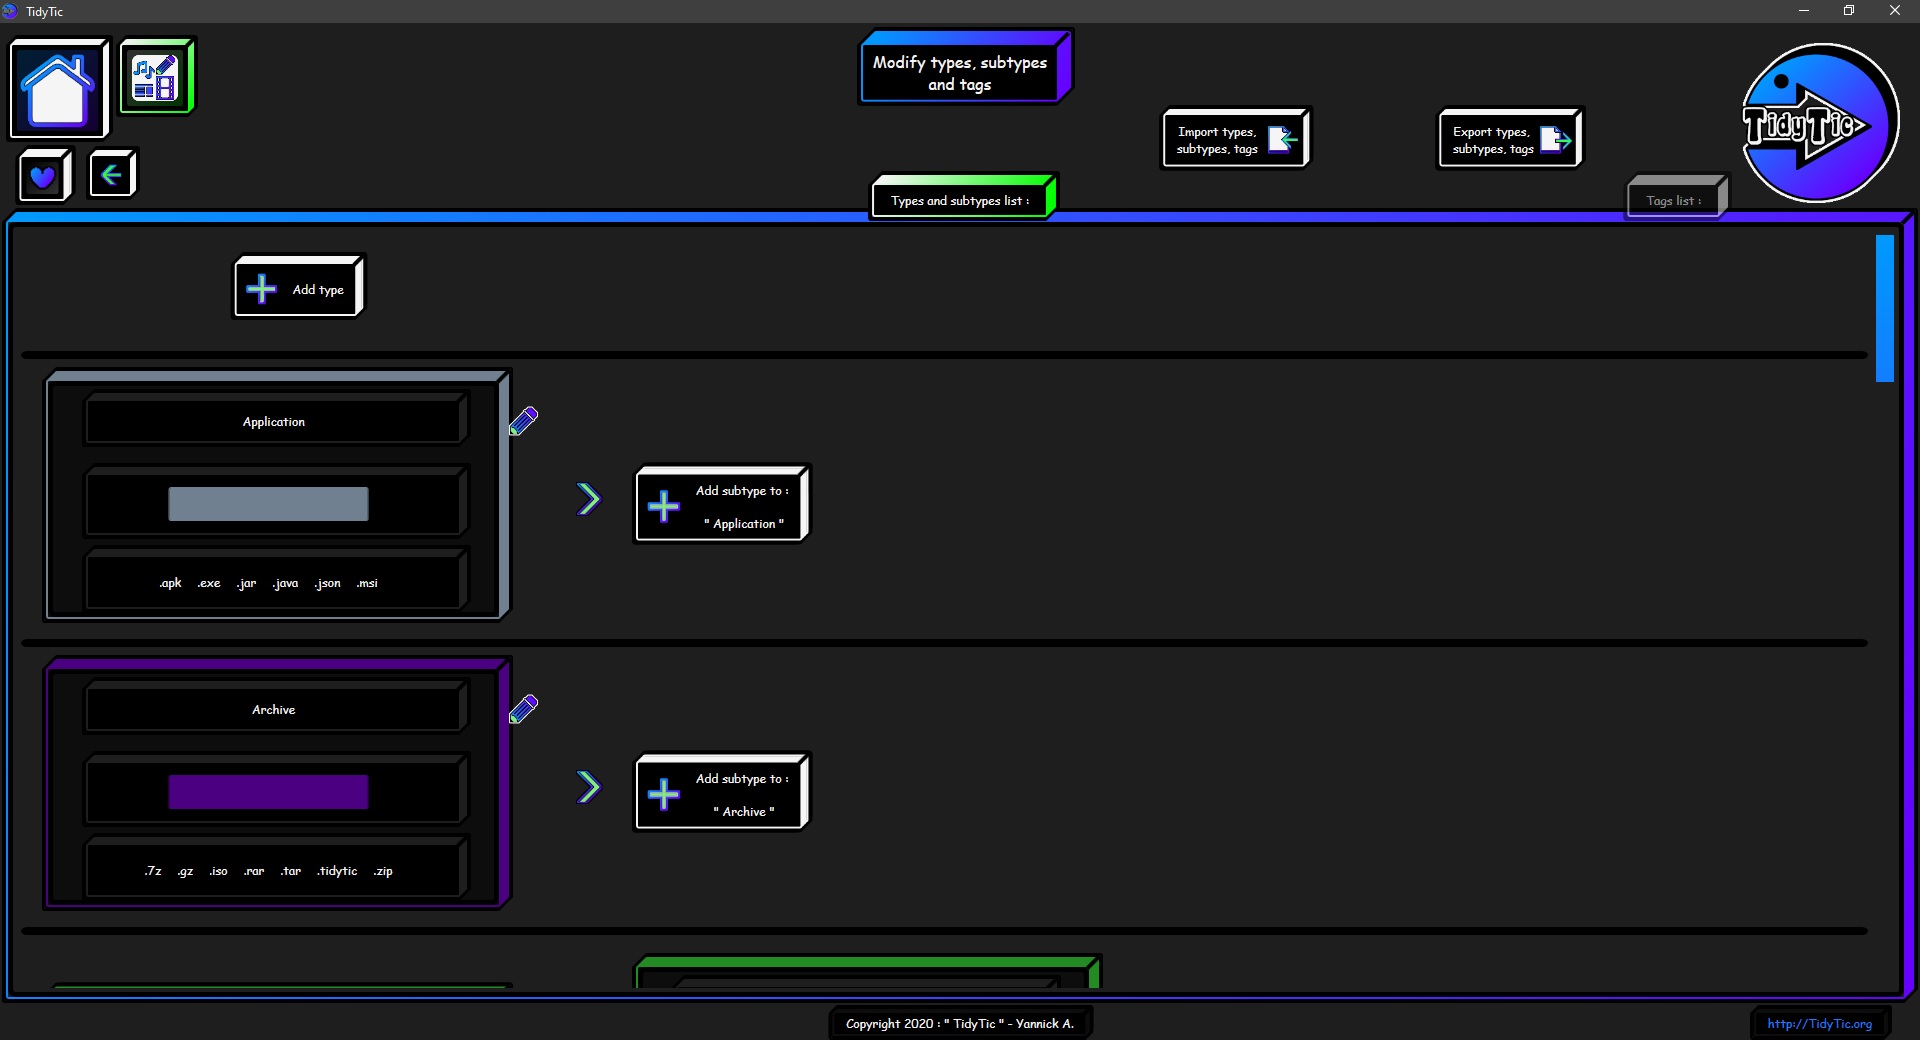
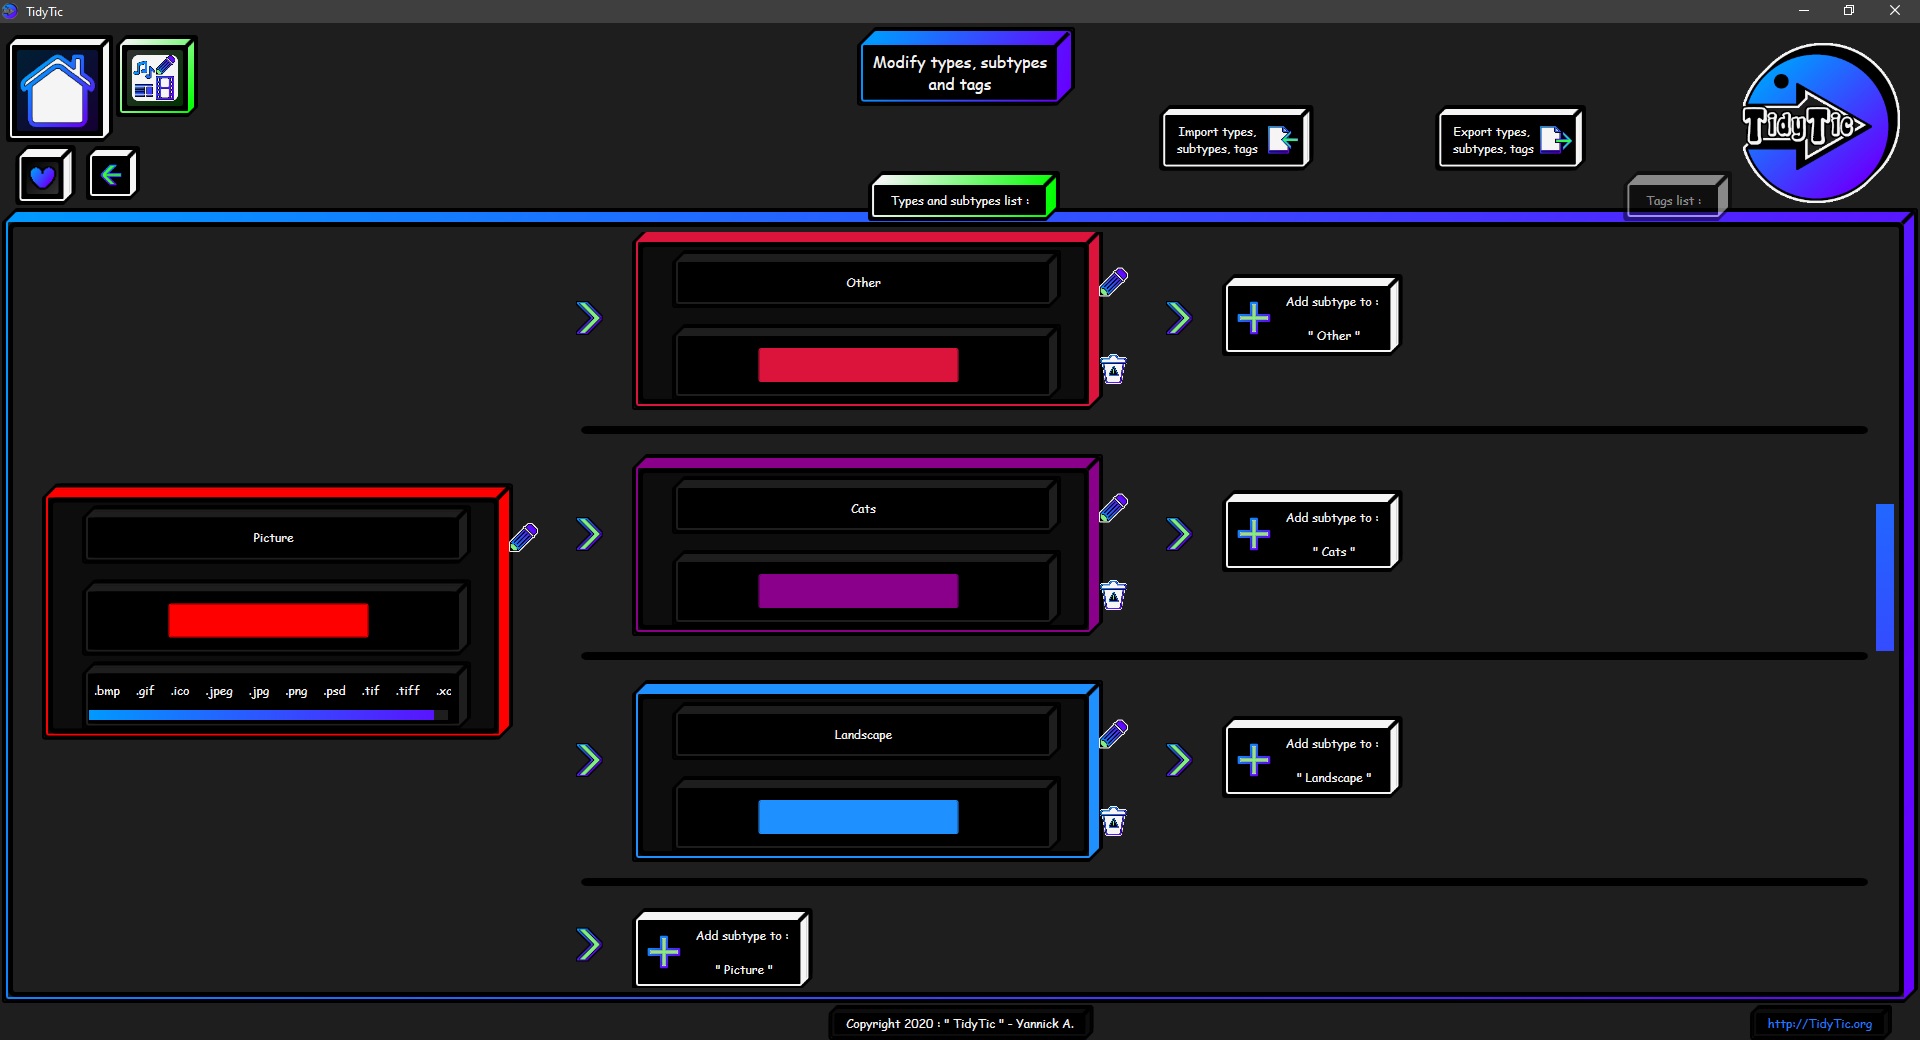
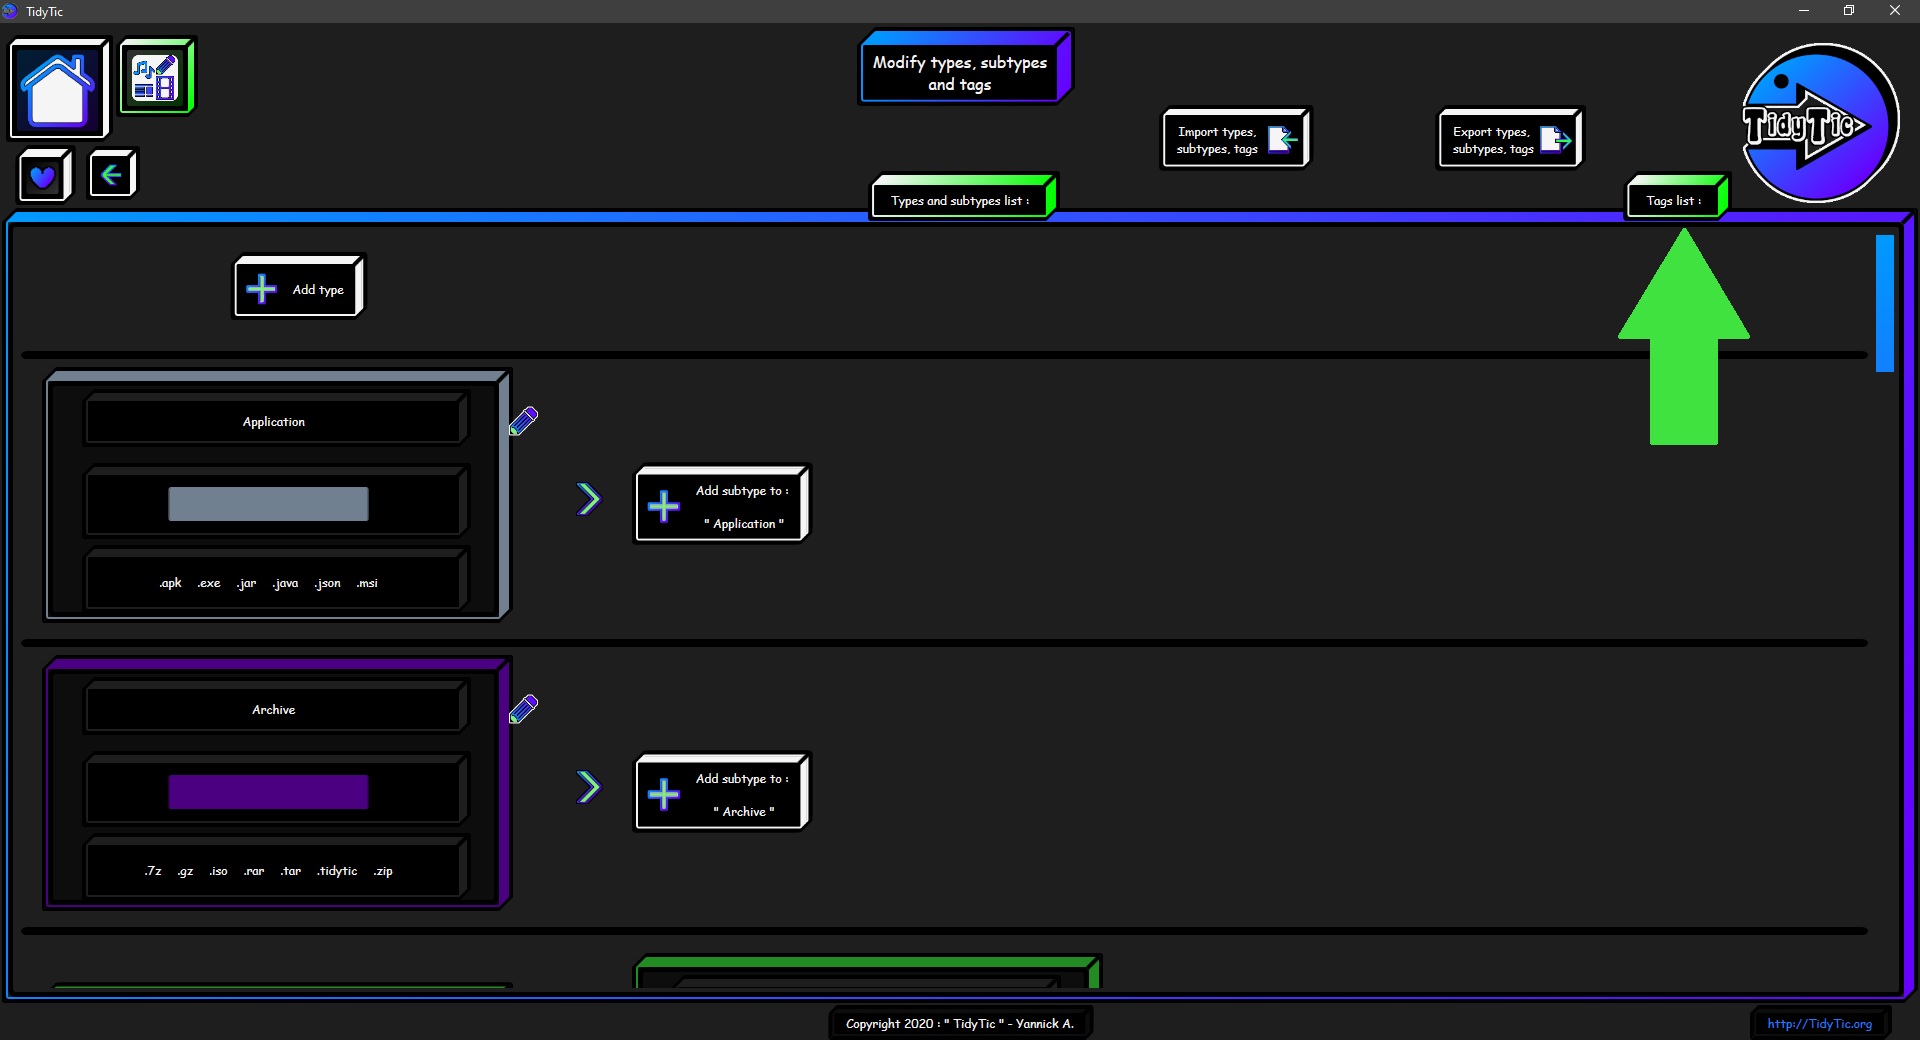
This page is very easy to use thanks to its presentation which will allow you to easily see the types present as well as their subtypes :
Each type having its line with its subtypes to its right.
You can have as many subtypes as you want for each type.
These subtypes can also have as many subtypes as you need.
 ____
____  ____
____ 
Modify a type :
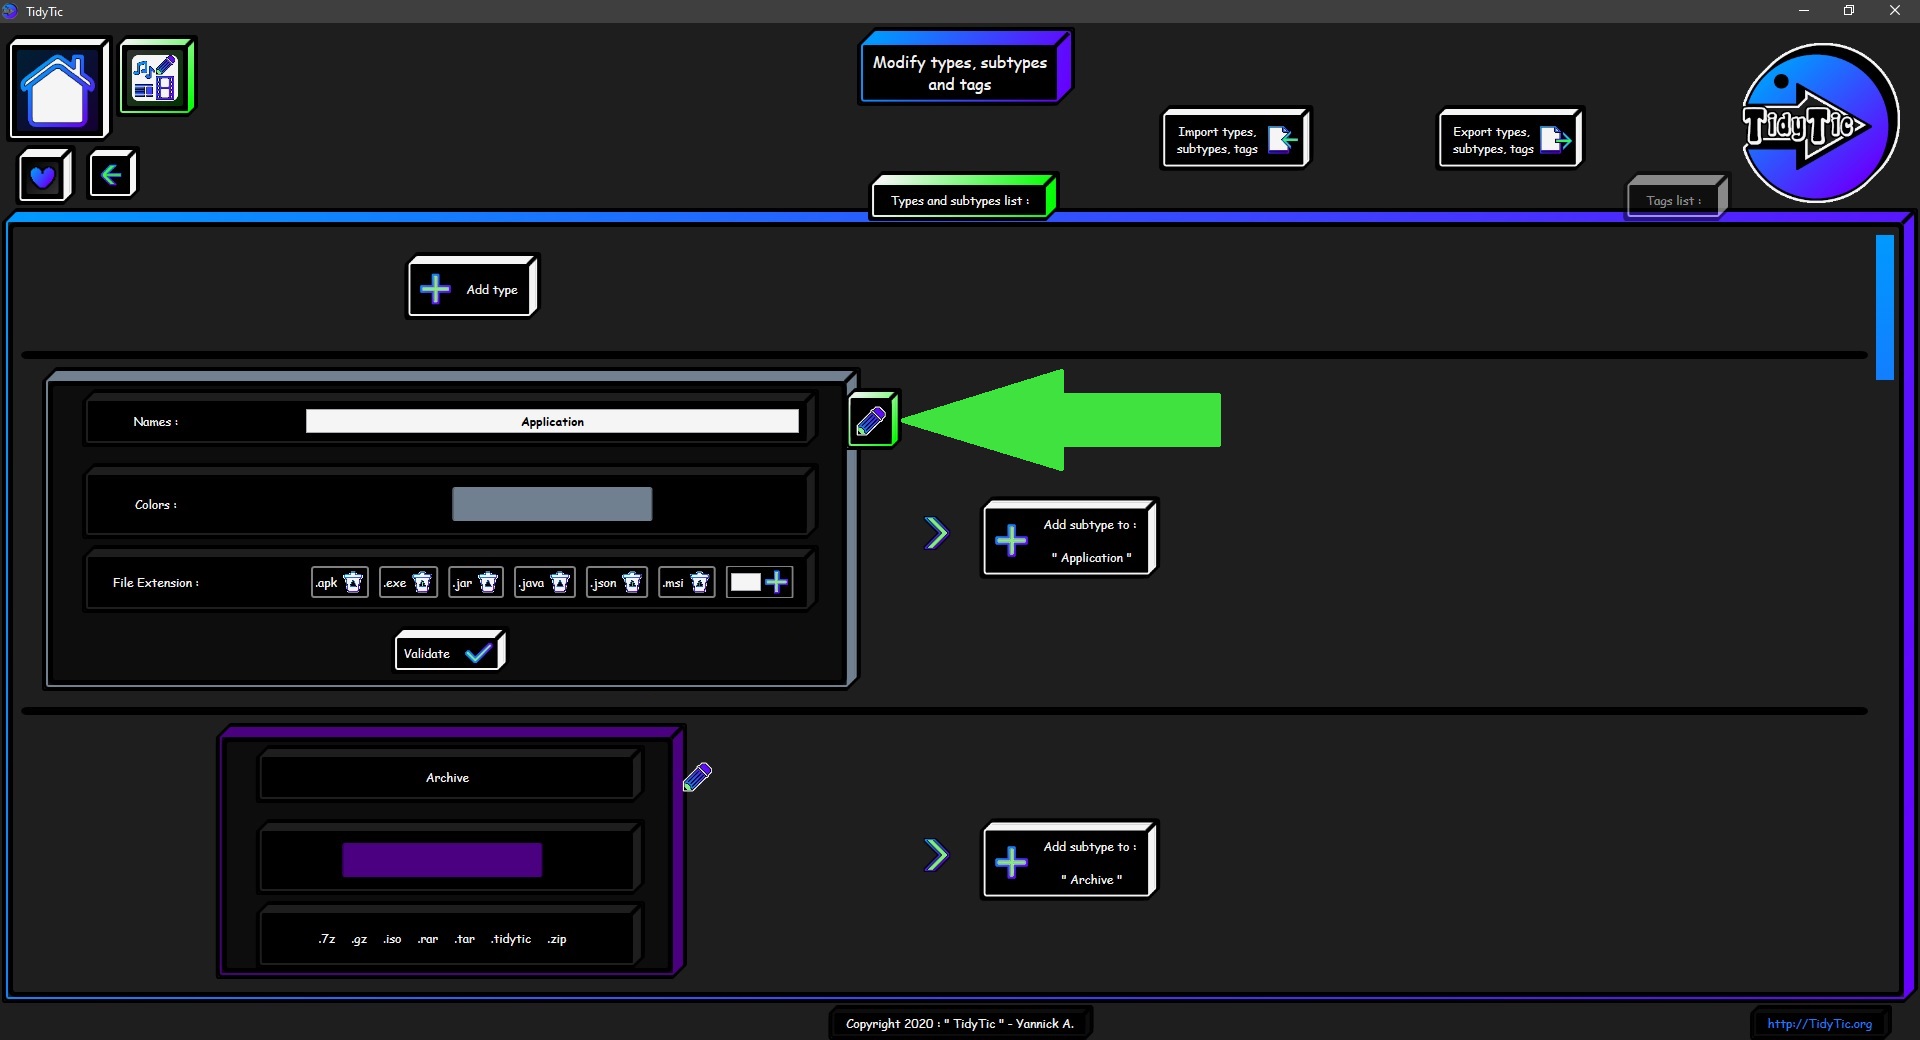
To modify a type, simply click on the modification icon " ![]() " to the right of each type.
" to the right of each type.
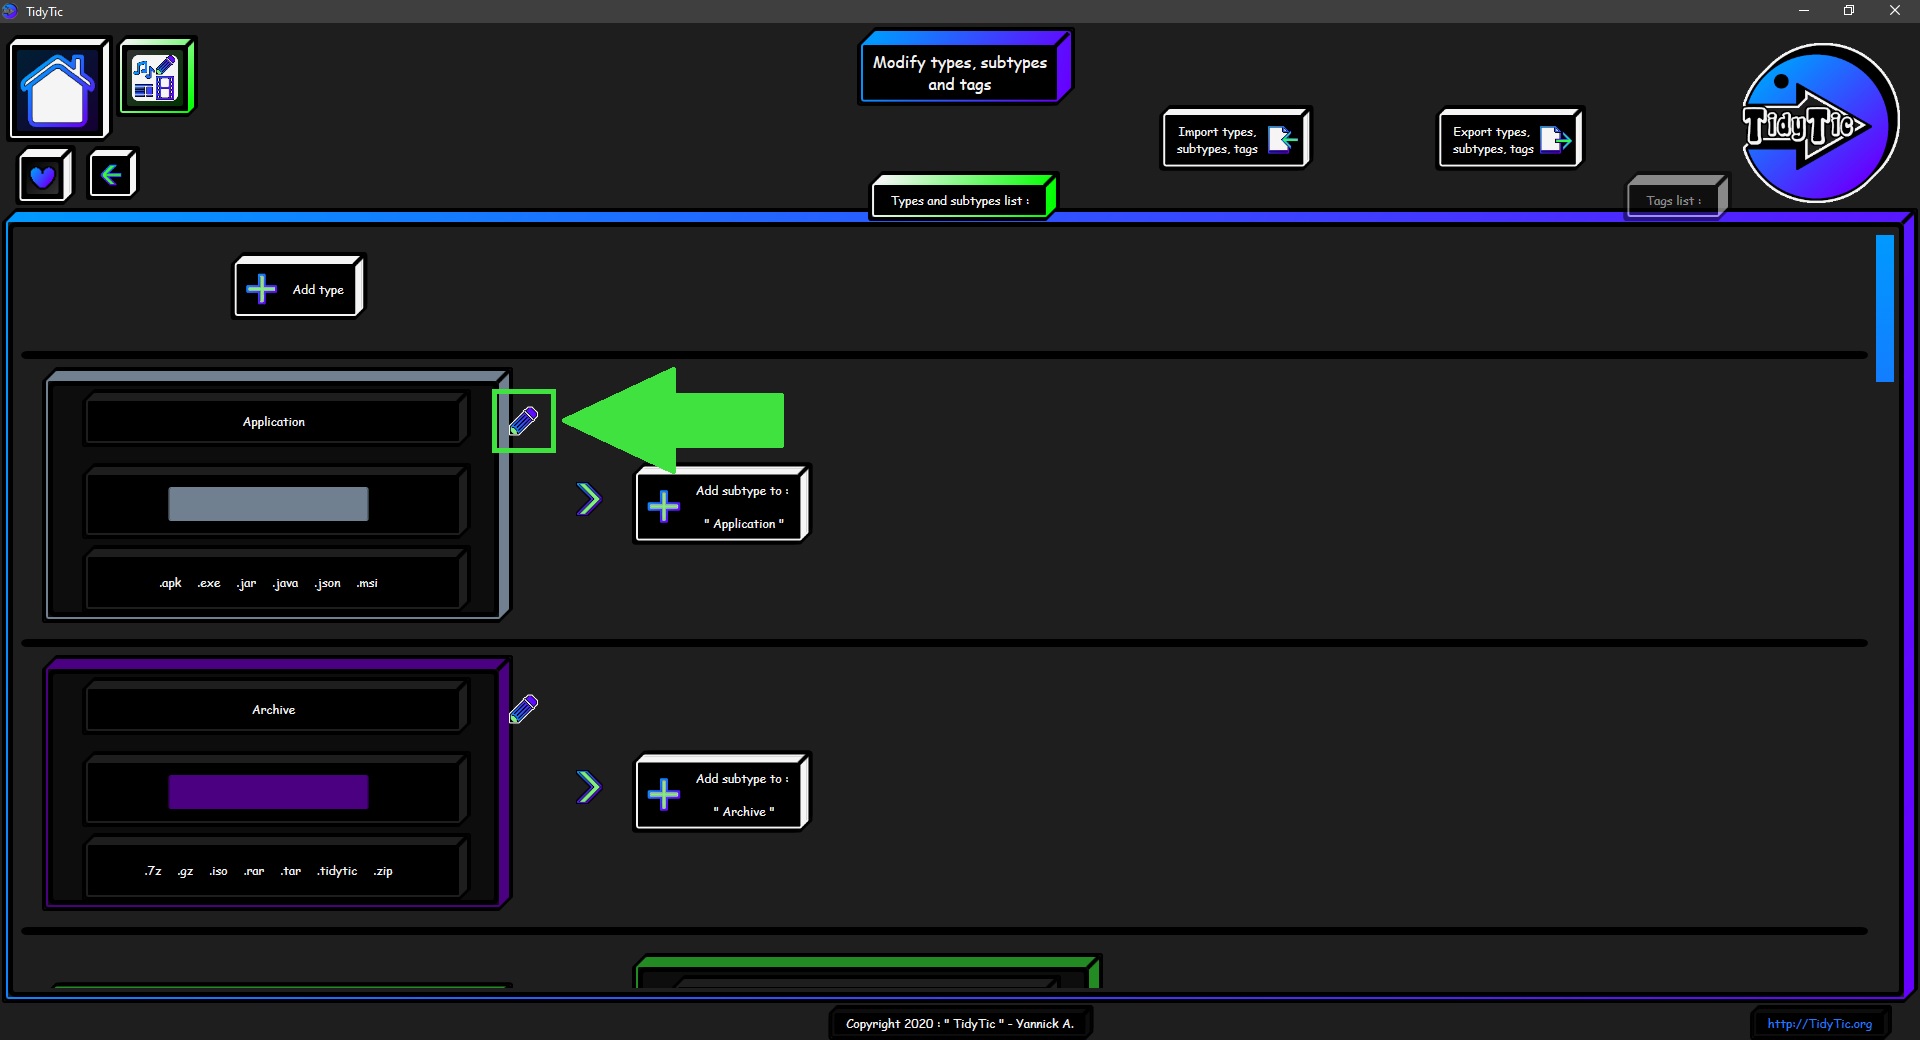
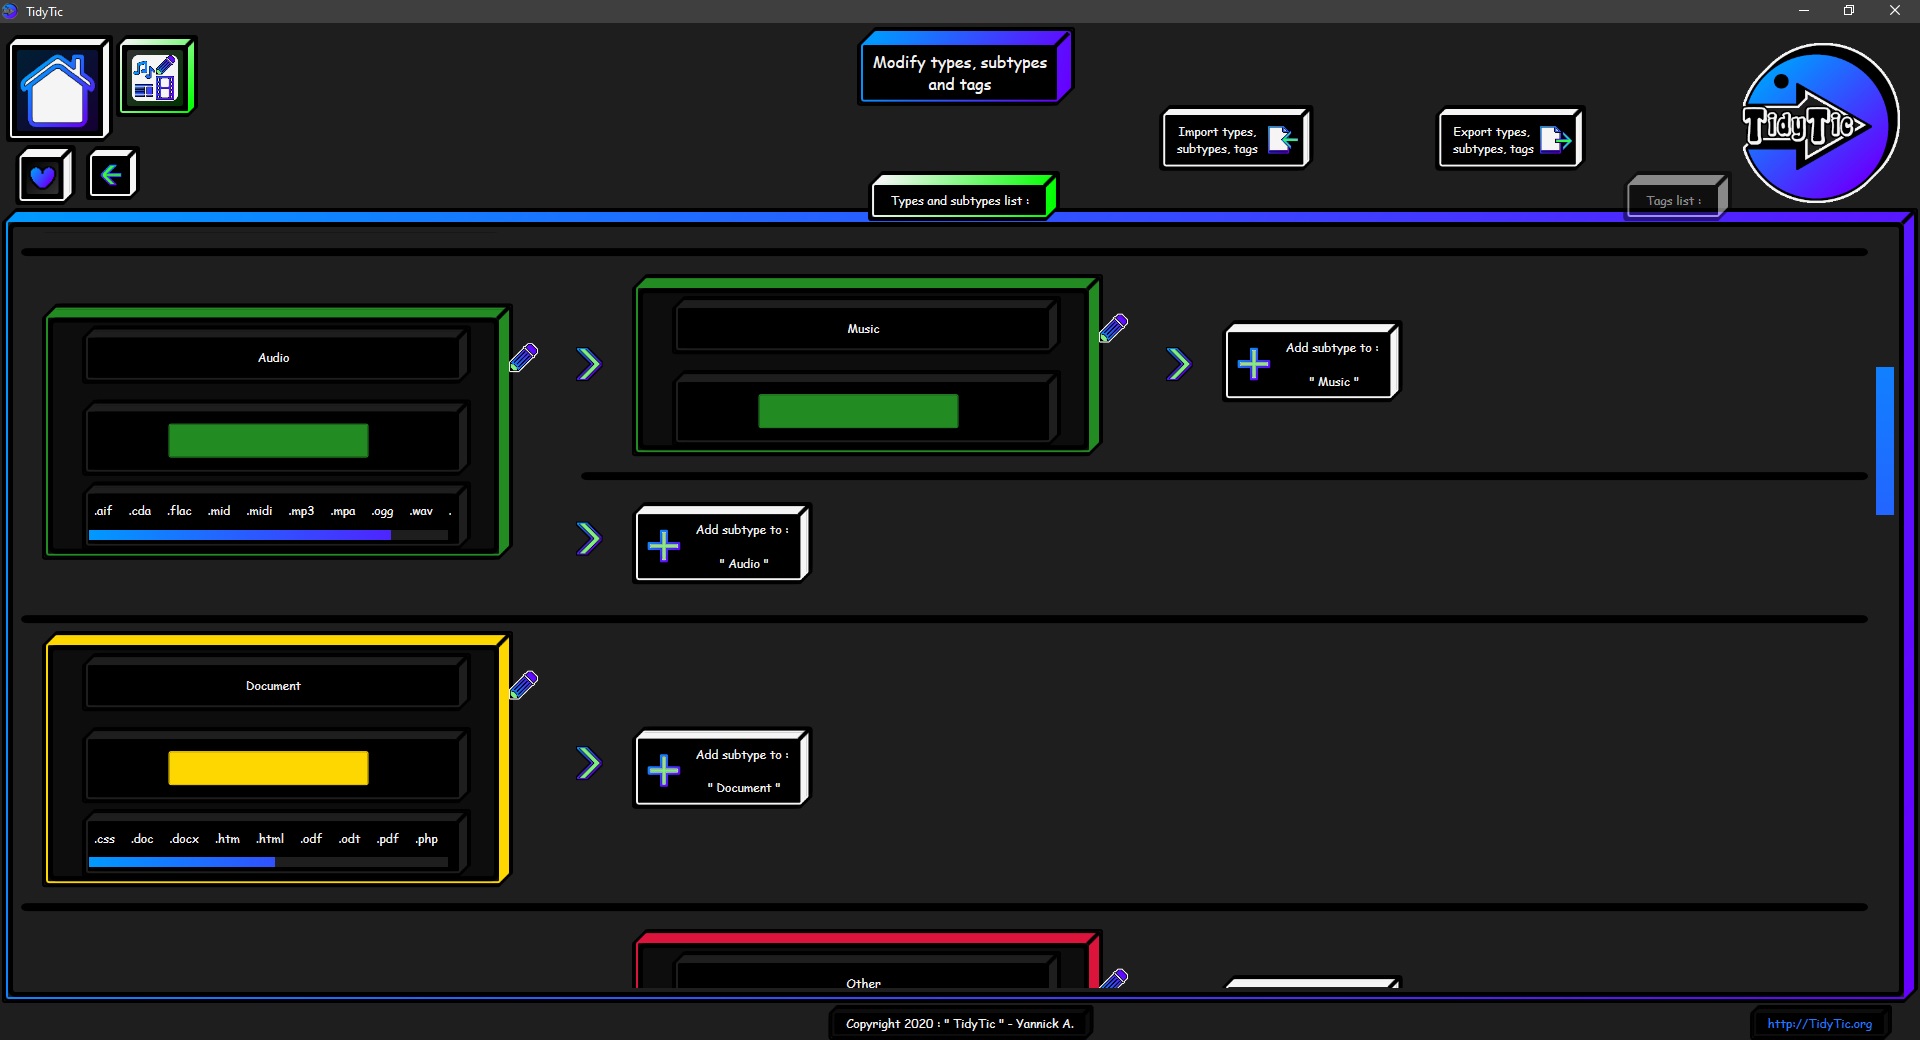
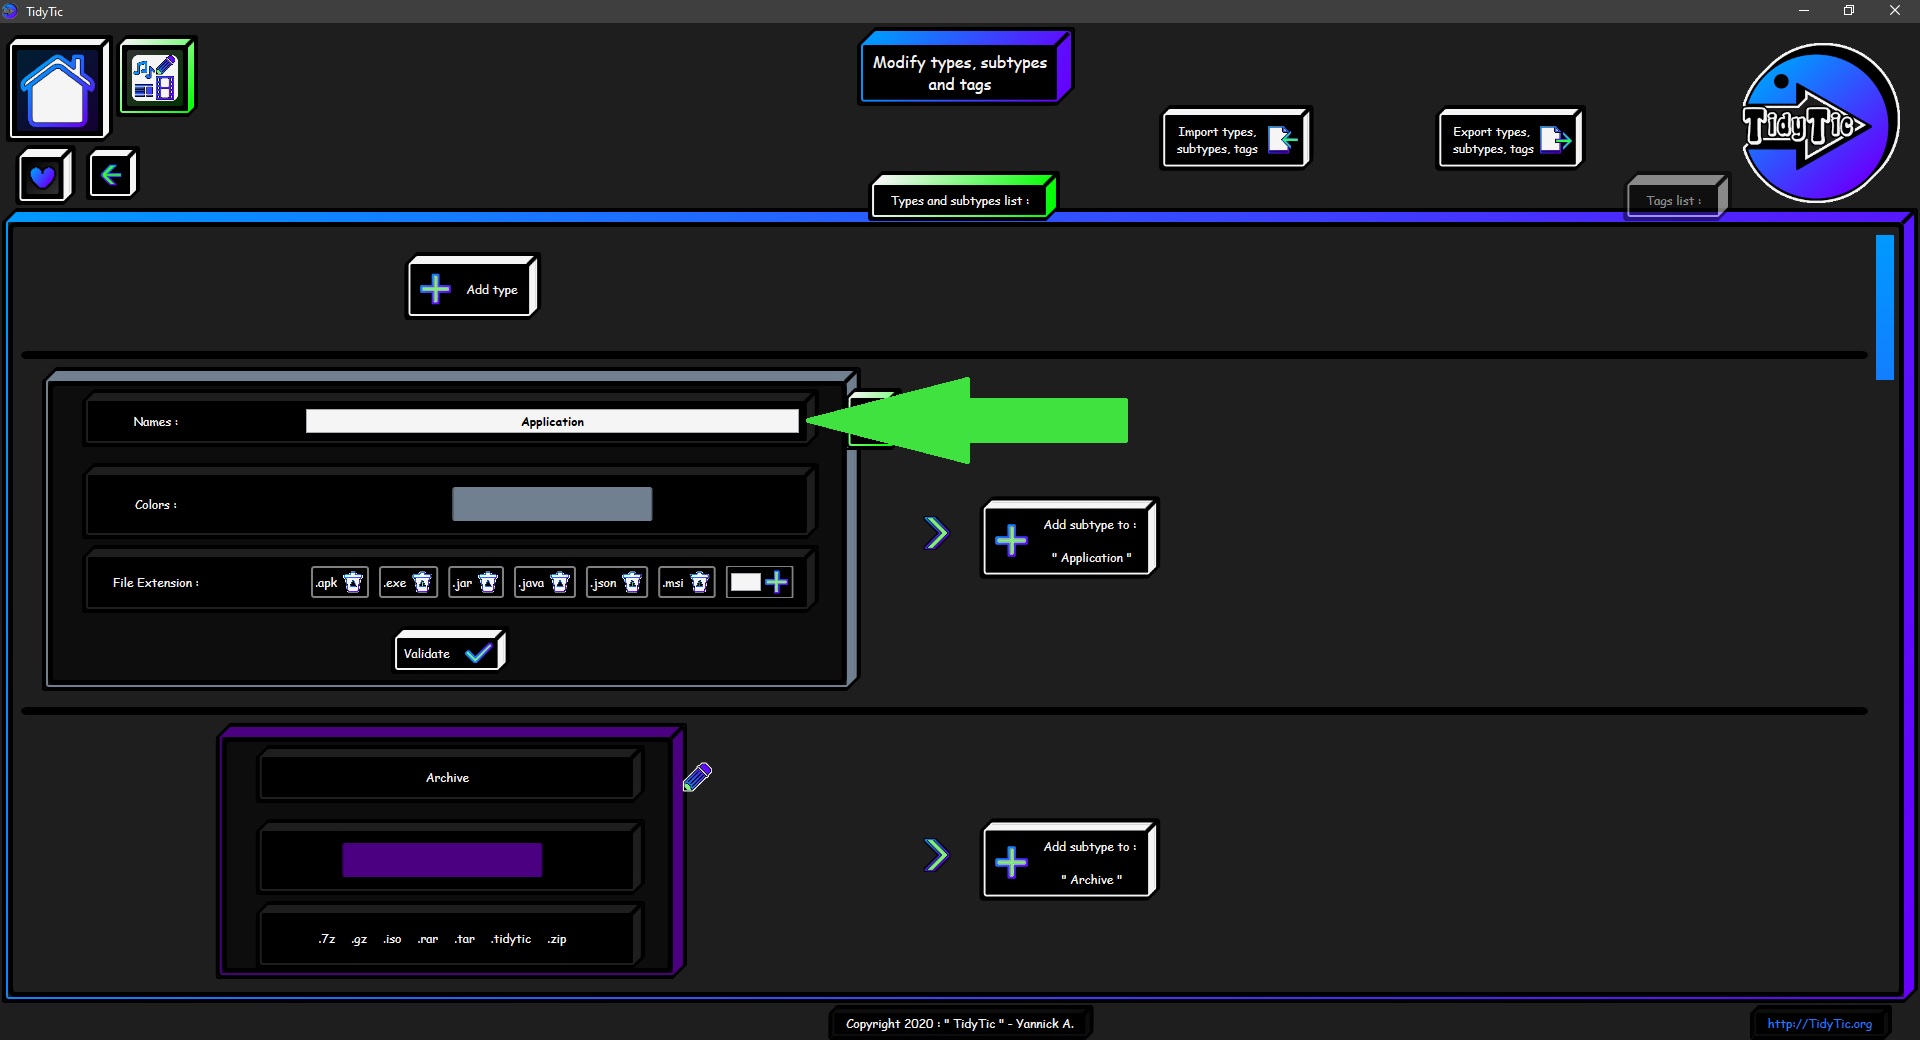
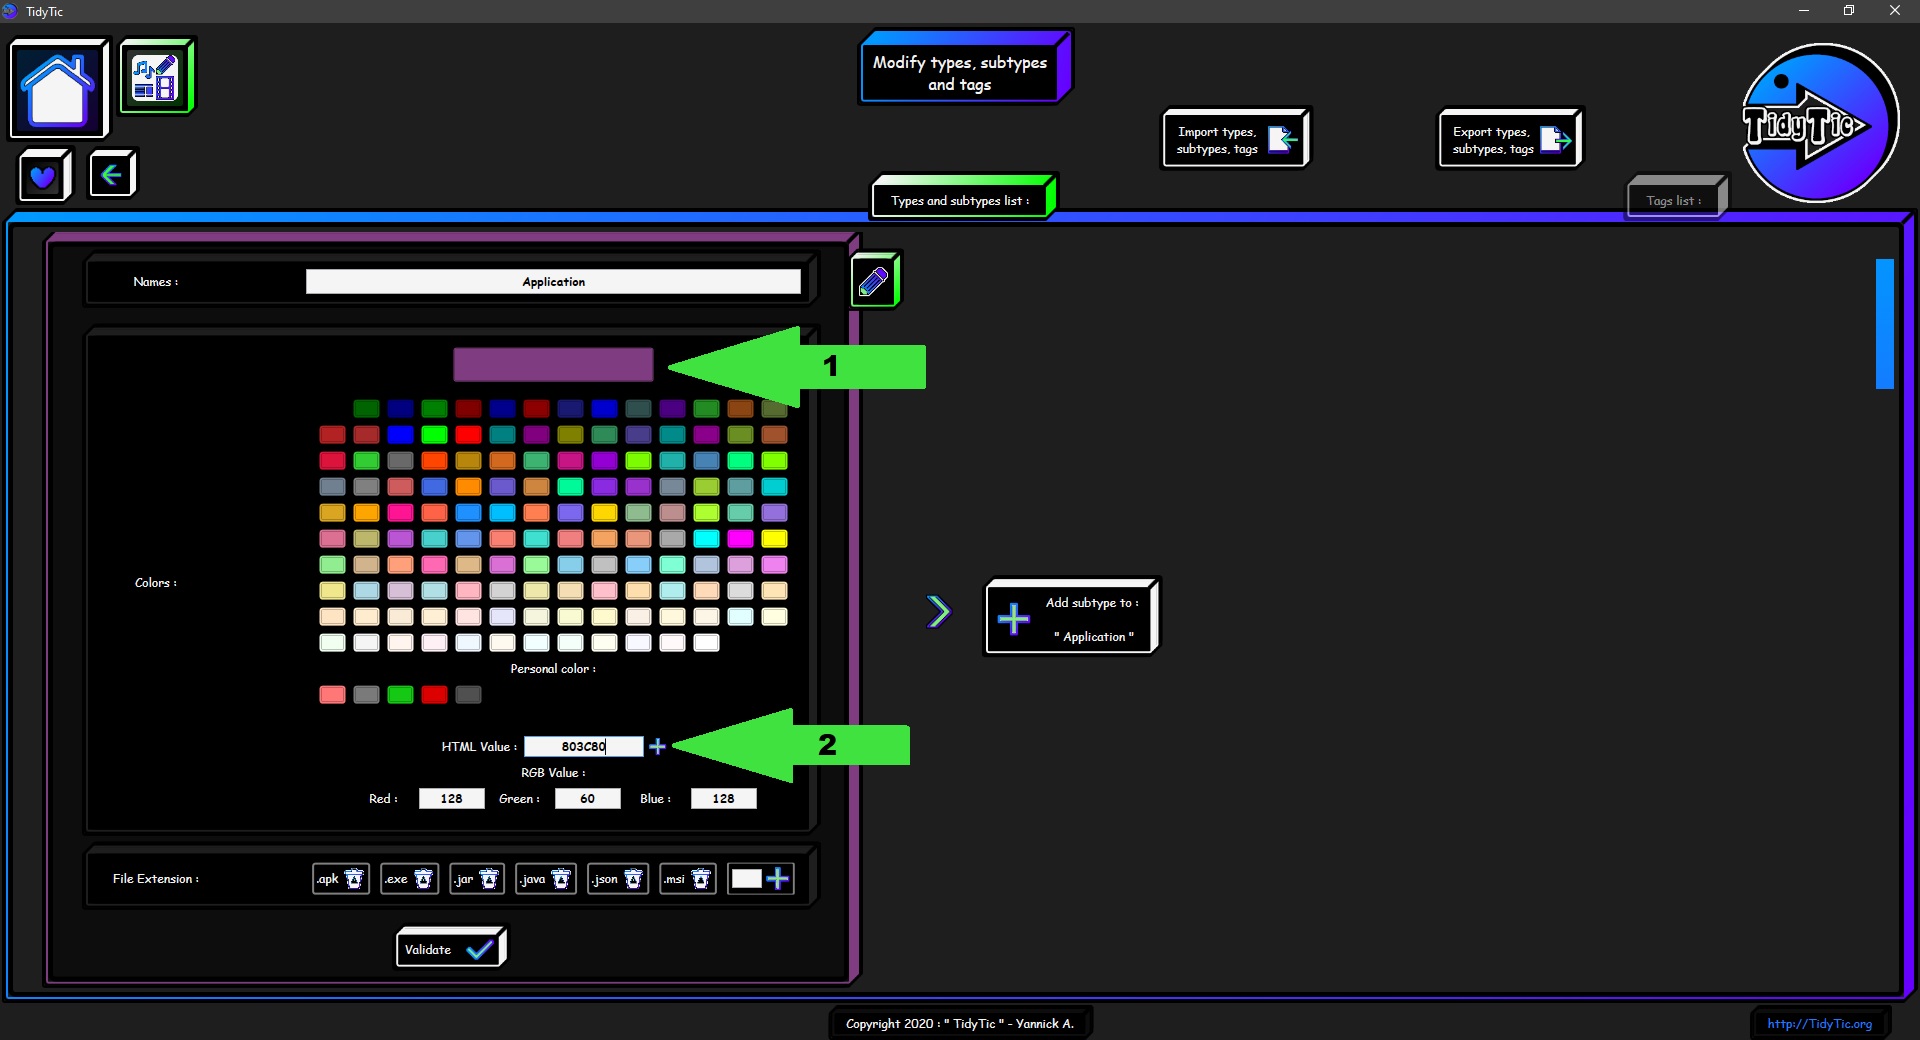
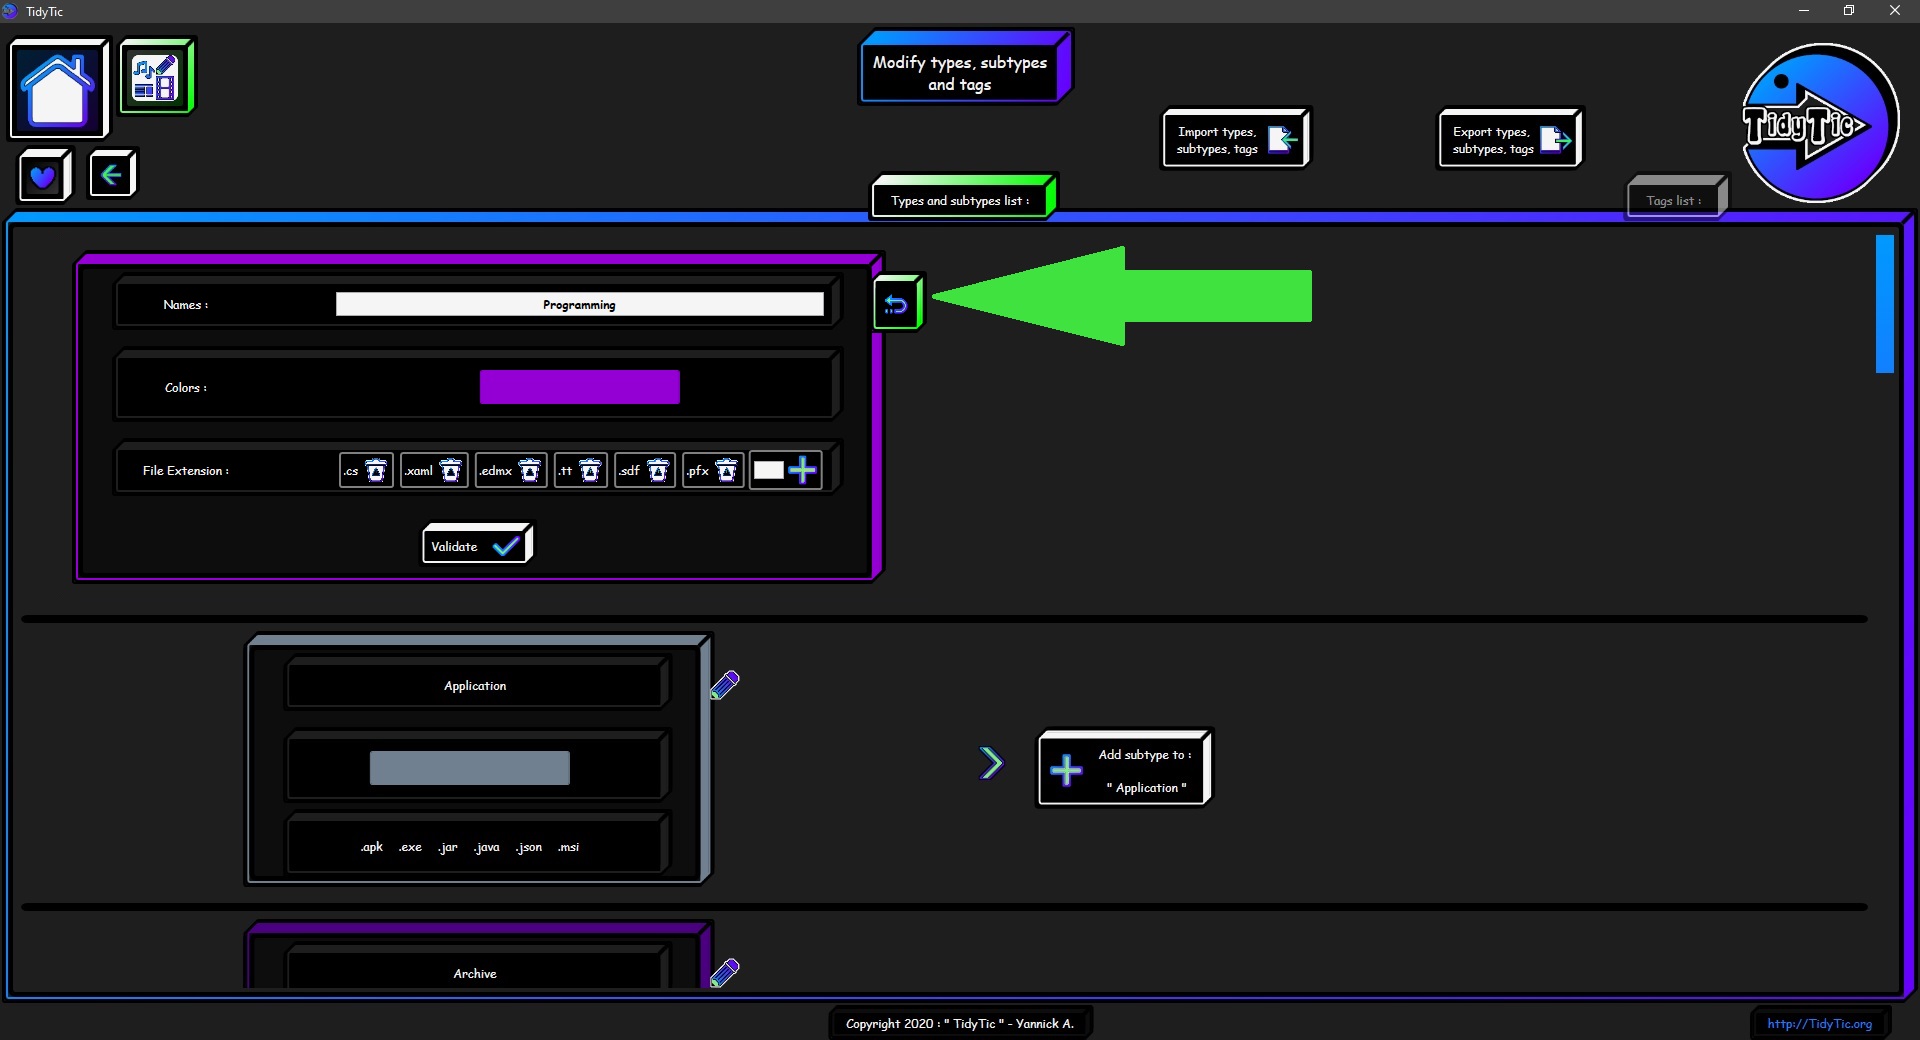
Once the modification has started, the display containing the type information will change so that you can modify everything :
His name will be in a box allowing you to modify it.
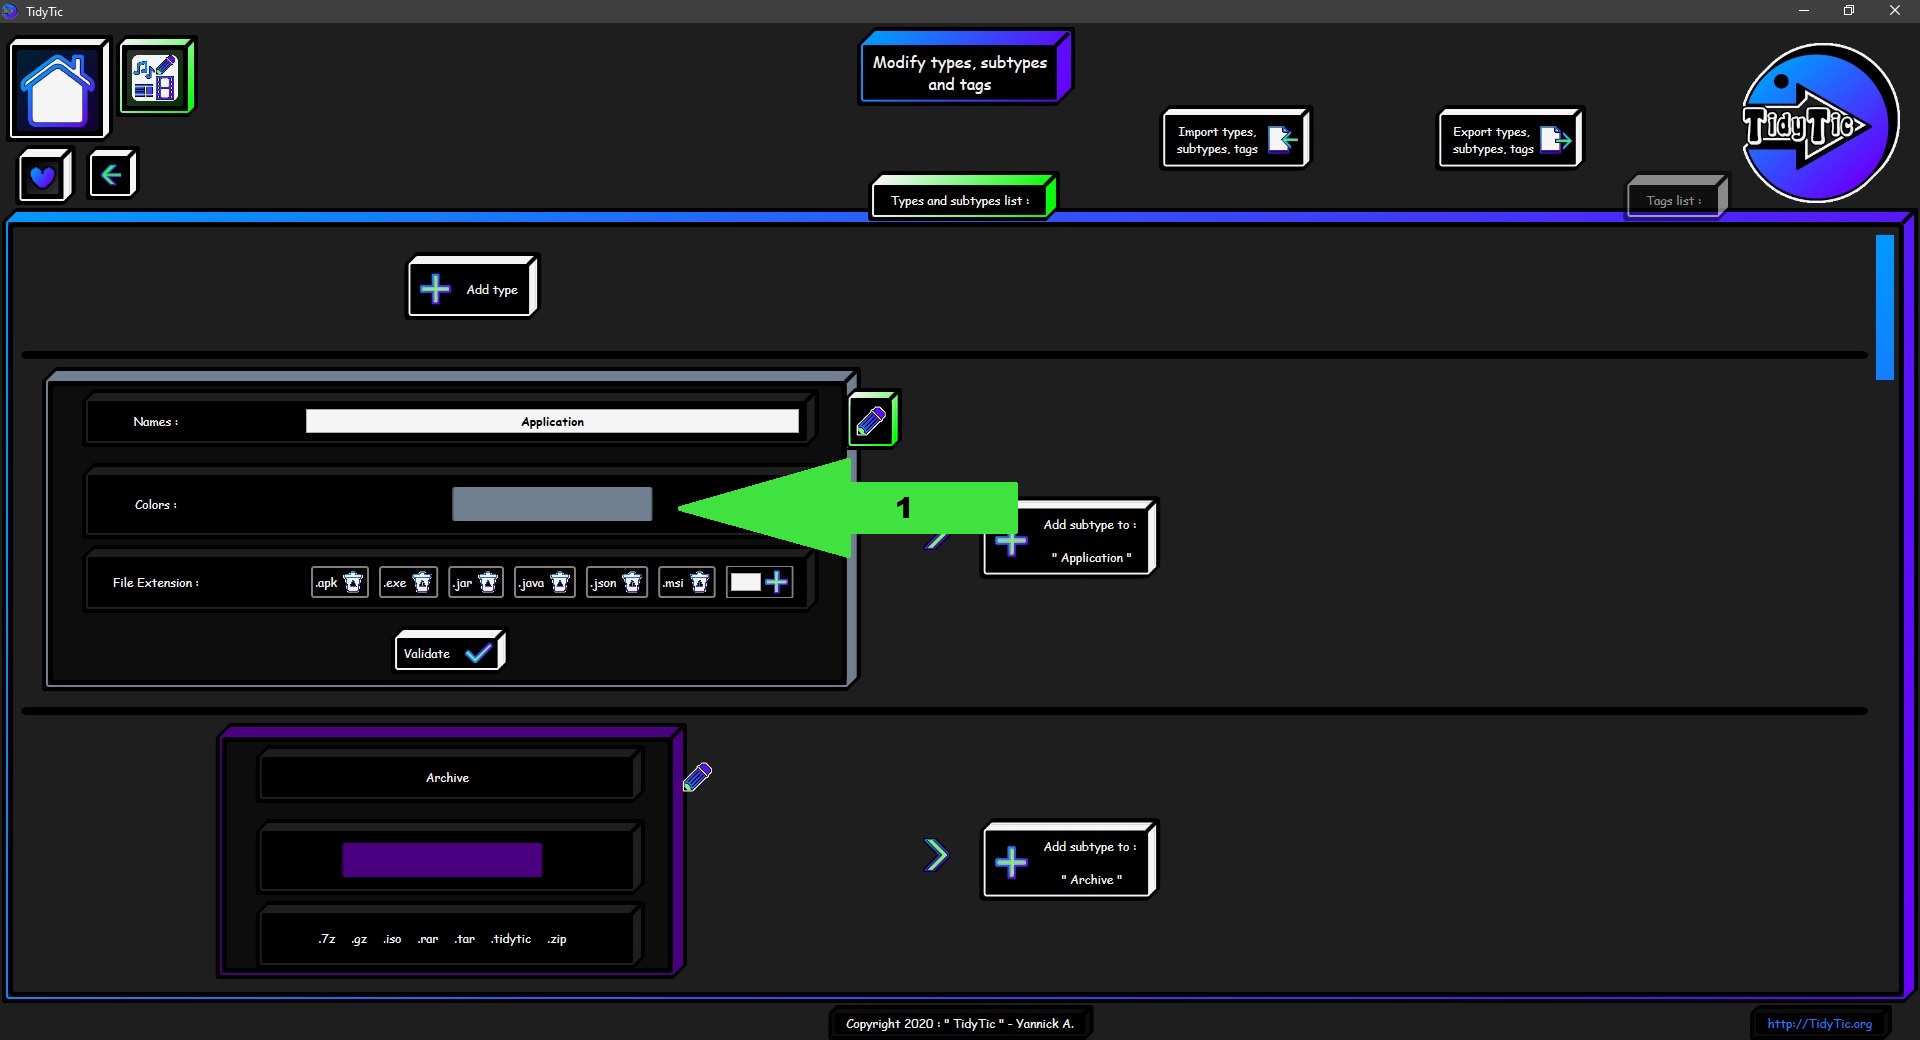
You can also click on the colored square to open a "menu" (1) allowing you to choose the color for the type.
In this menu some colors will be proposed to you by default.
You can also define any color by specifying the color code of this color (in RGB or HTML notation).
It is possible to save your personal colors in the list of colors offered using the "+" button (2) so that you do not have to give the color code every time.
If you click again on the colored square (1), the menu for choosing the color will be hidden.
 ____
____ 
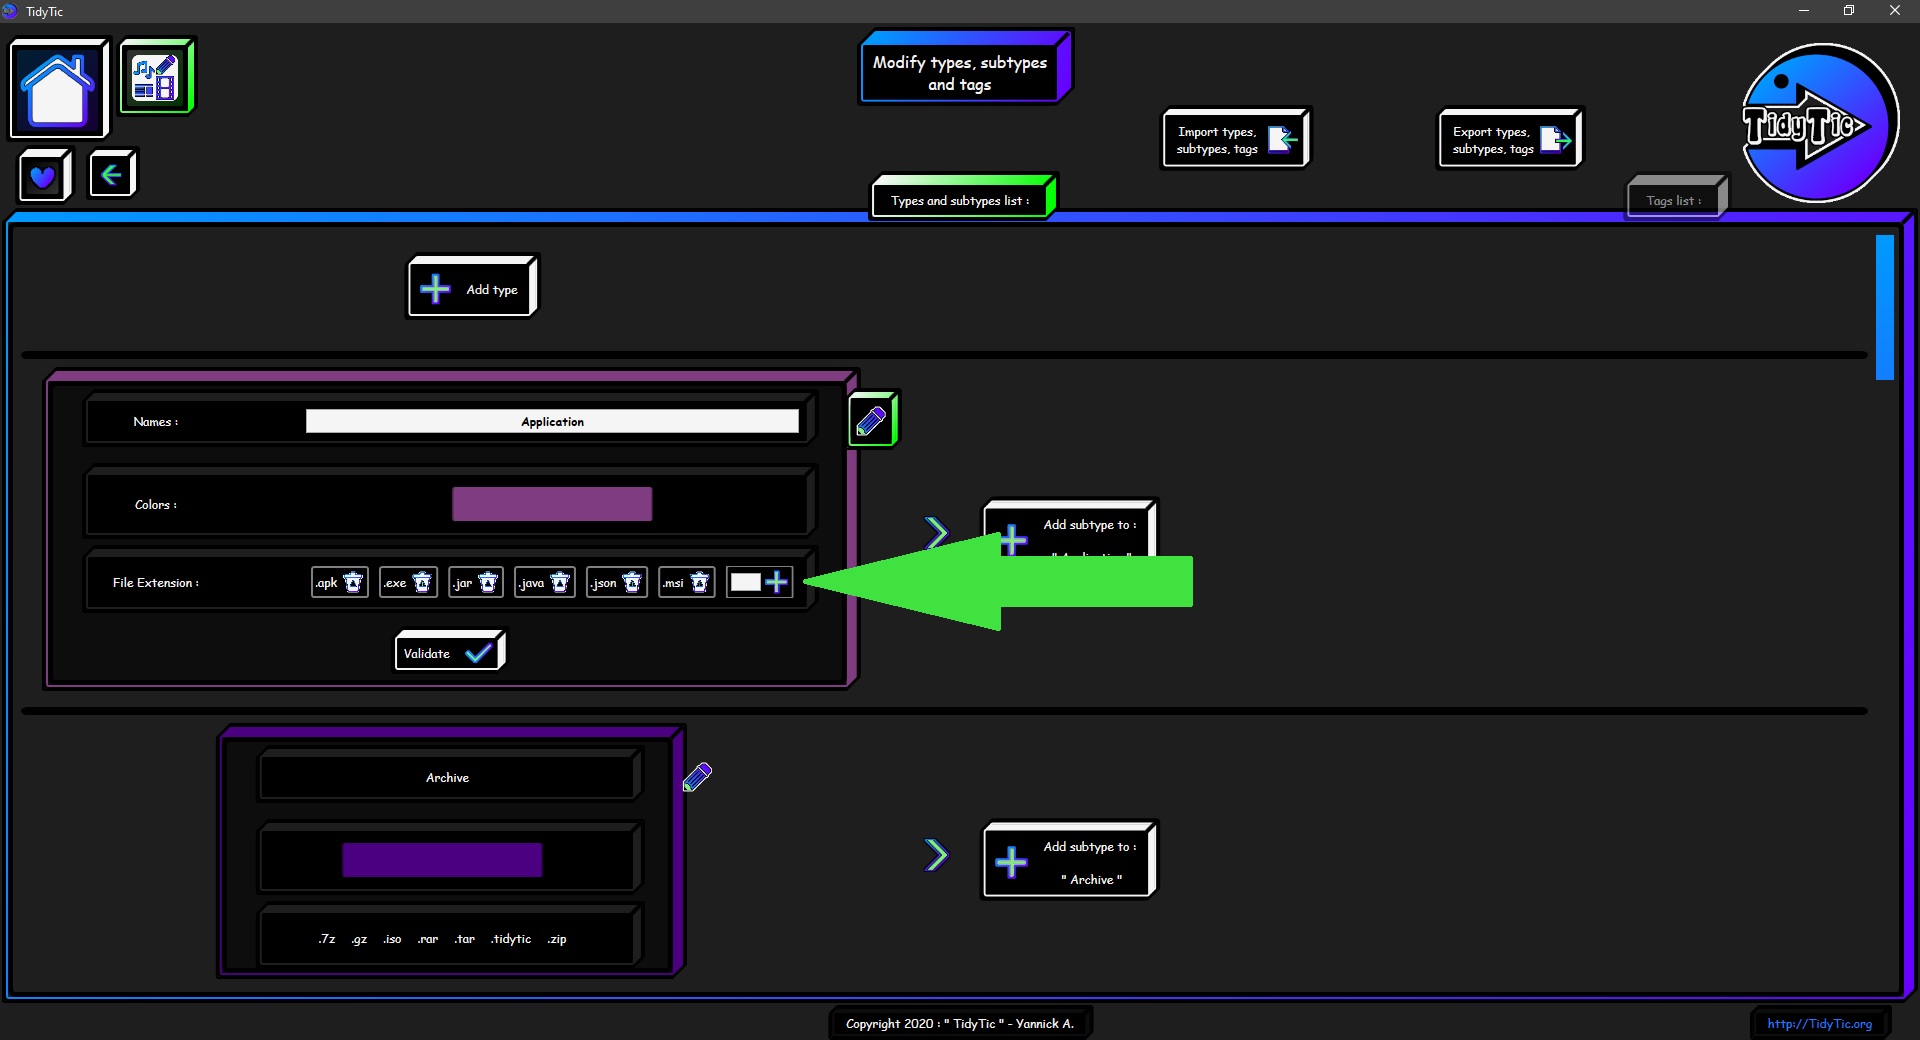
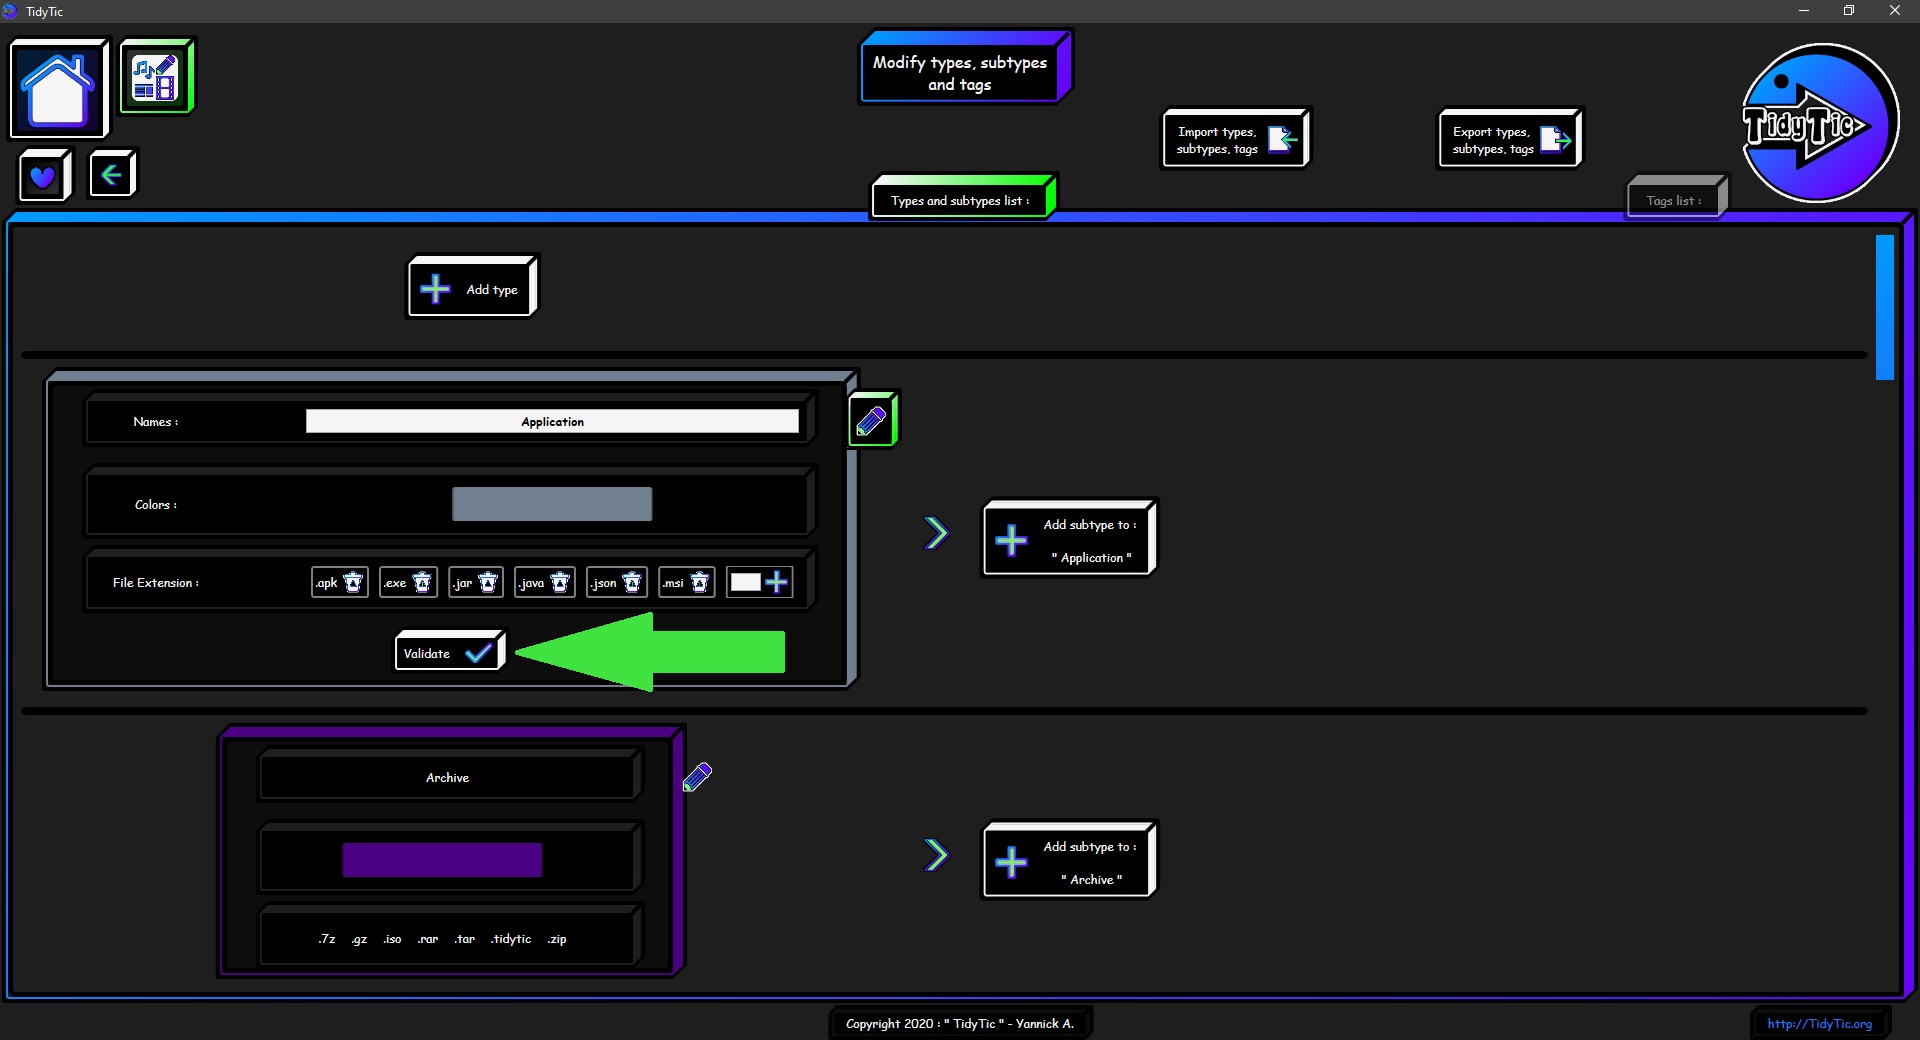
The last line of this display corresponds to the file extensions (file format) associated with the type.
It is thanks to this list that TidyTic knows to what type associate each of the files it scans.
So you can see on these screenshots that the ".exe" files (format of most installation files) are associated with the "Application" type.
For example, the .zip format is associated with archives, .mp3 format with audio files, .avi format with video files etc.
TidyTic contains most of the commonly used formats associated with each of the default types present in the software.
Unfortunately, it is not possible to have all the existing formats defined by default in the software because there are an exponential number :
Each software can freely create and use any file format.
If the software tried to have an exhaustive list of all the existing file formats, the list would become really huge and browsing in this list would be very annoying.
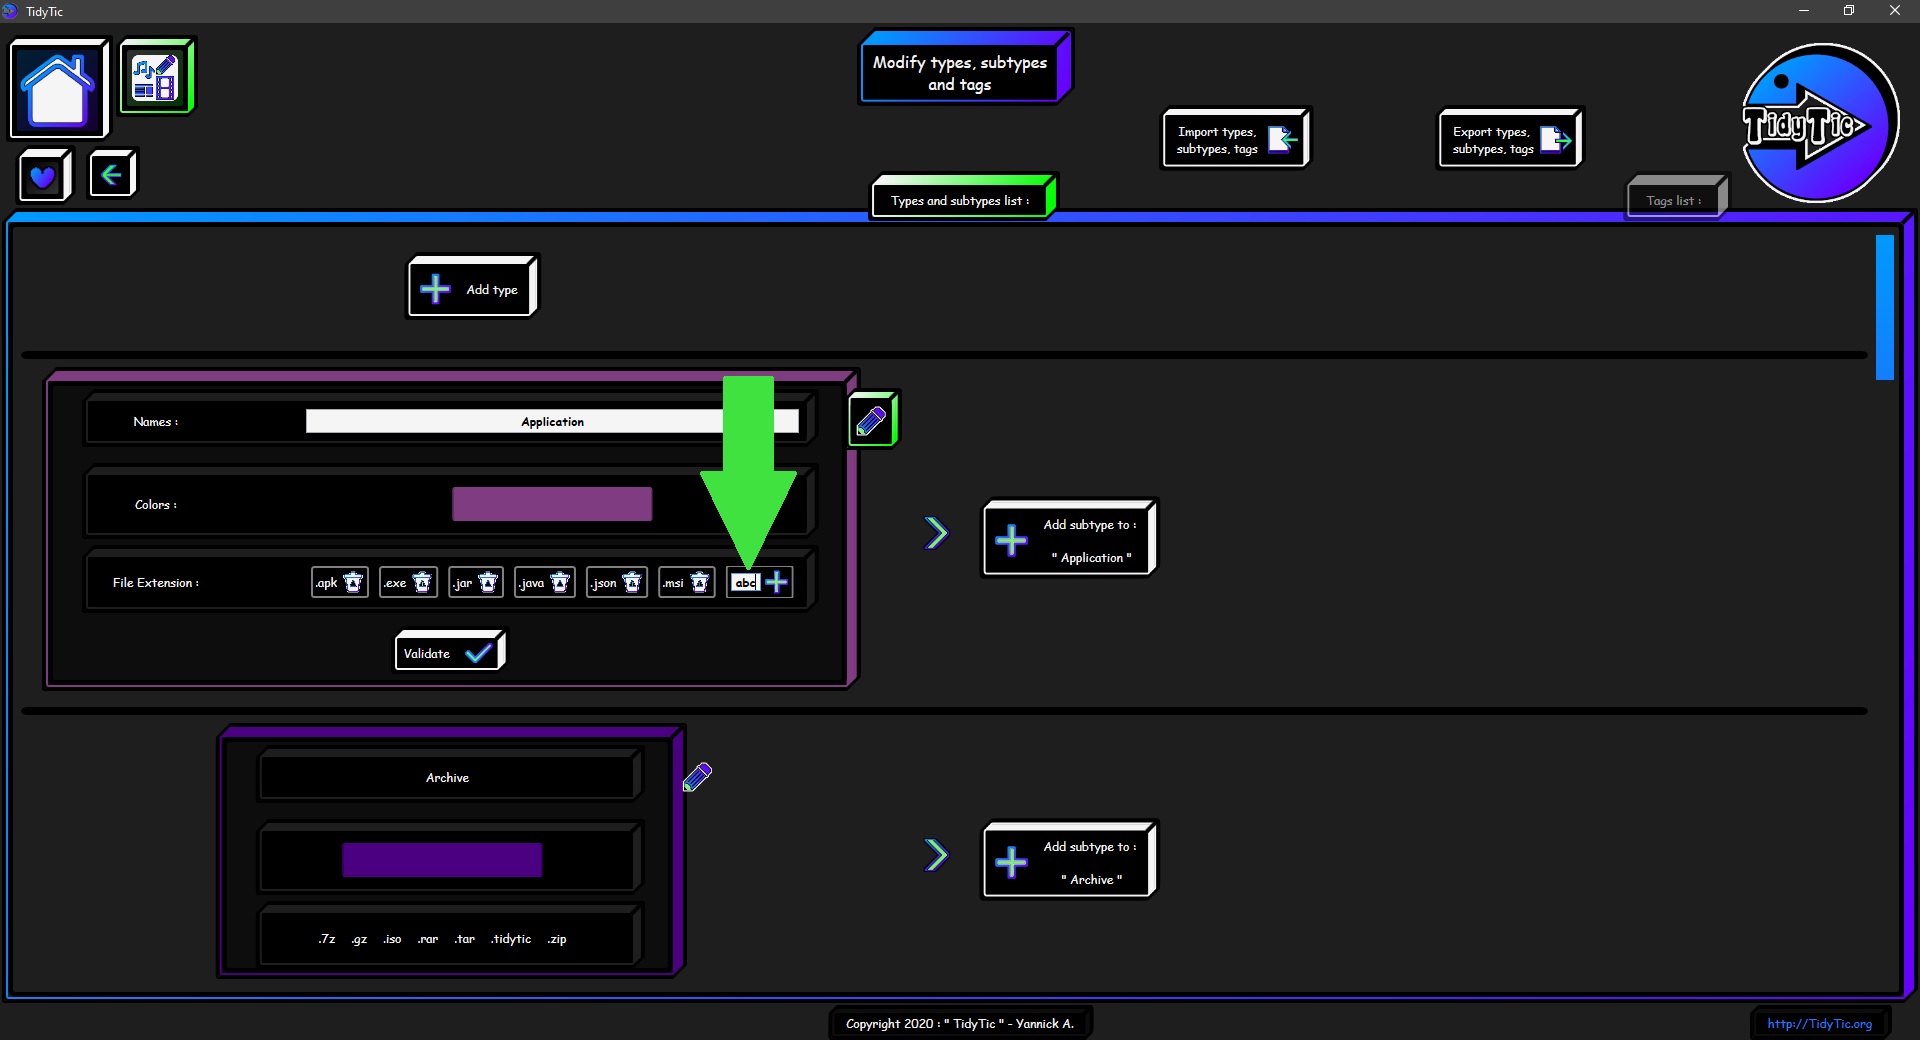
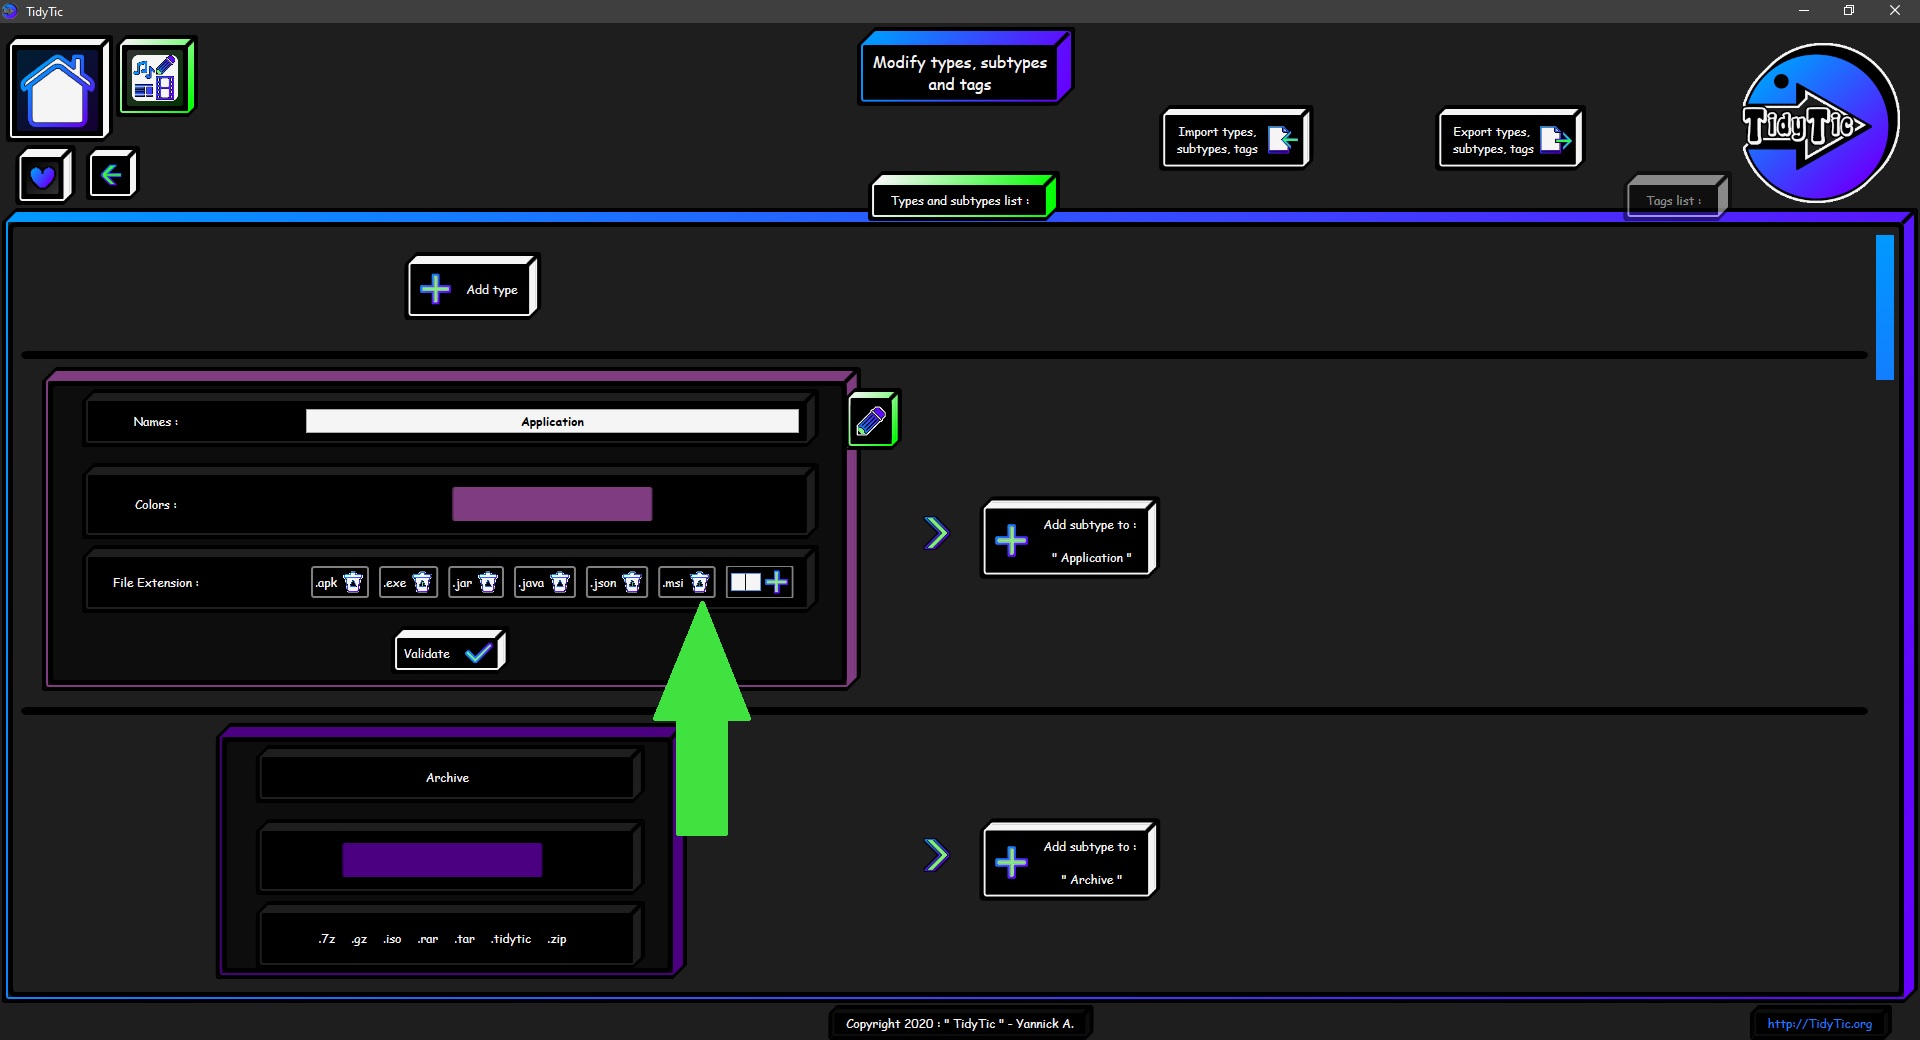
You can however easily customize this list to add a format that you are used to using by writing its extension ("abc" for example) and clicking on the + button.
This new format will be used when TidyTic will scan your files in order to associate the files with the right type.
This list is also used in the "Edit files" menu, modify "Type" for the "Auto" function.
This allows you to automatically associate your files with the right type in a single action if you have made changes in this list.
To delete an associated format in order to associate it with an another type, simply click on the " afin de l'associer à un autre type il vous suffit de cliquer sur l’icône «![]() " icon of the format in question.
" icon of the format in question.
It will then be removed from the list. You will still have to add it to an another type so the automatic association of files with the right type was done correctly.
A file format cannot be associated with more than one type.
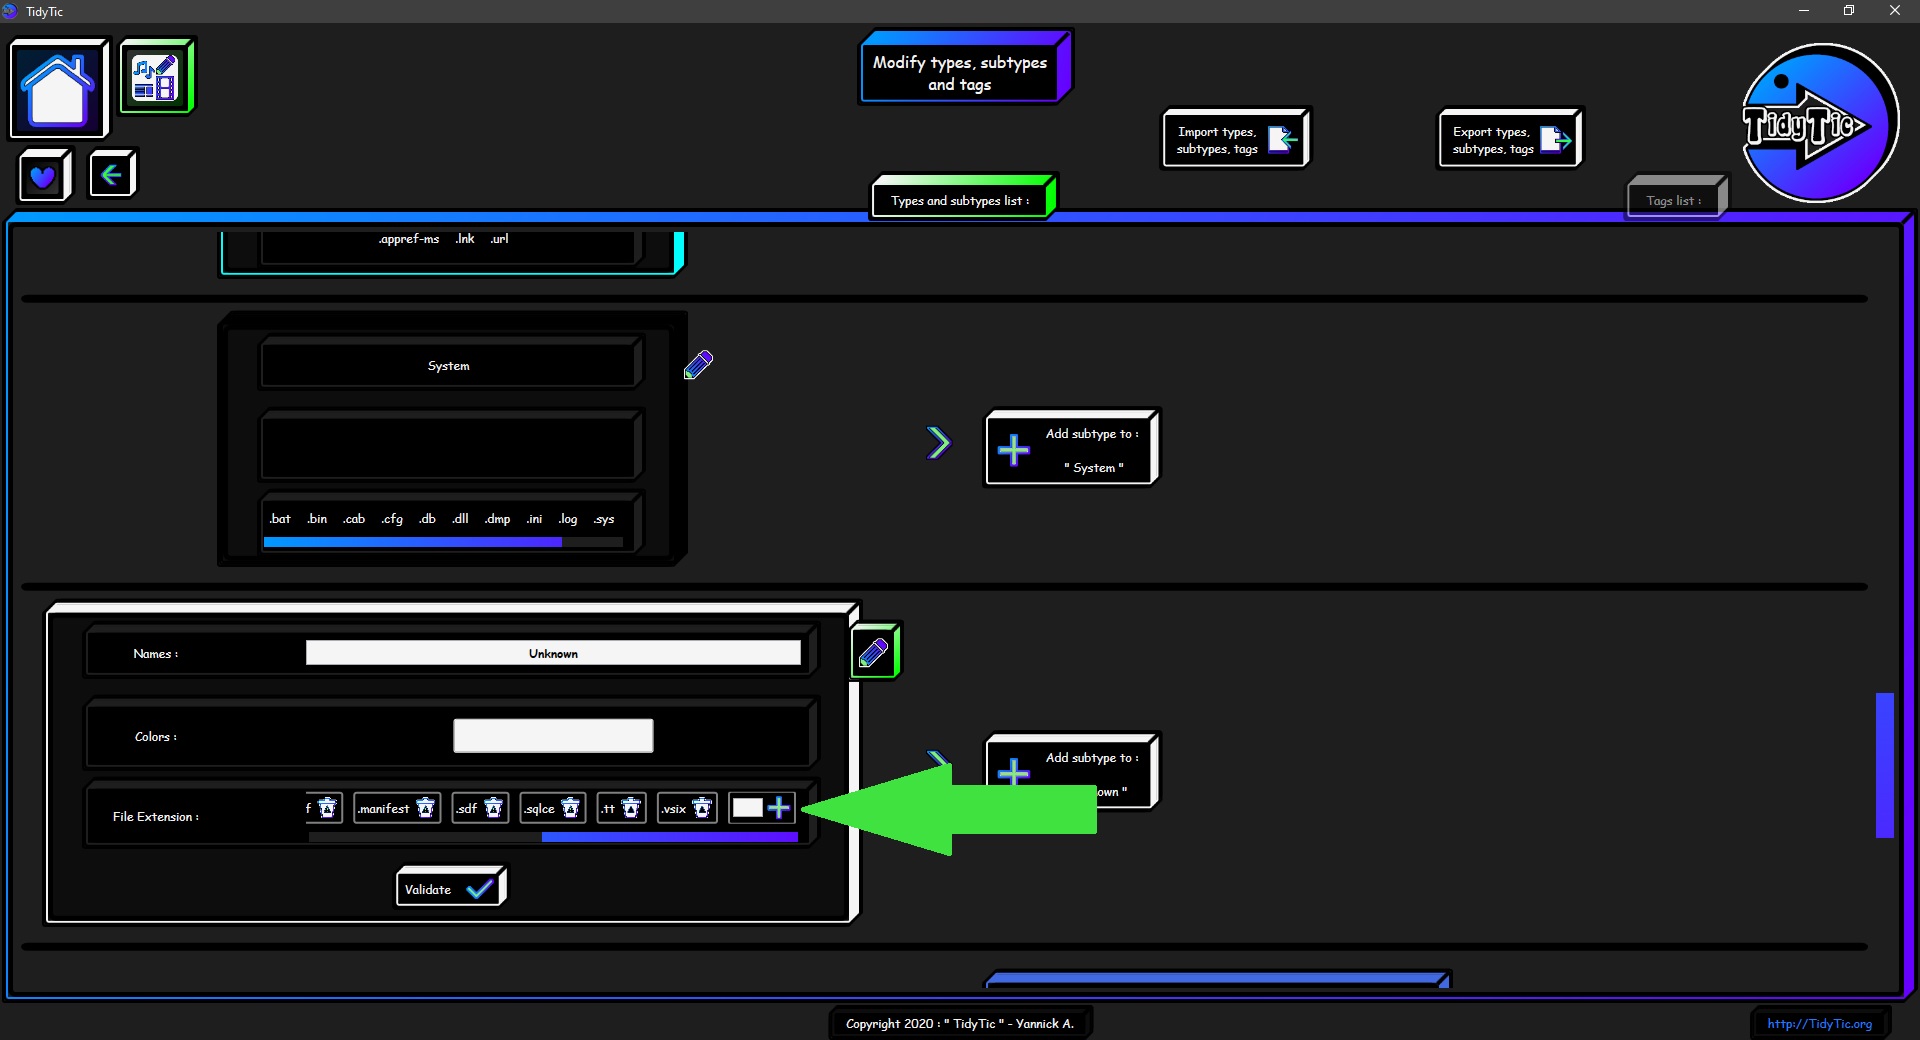
If the software scans a file whose extension is not associated with any type, it will be automatically associated with the "Unknown" type.
The extension will also be added to the extensions list of the unknown type.
To be able to associate this new file format with the type you want, you will have to remove it from the list of extensions of the "Unknown" type and add it to the list of extensions of the chosen type.
To save the modifications made to a type (on the name, color or list of extensions) you will have to validate your modifications.
To cancel the modifications, simply exit the modification mode by clicking again on the modification button: "![]() ".
".
Create a type :
You will find the button allowing you to add a type at the top of the page to edit : "Type / Sub-type / Tag".
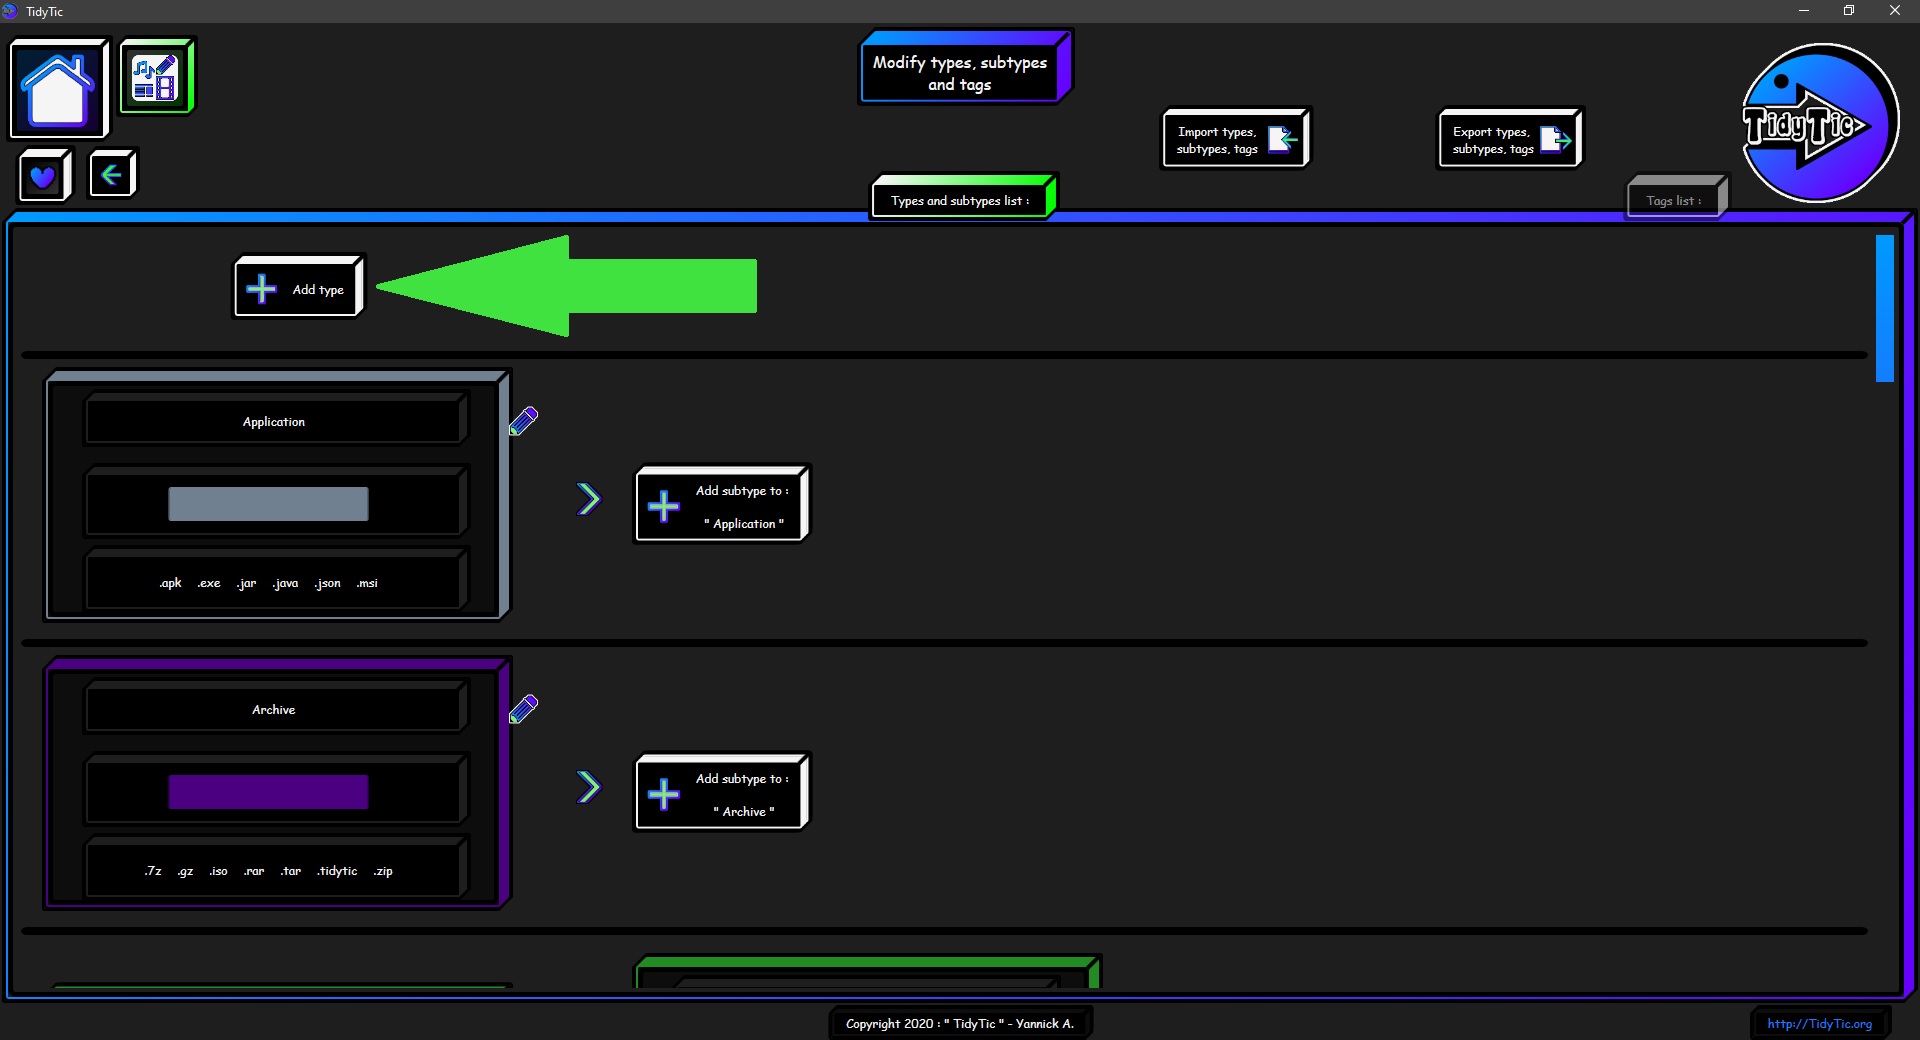
This button will open a menu identical to that of modifying a type that I described to you above.
You will again have the choice of name, color and the list of extensions that will be associated with this new type.
I will not go into details because the functioning is exactly the same as for the modifications.
Once the information concerning your new type has been completed, validate the new type in order to add it to the software.
In the screenshot below I am creating a "Programming" type which will contain the file formats I use for the creation of TidyTic.
Allowing me to find / distinguish them easily.

To cancel the creation of a type, simply click on the "![]() " icon
" icon
Delete a type :
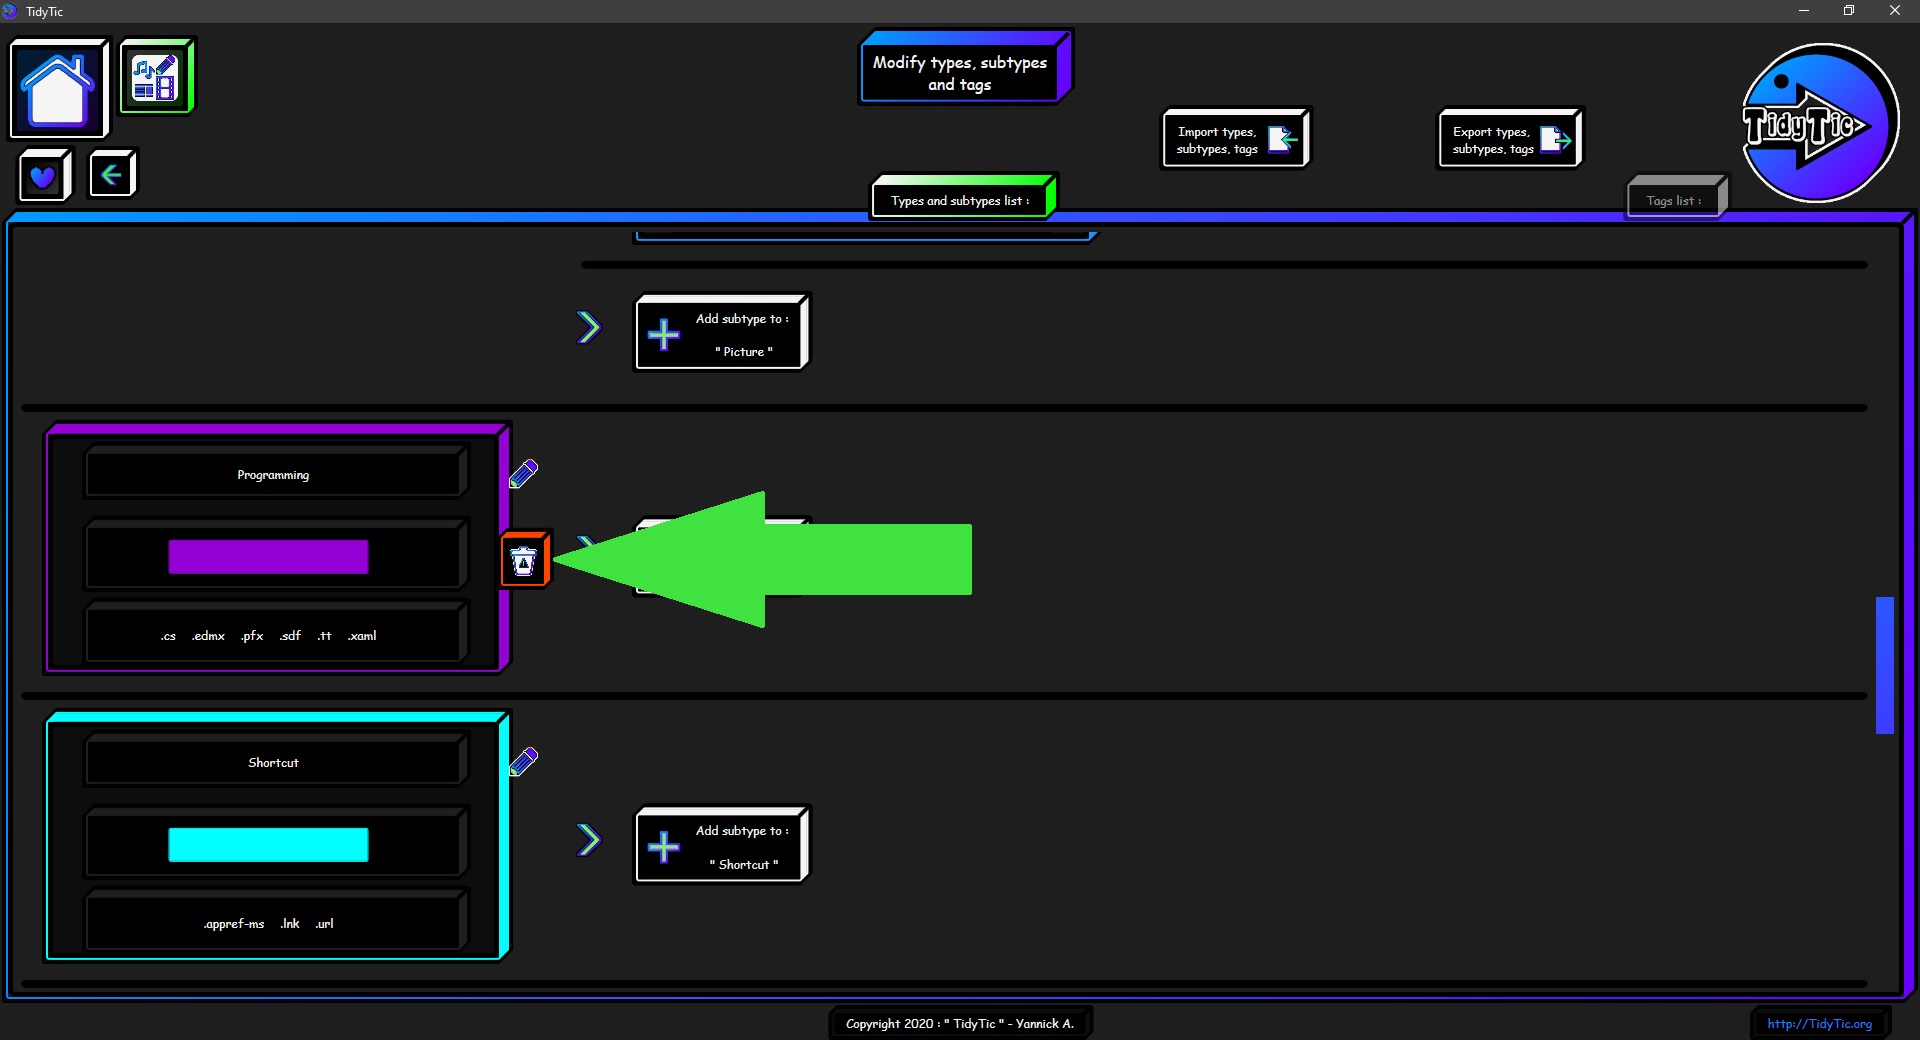
To delete a type that you have created, just double left click on the " ![]() " icon to the right of the type in question.
" icon to the right of the type in question.
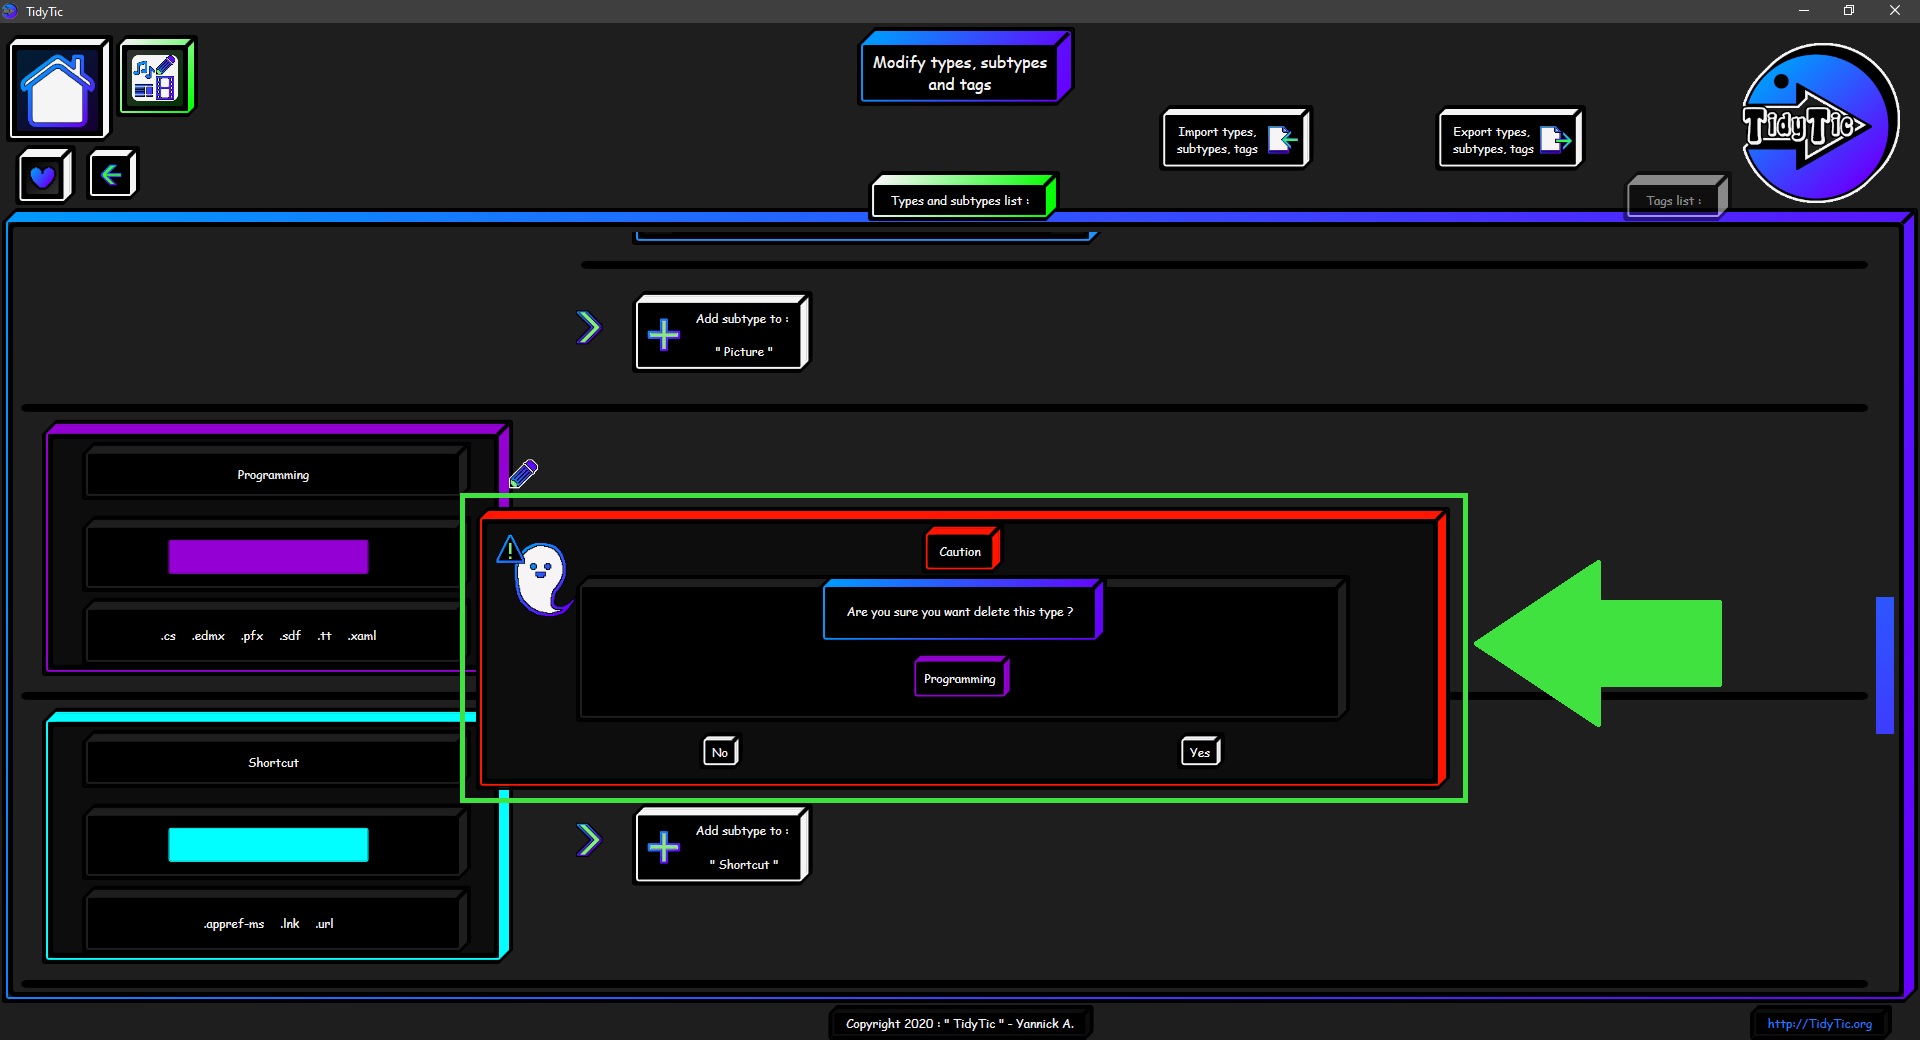
A confirmation message will ask you to confirm the type deletion.
 ____
____ 
TidyTic does not however allow you to delete default types from the software.
Some of these types having particular behaviors in the software, their deletions would prevent the proper functioning of TidyTic.
You will therefore not find any delete icon for these types.
Modify a subtype :
Editing a subtype is done exactly in the same way as for a type.
Just click on the " ![]() " icon to open the subtype in edit mode.
" icon to open the subtype in edit mode.
Clicking again on this icon will cancel your changes.
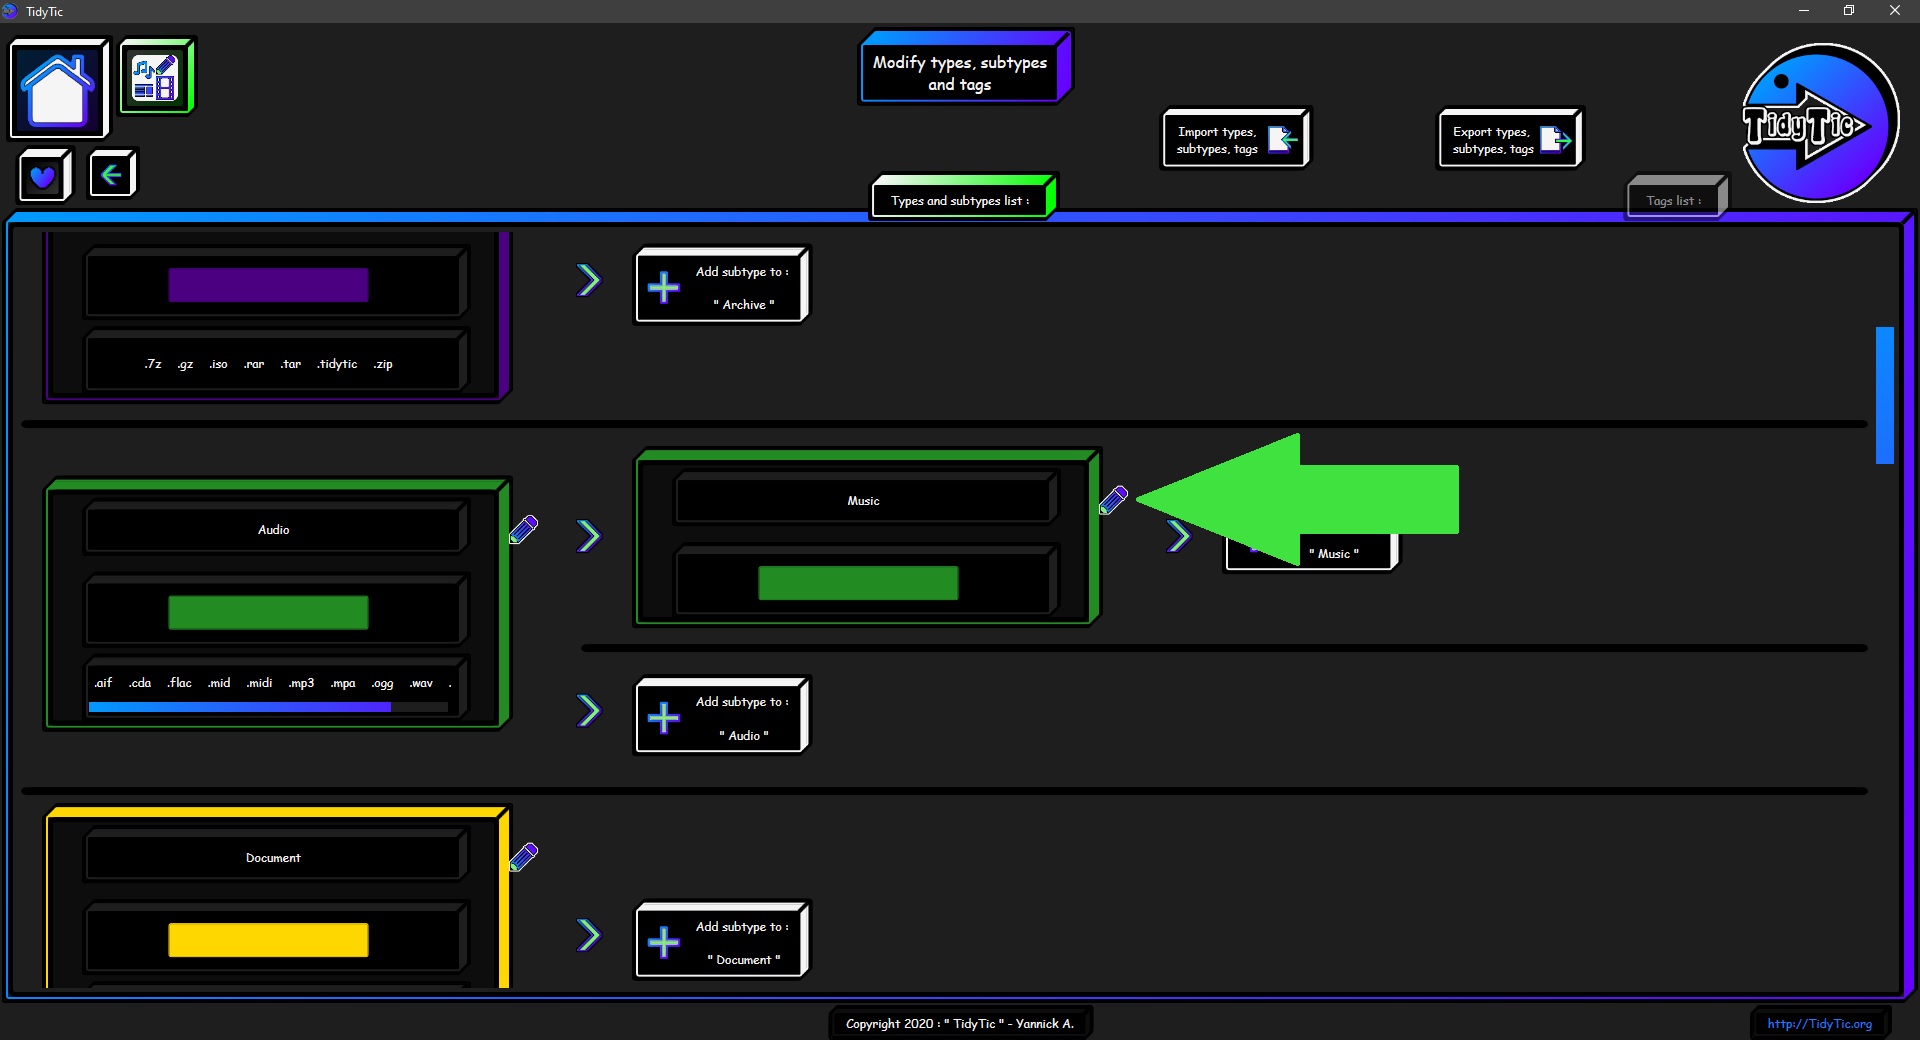
Here again you will have the possibility to choose the name as well as the color of the subtype.
You will have to validate your modifications in order to save them.
You will not have a line regarding file extensions because this possibility is limited to the type.
Create a subtype :
To create a subtype for a type or for a subtype, simply click on the button to the right of the type / subtype in question.
This will open a menu identical to the one you have for subtype changes.
You will be able to define the name and color of the new subtype.
You will have to validate your new subtype in order to add it to those of the software.
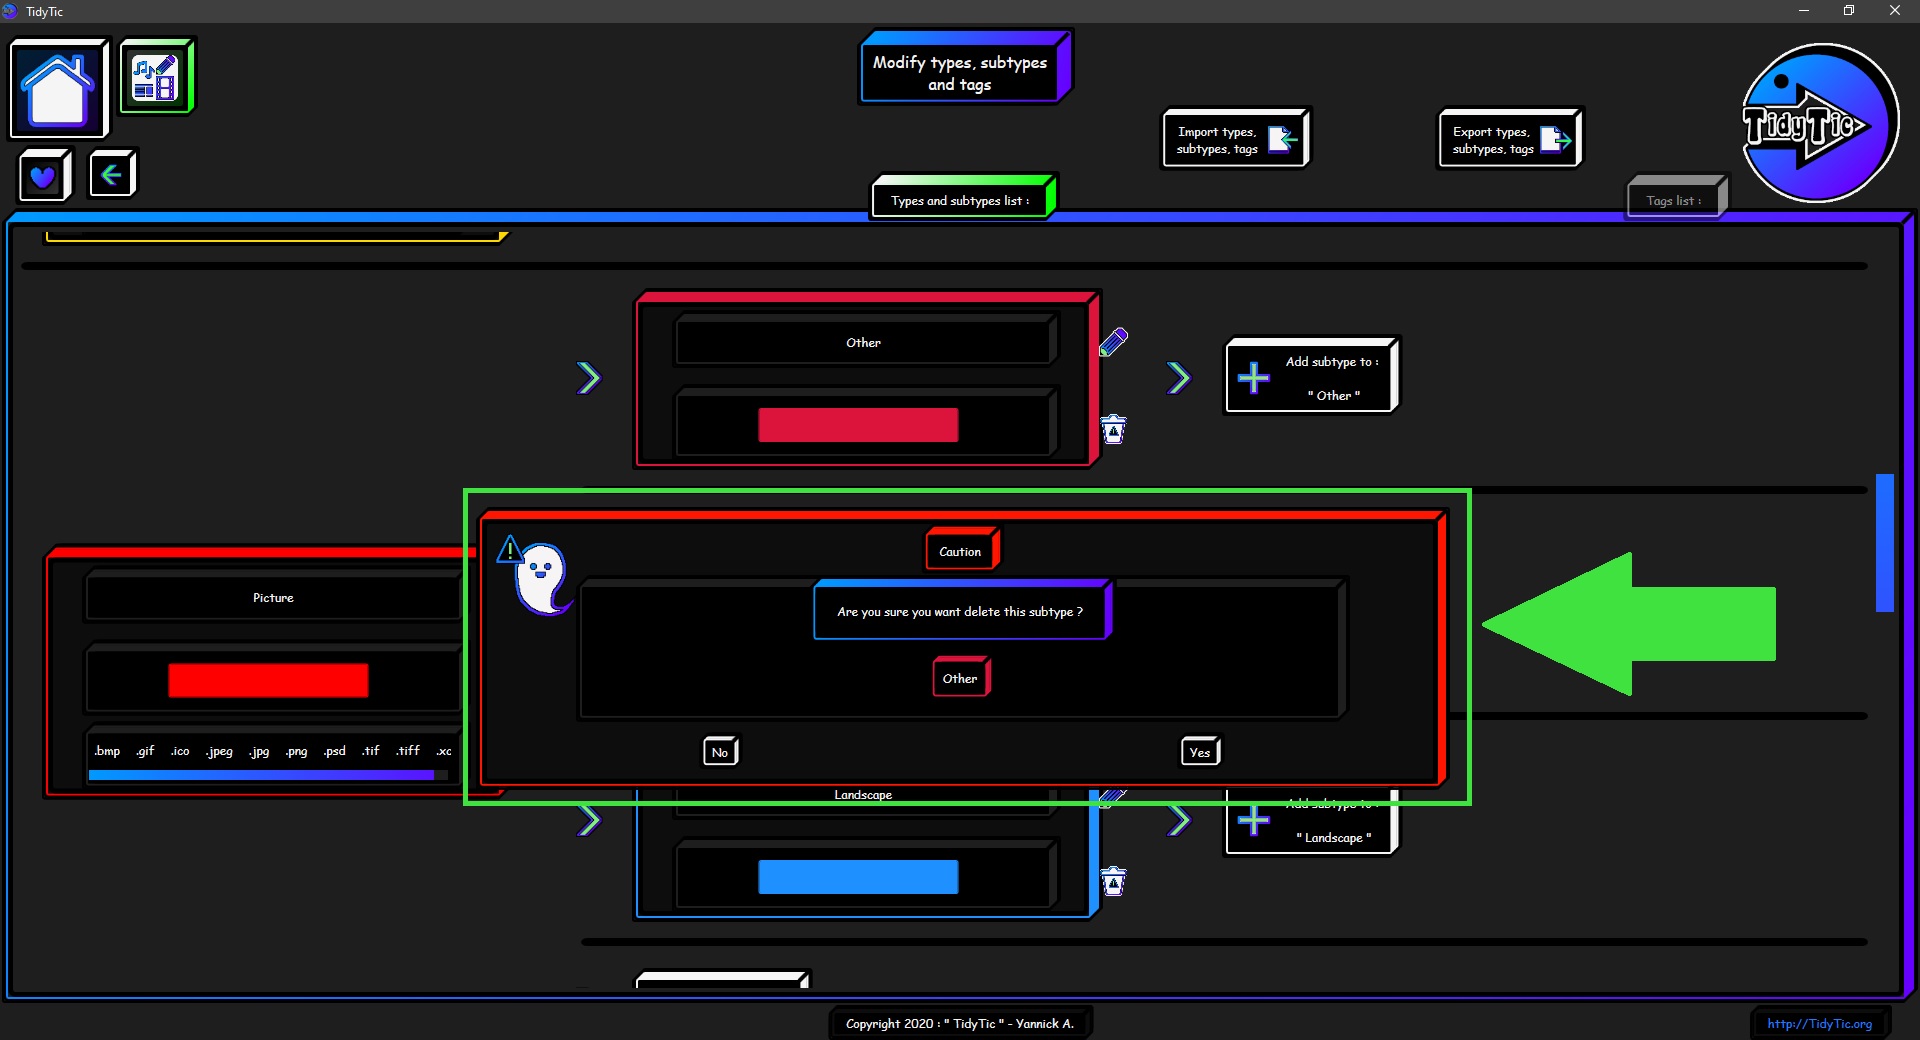
Delete a subtype :
To delete a subtype that you have created, just double left click on the "![]() " icon to the right of the subtype in question.
" icon to the right of the subtype in question.
A confirmation message will ask you to confirm your deletion of the subtype.
 ____
____ 
TidyTic does not however allow you to remove the "Music" subtype from the software.
This subtype having a particular behavior in the software, its removal would prevent the correct functioning of TidyTic.
You will therefore not find any delete icon for the "Music" subtype.
The logic behind types and subtypes :
As you have seen in the rest of the TidyTic tutorials, types and subtypes are very useful in many functions :
Organize your files, filter them, use them under the conditions of automatic rules etc.
But how do I know if I should create a type or subtype for my files ?
In general, the file types will be used to differentiate your files according to their format :
Image, video, audio etc.
The subtypes will allow you to have categories within your file formats / types :
An image can very well be a photo or a drawing.
Just like a video can be a movie, a series, or just a video taken with your phone.
There is however no right or wrong way to use these types / subtypes : It all depends on how you want to organize your files.
Each user being different there are as many ways to manage your types and subtypes.
This will evolve as surely with the use you make of TidyTic, or according to the files that you decide to monitor / organize.
The tags in TidyTic :
To go to the tag modification page you have a button at the top right of the edit : "Types / Subtypes / Tags" page.
Once on the tags modification page, the button will change so that you can return to the types / subtypes modification page.
You can therefore easily navigate between these two pages using this button.
 ____
____ 
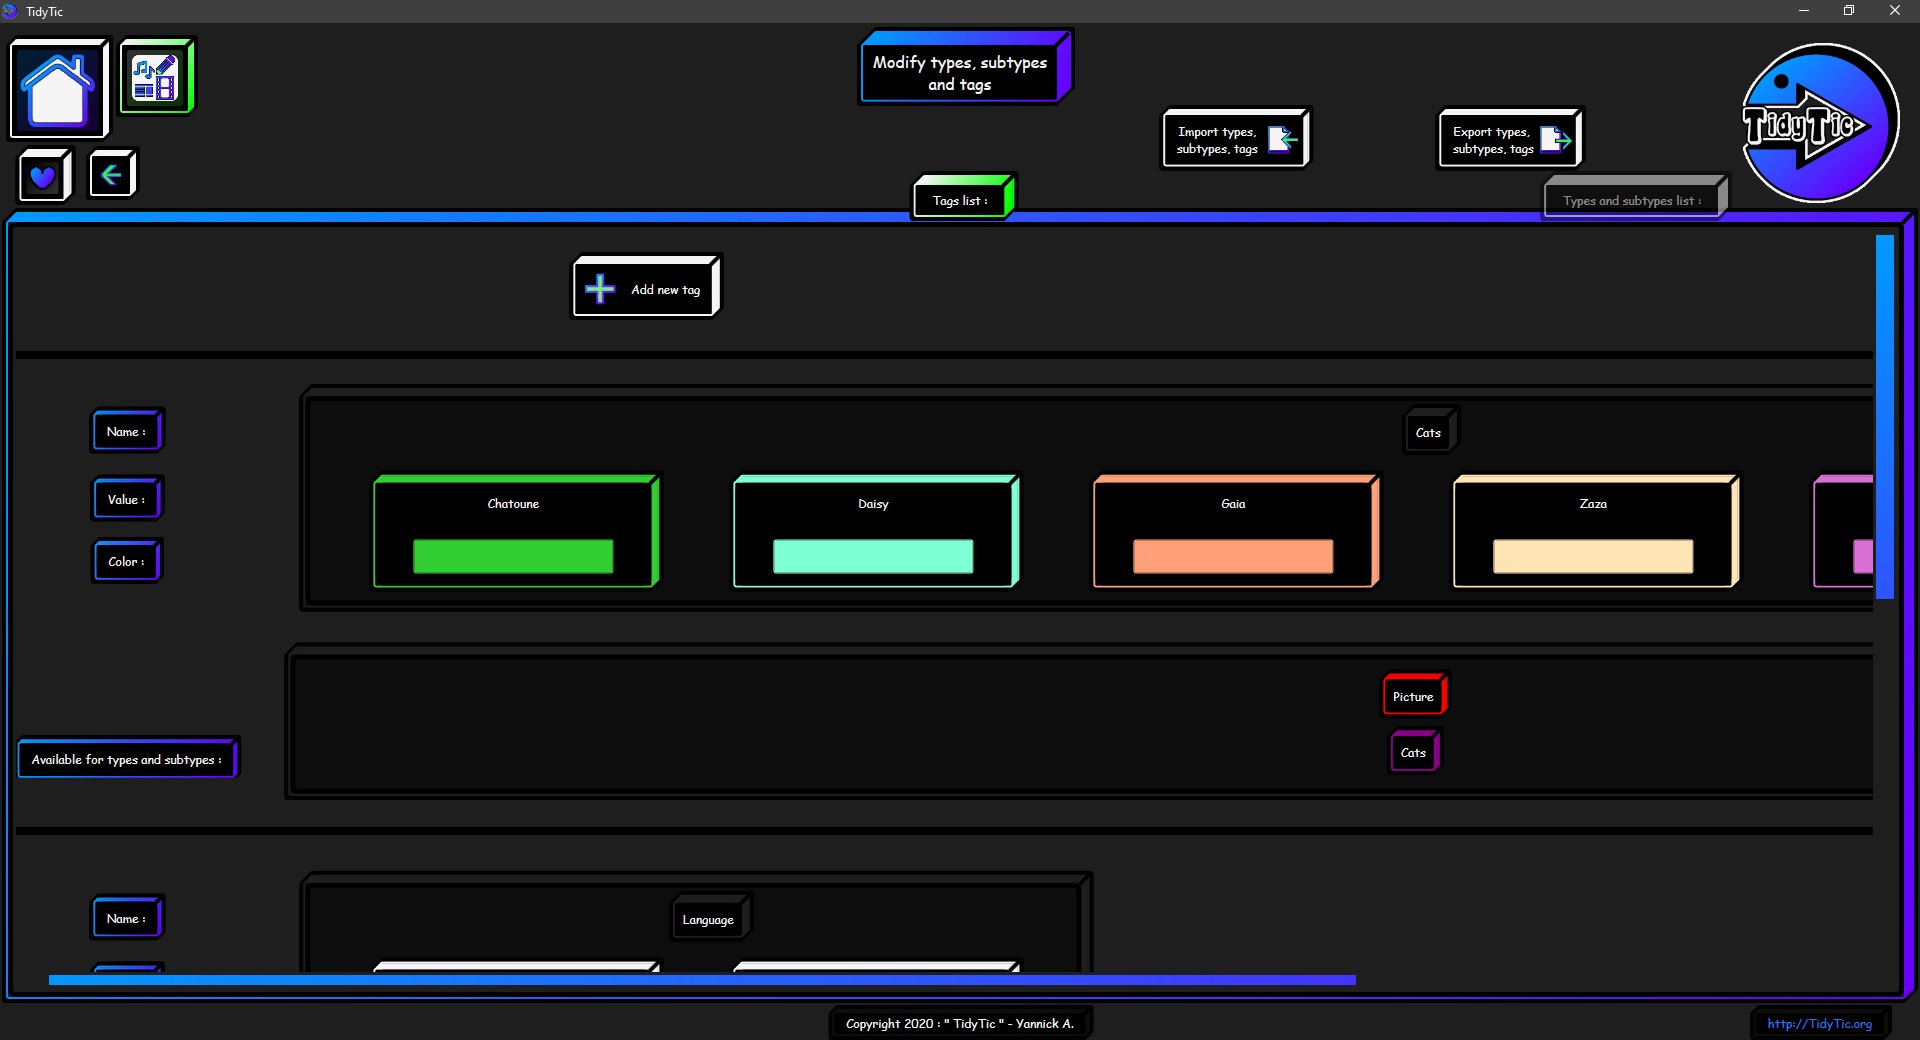
The page modification of tags is also very easy to use thanks to its presentation.
Allowing you to easily view all the information of your tags :
Each tag having its line with its name and the list of all the values that it can take.
Each value having a name and a color in order to distinguish them easily. Whether on this page or in all TidyTic pages.
You will also see for which file type / subtype it is available.
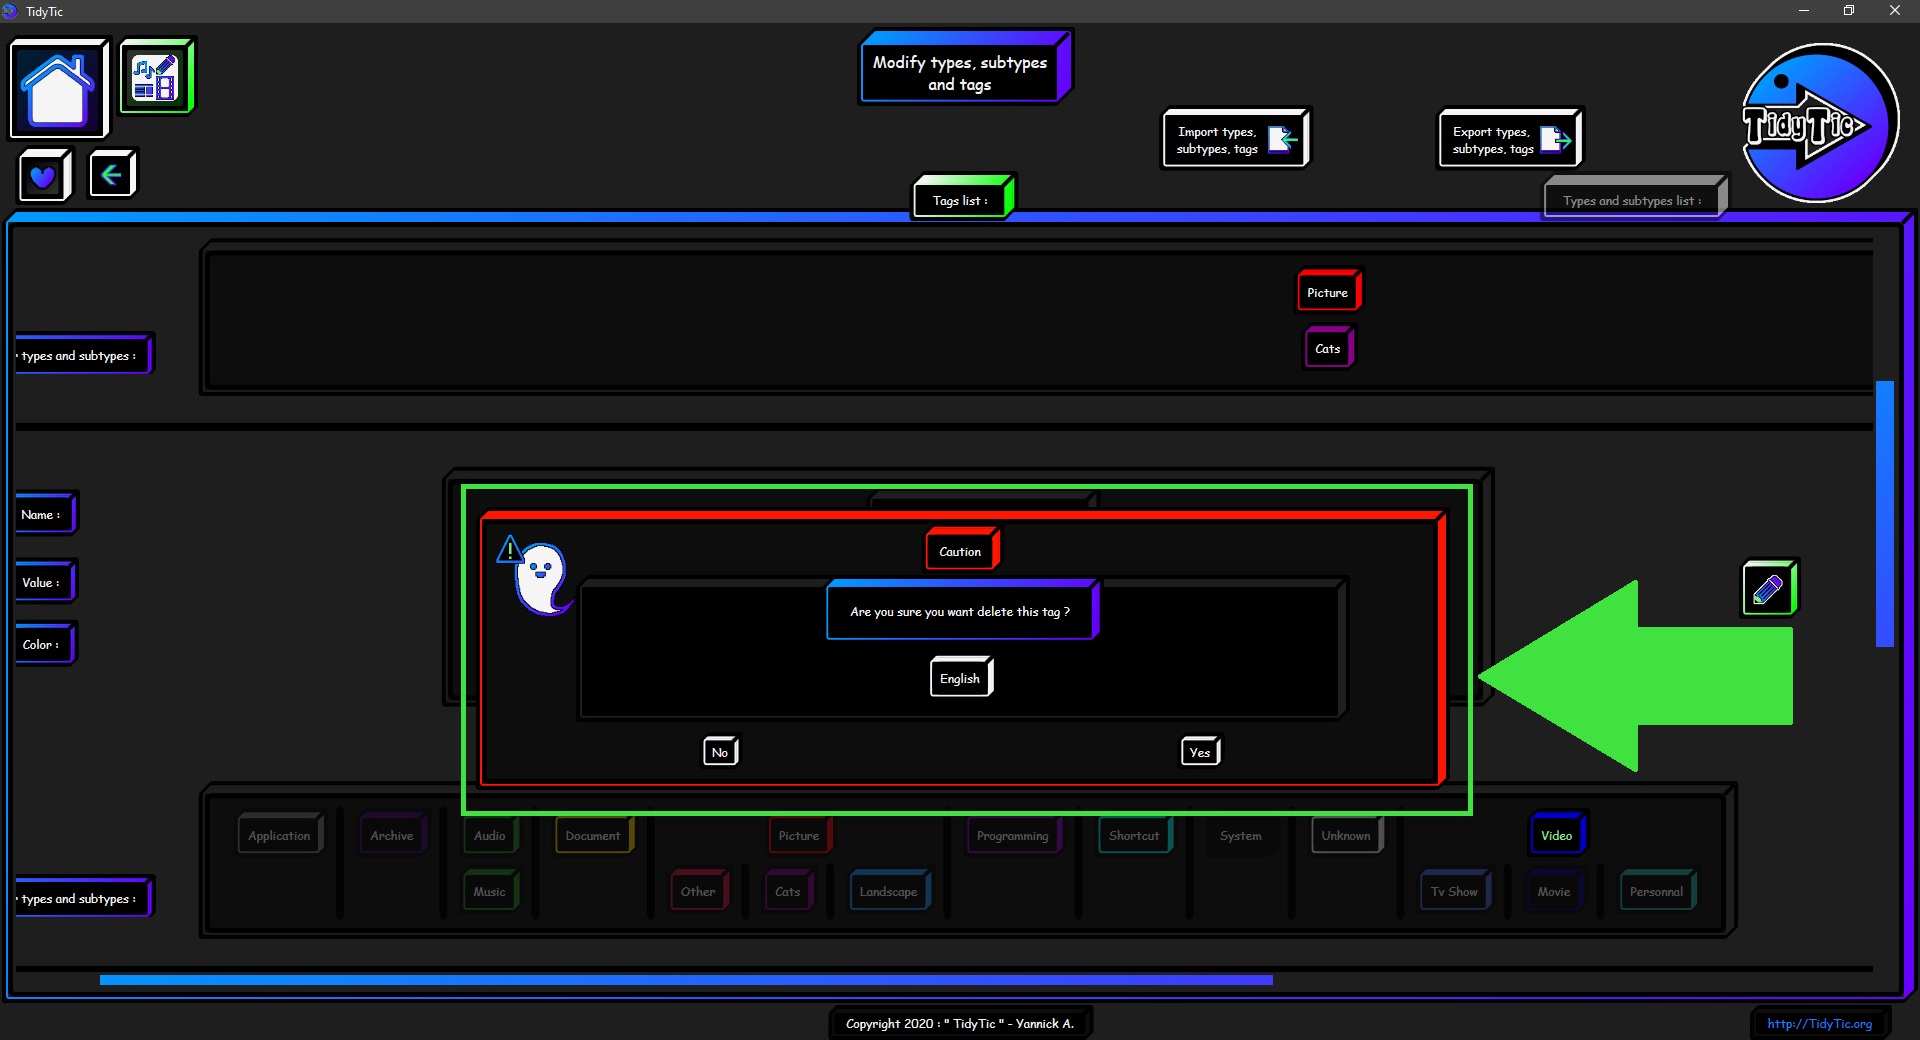
You can see in the screenshots below that I have already created a few tags that help me organize my files.
Like the "Cat" tag where each value corresponds to the name of the cats that you can see in my photos.
You can see that this tag is available for my "Picture" type and "Cat" subtype.
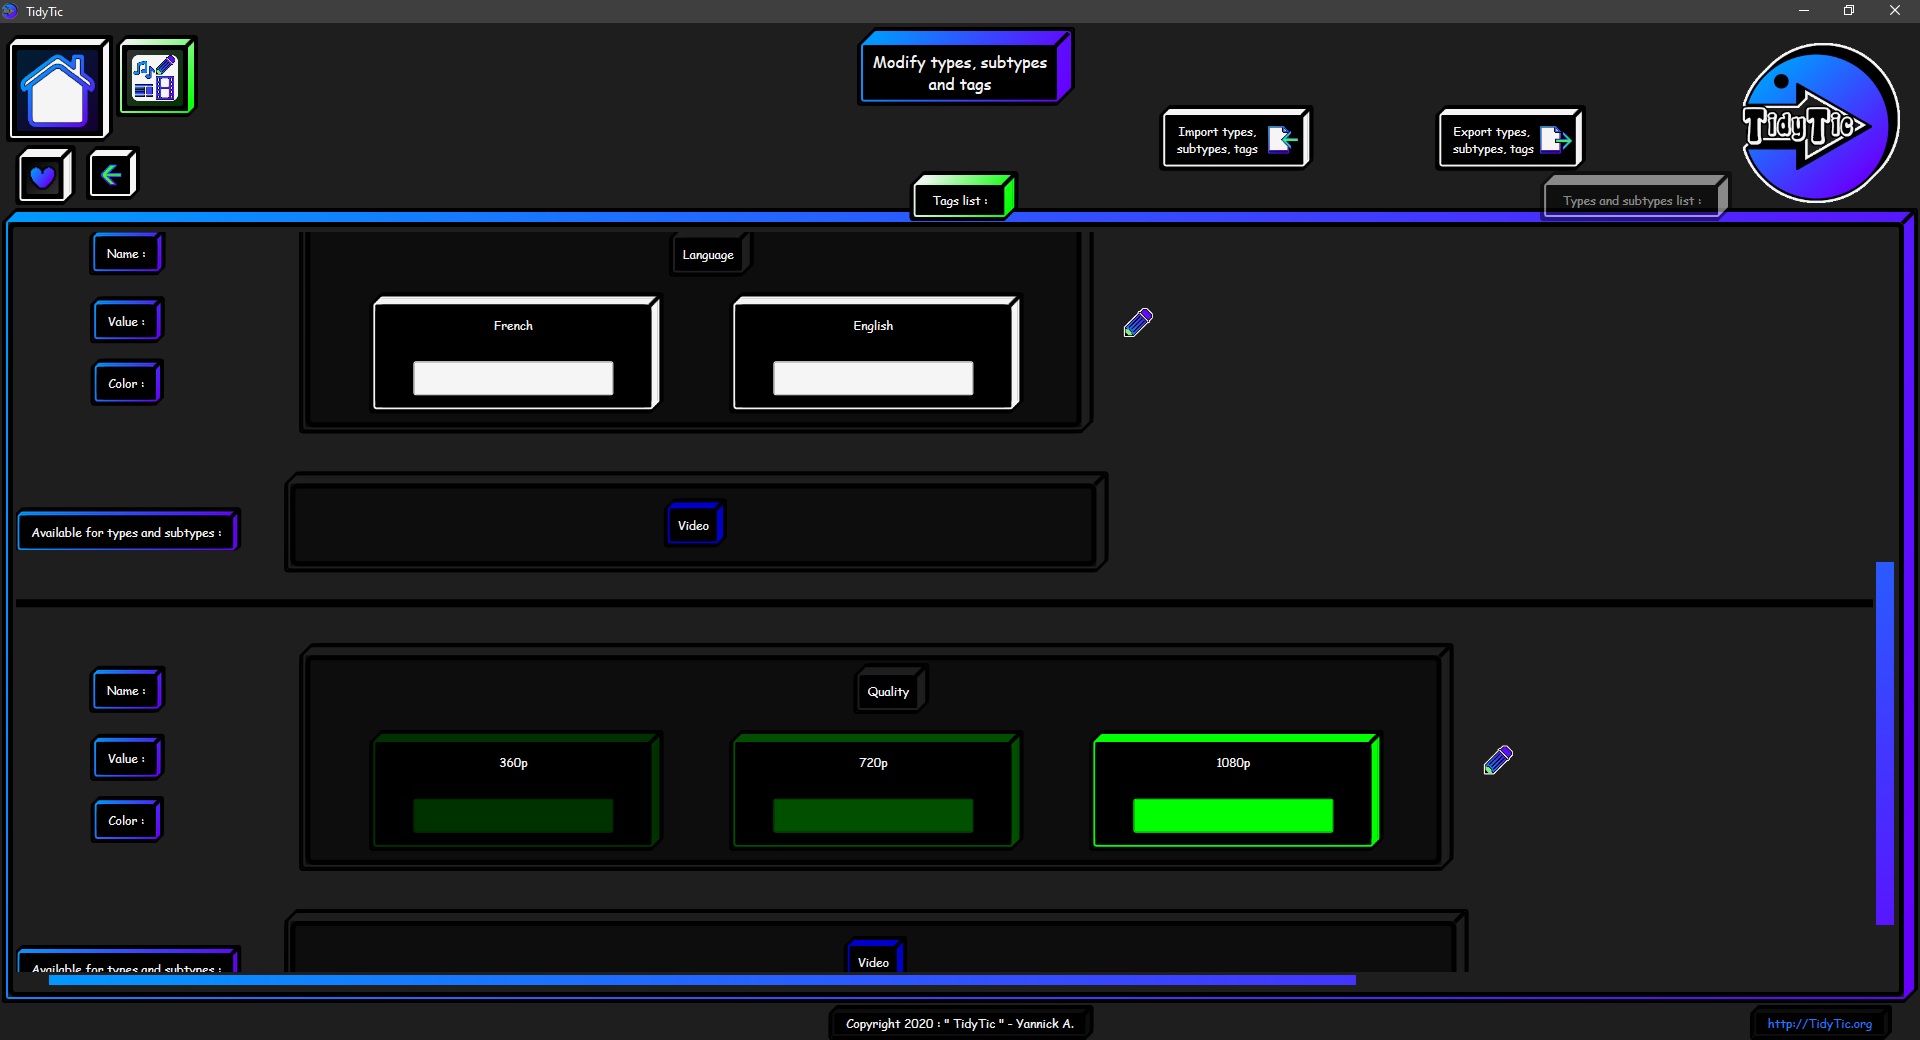
Or the “Language” and “Quality” tags which allow me to give more details on my videos in order to see this information in TidyTic without having to open the file or look at its properties to find out.
 ____
____ 
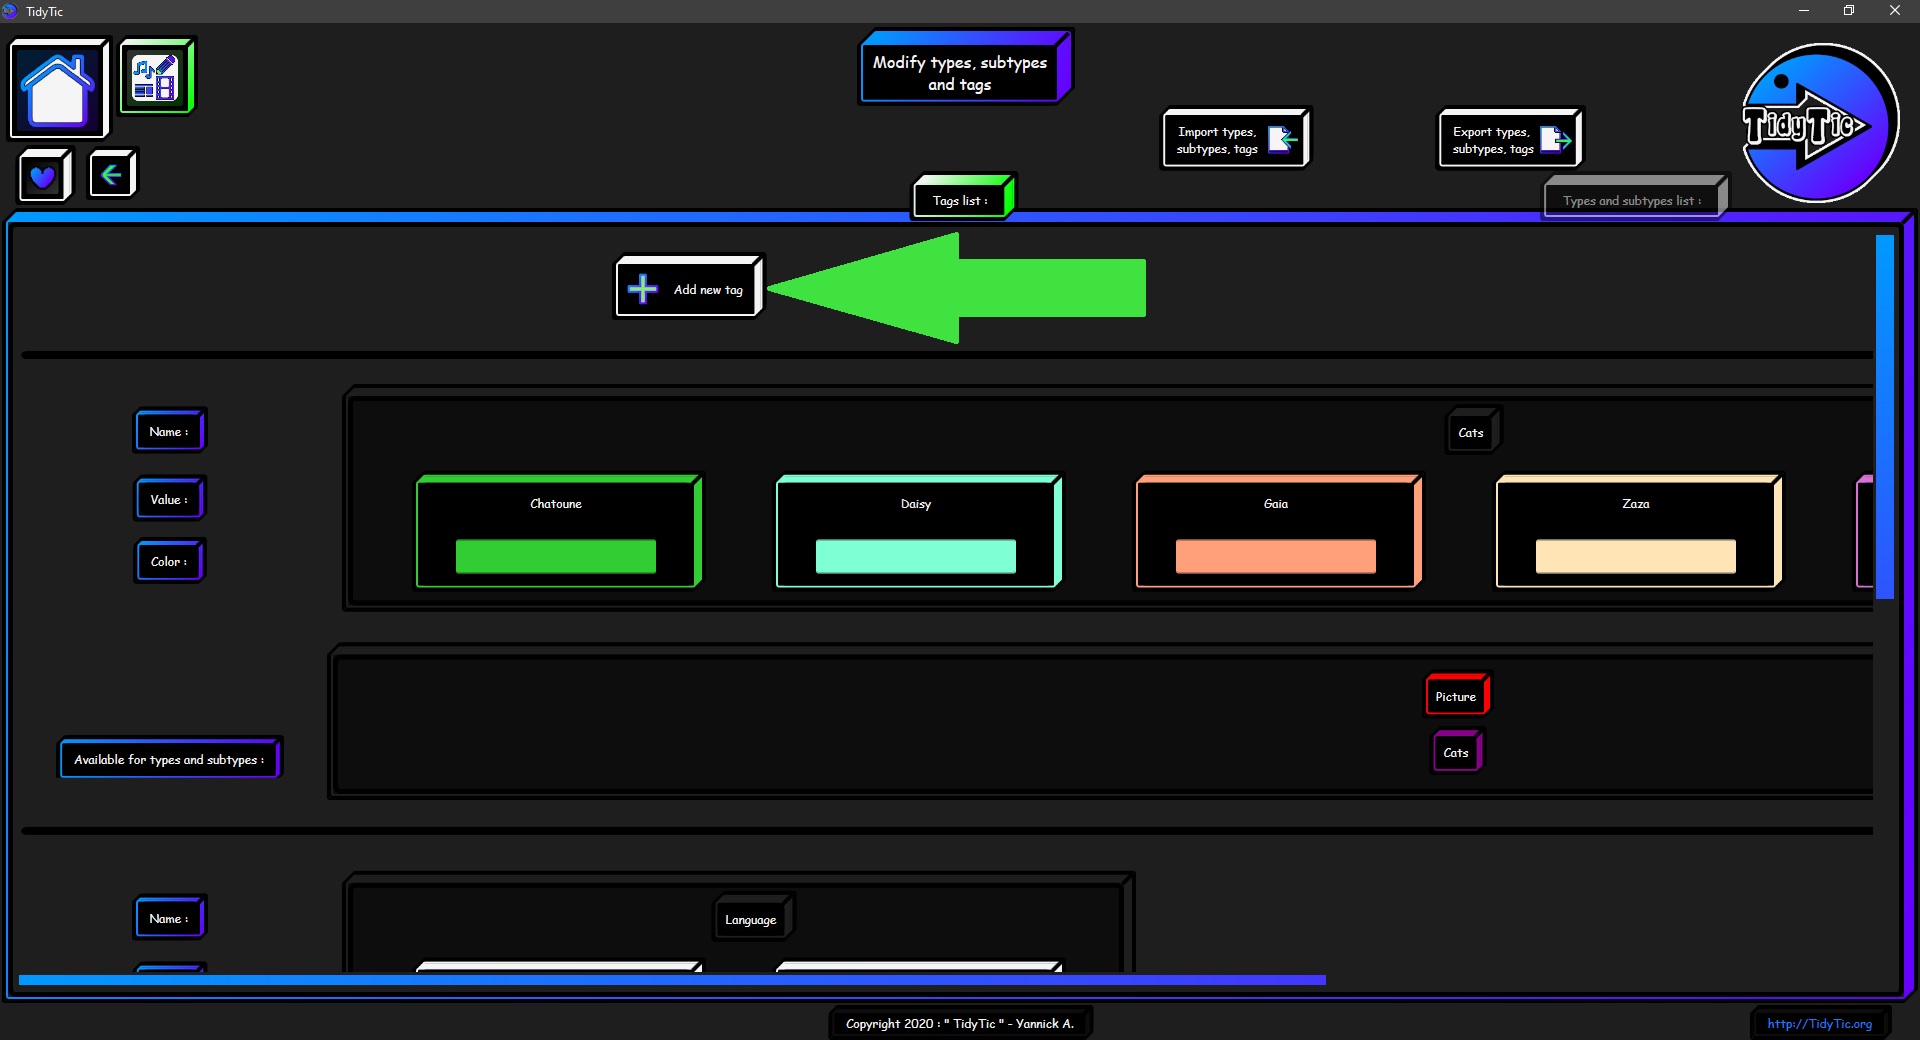
Create a tag :
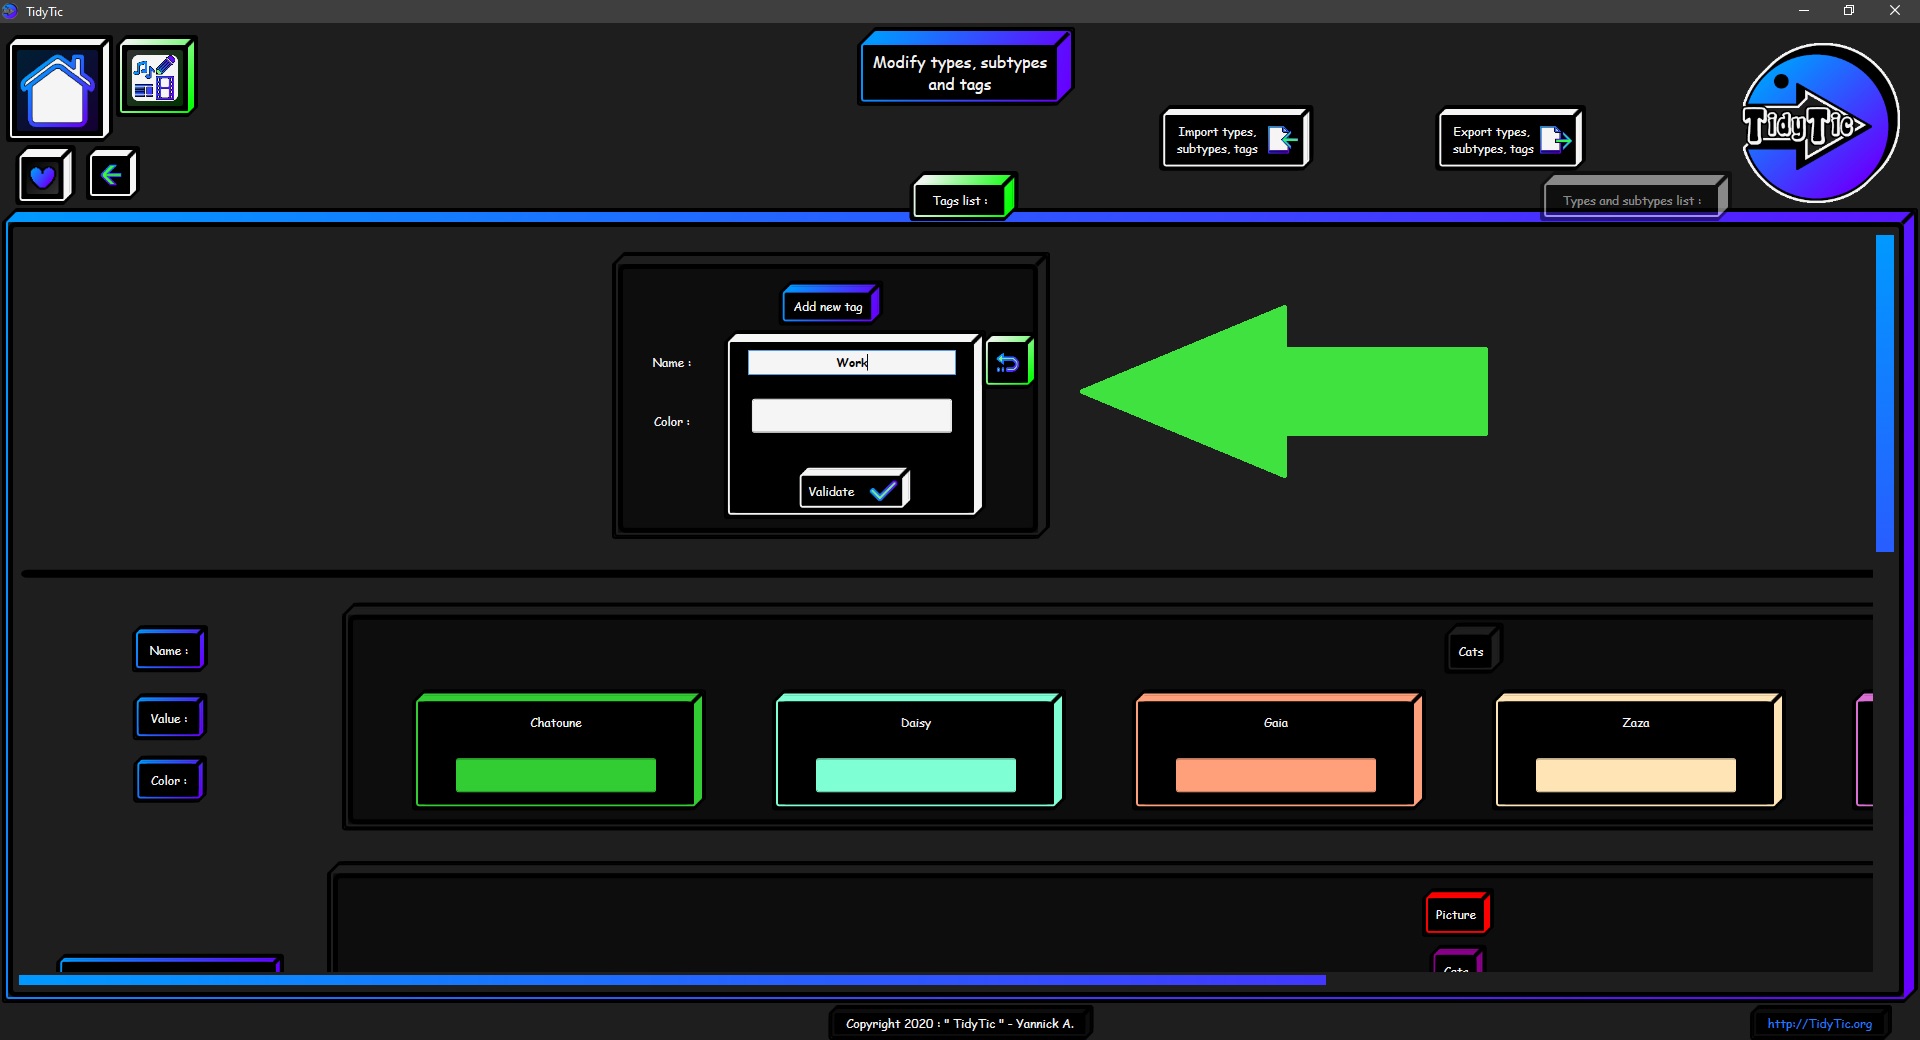
You have a button at the top of the page which will open a menu for creating the tag.
This menu will leave you with two options regarding this new tag :
Her name.
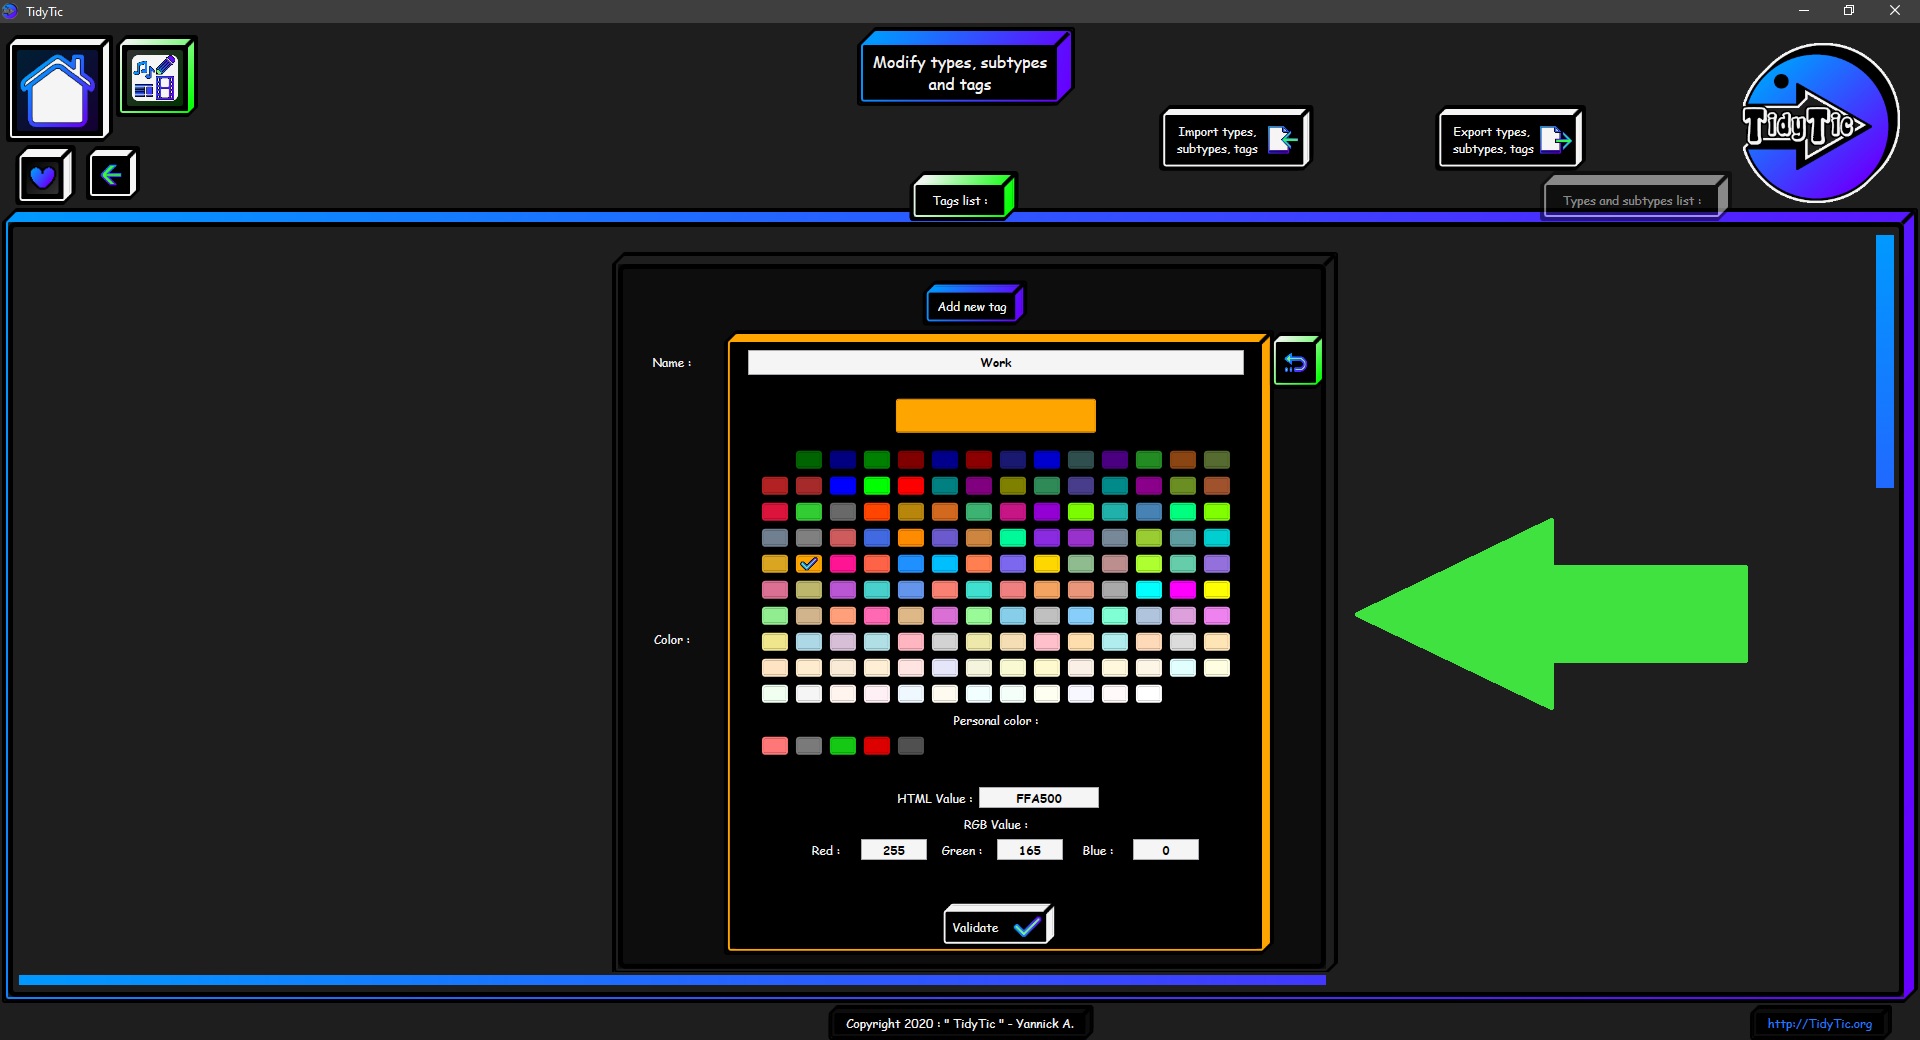
The default color for its values.
To change the default color, it's the same principle as for types / subtypes: just click on the colored square.
To add values to the tag, it must first be validated in order to add it to the list of tags.
Once added to the list you can modify it to add as many values as you want and customize its values.
By default the tag will be created with a single value which will be the same as the characteristic name.
 ____
____ 
To cancel the creation click on the " ![]() " button that you will find on the right.
" button that you will find on the right.

Once created we can see that it has been added to the list of tags.
Here it only has one value at the moment and it is not associated with any type / subtype.
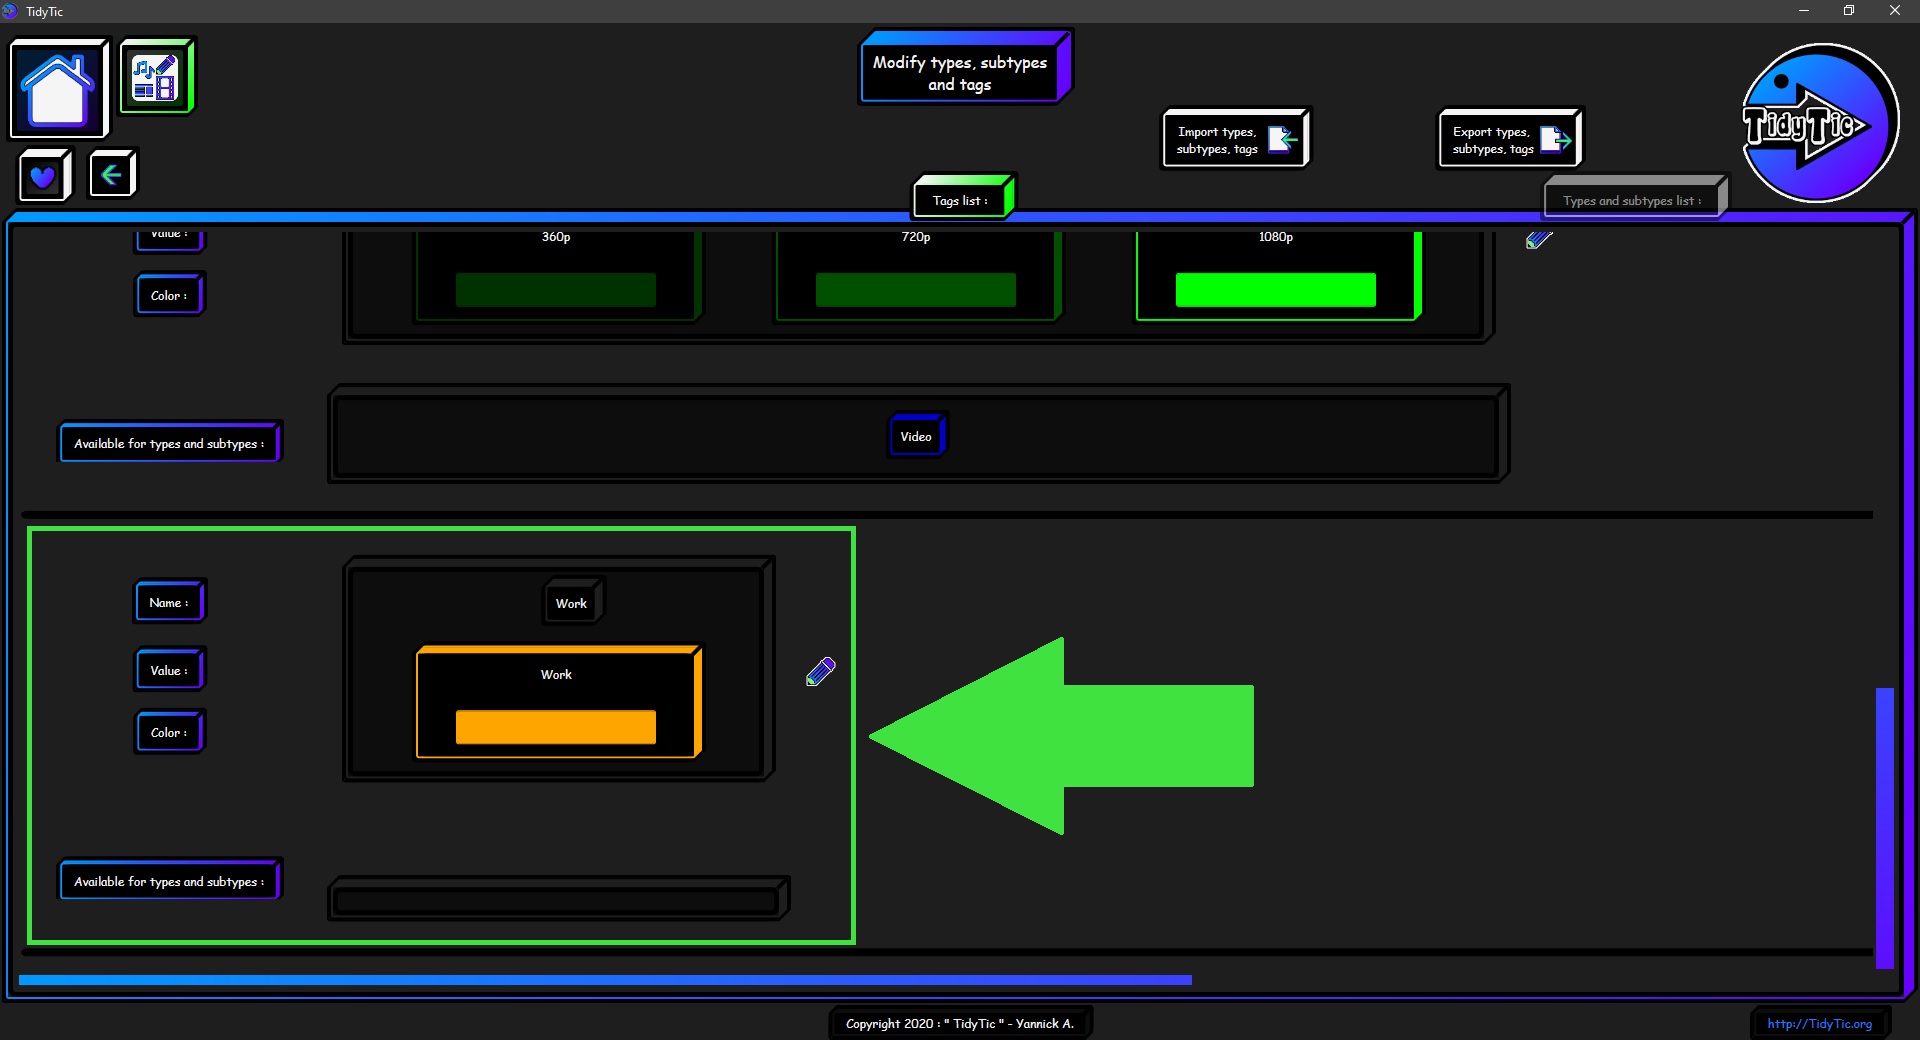
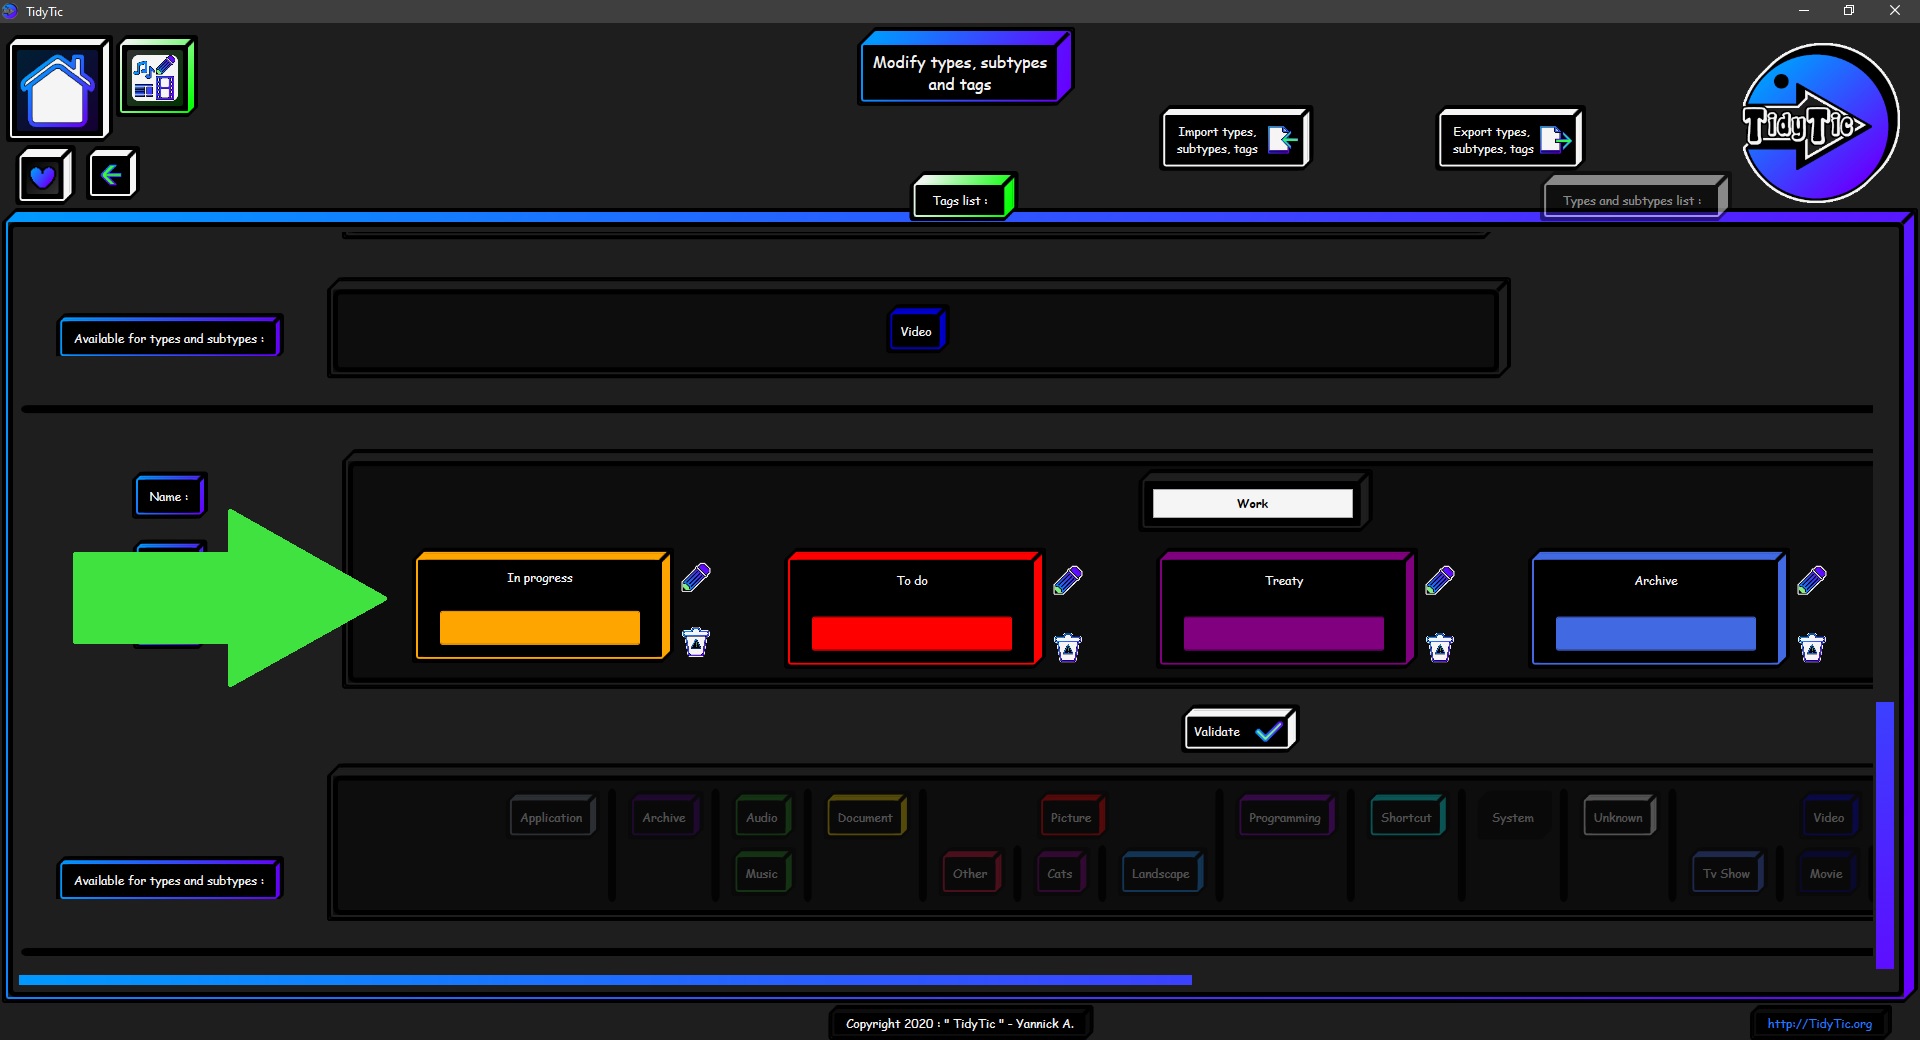
Modify a tag :
I'm going to work on the feature I just created to give you a concrete example of the possibilities.
I wish to have a “Work” tag with several values :
- In progress.
- To do.
- Treaty
- Archive
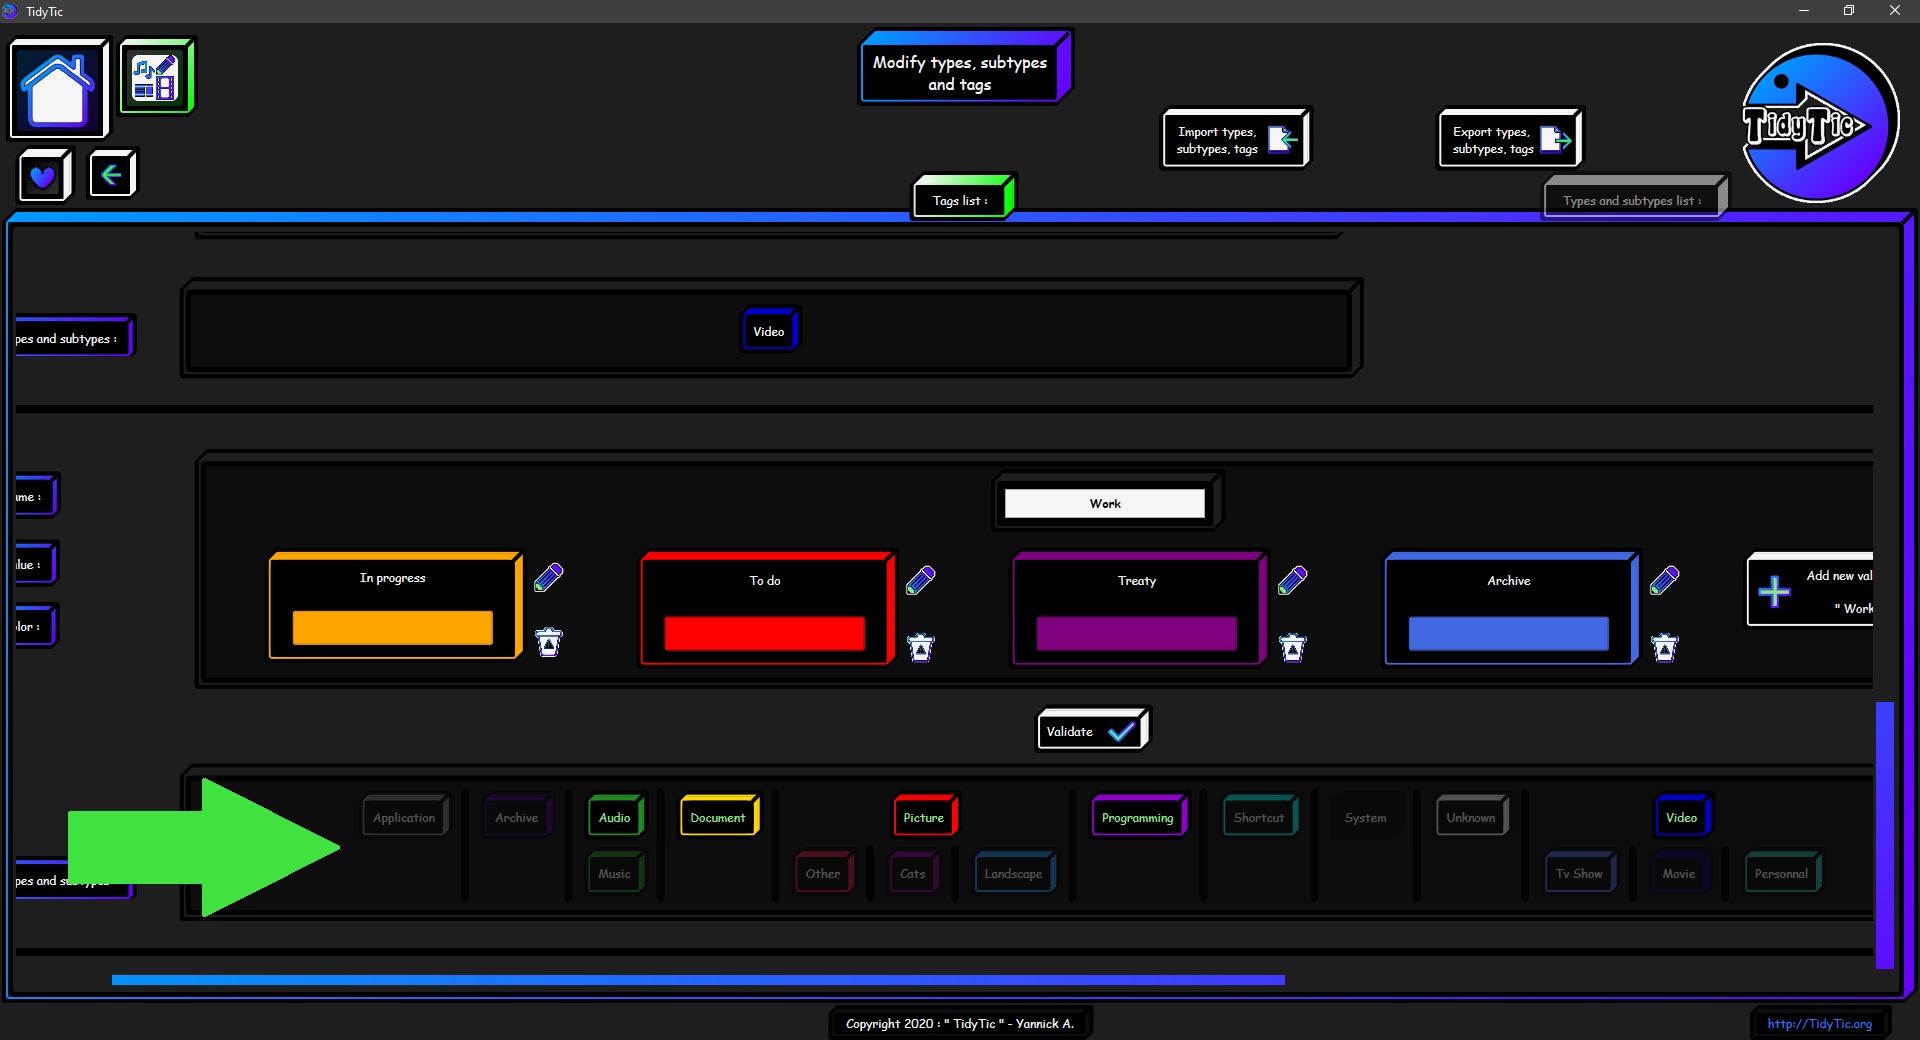
I will also associate this tag with several types so that I can use it on all the files I use for work :
The types "Document", "Programming" (which I created above), "Picture", "Audio" and finally "Video".
These types include all the files that I use for the development of TidyTic.
As for the types / subtypes there is no right or wrong way to use the tags, it depends on your use and the files you are going to work on.
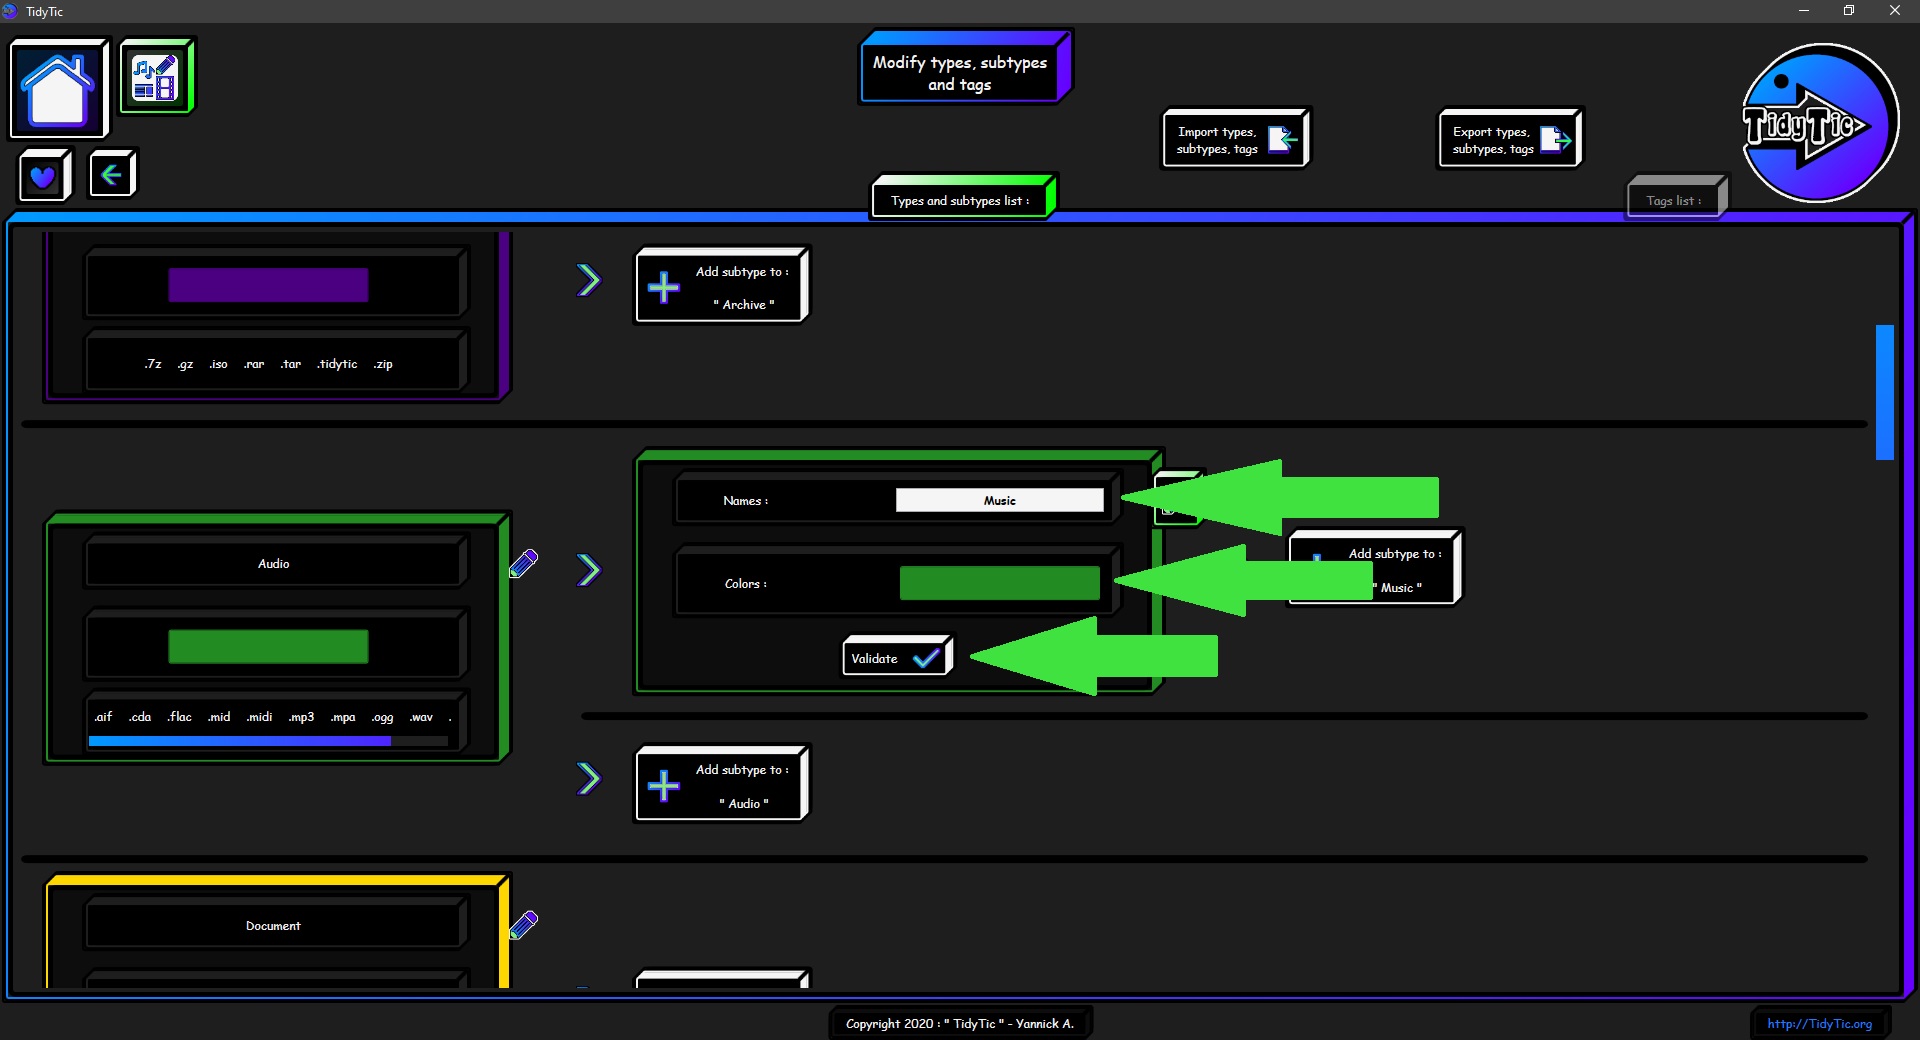
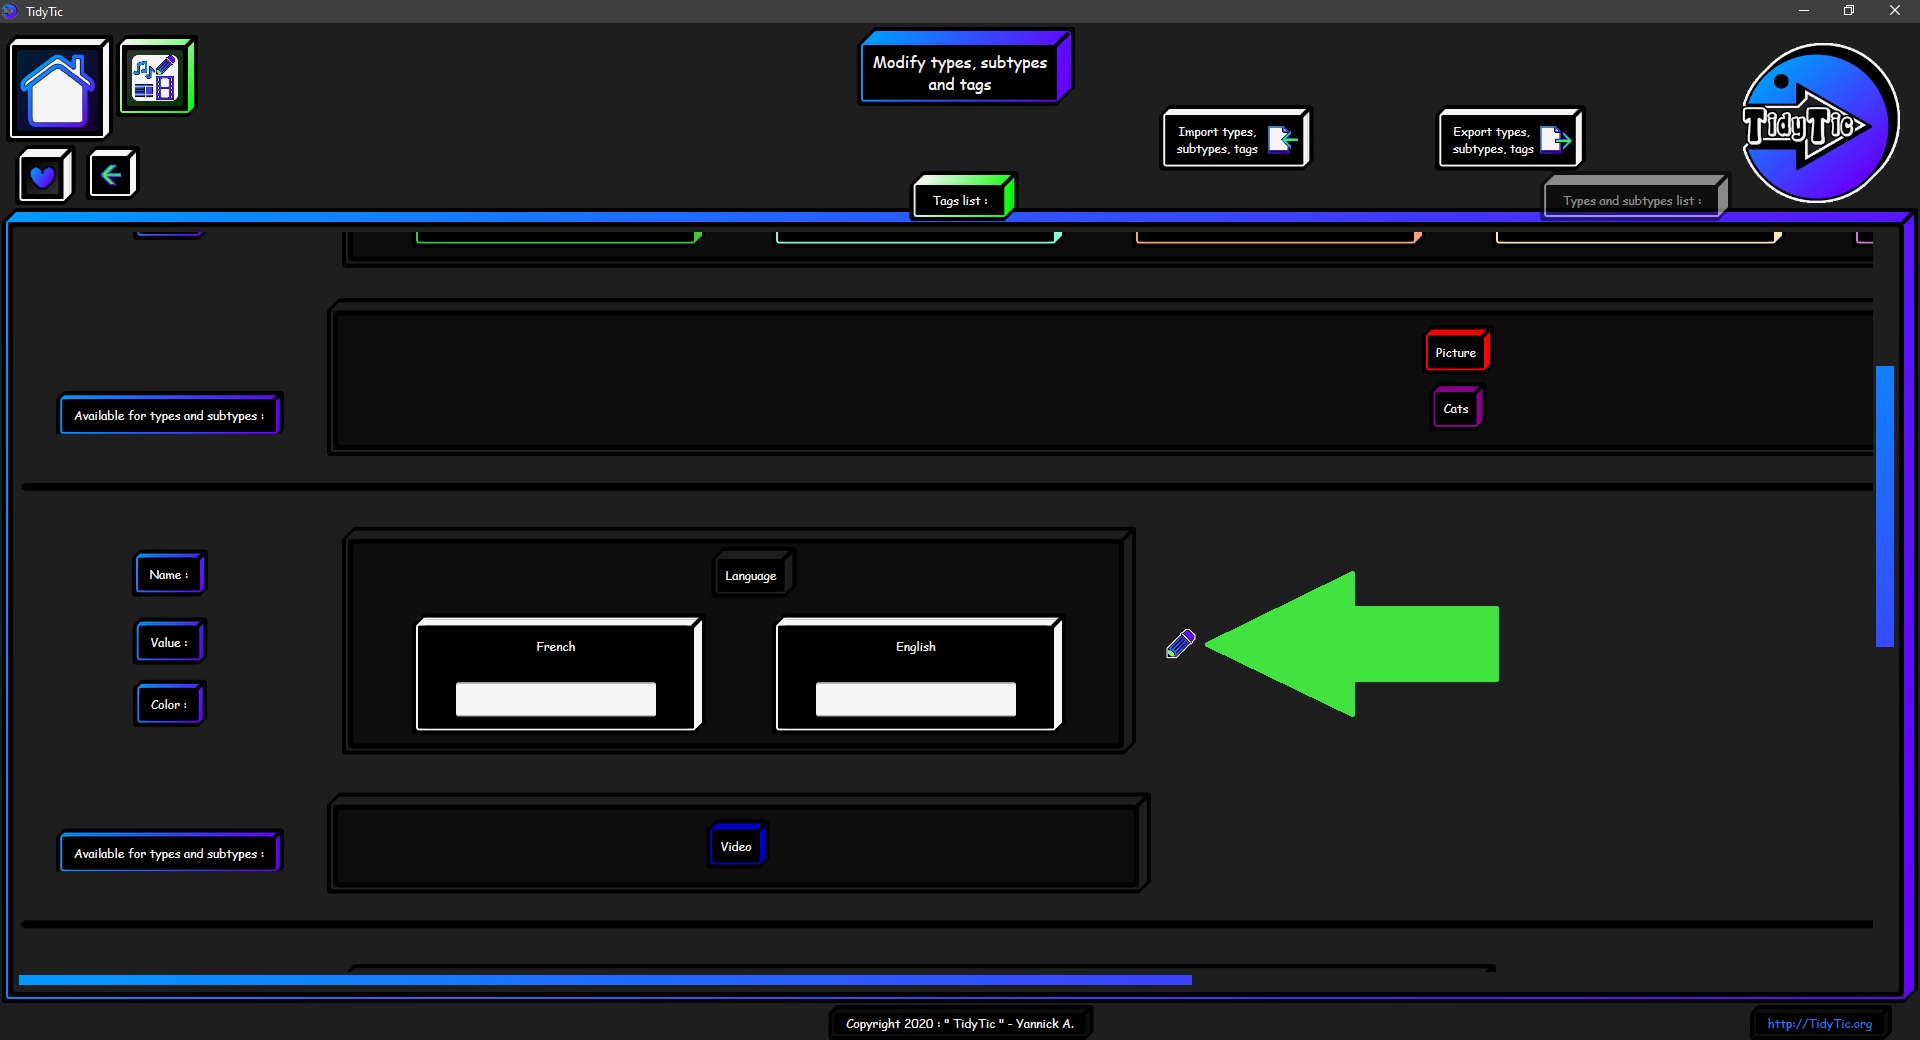
To modify it, I just need to click on the " ![]() " button to the right of the tag.
" button to the right of the tag.
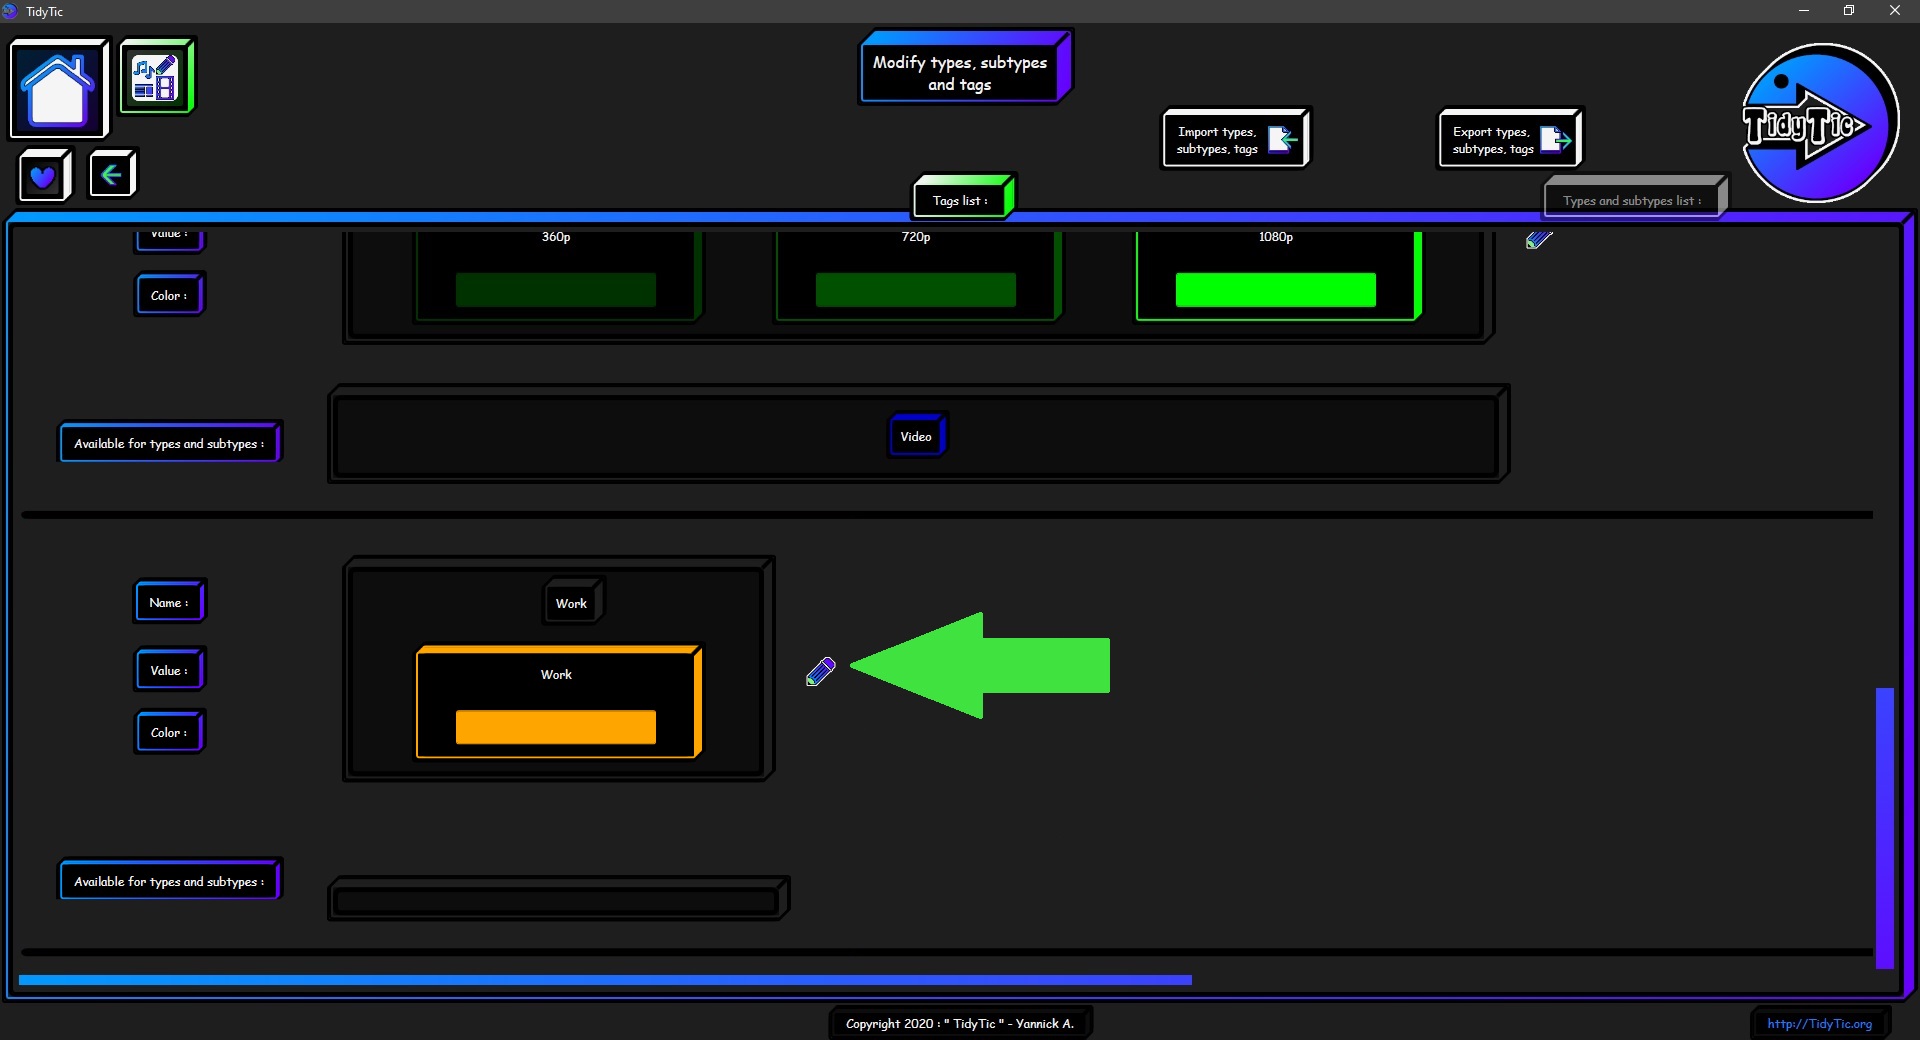
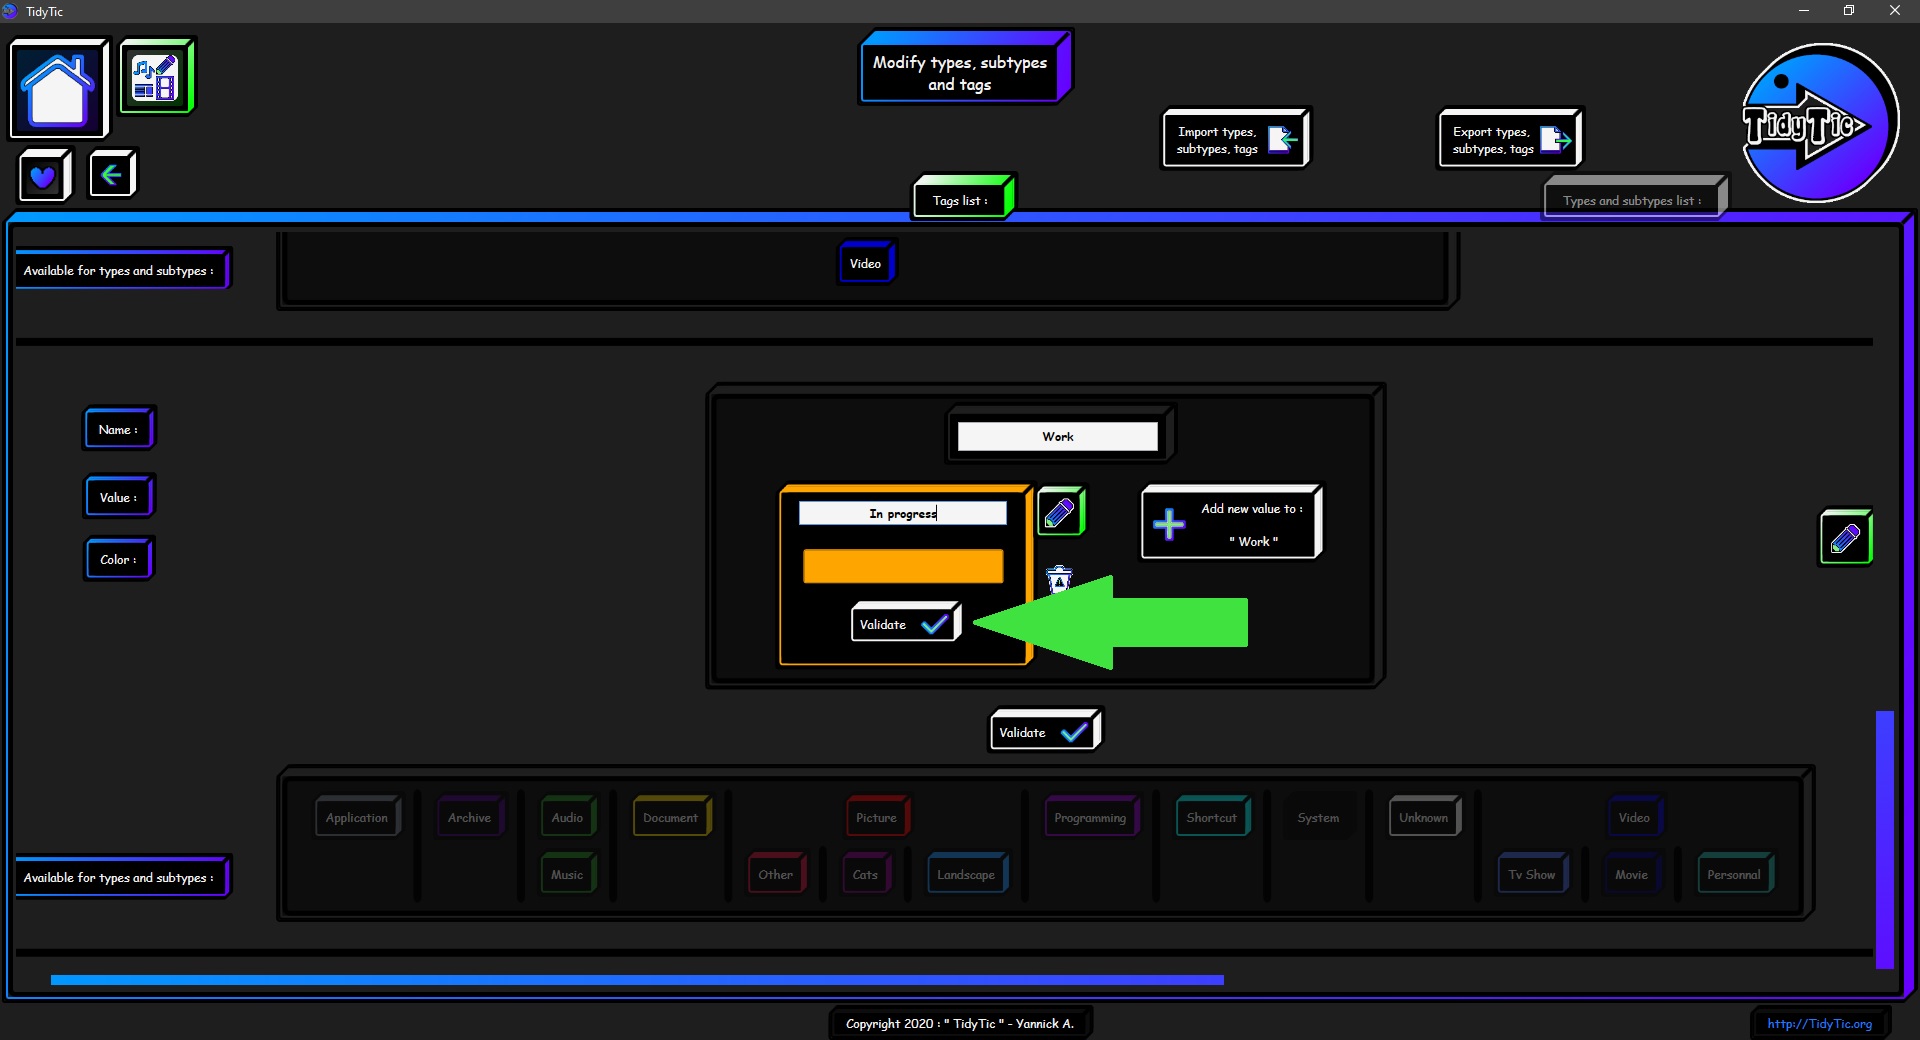
Once in modification mode you can modify the name of this tag.
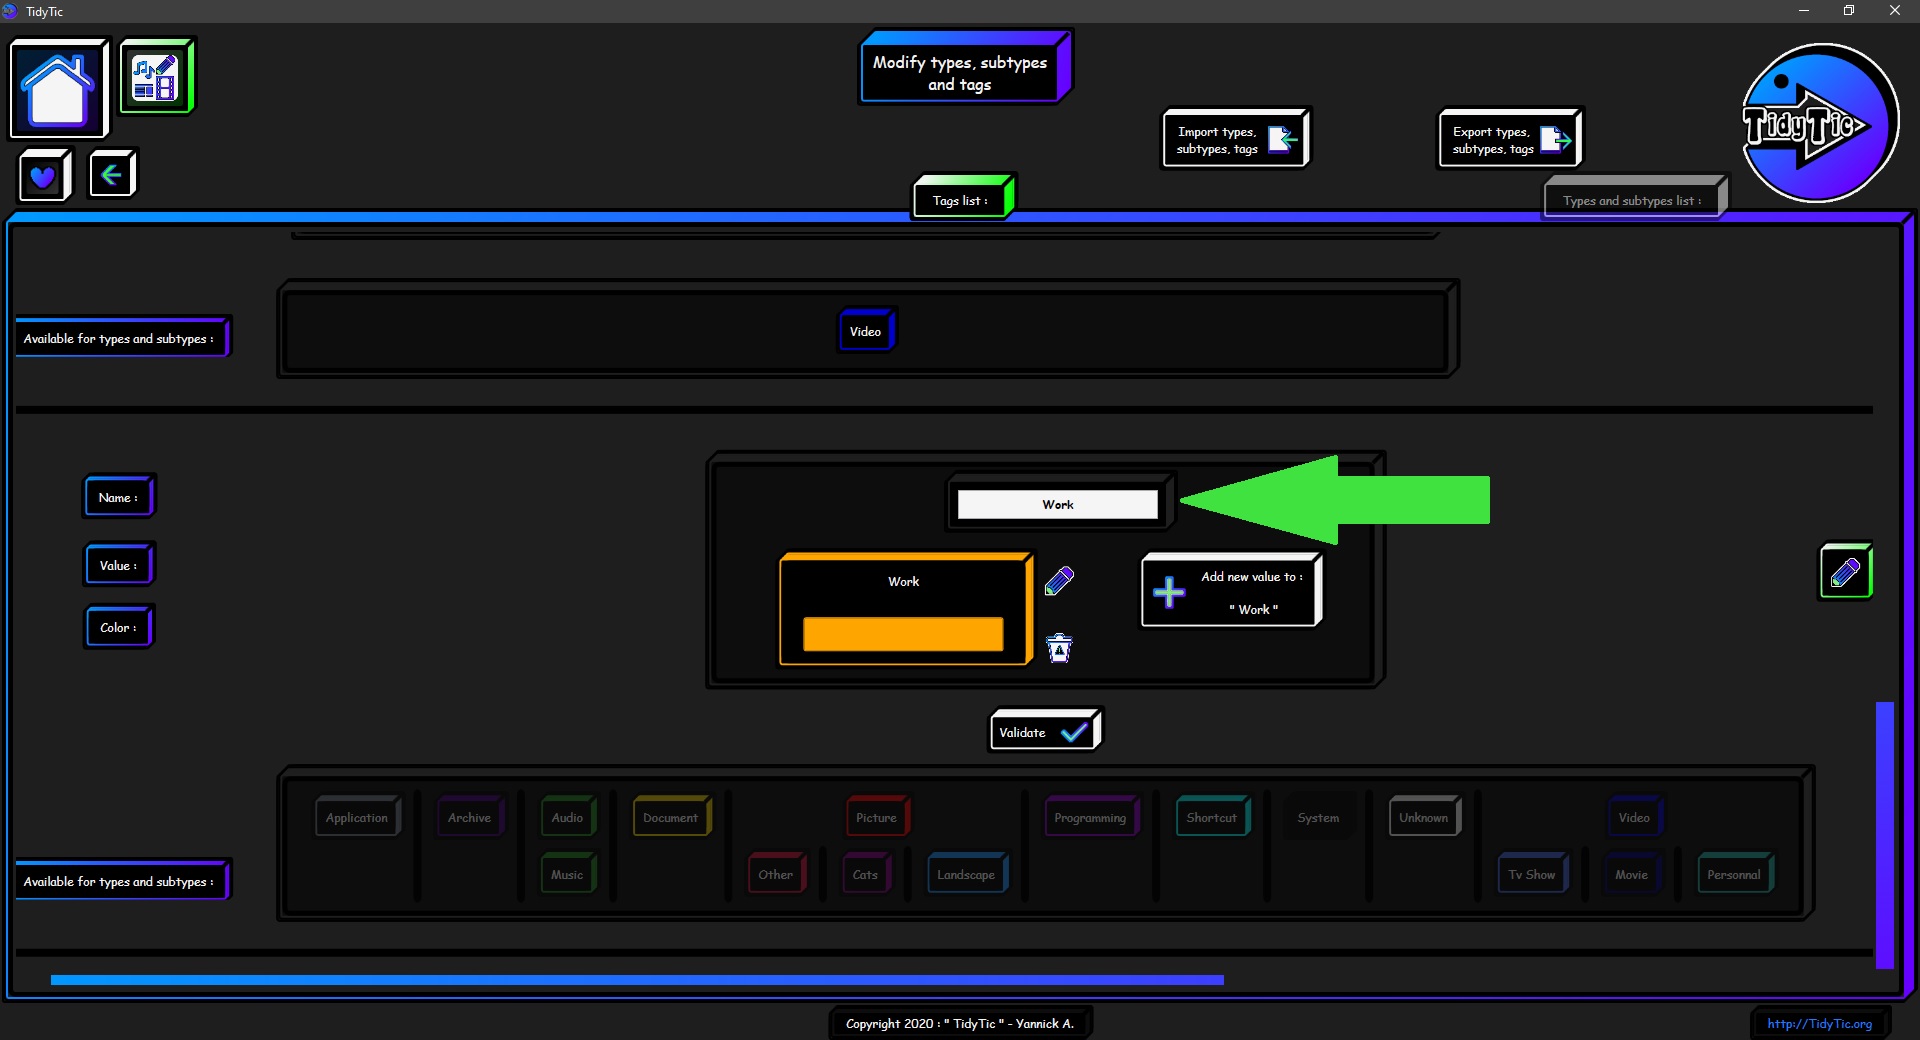
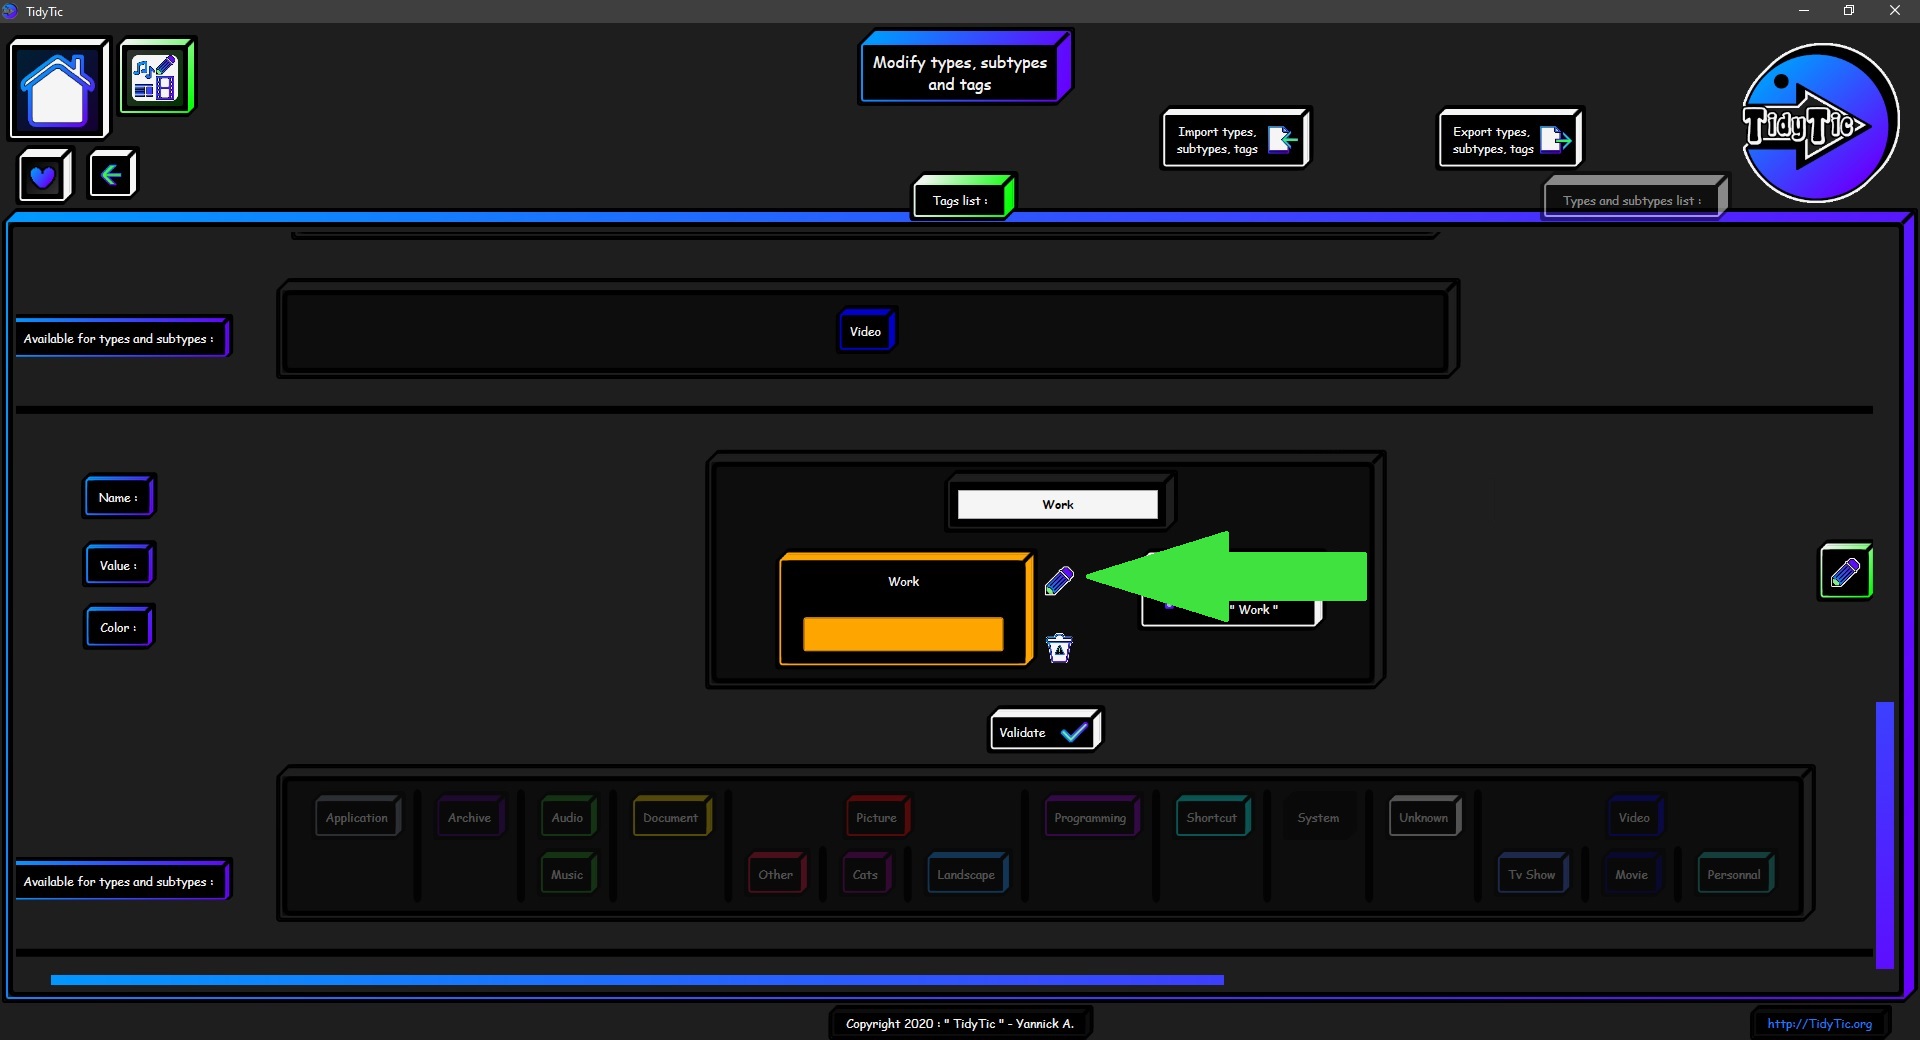
You can modify the values already present by clicking on the " ![]() " button next to each value.
" button next to each value.
To cancel the modifications, click again on this button.
You will also have to validate the modifications so that they are taken into account.
 ____
____  ____
____ 
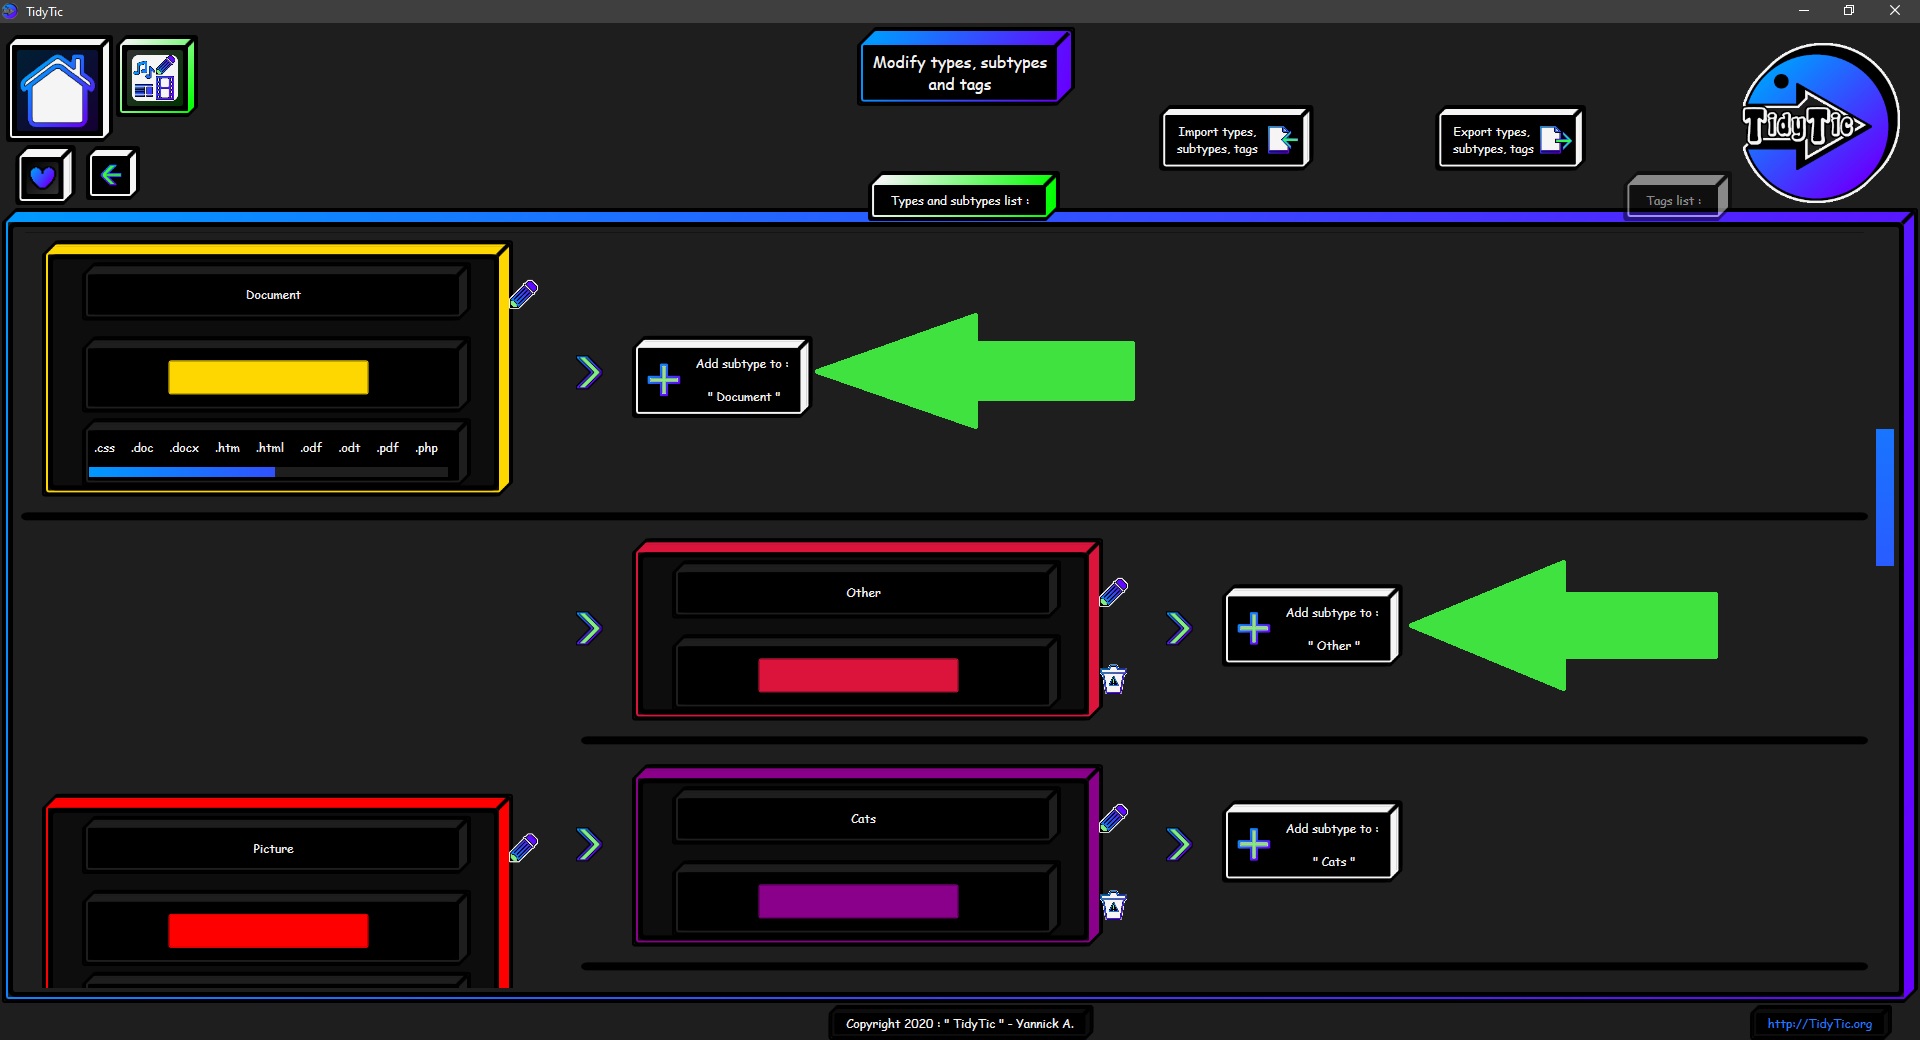
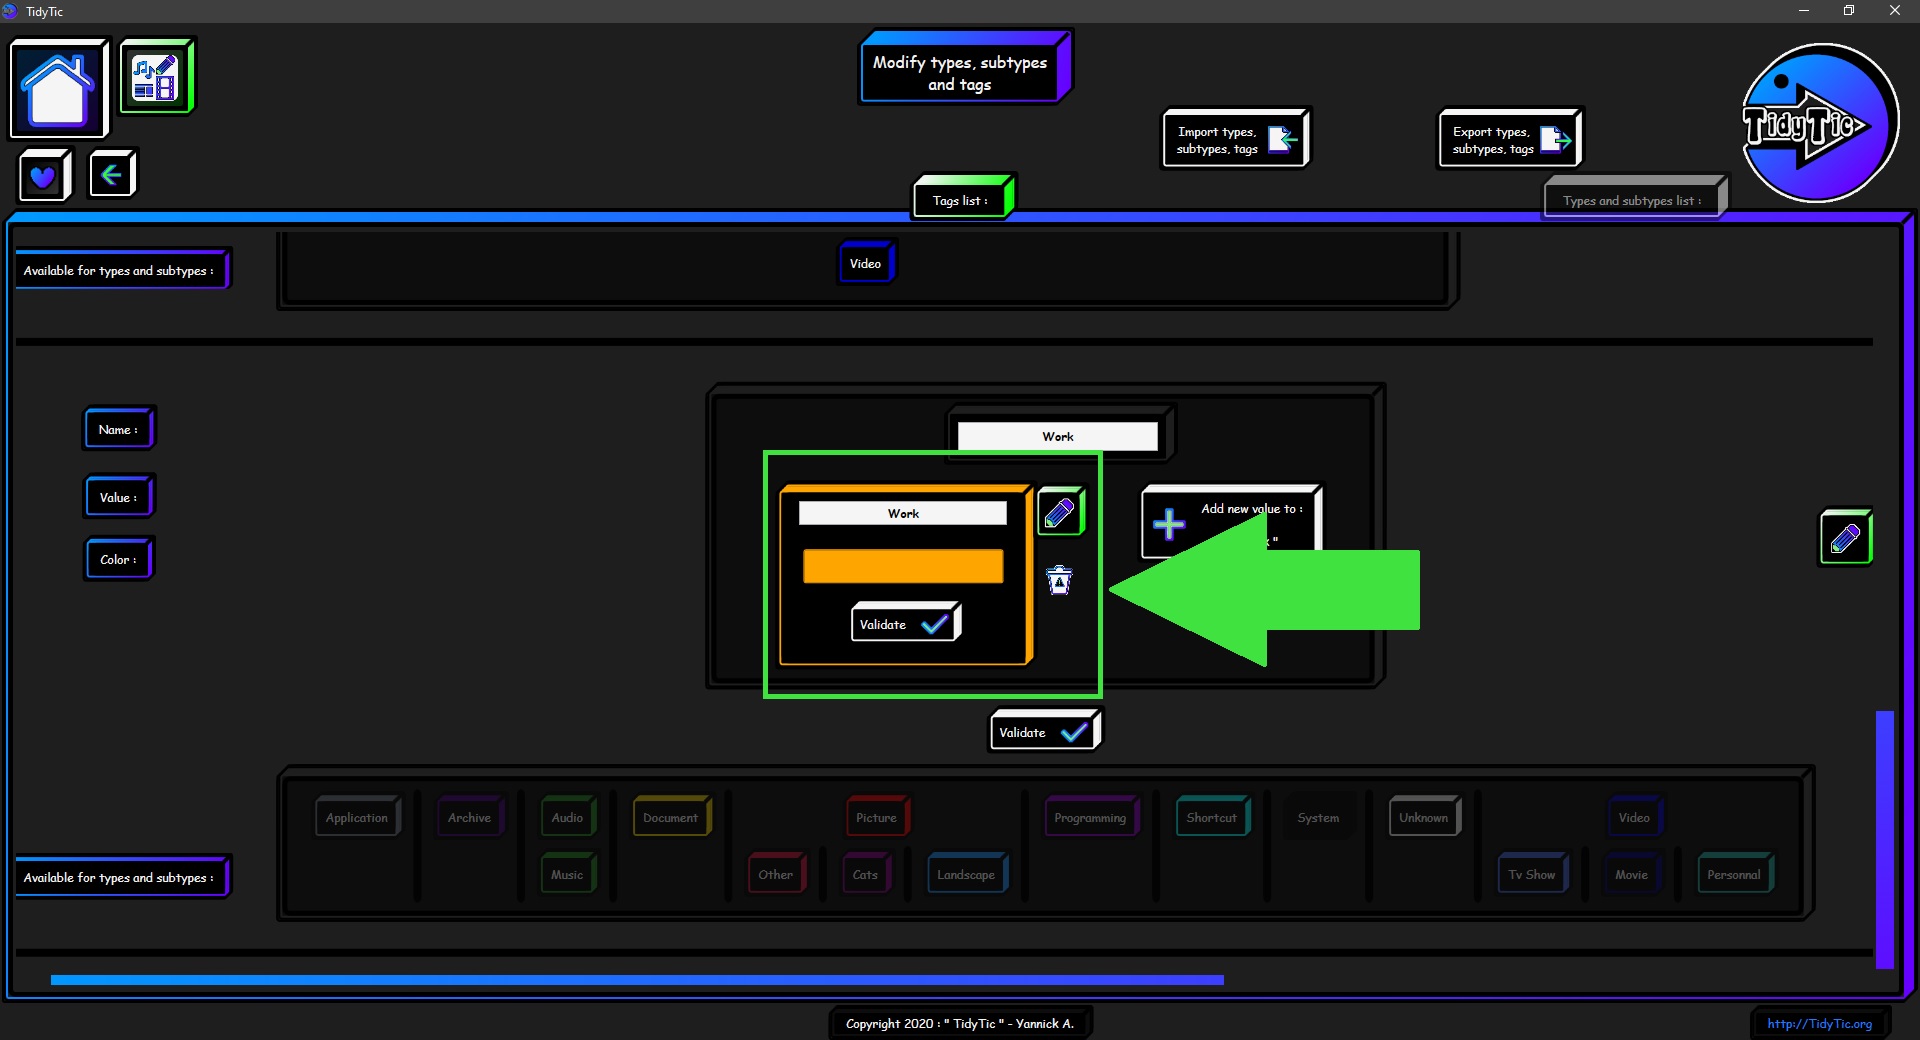
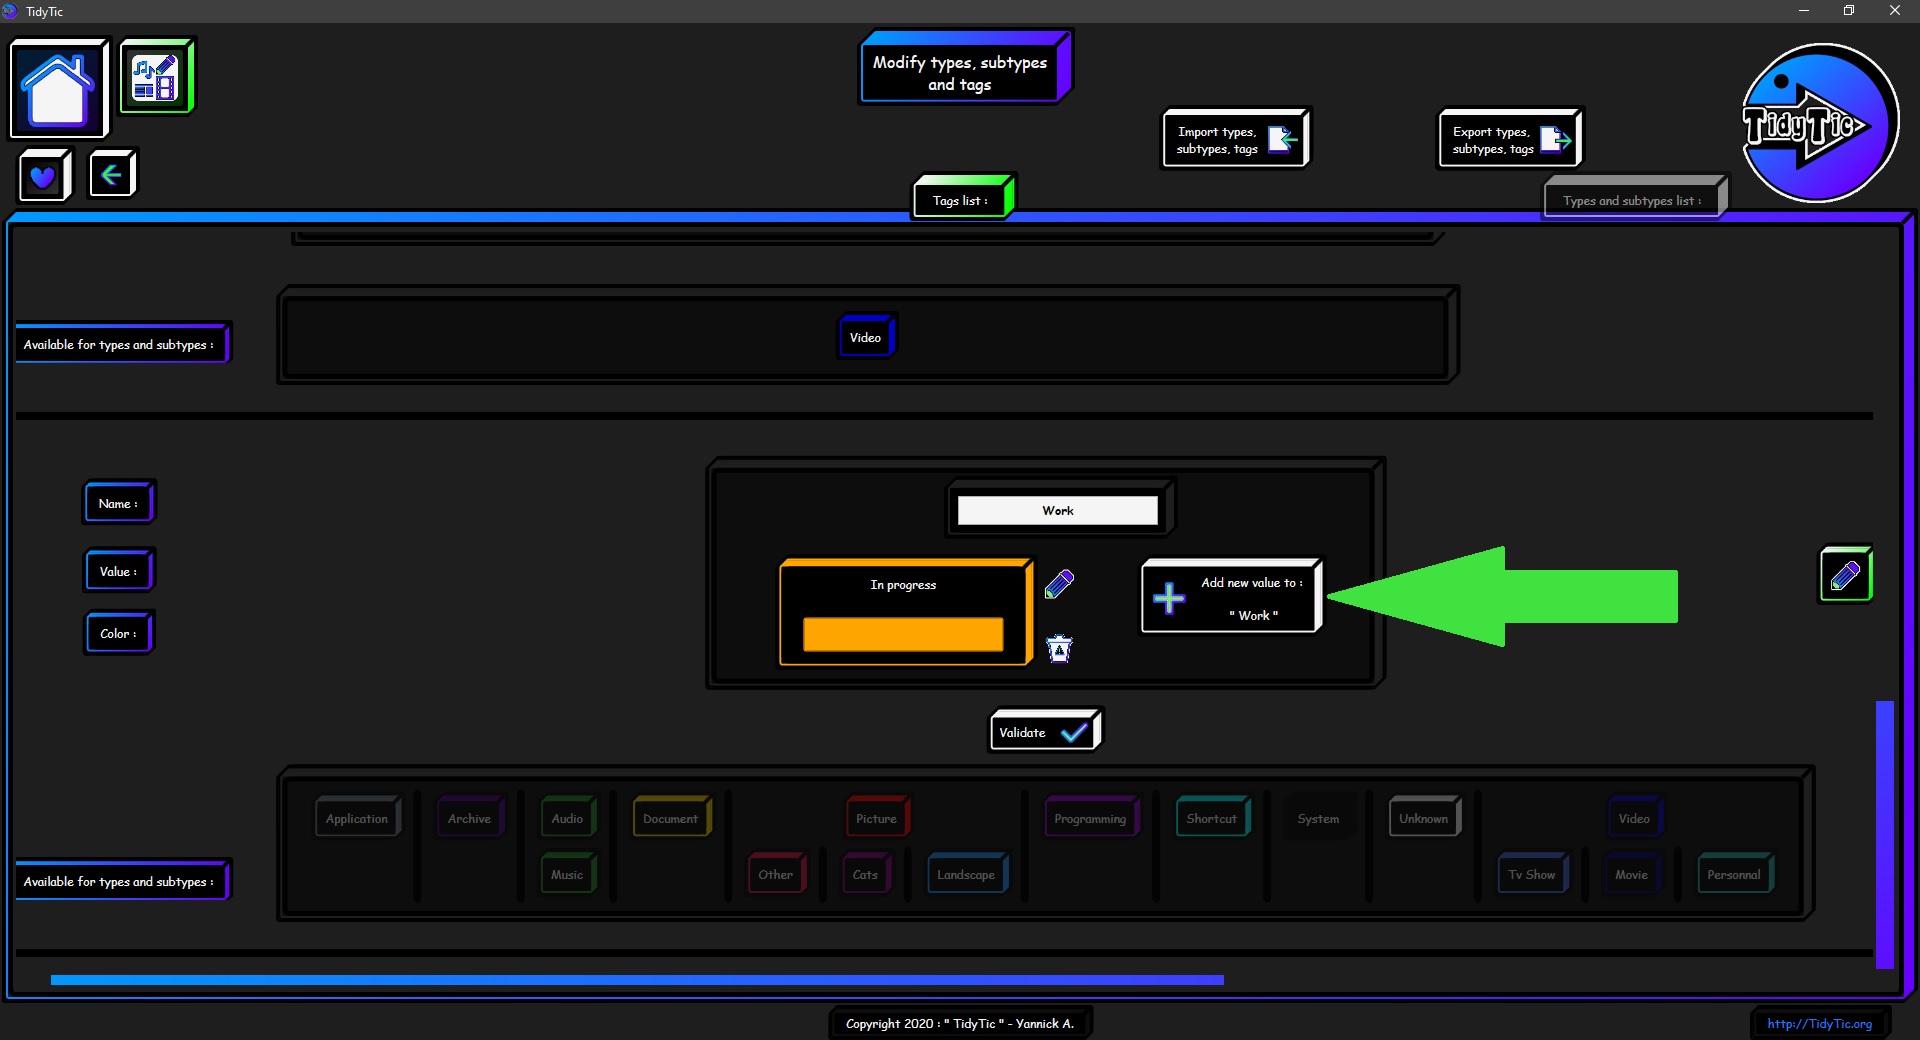
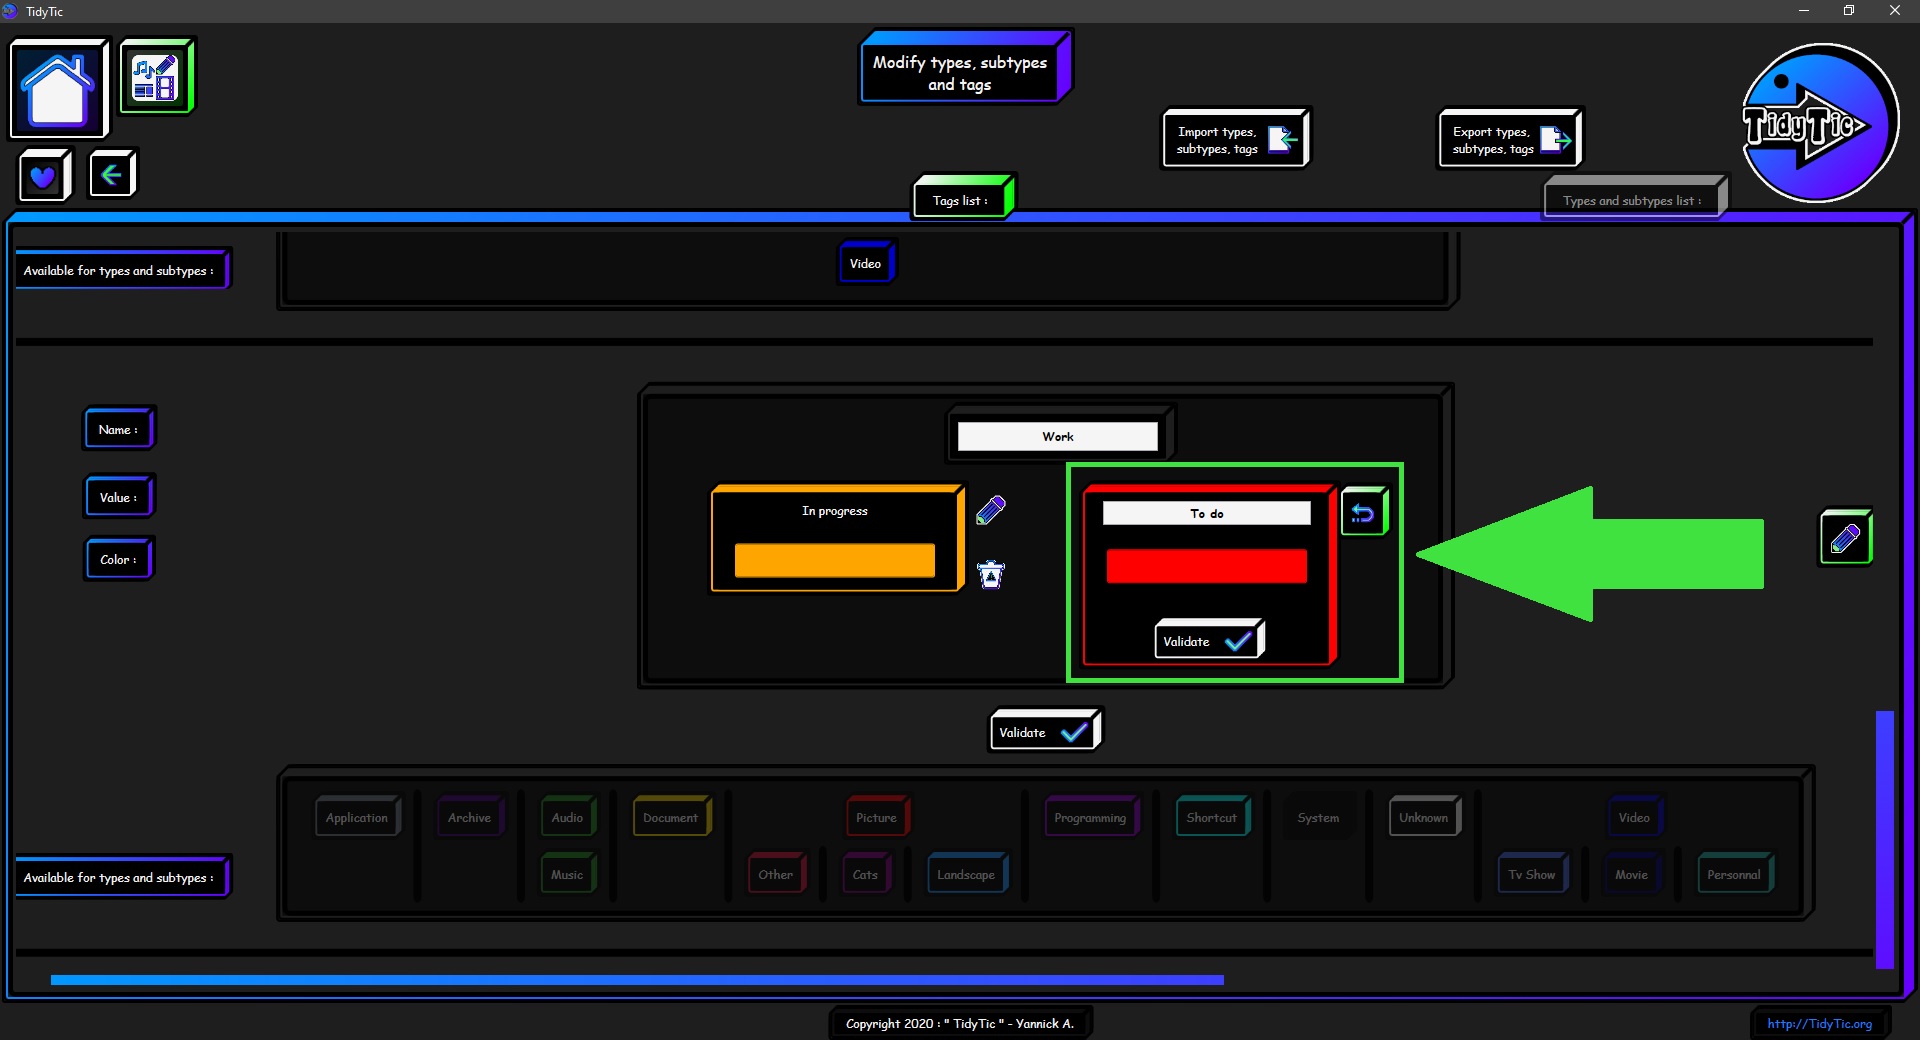
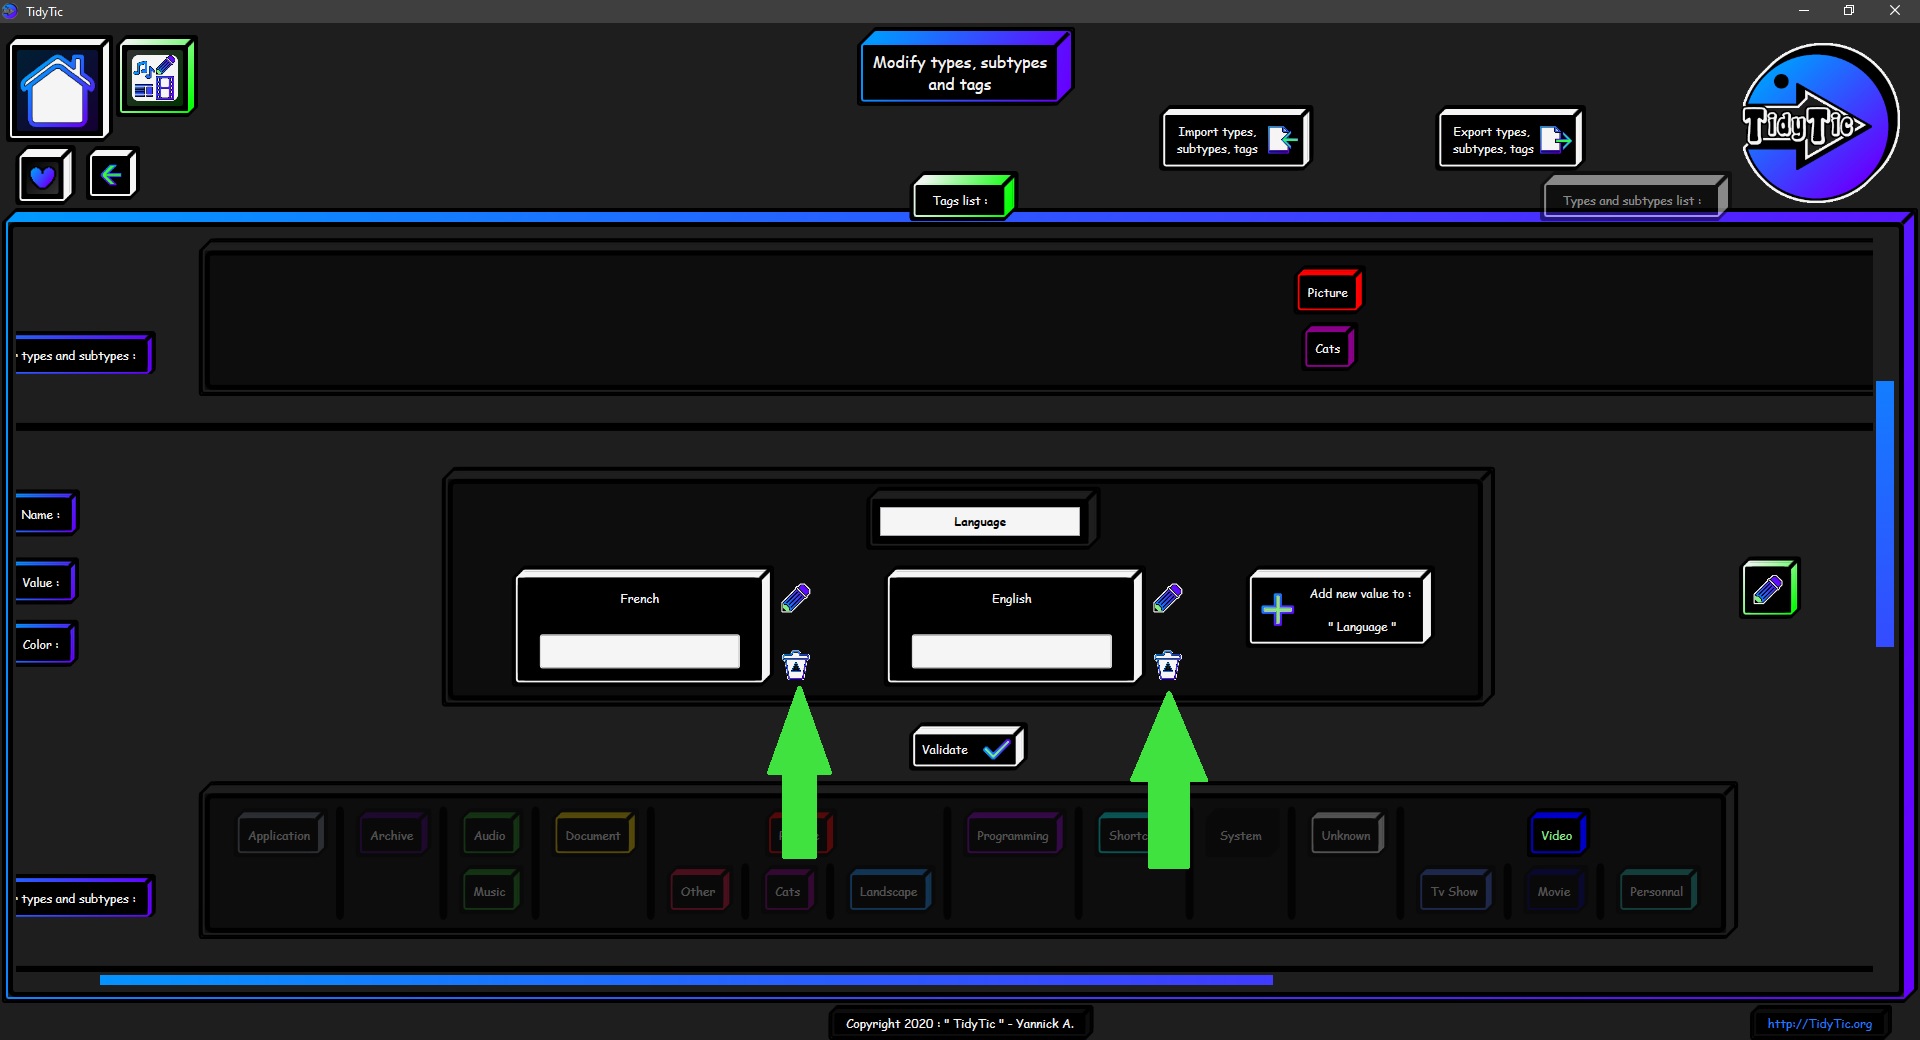
You can also add a value by clicking on the corresponding button.
Here you can give the name you want and choose a color for this value.
 ____
____  ____
____ 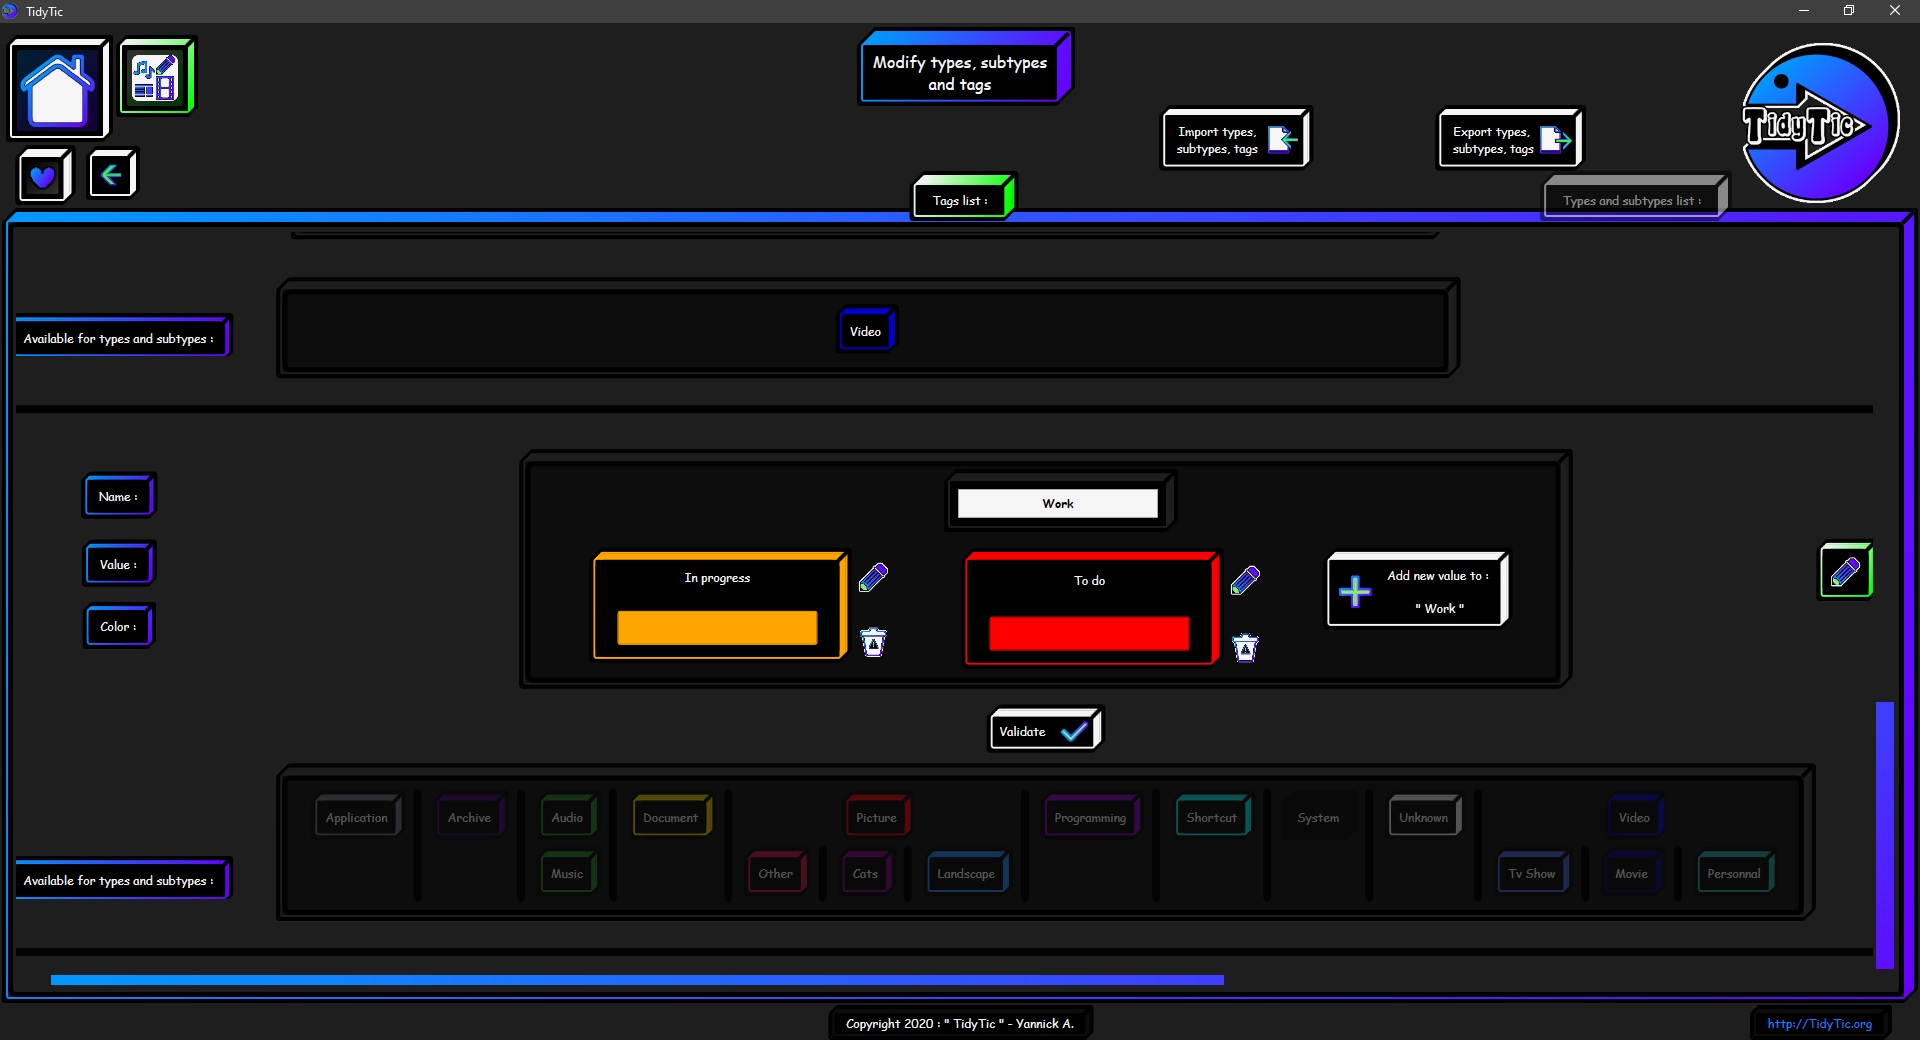
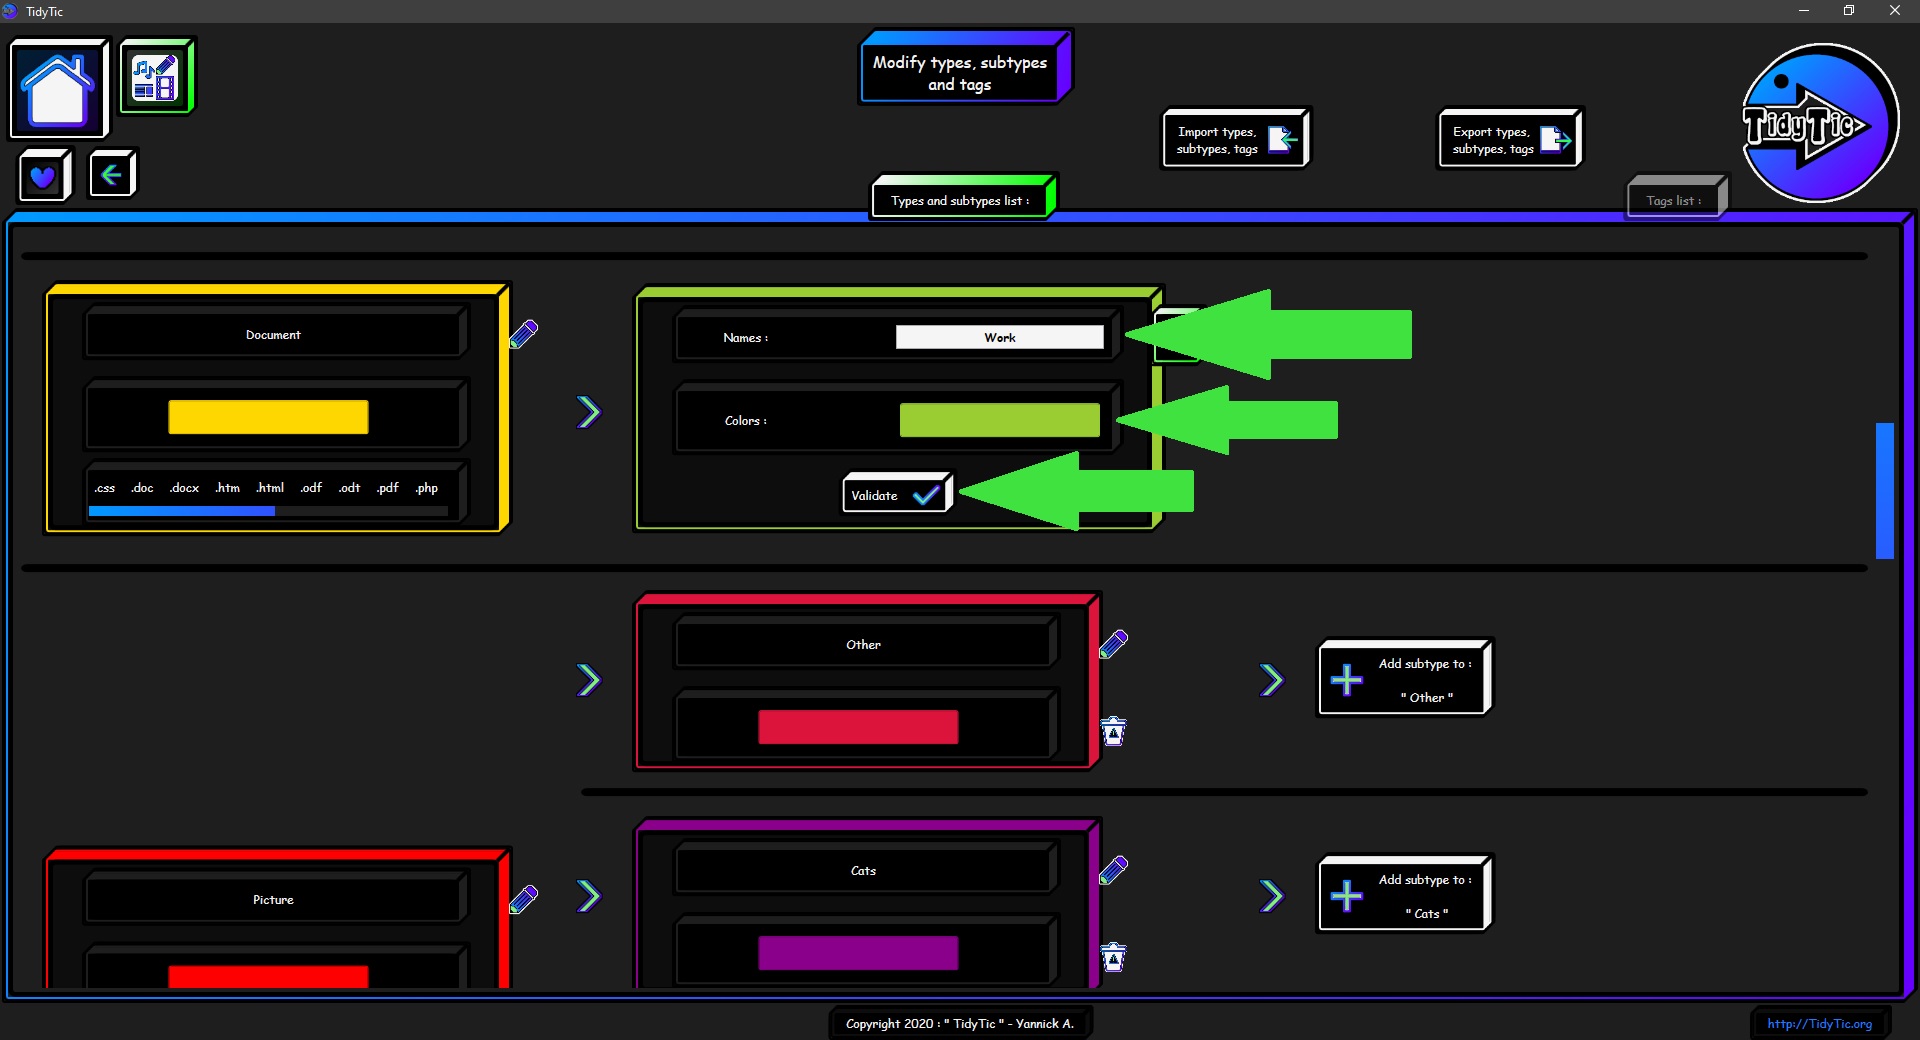
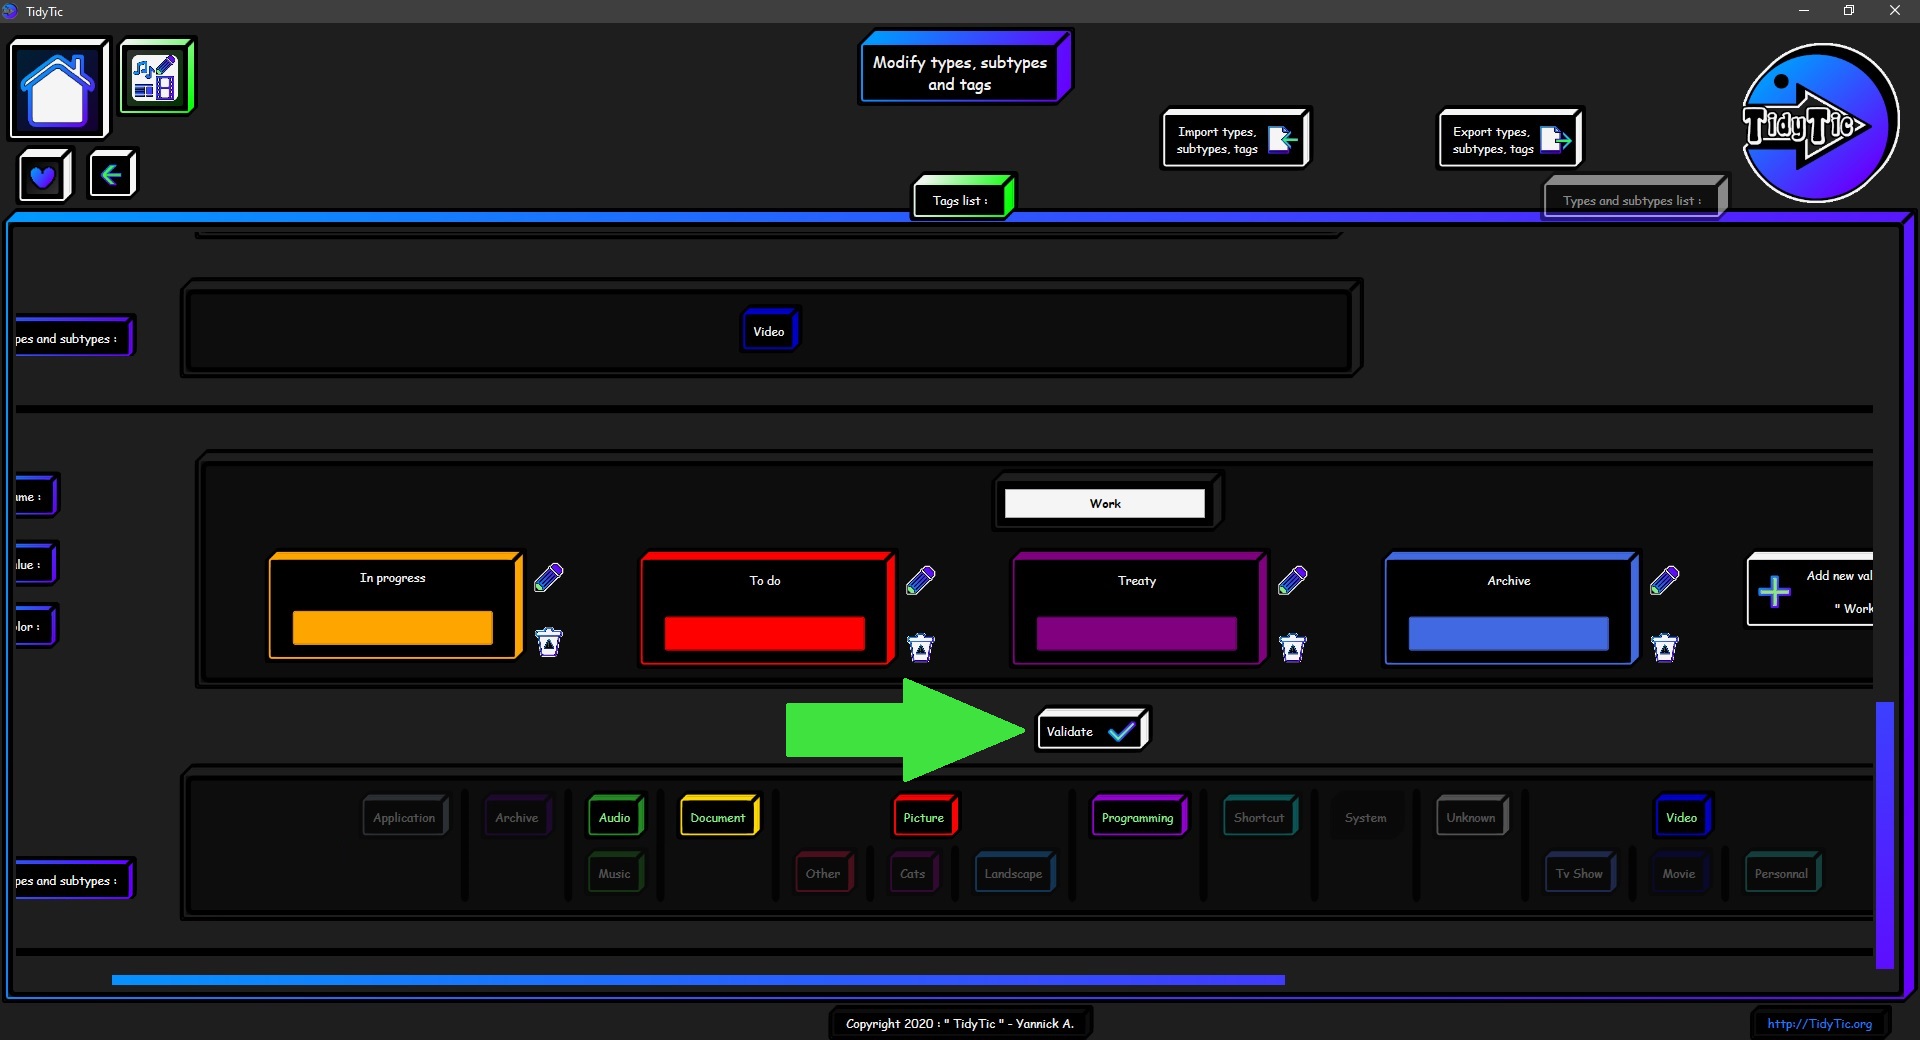
We can see on the screenshot below that I have my 4 values for the tag.
I have chosen colors which will be a good visual indication for me.
I can change my mind later and change these colors.
These modifications will be visible everywhere in TidyTic once validated.
I can also add a value later if I think I need it.
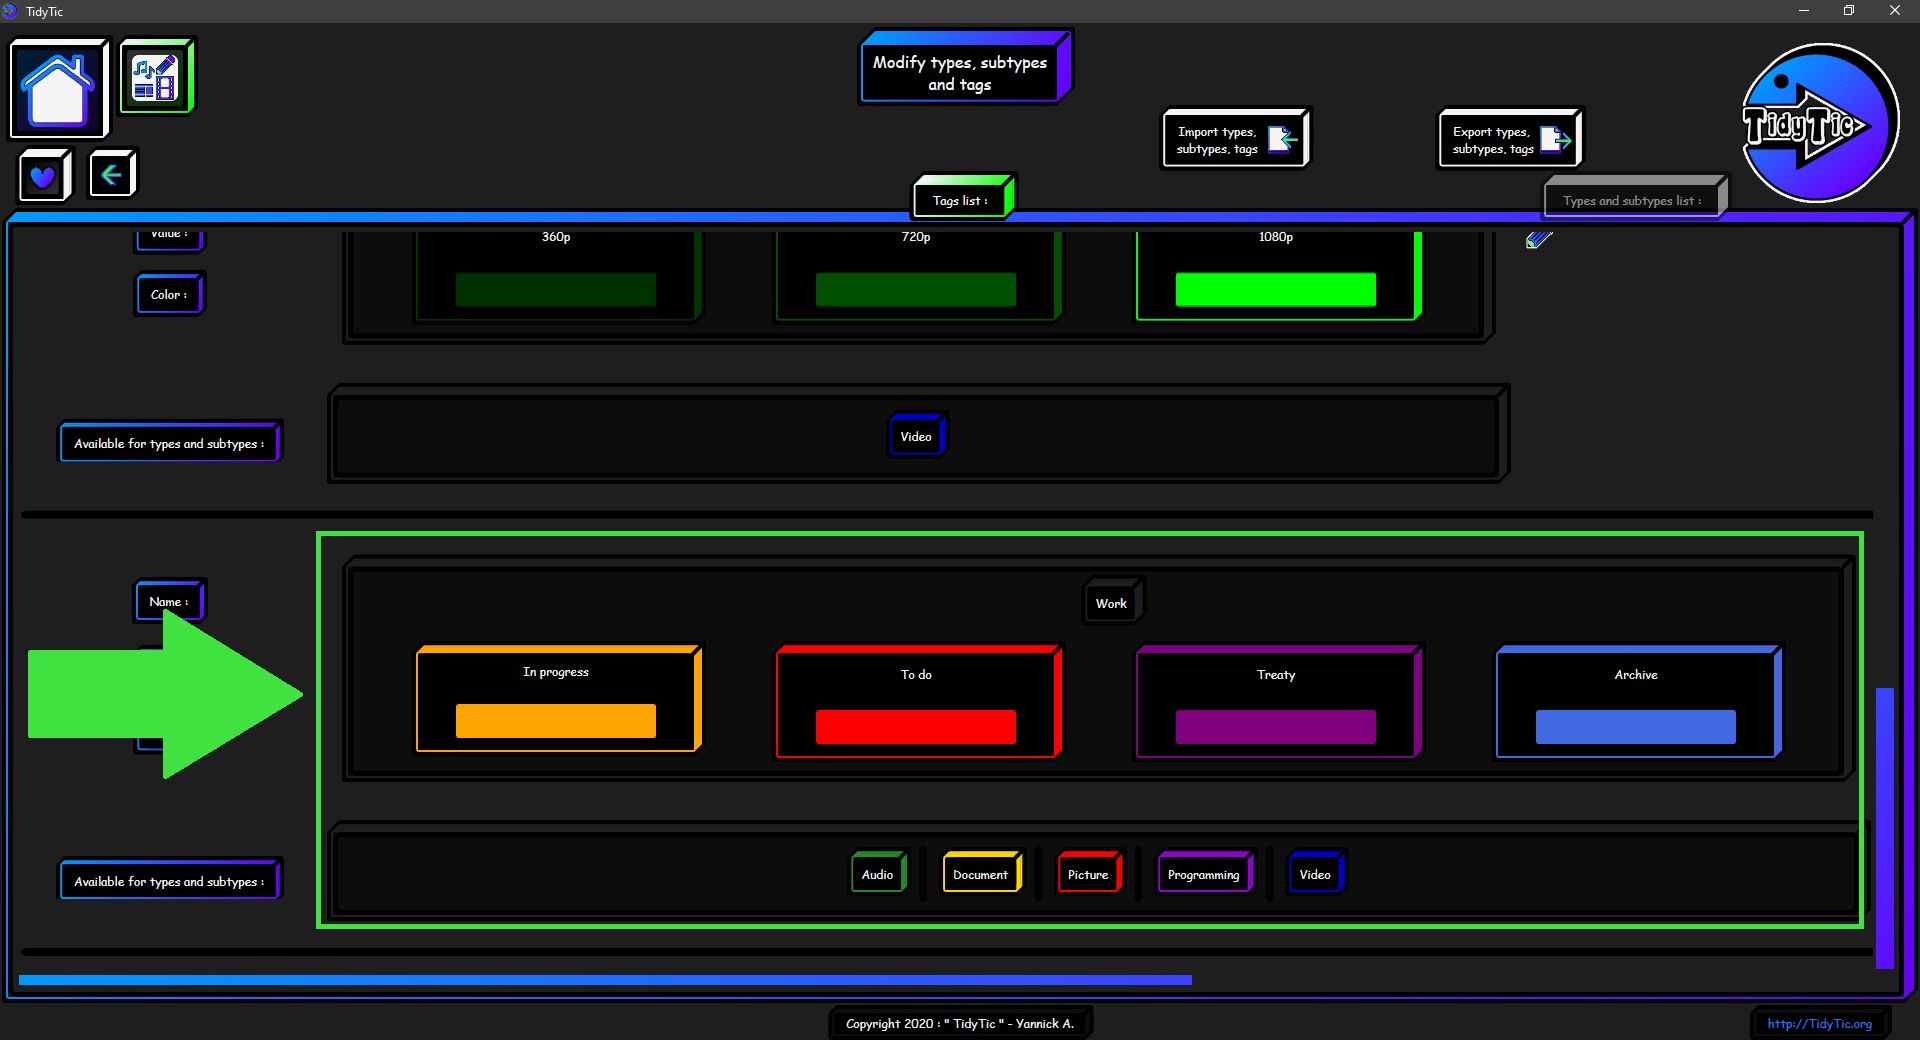
It only remains for me to choose for which type / subtype I want this tag to be available.
In the last line of the tag you will find the list of all the types / subtypes configured in TidyTic.
Arranged in "tree" so that all the subtypes of a type are just below it so more visible.
The subtypes of a subtype would be displayed the same way if I had any.

So I'm going to take the types I mentioned earlier :
The types "Document", "Programming", "Picture", "Audio" and finally "Video".
For that I just need to click on the type, it will no longer be transparent and its name will be in green to see that it is well selected.
And now, my tag is completely configured.
It only remains for me to validate it so that it is available in the software and so that I can use it on my files.
 ____
____ 
I can now use it in the "Edit files" mode of the display by type or by folder and assign it to my files.
Allowing me to tidy them easily, find them or simply see easily the status of my files by walking around in them.
For more information see the tutoriel : “Edit your files in TidyTic: Rename, sort, move etc.”
I can also use them in an automatic rule for example by specifying in this rule that all the files of a folder must have the tag "To do" or "Archive" etc.
So all the files which are in this folder, or which I will place later in this folder will automatically have this tag without having any manipulation to do.
For more information see the tutoriel : “Use the automatic rules in TidyTic to automate the tidying of your PC. "
Delete a tag :
To delete a tag, it must first be opened in modification mode :
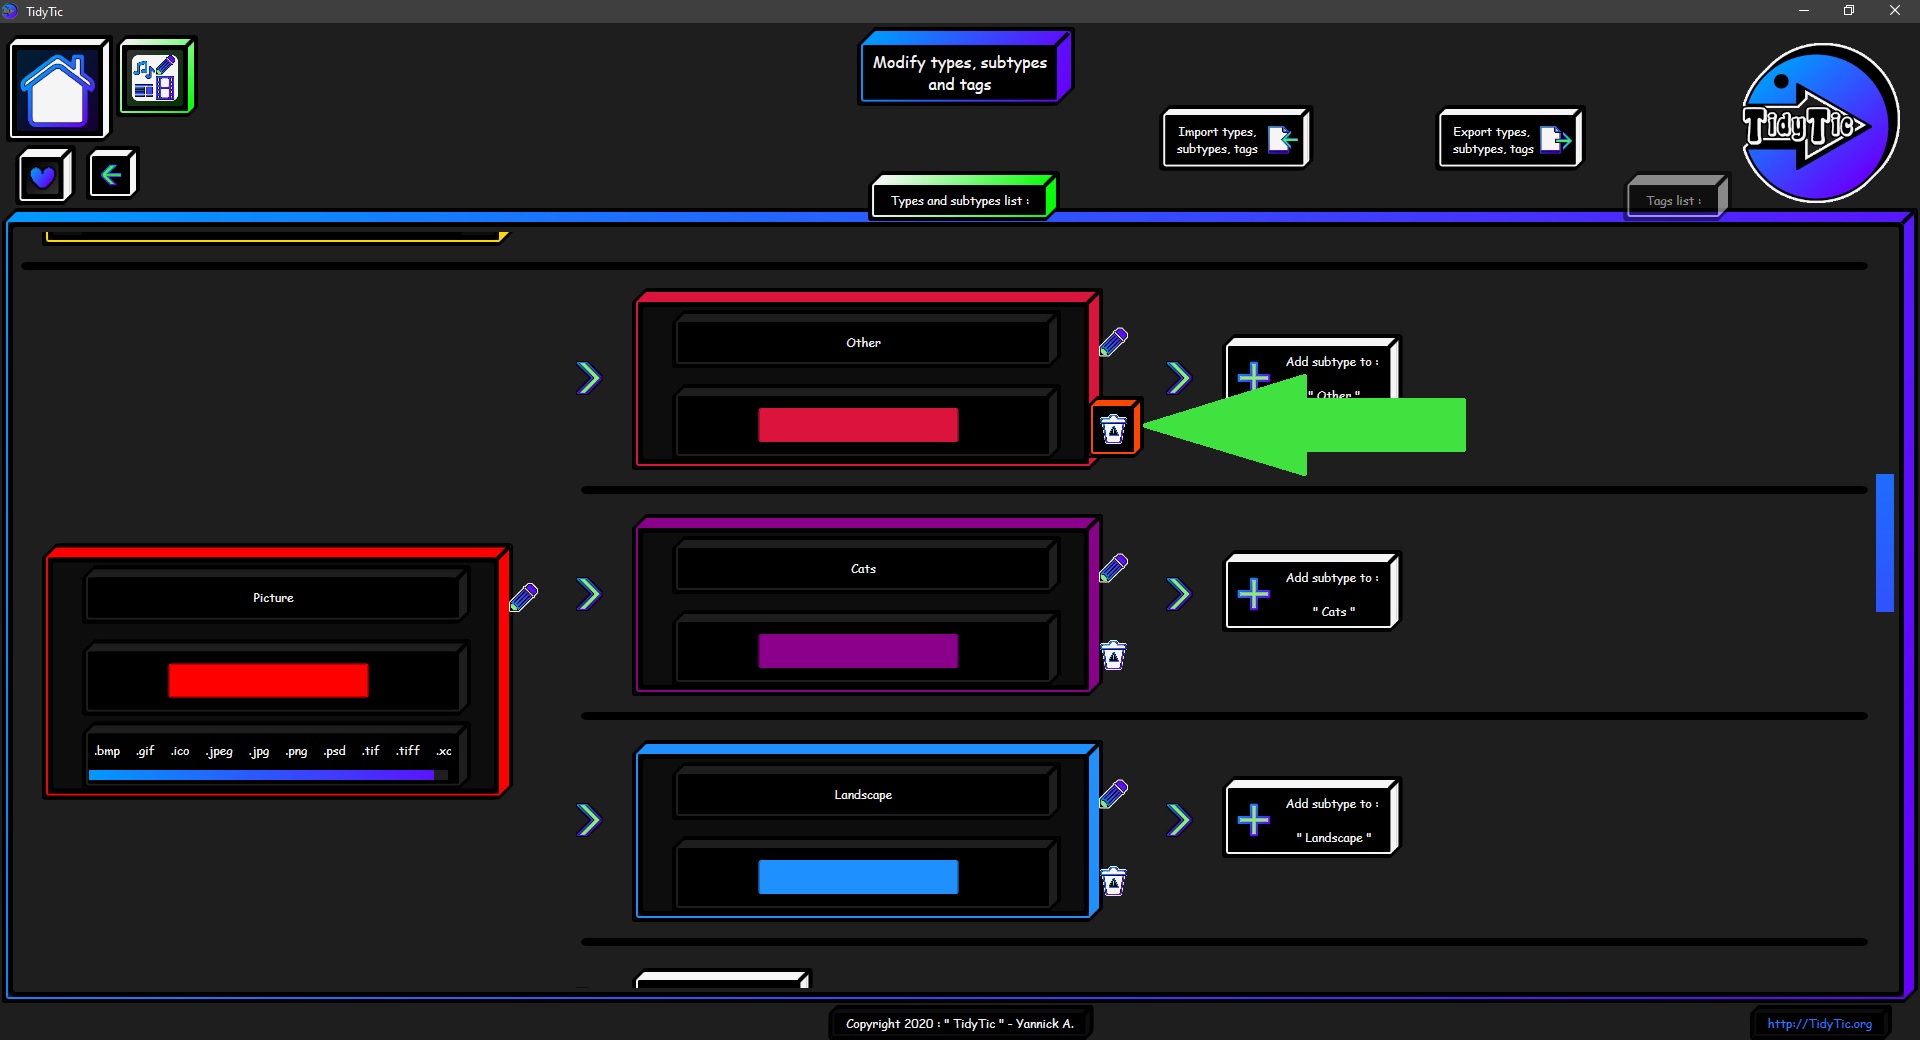
Once in modification mode you will see that each value has a button on the right allowing you to delete it :
To completely delete the tag, I just have to delete all of its values.
A double left click on the " ![]() " button will allow me to delete the values one by one.
" button will allow me to delete the values one by one.
A warning message will ask you to confirm the deletion for each value.
Once the last value has been deleted the tag will be completely removed from the list.